


bkahler
-
Posts
1,752 -
Joined
-
Last visited
-
Days Won
25
3 Followers

Recent Profile Visitors


-
That's quite the car hauler. I like it
-
51 B3B build thread - after all these years
bkahler replied to bkahler's topic in Mopar Flathead Truck Forum
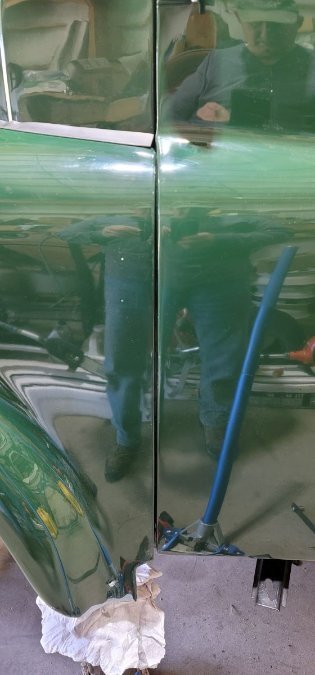
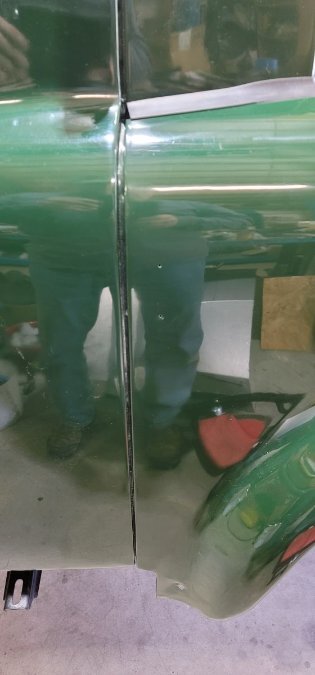
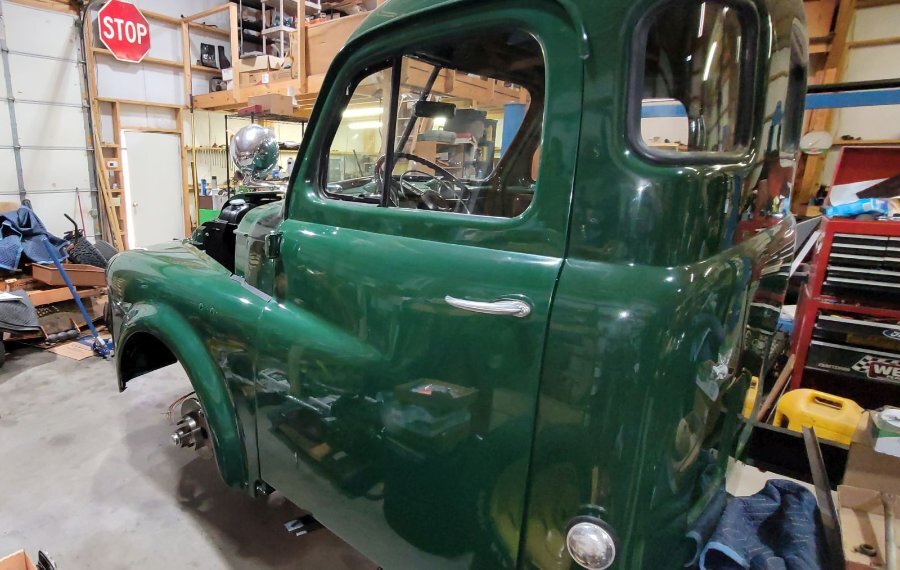
This past weekend I had a few hours to play around with the truck and I didn't really make any progress with the panel alignment problems. I think I can better articulate the issues now so maybe that will help As a preface, all of the bolts that would allow panel movement are loose. In the attached pictures you can see the front nose is not centered on the frame (as mentioned previously), the drivers side door gap is too small and the passenger side is probably a little large but unfortunately it tapers from top to bottom, getting smaller at the bottom. Something not shown in the pictures are the tops of the front fenders where they align with the middle curve of the door. On both fenders, when the L bracket bolts to the side of the cab (accessed from inside the cab) then fenders are not flush with the door skins. The fenders are recessed an 1/8" to 3/16". It's as if the L brackets need spacers installed. This spot is one of the few where there is no real adjustment other than up/down and forward/back. No in/out movement is allowed for. I would think this means the doors need to be moved inward at the top hinge, but if I do this then the doors don't fit the door openings properly. It seems to me that the fit of the fenders where they meet the doors is the key to getting everything else to fall into place. I believe I understand how to align the fenders up/down and forward/backward but the in/out has me baffled. Tips anyone?!
-
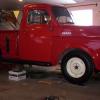
I wonder how fast that rig was when it was fully loaded
-
51 B3B build thread - after all these years
bkahler replied to bkahler's topic in Mopar Flathead Truck Forum
I don't have the running boards installed yet but I'm sure using the trolley jack with some wood to spread the load it should work. Thanks, I'll give it a try -
51 B3B build thread - after all these years
bkahler replied to bkahler's topic in Mopar Flathead Truck Forum
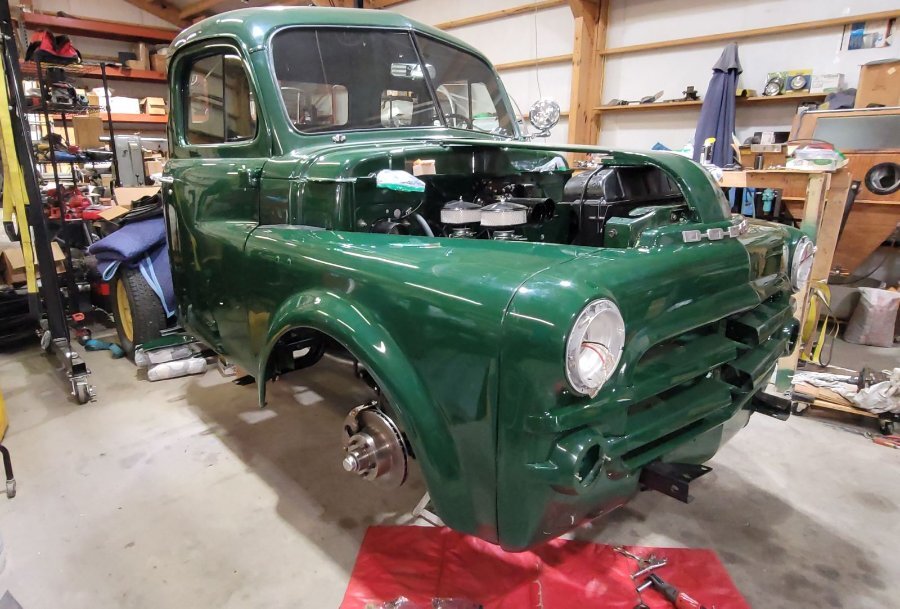
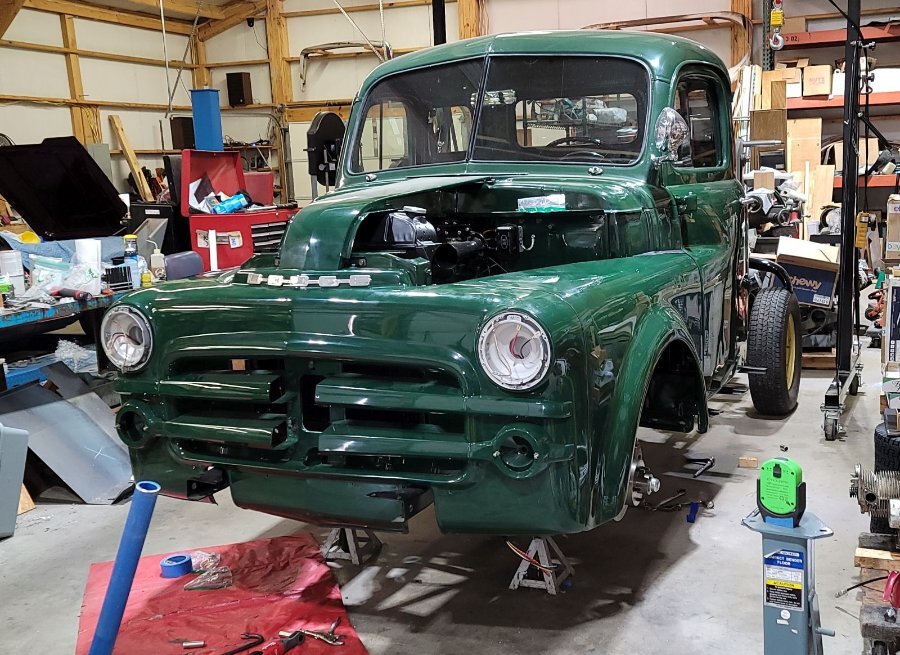
Yeah, PITA pretty much sums it up. Your comment about the radiator support got me thinking, so I went and took a couple of pictures that might explain a lot. The front end does not seem to be centered over the frame supports. I've been stuck on the idea that the radiator support is where it needs to be, but now I'm thinking that's not true. If it get the time, tomorrow I'll loosen the two nuts holding the frame in place and see if that gains me anything. Stay tuned....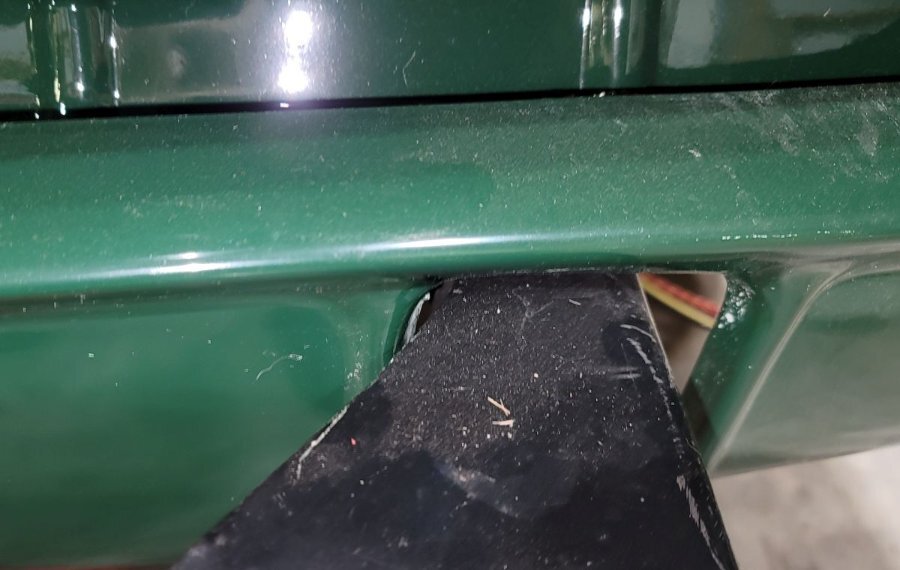
-
51 B3B build thread - after all these years
bkahler replied to bkahler's topic in Mopar Flathead Truck Forum
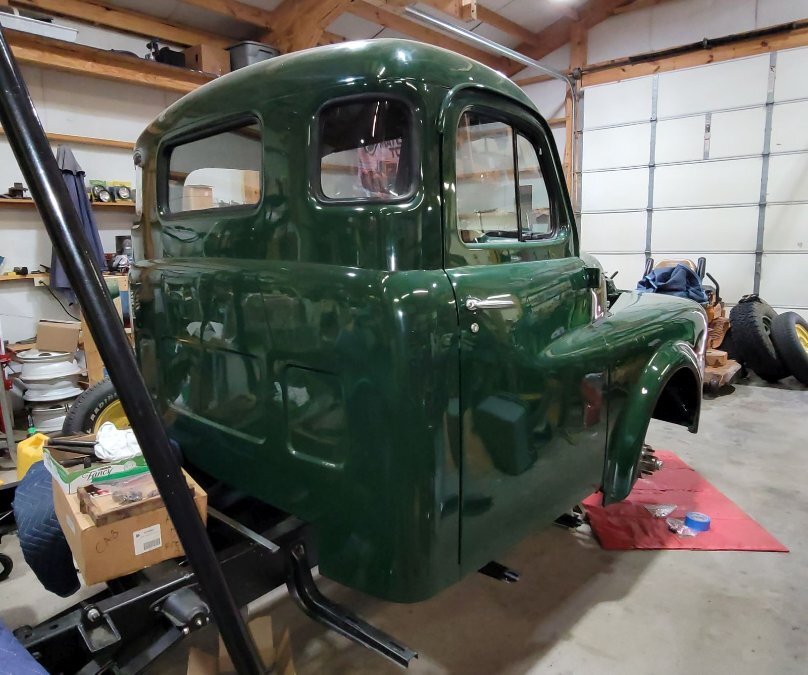
Ok, I've finally got a few things that worth an update. The bed panels are done and the front fenders are mostly installed. I'll be the first to admit the bed panels aren't perfect, but they are good enough for me. The trick is once installed, drive fast enough that people don't get a good look at them The panels are still at the painters, which is good because I currently don't have any room to store them. I've had a lot going on and the shop was packed with stuff so it's been really difficult to work efficiently. I finally managed to make room and once the front sheet metal is all bolted into place then I'll be able to move things around to make an assembly area to build the bed. This morning we worked on fitting the front fenders. Started on the right side and fought it tooth and nail to get the gasket and bolts between the front of the fender and the front nose. The left side we were able to apply lessons learned and it went a lot faster. The bolts holding the fenders to the nose are now tight, but the bolts holding the nose to the radiator frame are still loose. We're having difficulty getting the door gaps to stay put. I can pull the nose on the left side and get a decent gap but after letting off on the pressure it moves back closer to the door. Tightening the bolts on the left side don't seem to help it stay in position, it still springs back somewhat. The passenger side gap is slight larger than it should be so I think the cab needs to rotate slightly. I'm currently struggling with finding a method to pivot the cab (the four bolts are loose). I believe the front left bolt is somewhat of a pivot point and what needs to happen is the passenger side needs to pivot slightly forward. What's the best way to do this? It's been around 28 years since I dismantled the truck and its kinda weird to see fenders on the truck!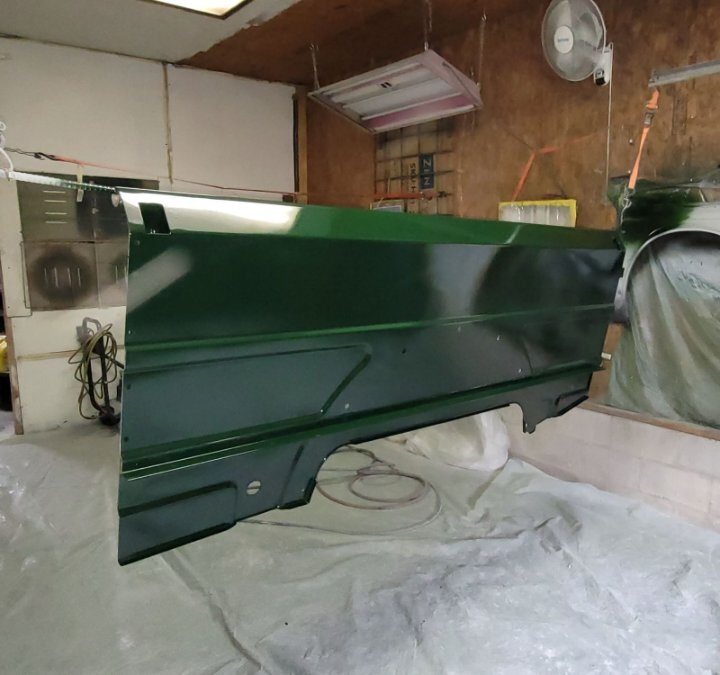
-
51 B3B build thread - after all these years
bkahler replied to bkahler's topic in Mopar Flathead Truck Forum
We'll never know.... -
It does look like a pretty gentle plane crash
-
I don't know which is more interesting, the old Dodge or the plane in the roof....
-
That looks to much like real work to me...
-
51 B3B build thread - after all these years
bkahler replied to bkahler's topic in Mopar Flathead Truck Forum
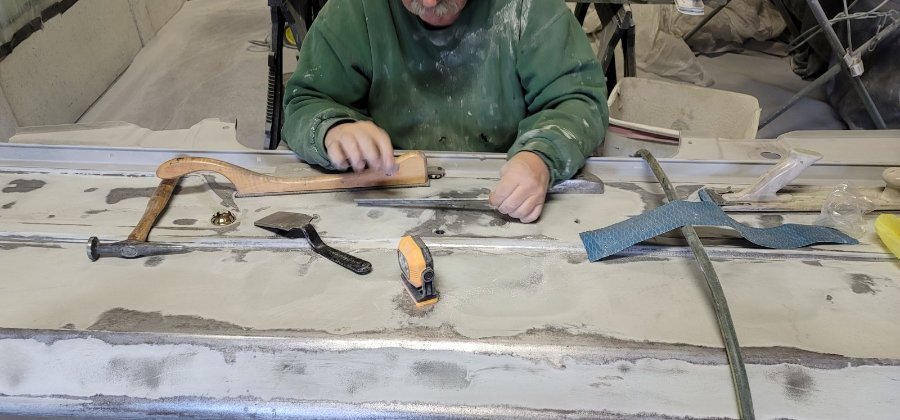
Bed panel repairs are moving slowly but still moving These pictures were taken a couple of weeks ago. He's working on getting the last section flat. I believe the panels are now ready have primer applied. The weather has been on the cold side so he's waiting for slightly warmer weather before doing so. After about 28 years of waiting I just might get to drive the truck on the street this spring!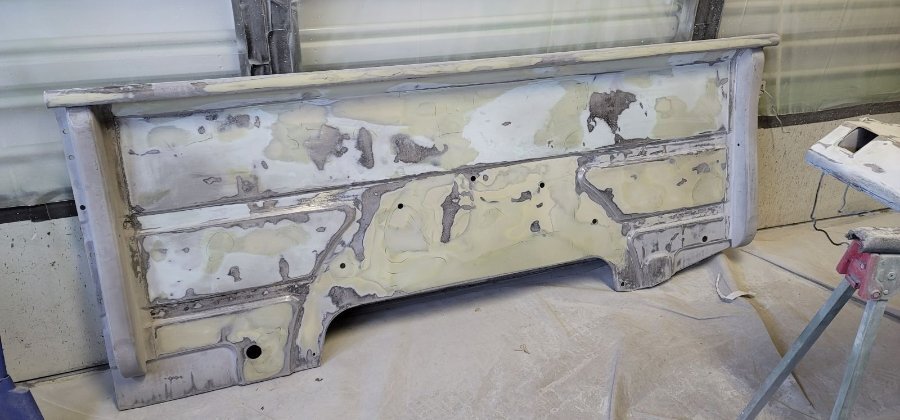
-
51 B3B build thread - after all these years
bkahler replied to bkahler's topic in Mopar Flathead Truck Forum
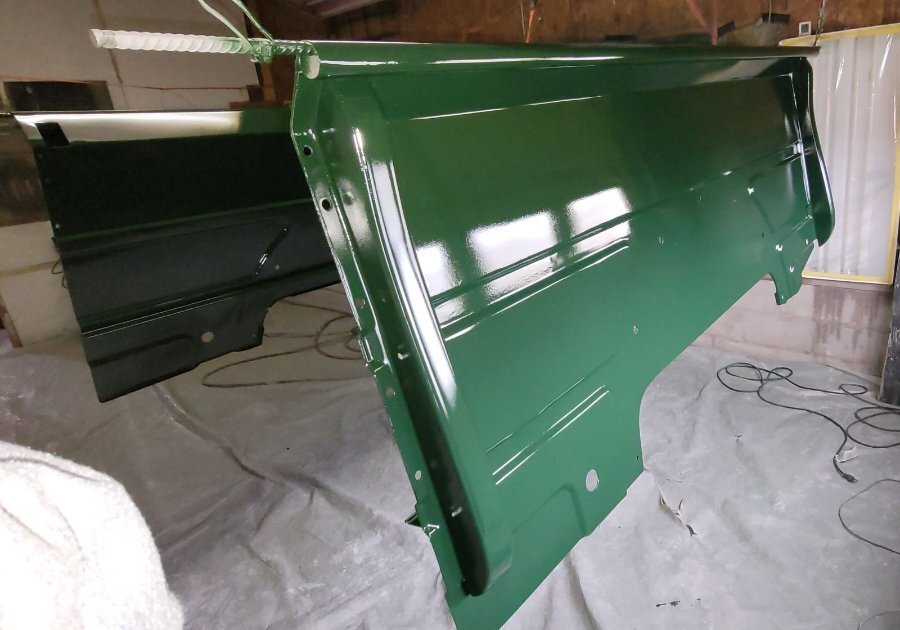
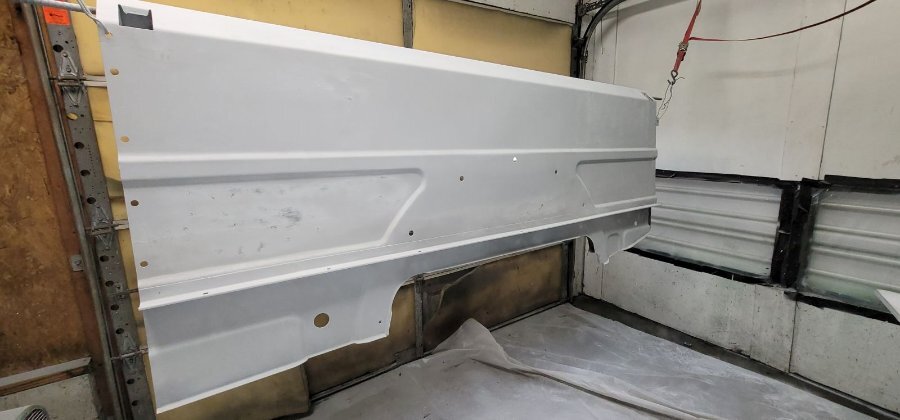
More progress on the bed panels. First coat of primer on both and he's starting to add filler for all of the rust pits.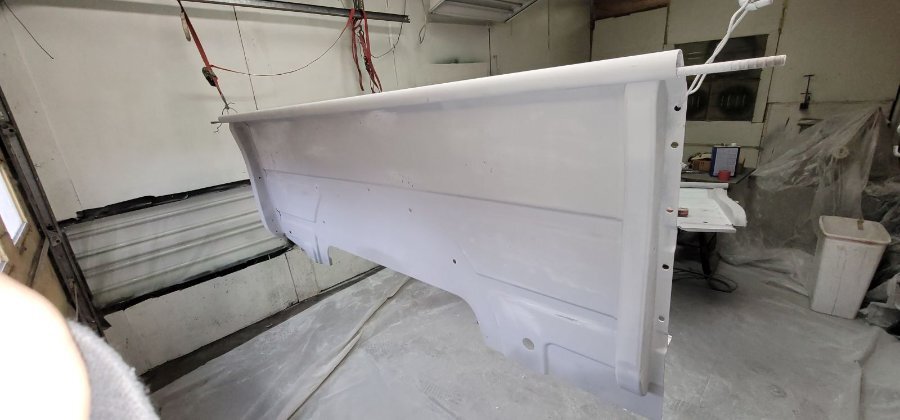
-
51 B3B build thread - after all these years
bkahler replied to bkahler's topic in Mopar Flathead Truck Forum
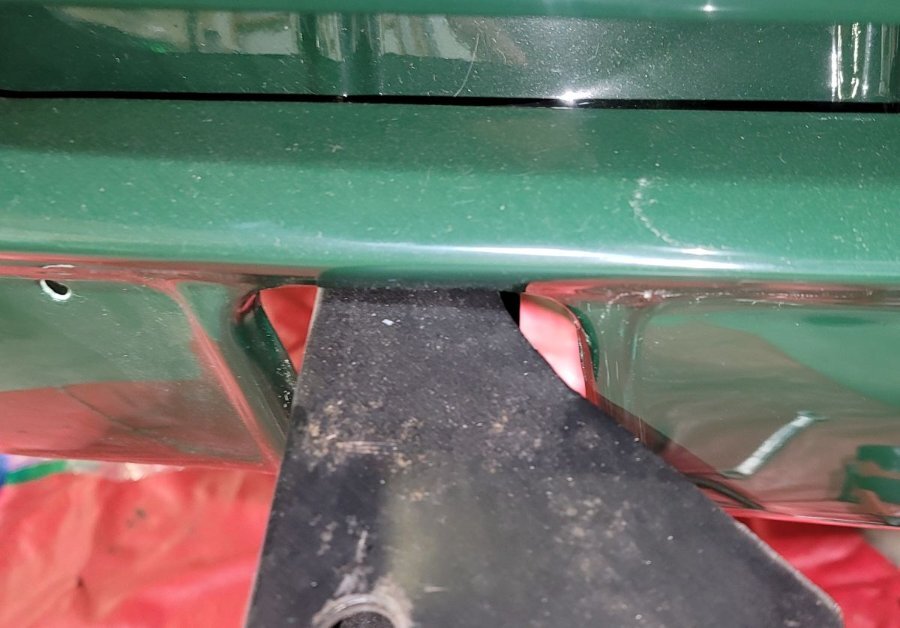
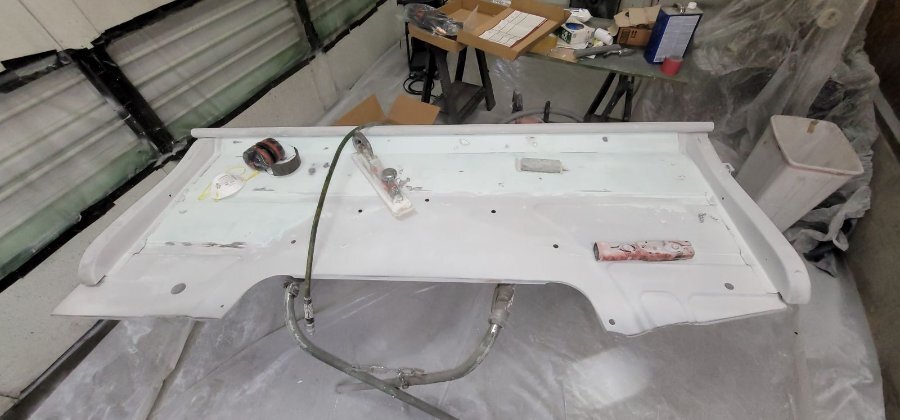
One step closer to getting the bed side panels painted. Last week we welded the stake pockets and bed rail to the passenger side panel. This weekend we welded the pieces to the drivers side panel. It's in surprisingly straight condition now. Both panels are now being prepped for paint. There are a couple of flat spots on the top tube of the panel and we were trying to use one of those harbor freight tubing expanders, unfortunately the smallest one they have is just a bit to large to be able to comfortably slide it down towards the middle of the tube without getting stuck. As an alternative he's considering JB Weld as a build up material and shaping it to match the curve. As long as I own the truck it's not going to be a work truck so that might be the easiest option. Its about time for me to start milling the lumber for the bed floor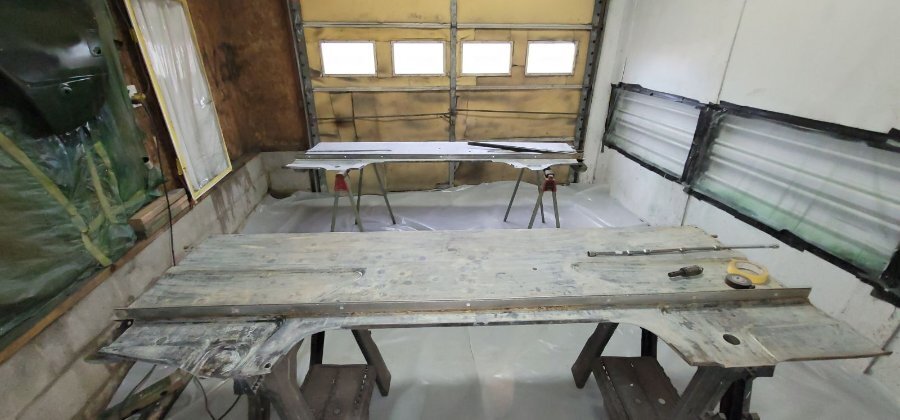
-
51 B3B build thread - after all these years
bkahler replied to bkahler's topic in Mopar Flathead Truck Forum
Beg, borrow or steal one of these drills. They are great for getting into tight spaces.
-
ggdad1951 truck project montage: FEF!
bkahler replied to ggdad1951's topic in Mopar Flathead Truck Forum
What's the cardboard for....?
