


Oberstar
-
Posts
87 -
Joined
-
Last visited
Content Type
Links Directory
Profiles
Articles
Forums
Downloads
Store
Gallery
Blogs
Events
Classifieds
Everything posted by Oberstar
-
Are the shift rail caps found on the shifter housing a product I can find at a local hardware store? I'm missing a couple and would like to keep fluid actually in the tranny... http://
-
Thank you. Seller cancelled order without issue.
-
The seller accepts returns, has good feedback, but did describe it as NORS and in working condition. I don't think we'll have a problem with a refund if it comes to that; I wrote him to ensure he includes the spring. PA- can this not be resolved by just adding the spring, or am I missing something truly broken?
-
Thanks, brother. My local NAPA wanted $25 for a new one by Standard, so I bought it, but then I kept getting jerked around with the shipping time. Canceled the order, found this one on Ebay, and but screwed myself again
-
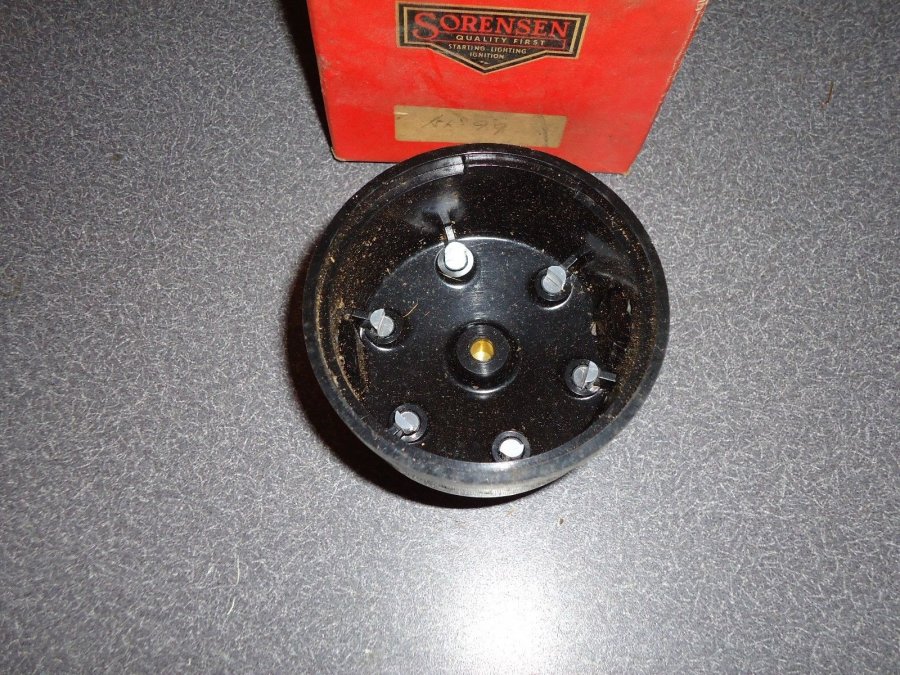
I recently found a new cap for my IAD-4201 dizzy for my 46 Dodge motor. Only after buying it, I noticed that there's no 'spring' at the inside coil connection? Am I missing a part, or is this the way Sorensen built their caps?
-
Thanks, Dpollo! I found a 6v Stewart Warner electric temp gauge that was NOS, and came with the 362J sender, that is apparently 1/2in and should fit right in. Fingers crossed!
-
Gents, what size is the threaded hole (in the head) in a 230 that accepts the mechanical temp gauge sending unit? Perhaps accepts a sender with 1/2in Pipe Thread?
-
Thanks for the replies, guys- In an effort to be aware of changing the water pump in the future, I utilized a stud at the 3 position, but new bolts and washers at the 6 and 9. I chased the threads and cleaned the bolts- but how are you expected to seal the threads that go into the water jacket, but also keep the bolts from seizing?
-
Gents, I'm applying a new water pump to my D24 motor, installed into a WC52 3/4T truck. My WC manual shows (3) studs utilized. May I ask what length bolts you used in your block, and where did you place them? Looking at the front of the motor, I plan on using a stud at the 3 o'clock position, but which lengths to use at the 9 and 6? Thanks! Got a good price on a Gates, then learned it was Chinese...
-

Dodge 230 front engine plate troubleshooting..
Oberstar replied to Oberstar's topic in P15-D24 Forum
Thanks, Motterso. Grief- nothing's easy... -
Gents- none of my manuals show, what appears to be, a bolt that comes from inside the block, and attaches to the front engine plate? I'm attempting to change out the seal there, and the timing cover seal, and having a heck of a time removing it due to that object sitting at the 8 o'clock position from the gear. The only holdup to re-sealing this motor...

-
Rich- no, it's not the 'typical' crust you see on a modern cable. It's just the "copper wire cable sitting on a dusty shelf for 60 years" kind of grit and tarnish. The cloth is attempting to unravel as well. Best way may be to just measure impedance and see that its doing its job?
-
I have original 1ga cable from my 43 Dodge, and the ends are a bit corroded, not knowing what the condition looks like underneath the heavy cloth. Can the entire cable be dropped into some vinegar until clean, or another method that will get these originals back into service?
-
Well, pain may be my best Instructor! I chose to do this motor the hard way, by having the entire motor/tranny supported by my shop crane. I'm in the process of degreasing, and shot the first coat of primer yesterday. Anyway, I overlapped the front main as you should, but did cut the rear small tabs to be able to fit flush against the end of the pan. I then used spray glue to glue the cork gasket down to the pan, and Permatex 2 dabbed in each of the gasket corners. Grease was the only item used on the end gasket pieces. I may have made a mistake by not using any Permatex on the long gaskets, but we'll see how she acts. This site has always been fantastic about guidance on these flatheads, but the experience of screwing something up and re-doing it stays with me longer...

-
Yeah, I'm making this out to be harder than what it really is! The notched gasket set is actually from Fel-Pro. And Don, I've read your instructions on another thread as well, so its time just to get it done! For now, I'm planning on using grease only for the end seals, and Permatex Aviation Sealant for gasket to pan adhesion. Not sure if my 1946 motor uses the rubber rings on the main cap, but I'll check it out...
-
Hmmmm- only one notch per cork gasket strip, though. Might just make sure that the notches go to the rear main..
-
Where do the 2 notches align in the pan gasket of a 230 pan? Also, how and where are the supplied (2) O-rings utilized?

-
For those of you who have used Rustoleum's Rusty Metal Primer in a can, is it necessary to 'scuff' the paint with a red 3M pad before topcoating? The situation is that all small metal parts have been bead blasted, and because my work schedule is sporadic, I have started to spray bomb the parts with Rustoleum spray can primer. Before I can topcoat with an oil based enamel that is compatible with the Primer, it will be a minimum of 2 weeks, so the primer will have fully cured by then. When I return, can I go straight to topcoating?
-
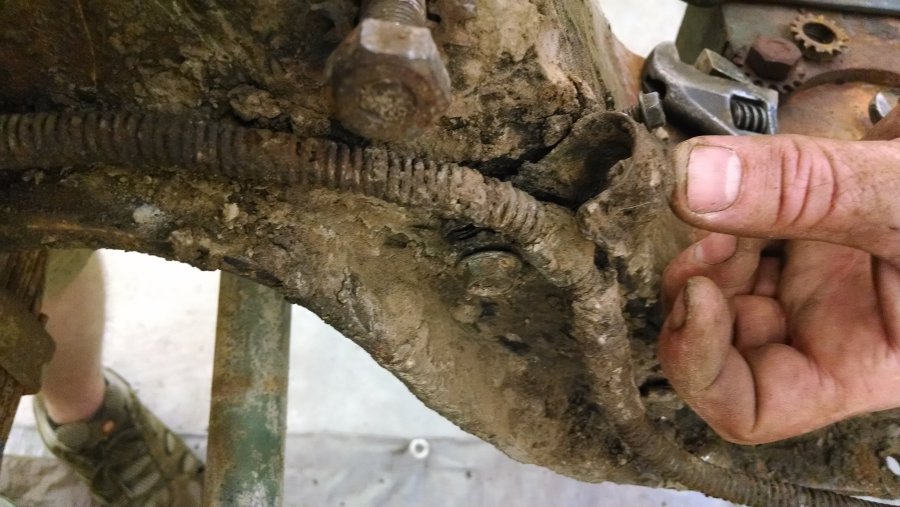
Gents, I have a question- Dodge 230 out of a 43 WC52 3/4T truck. Compression averages 87psi in all cylinders, and oil pressure at 48lbs. We have been scraping the thickets mixture of old oil, grease, and dirt off of the front, bottom, and rear of the motor, entire clutch housing, and transmission. I made the mistake of not taking before and after pics of the scraping result. My question is this- if you have a motor that runs well, but is now out of the frame, should I consider replacing the timing cover seal, pan gasket, and rear main seal?? I want to leave well enough alone and not throw money at an issue, but what in the world could have caused inches of hardened muck to cover an entire motor bottom end, clutch housing and transmission like that?? Is that just normal accumulation through its 70 years of life? Here's a pic of the frame rail underneath the steering gear. This is after cleaning...
-
Lugnut, I would appreciate any help on that. Yeah, my FIL put a Cummins from a bread van into a 40 chevy. It's a looker, and gets great mileage. I'm just a fan of stock myself...
-
My Father in Law has (2) Diamond T trucks- a 201 and 301. He's restoring them, but would like to change out the rear end for a bit more speed. Anyone know what the options are for gearing?
-
Chris, what are your plans now? Let us know vacuum numbers at the intake port when you get a chance. The plate issue is one thing, but the dizzy advance keeps nagging me as the priority issue. But I'm just thinking out loud, and have almost zero credibility in comparison to a lot of the guys on this board
-
Chris, you have a lot of symptoms flying around in your head right now. It's times like this where I step away from the vehicle for a handful of hours, think about the various issues, prioritize them, and then come up with a plan of action. Start back with ignition- grounding, firing order, points- (I'll place a bet on your timing) While in the military, we had a saying- "Plan your dive, dive your plan" Don't jump from exhaust to manifold to condenser to points to vacuum advance, etc... In my experience- If hooked up properly, 12v battery should not overtask a 6v starter, unless your hard starting issues cause you to lay down on the starter too long and causing it to overheat.
-
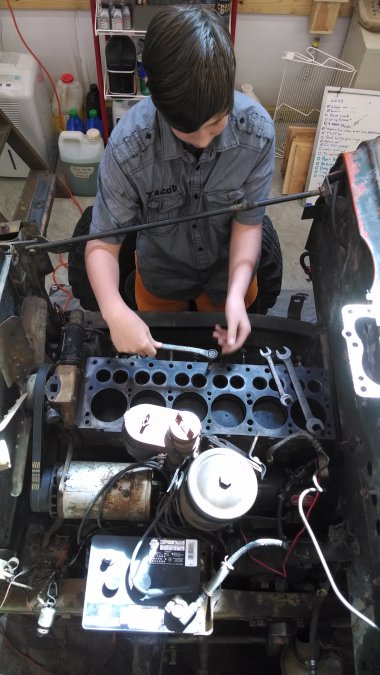
Installation of the new head gasket and bolts went well, no issues (as of yet). Going to let the Aircraft Sealer set about 24hrs, and then fire it up and check for leaks. If me and my Son have done the flathead right, the valve job should bring up the PSI of cylinder number 6 from 40 to at least 90. My only concern right now is possible coolant leaks. We'll deal with that if it arises.... It still feels weird putting nasty ol' Chevy bolts in a Chrysler powerplant!
-
No, even if I knew, it's always good for it to be re-enforced! Thank you! I removed the Teflon paint from the threads, cleaned them with carb cleaner, and even went out and got some Copper Spray Gasket. I whined about the $7 price, but want to ensure that I don't have to remove this head for a long time.
