

White Spyder
-
Posts
750 -
Joined
-
Last visited
-
Days Won
7
Content Type
Links Directory
Profiles
Articles
Forums
Downloads
Store
Gallery
Blogs
Events
Classifieds
Everything posted by White Spyder
-
Enjoyed seeing your work
-
 I feel your pain on the starter removal. I was not sure about removal of the bell housing support. I custom made two tools to help me get a bit mor clearance without having to mess with the brake and clutch linkage. A shallow socket and a thin shouldered open end wrench. Patients was the word of the day to get small turns on the 5/8 bolt. when you removed the support did you support the transmission or bell housing?
 -
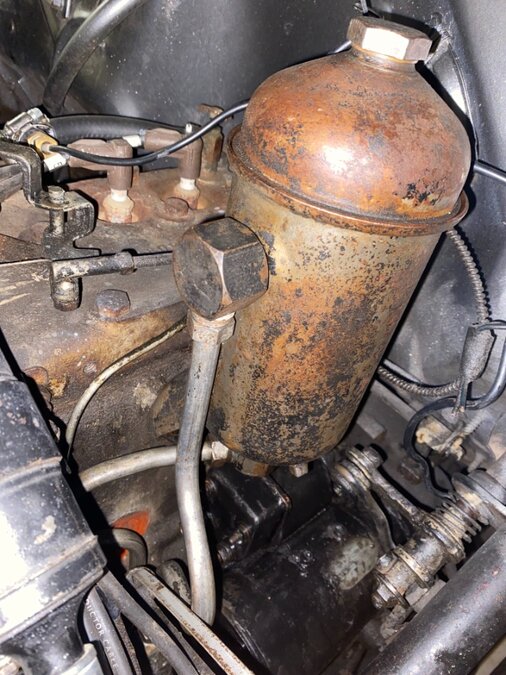
I did a thread about this when I had to change a Welch plug. Be aware that the inlet and outlet need a copper cup crush washer to seal. Tighten up snug then run. If it leaks tighten a bit more then repeat u til the connection has no leaks. Do not over tighten, it will ruin the washers.
-
48 Chrysler Windsor with the 251.
-
Second photo

-
Marc, maybe these will help
-
Update: Finally got the starter back and some time to do the re-installation. Got it rebuilt at a local shop for just 30 bucks. After the struggle to remove it I custom made two tools. Ground the shoulders off an open end wrench to give me a bit more turning range and cut down a socket to allow me to thread it in. Used a regular wrench to snug it up tight. now I have another question before I hook up the wiring and give it a whirl. Is the an alignment procedure for the starter? I know in modern starters have shims but when I removed this one there were no shims. It was just snugged up against the bell house with just the two bolts.
-
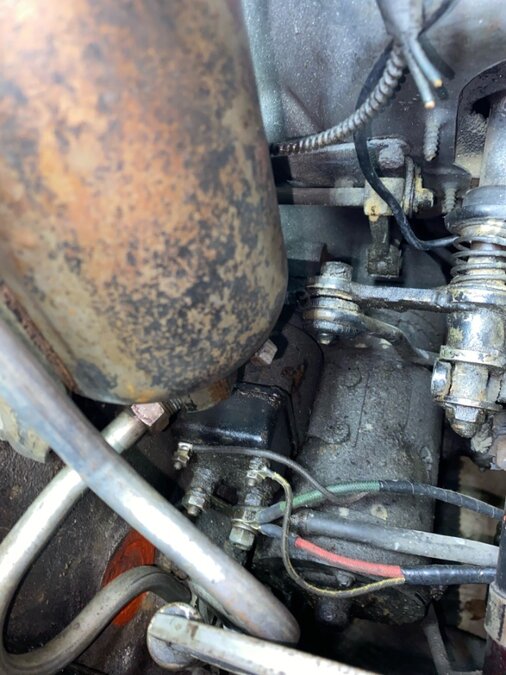
What a PIA! Spent a few hours getting the bottom bolt out. Moving it only millimeters at a time due to the cramped space with the clutch and brake leavers. Once the bolt was out, the oil filter lines would not allow the starter to clear the bell housing. See photo. Finally was able to back out a bit and lift the rear and wrist along the curve in the line and drop the starter nose first.
-
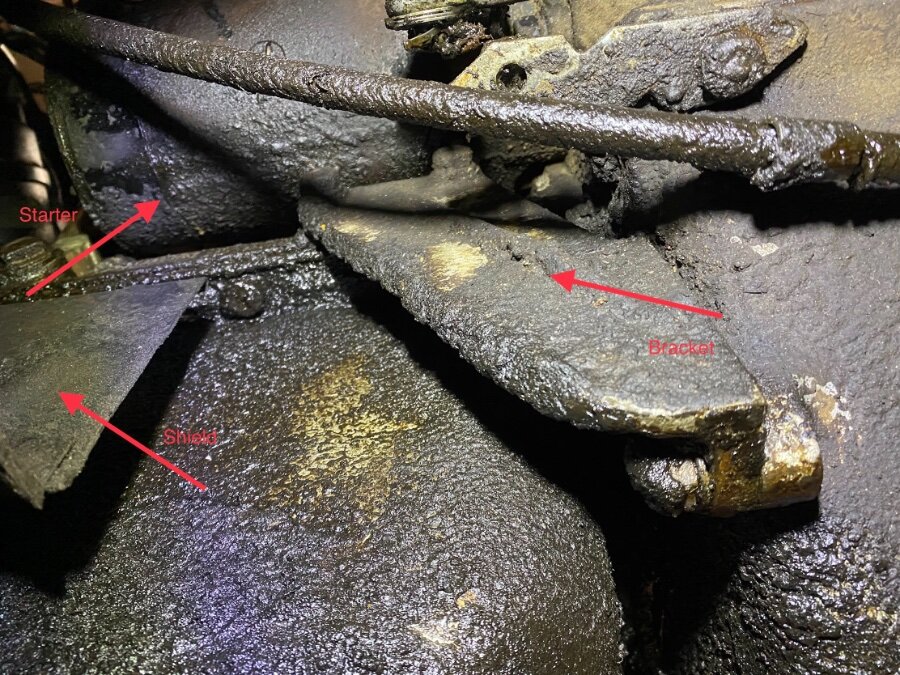
First excuse the mess I will be cleaning things once I get the starter out. My car has fluid drive. As you can see from the photo, there appears to be a lot blocking the starter from coming out the bottom. I think if I remove the bracket shown it will drop out. My question is, doe I need to support anything that the bracket is attached to print to removal? thanks for the help
-
Looks like it will be tight working space around the linkage. A local shop that specializes in starters and generators will refresh it for $40. Brushes, bushings and cleaning. IMG_0447.MOV
-
Thanks for the Photos. Has anyone got an idea on the diameter and length of that pin? Any thoughts or suggestions on if the repair can be done without having to pull the starter? thanks
-
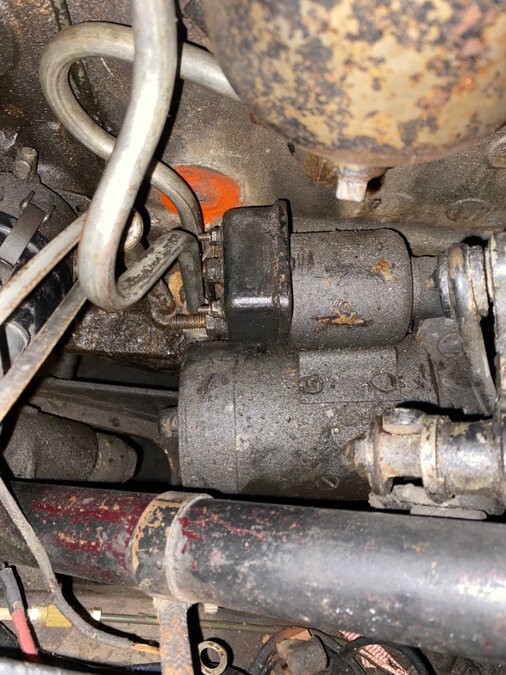
Needed to move the car today and when I engaged the starter it worked as usual but with an odd non electrical click in the rotation. When I went to restart the car to move it back in the garage, the starter would spin but not turn the engine. In the photo below you can see the back of the starter looking down from the hood. In the area of the circle, it appears that a pin or bolt is no longer connecting the two parts. Any help with this and a photo with yours would be appreciated.

-
I purchased the seal from Burmbaum and it should be in Monday. Installation appears to require a lot of disassembly of the shaft for steering and shifting. I am going to carefully cut the seal and slip it over the two shafts. One once secured by the screws, use rubber cement to seal the cut. Thoughts?
-
Thanks all. Looks like installation would be quite involved. Any suggestions?
-
Anyone know where I can find this part around the steering column ? As you can see it is in need of replacement.

-
Fan placement post water pump replacement
White Spyder replied to White Spyder's topic in P15-D24 Forum
So far all is good. Doing a flush and re-flush this weekend. Drove the car 70 miles today and it never went above 180*. Air temp was was 72. -
Fan placement post water pump replacement
White Spyder replied to White Spyder's topic in P15-D24 Forum
Reinstalled without the “spacers” but waiting on a new belt of correct width. The belt brings another question. The front bracket of the generator is anchored to one of the bolts that goes through the water pump. On my car, that is the slotted bracket that allows for tensioning the generator and the belt. Without the bolt going through the pump loosened, the generator can not move on the slotted end. By loosing the bolt at the water pump, does that compromise the seal of the pump against the block and possibly resulting in a leak? -
Fan placement post water pump replacement
White Spyder replied to White Spyder's topic in P15-D24 Forum
One comment that the fan is backwards, one photo shows it is correct. Two comments on the belt width match. Who else will chime in?….. -
Fan placement post water pump replacement
White Spyder replied to White Spyder's topic in P15-D24 Forum
If the fan is backwards then that may be why the spacers were added. I am going to spin test the fan position. -
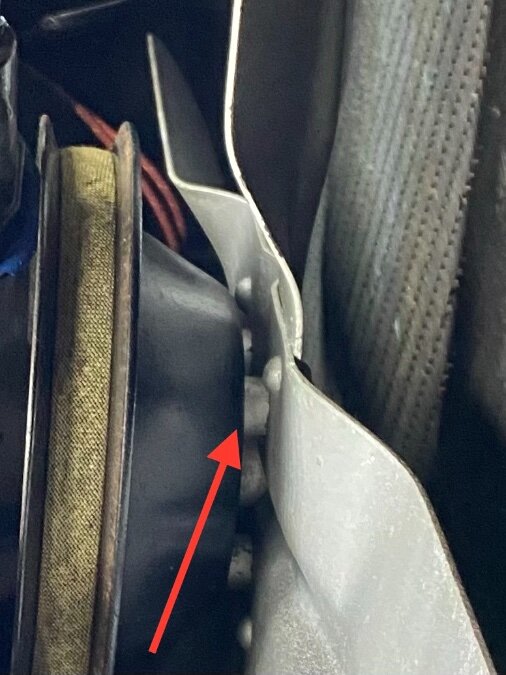
I had to replace my water pump and have a question for the group. In the photo below, the arrow points to a spacer between the fan and the pulley. It seems to be made of nylon or plastic. Is this correct or did it get added by one of the previous owners? Also, is the direction of the fan correct? In the photo the raised portion of the stamping on the blade is pointing to the front of the car. Thanks in advance.
-
Check out this thread.
-
Mine has tubes coming off the block to the canister mounted up at the top of the motor close to the firewall.
-
You can just soak it in cleaning solution and then throughly rinse. Make sure you use the proper copper “cup crush” washers when reconnecting the lines. I got them through Grainger.
-
So, if it draws more than 65 amps while slowly turning the engine, it is time for a rebuild? My battery is holding 6.v but I have noticed that the starter is slower turning the engine than in the past.
-
For an original 6volt Chrysler 251, how many amps should the starter be drawing when engaged?

