Tom Skinner
-
Posts
1,372 -
Joined
-
Last visited
-
Days Won
3
Content Type
Links Directory
Profiles
Articles
Forums
Downloads
Store
Gallery
Blogs
Events
Classifieds
Everything posted by Tom Skinner
-

Transmission Removal Question
Tom Skinner replied to Jim Shepard's topic in Mopar Flathead Truck Forum
Jim, INHO, I believe removing the emergency Brake Band, and then removing the Selenoid and Governor and then removing the transmission before removing the engine is in your best interest. The reason why is so simple. If its already "tight" in there to remove the transmission you stand a high probability of jostle and damage to parts trying to swing all that out in one piece. Your Vehiclce your call. I removed all that stuff first, and in so doing didn't need to fix any potential damage later on. Good Luck! Besides wrestling the nut off of the Band after removing everything will be some trick with all that movement - ie - its not bolted to the car anymore. Tom -
The NAPA Carb re-build Kit only costs $19.95 and has all the Carb Gaskets The Pump Piston Springs etc., and I believe 2 of the ones you seek as well at the base of the Carb. I forget the NAPA # and its pouring rain here and my Dat Timers in my truck so if someone doesn't give you the Carb Kit # I'll get back with it later. Tom
-
Ditto - IMHO - Restored properly the original System works - and works good. Tom Skinner Huntersville, NC
-
Windsor 8, They sell these on ebay, just type in 1946 chrysler. They sell 10 for $19.99. Pry up to loosen them/remove them, and pinch downward to install/tighten them for use. Pop trim off with a small flat screw driver and catch it so as not to chip paint Tom
-
It followed me home, I swear.............
Tom Skinner replied to Olddaddy's topic in Mopar Flathead Truck Forum
Road Trip! Go enjoy that bus. Bring along some friends! Tom -
Burning it out takes just the right amount of time to have a beer. Thats the fun part.
-
James, Thats why I started this Thread - so we can reminisce. You see we can all be Happy in remembering the good old days. We can choose to have good stories to share. Alot of those yards are still there - but west. NM. and ND. and elswhere where the weather is kinder to the "old" Iron. I'll bet that when we sat in one of those old Imperials we day dreamed about going down the road in it or restoring the very car you sat out a rain storm in? Those Days still live on. Young Guys today are still picking parts at Junk Yards everywhere. Fun is where you find it - why its everywhere. I'm 54 and still want to go through a yard - possibilities abound. Tom
-
Fellows, I would like to try to start a Thread on Memorable Junk Yard Searches. I can remember back in the 1970's going to different junk yards in NJ and PA with a buddy and spending the whole day finding parts for our 1947 Windsor and 1948 Royal. We were just young then and would pack a lunch and drive a couple of hours out to the junk yard. Back then you could go "pick" for parts providing you closed all windows, doors, trunk and hood lids when you were done. I believe one place was called Kobers - or something similar to that - its been 35 years - names allude me now. We were just poor teenagers. I remember one fine day I found and removed a full Ashe Wood Roof Luggage Rack (brackets and all) off a 1947 Traveler for like $10. Thinking back now those were some of the happiest days of my life, it was like going fishing. Of course having no better sense we would always grab a cigarette lighter or dash knob, and pocket it - I had very little money and not much values then. Sometimes it would pour down rain and we would sit it out in an old 1958 Imperial or some such fine automobile, and smoke a camel. Then when the sun came back out, off we went scrounging around again happy as kids in a Candy Store. Those were the Days and they sure were good. Tom Huntersville, NC
-
Dan, Welcome to the site. I have owned a couple of 1948 Chrysler Royals and they tend to like oil changes - frequently, which is OK. You choose an Oil. The Spitfire 6 can get up to 18-20mpg when the Timing is set right and a Vacumn gauge then sets the fuel mixture to the highest reading at the Carb. Good Luck with your Car and enjoy it - I have been doing that since I was your age - back since the earlt 1970's. Its a Great Hobby and will last a lifetime when you want it to. The more you drive these old Mopars the better they run. Tom
-
I agree a little leakage will not hurt. It is after all a protective barrier.
-
You know I might just try to put my old one in to see what happens. Meanwhile my observation is they are all made in Taiwan now. How and why - did we ever get to this point. On another note - try to buy Light Bulbs made in America. If the Chineese get mad at us we will all be in the dark - I think I spelled their name wrong - Oh who cares:eek:
-
DodgeB4ya, You were right, I ran jumpers (Green) to Front and Back of Left Hand of the Chrysler, then to the Green Wire at the Triple Junction (AFTER) disconnecting old Green Wire at All Ends. The Right Directionals Work Fine - All Directionals work FINE. Now the Hand Brake Bulb and Ground are Good so I have another NAPA 535 Flasher on order and that will fix everything. For Now I am running Temp Wires under the Carpet - Through the Fire Wall for a Temp Fix. Thank You for making this so easy. Tom Skinner Huntersville NC
-
DodgeB4ya, Thank You! Yes I was only disconnecting one side of the wire at the Connector Block on the inner fender trouble shooting to the Column so my tests with jumpers was nulified. I have a nifty Light Bulb tester I soldered onto a bulb in 2 places I used to run down a short in my Transmission Harness a couple of years ago. I'll start back using your direction tomorrow night. I finally replaced my whole Tranny Harness to clear up that problem. I just replaced the Directional Bucket Wires in the Front from RI Wire thinking I would find the problem there - but these old Chryslers persist in challenging us suceed in life continually. That is the fun part. Once found I will post results. Tom
-
10-4 I'm going to run new separate wires if need be with the new Flasher Thanks for the help - everyone! This is a great Site - if that doesn't work i'll pull the Steering Wheel and have a look see there.
-
Rockwood, I have a Manual with the schematic - Thank You though. Now I'm sure I blew the Flasher - I just ordered another one. Its either the Directional Switch at the Steering Wheel - in which event I must remove my Steering Wheel to get at it without Monking up my Directional Housing Cover - or a wire is grounding somewhere which I don't see being the case because I used Jumpers 8-10' long with alligator Clips and bypassed every thing possible Front and Back on the Left Side where the problem is. The right directionals work fine I even got the back left working - the front right is doing nothing. Grounds Good Bulbs Good ?????? One last thing the breaker on the X connector of the Flasher Box kept vibrating real fast until it sounded like it blew out. I'm ready to re-wire the whole damn car at the moment but that big bucks. Tom
-
Thanks DodgeB4ya, I did the Alligator Clips and Its not The Green Wire to the Front Drivers Bucket. Then I switched Brown and Green at the Connecting Block on the front Inner Fender and the Front Driver and Back Passenger Lights Blinked. Thus my Ground is good up front Conversly the blinker Switch the other way did not get the other two Directionals to Blink. Then I futsed around some more and my Emergency Brake Light won't Blink any more. I think my Directional Switch on my Steering Column is Kaput??? I probably just blew a bulb out on the Emergency Brake Light poking around with a wire tester.?
-
Yes a 1948 Chrysler Royal. All Bulbs New - System 6 Volt - all original. I'll Check Grounds again and use Jumpers. Why would there only be three wires to my directional Switch on the Column? One to Left Bucket. One to Right Bucket. One to the L Trerminal on the Flasher/Directional Switch.
-
Fellows, I need Electrical Help, My Directional Lights on the Right Side (Tail and Front) Blink/Work. My Hand Brake Blinks/Works. My Left Side Sounds Like it is working but does not. The Old Original (3) Prong Switch was blinking so fast when I had my Left Blinker on it was just making noise - no Lights. So I went and bought a new one, NAPA 535 6 Volt now the left sounds like its blinking slowly but -no lights. OK I changed out front Directional Light Bucket Wires from RI Wire correctly and they are Grounded all new 1158 Bulbs all Around and good Grounding. I am getting ready to use long jumpers and look for breaks in the wires. Any Other advice. Why is there a Circuit Breaker on top of the X terminal to the Ignition Switch? The P Terminal goes to the Light Indicator on the Dash, The L has (2) Wires one to the Hand Brake Switch one to The Directional Signal on my Steering Wheel Column. It looks like I would have to pull the Steering Wheel to get into my Directional Signal Switch - could this be the Culprit? If Jumpers prove my Wiring sound I guess its pull the Steering Wheel and look inside the Directional Switch????? Tom Skinner Huntersville NC PS I already searched the Technical for a similar Thread (They Dealt primarily with getting the Brake Lights to come on with the Tail Lights).
-
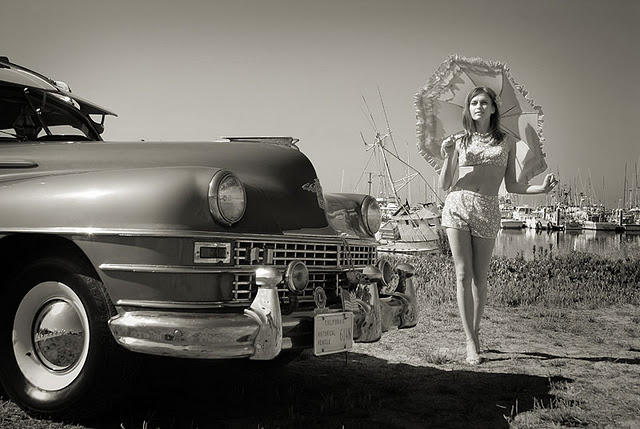
I took Bluebelle out for a ride in the snow!
Tom Skinner replied to Jim Saraceno's topic in P15-D24 Forum
Jim, Great Pictures! They bring back memories when we drove them in the snow without a second thought because they were not old then just transpotation. Tom -
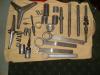
I nabbed these babies last week on ebay. A complete Fluid Drive Kit for 1942-1949 Chryslers. All Miller Tools. The Box they came in was Rusty so I'm getting it Sand Blasted to repaint and Felt the Drawer
-
That looks like the Hub Cap Remover that slid across the Tire Iron in Days gone by. I had one on my first 1948 Chrysler Royal from 1973-1984. The 1948 Chrysler Royal with a Tire Iron I have now - it is misssing. They could be as rare as Hen's Teeth by now. Tom Huntersville NC
-
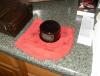
I just prefer kerosene. for soaking stuff. By the way that breather will burn 10 minutes or more and be cherry hot when it finally goes out, so let it cool for 10 more minutes also. The oil globules and rust looks like coffee grinds when you beat them out of it afterwards. The results are remarkable almost unbelievable. Wire Wheel the top and sides and then paint semi-gloss black then decal. Tom
-
Soak it light it burn it. Let it burn all the way out. On Concrete in a well ventilated area - driveway. Let it cool all the way before touching. Its like new again.
-
Burns it back to bright clean metal. Service Manuals intructed Mechanics to do this back in the Day. That is not Steel Wool in there. It is Stainless Steel Mesh. I have been doing mine this way since the 70's and they are in great shape. Of course soaking it in Kerosene for a few Day might clean it up as well. When they look like you want to throw them out - don't - burn em out. It really works, these parts didn't just march on down from mamby pamby land like they do today. They were built to last.
-
OK Fellows here's how it was done! Pour some Kerosene into it - light it on fire and let it burn all the way out. Bang it against a Column or Slab somewhere and beat all the rust - crap as you said out of it. Soak it in oil. Let Drain for a day. Clean and Paint outside. Put on Decals Re-install. Everything is new again. Fire seems to do the trick. Tom