


Allan Parkhurst
-
Posts
78 -
Joined
-
Last visited
Content Type
Links Directory
Profiles
Articles
Forums
Downloads
Store
Gallery
Blogs
Events
Classifieds
Everything posted by Allan Parkhurst
-
I have a friend in Ohio that saved a 53 1 ton from the crusher. The fork lift at the yard made a mess of the drive shaft. Does anyone know where he can find one. 53 B-126-D Thanks Allan
-
Anyone have B-1-B or B-1-C spindle for sale?
Allan Parkhurst replied to dwilliamson03's topic in Mopar Flathead Truck Forum
Where are you located. I have a full frame. Location is NE Ohio. -
I have one now but would buy another. I have some friends that would need one also.
-
I recieved the 2010 calender in the mail today. I also feel honored to have my truck picture in the calender. The other trucks selected were great and I know of many others that could have been selected. Thanks to all the members that helped me during the three year restoration. Allan
-
I have electric 6 volt wipers,but need one pivot, because the bushing was worn out. I also need gasket, cover and screws and arms for both sides. I checked the motor and it works.
-
Using the brake adjutment tool
Allan Parkhurst replied to austinsailor's topic in Mopar Flathead Truck Forum
I sent instructions for the Ammco 1750 was that what you wanted? If you can't read all the instructions I will mail you a copy. I have one and it is very easy to use. Allan -
Using the brake adjutment tool
Allan Parkhurst replied to austinsailor's topic in Mopar Flathead Truck Forum

-
John I sent you an e-mail. Allan
-
I found an error in the wire color code for Foxton 7 wire turn signal. Everything worked but when I applied the breaks the left front park light would come on. I found an error in the drawing supplied by Foxton, Number 3 shows left front flasher lamp Dark Blue but the correct color for number 3 should be Cyan and goes to Left rear. Number 4 shows Left Rear flasher lamp color Cyan but the correct color for number 4 is Dark Blue and goes to the Left front flasher lamp. I supplied the drawings for the Knowledge section so Page 23 needs to be updated along with page 24. I also found why my indicator light on the turn signal would not light. I ran a seperate wire to ground the case to the frame, now it works. I will send a note to Foxton for correction. Allan
-
http://www430.pair.com/p15d24/mopar_forum/showthread.php?t=2971&highlight=fender+seal This is a post in 2007 by Jim Shepard try to open or do a forum search. Allan
-
Another Pilot-House Saved! Photos
Allan Parkhurst replied to JJs 1948's topic in Mopar Flathead Truck Forum
Beautiful truck!! Please post more pictures. Great job. -
My project is just about done
Allan Parkhurst replied to streamer's topic in Mopar Flathead Truck Forum
Great looking truck. All the work paid off, you should be proud. -
1948 hood/fender/grille removal 101 videos
Allan Parkhurst replied to 48Dodger's topic in Mopar Flathead Truck Forum
Tim I enjoyed the videos. It would help me if one could be on how to dis-assemble, check and re-assemble a 3 speed transmission. Great idea and keep up the good work. Allan -
1948 B1B 3 Years first trip
Allan Parkhurst replied to Allan Parkhurst's topic in Mopar Flathead Truck Forum
Thanks for the comments. I tried to keep it original but did change some colors to match my taste. I did the interior myself using ABS plastic sheat .090" and used a heat gun to form the top curve, then covered in vynal. I will post some pictures later. One good thing about working on the truck is I can now take apart and fix many parts of the truck. I also have a 1949 B1B in red and it is alot of fun to drive. Now that the 48 is running I see several thing I can improve, such as the steering and brakes. It is original except for 12 volt. Having fun and always promote the Pilot-House club. Allan -
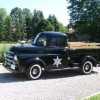
I just completed transmission and universal replacement. Runs great just had to adjust rear break clearance. I put inserts on side rail post so bolts don't show. I put it back as close to original using 6 volt, new wires,interior etc. etc. I put a link to my Photobucket pictures if you want to check them. Thanks to all for the help. http://s93.photobucket.com/albums/l79/allanparkhurst/1948%20B1B/

-
First ride 2nd gear jumps out
Allan Parkhurst replied to Allan Parkhurst's topic in Mopar Flathead Truck Forum
Thanks for the information!! The alignment of the clutch housing is a possible solution. I have a dial indicator but will need to find or borrow an Aligning Arbor. I have cleaned and painter my spare 3 speed, but it is a 1948 make and probably not have the internal changes mentioned in the Service Bulletin. I also have a 4 speed transmission but it is longer than the 3 speed. I will check if I have a shorter driveshaft. I will keep you posted. Thanks Allan -
My truck is finally coming home.
Allan Parkhurst replied to coW52Dodge's topic in Mopar Flathead Truck Forum
That is a great find. Enjoyed the pictures and video. Is that a spare tire carrier on the drivers side? These trucks are great to work on, especially with the knowledge of club members. -
First ride 2nd gear jumps out
Allan Parkhurst replied to Allan Parkhurst's topic in Mopar Flathead Truck Forum
Yes this is the black 48. The engine runs great after rebuilt carb,rebuilt distributor,spark plugs,plug wires, rebuilt starter, regulator,fuel pump etc. etc. It has been fun, just hope the transmission can be fixed. I have the bed wood cut out but need to sand etc. The interior came out ok. I hope to post some pictures when I get it outside. Getting close. Your truck looks great! Thanks for the help. -
First ride 2nd gear jumps out
Allan Parkhurst replied to Allan Parkhurst's topic in Mopar Flathead Truck Forum
Thanks for the information. I will pull the top off tonight. Is there a place to replace seal if needed? Hope I can tell what is needed to fix it. I do have a spar but don't know the condition. Hope to get it out for a long run. -
First ride 2nd gear jumps out
Allan Parkhurst replied to Allan Parkhurst's topic in Mopar Flathead Truck Forum
Thanks for the replys. I didn't get very far but it happened getting up to speed. Is there an adjustment I can make since I still have the floor out. I do have a spare 3 speed if need be but this transmission was rebuilt. Is it possible a shim or spacing is out of tolerance. -
After 3 years took truck for shakedown ride. Made it 1/2 mile checked brakes and right front was hot so i returned. I will adjust tonight. My question is the transmission shifts smooth but jumps out of second with a pop. Any suggestions would help me alot. I have a 3 speed floor shift. Also my gas pedel would not return to idle. I installed it with the arm verticle on the rod at the back of the engine. I took out the floor and turned the arm down and it works fine now. I have the bed wood all cut and will install soon. I will post pictures soon.
-
53' pilothouse glass install woes
Allan Parkhurst replied to YourPowderCoating.com's topic in Mopar Flathead Truck Forum
Just a note. I got my corner glass installed last fall with the help of my neighbor. He was the brains and I was the brute force. It took less than 30 min. per window. We installed the rubber on the window first. I found out that they were roller inside out at first so once I figured out how to put the rubber on the glass we used 16 Ga. coated wire in the groove with both ends meeting at the bottom corner closest to the door. We installed from the inside pushing the lower corner in first. My neighbor lubed the rubber with WD 40 then used 2 vicegrips,twisted around the end of each wire and clamped. Holding one vicegrip at the botton corner he pulled the wire so the rubber slipped over the metal. It takes alot of pressure from the inside, always toward the area the rubber is being moved. It is like pushing against a brick wall. Once the bottom corner was started and around the top curve it went easier. Keep holding the other vicegrip in place until the wire comes around in the clockwise direction. Hope this helps. Good luck. -
Photos of wooden bed side rails wanted
Allan Parkhurst replied to 1937 Dodge's topic in Mopar Flathead Truck Forum
http://www.nutty.com/cgi-bin/Shopper.exe?preadd=action&key=0060-EZW51618 these go with the inserts. http://www.nutty.com/cgi-bin/Shopper.exe?preadd=action&key=0680-XFSC51618112 I ordered mine from nutty.com but you can also find the inserts at the hardware store. The flat head scews are hard to find at a hardware store. -
Photos of wooden bed side rails wanted
Allan Parkhurst replied to 1937 Dodge's topic in Mopar Flathead Truck Forum
I tried to attach a picture but it didn't work. There is a picture of my truck on the wire harness under tech. section though. I do have a suggestion I'am using on my 48 B1B. I have two 4" wide side rails but instead of using bolts with nuts that stick out of the vertical post, I will use wood inserts drilled into but not through the vertical post, then use stainless flat head bolts through the side boards. This will make every thing neat. I will try to send a picture later, or to your e-mail. -
Just a note: On the link go to the bottom and use the "New" complete pdf file for the latest information. Allan

