

48Dodger
-
Posts
4,307 -
Joined
-
Last visited
-
Days Won
81
Content Type
Links Directory
Profiles
Articles
Forums
Downloads
Store
Gallery
Blogs
Events
Classifieds
Everything posted by 48Dodger
-
lol. agreed. 48D
-
There are several forums I know of that address this kind of thing right up front. Read, Research, then ask. I think it's only fair to respect the knowledge of the guys here by reading the vast amount of infomation they've already shared. Come on, Norm's Coupe has 7,522 post and Don has 6,983.....its not all jokin around. Don doesn't know 6950 jokes and 33 useful bits of information. I think he only has about 3 good jokes......lol. Seriously, nothing wrong with a sticky ask'n newbies to look things through first. 48D
-
When determining if an axle will fit, I consider the spring perches first. I don't think anyone was trying to say the axles were the same, we were going over the differences. Many of us on this forum have changed over to late 60's 8 3/4 axles for the "modern" advantages. The original question was answered a few times. br0k3N18 "meh funk it, I dont care if its a 8 3/4 or not, just wantin to know the width of it so i can swap one in!" yea...swap it in. 48D
-
Spring perches on a 1968 Super Bee 8 3/4 is 44 inches center to center. Spring perches on a 1950 PH Truck is 44 1/2. The big difference is the spring perches are on the bottom of a 1968 pass vehicle. The 50 Truck has the perches on the top. 1950 Truck axle's two top studs are 3 1/4 apart, the 1968 is 2 inches apart. The flanges on a 1968 8 3/4 are flat on top, the flanges on the 50 are round. the next 3 pictures are a 1950 orginal axle set-up The next 2 pictures are of a 1968 8 3/4 axle housing Next pictures are of a 1950 truck with a 60's 8 3/4 modified with the 1950 style perches put on top. 48D
-
As you go higher in grit, the depth of which it reaches, decreases. In otherwords, 320 grit won't reach deep enough to "hide" the 60 grit scratches. You might consider using a 100 grit, spray it with high build primer, than work it with the 220 grit, then 320. 60 grit scratches are deep. Making a big jump in grit, most times, you don't appreciate the mistake til the paint dries. lol 48D
-
Left side is the driver side. The numbers are light. I have a few frames laying around and none "pop out". Just clean and rub til the numbers show themselves. 48D Picture from the DPETCA Knowledge page
-

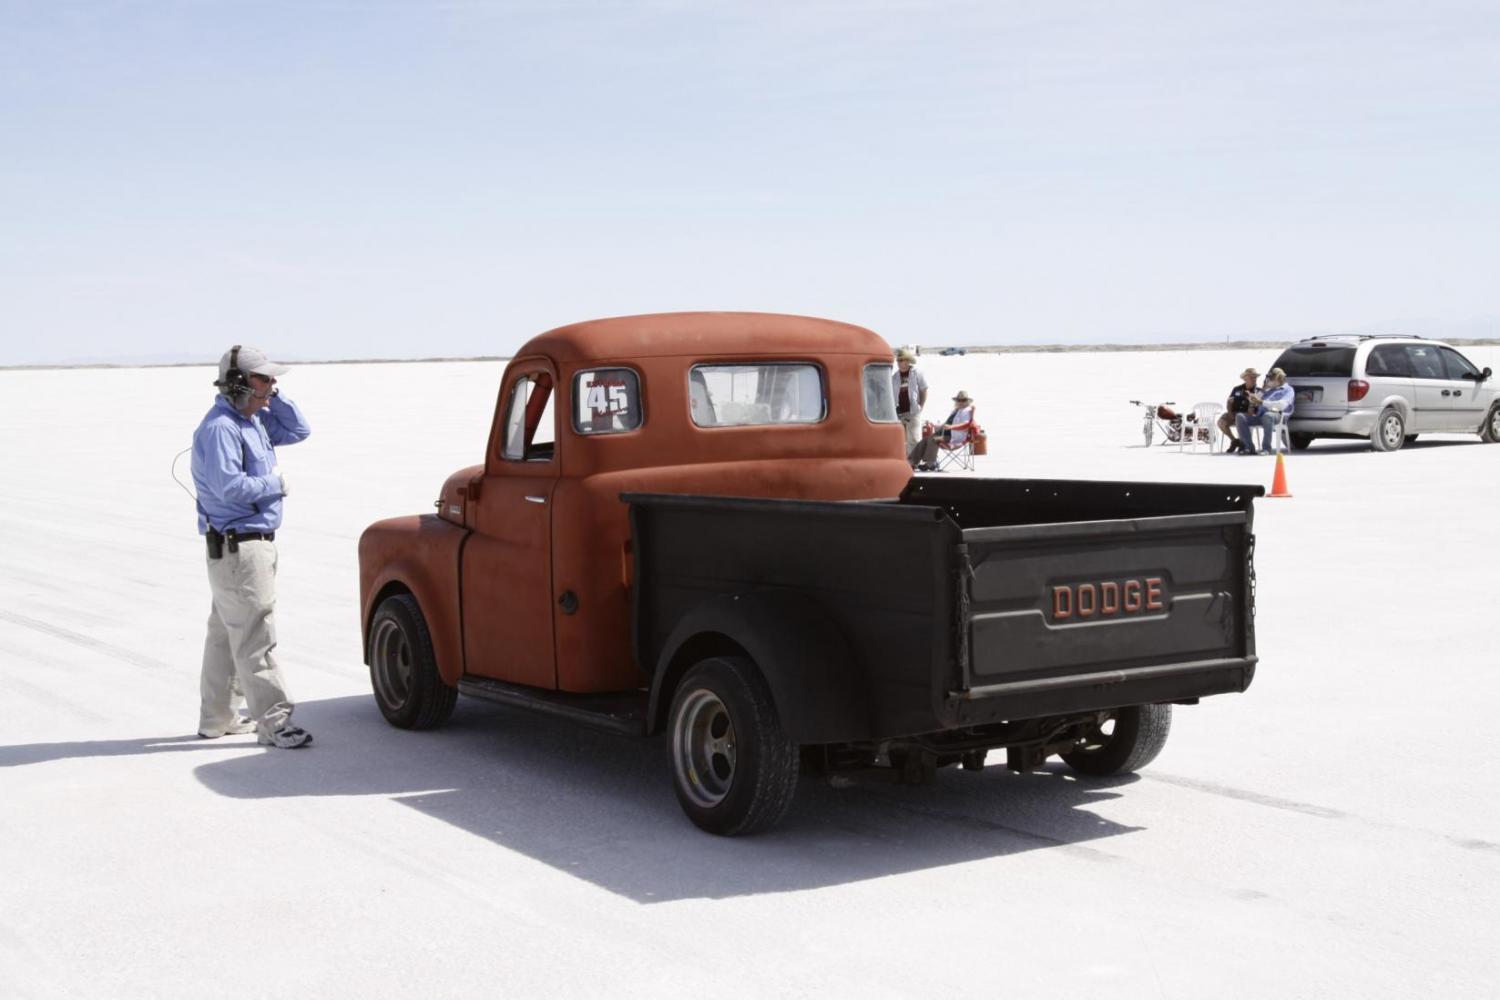
Build Thread : The Bonneville experiment.....
48Dodger replied to 48Dodger's topic in Mopar Flathead Truck Forum
Yep. They are cut to the demensions related to where I put the frame jig. They'd easily be adjusted for any new project of course. These 3 pictures show the drivers side cut out with a bend I put in for the steering box. The steel is a 3/16 PG+E Panel I got for free. I welded up the bolt holes before welding it to the frame. I'll have to find pictures of it finished. 48D -
Over 20 '57 pilothouses for sale???
48Dodger replied to Fireball's topic in Mopar Flathead Truck Forum
looks like another old school wrecking yard going out of business. 48D -
found a motor and trans for the truck
48Dodger replied to buds truck's topic in Mopar Flathead Truck Forum
http://www.700r4l60e.com/transmission_chrysler.html As you can see, they are very similar in appearance. But really, its hard to say from your one picture. Check the shape of the pan and let us know. 48D -
found a motor and trans for the truck
48Dodger replied to buds truck's topic in Mopar Flathead Truck Forum
From what I can tell it looks like a 318/904 from a Van. The Trans park brake and front sump pan are typically use on those. Passenger oil pans are in the middle and Trucks in the back. If it's a 69, it needs the hardened seats and nylon timing gear changed out. The 318 came with better heads in the late 80's I think with the closed chambers and hardened seats. Might be better than tryin to use those heads. Don't lose that damper either. 318's are internally balanced, but the thickness and the timing mark are important references you can use if you go to a HP damper. Are you sure its a 69' ? Can't wait to see what you do with it. 48D -
Maybe after you drove it...put it away...tried to start it again, you flooded it. Thinking something you was wrong you worked on it and switched plug wires or put the dist 180 out. Just a guess from what you wrote. If I got the sequence right...you tuned it up, drove it, no start, then changed plugs/wires/coil/condensor again. Start over one more time, and see if its something simple. 48D
-
found a motor and trans for the truck
48Dodger replied to buds truck's topic in Mopar Flathead Truck Forum
In 69 it should be a A-904, not 727-A (727-B is 1972 and up) . Check and see if its a 727-B cuz there's a bunch of those around. My guess its a 904. Most sellers who see a 60's mopar automatically assume 727..... I run a 904 with a shift kit on my 72 stock car, which will be the same I'm using for Bonneville. If your motor/tranny is from the 70's its get a little more complicated in the history. 727 small block vs big block housing etc... Here's a thread I was watching earlier: http://www.forabodiesonly.com/mopar/showthread.php?p=477508#post477508 And a good car craft article: http://www.carcraft.com/newlook/crc_act/116_0302_trans/index.html Vin decoding: http://www.stockmopar.com/how-to-decode-a-1969-1974-fender-tag-part-1.html And of course Wikipedia: http://en.wikipedia.org/wiki/TorqueFlite#A727 48D -
found a motor and trans for the truck
48Dodger replied to buds truck's topic in Mopar Flathead Truck Forum
Nice work Bud. The majority of my "stock" around the ranch is 68-70 B+A body stuff. If you need anything 318 to 440 I might have it. Can't wait to see your truck on the road. 48D -
Build Thread : The Bonneville experiment.....
48Dodger replied to 48Dodger's topic in Mopar Flathead Truck Forum
I sandblasted the bottom side of the cab, shot it with "Rust Out", blasted it again, then sealed it with Rustoleums "Rusty Metal Primer". Of course there was some discover on the passenger side door. Rust through and pin holes. Probably gonna fill'em up with long hair fiberglass. If it becomes a bigger problem I'll cut the bottom and patch some metal in. My time is getting short, so I have to pick my battles. lol. I'll be filling some seams with fiberglass and finishing the rest with seam sealer. All this to keep the salt at bay. Then I'll I'll paint the bottom with a light gray enamel. Why? Well, in racing, when everything counts on you finding "it" before it breaks, light gray works better. You can see leaking problems etc....better than if everything was painted black. 48D -
Build Thread : The Bonneville experiment.....
48Dodger replied to 48Dodger's topic in Mopar Flathead Truck Forum
Here's a pretty good thread concerning sand blasting and related ways of removing rust. I posted my "rig" of stuff on that thread. Thanks for the kind words and good luck with your cab. 48D http://www430.pair.com/p15d24/mopar_forum/showthread.php?t=13161 -
Build Thread : The Bonneville experiment.....
48Dodger replied to 48Dodger's topic in Mopar Flathead Truck Forum
I had to get to the bottom of the cab with the Sandblaster, so I welded some tabs to the side, drilled a couple holes and used some spring clips. Still got welding to do but by tomorrow the bottom will be all sealed up. During the process of sand blasting, I uncovered pin hole rust at that bottom of the passenger door. Other than that, just a bunch of scale rust. 48D -
Reminds me of the "1%er" deal with motorcycle clubs. I'm guessing a relative of a local politician got one and the whole deal went down the tubes. lol 48D
-
lol...seriously, how many you didn't for just a moment say "why didn't i think of that?" Personally, I had that moment with the Hot Dog Rake.... 48D
-
Water leak from block - Lots of questions - Help!?
48Dodger replied to boxer_inv's topic in P15-D24 Forum
lol.....Don't know why this struck me as so funny. I guess it's because the best info I have, is on the stuff I've either blown up or wrecked. 48D -
Even if you don't make the drags, it a great motivater isn't? Personally I love White Walls. Great looking car. 48D
-
That was cool! looked and sounded like you guys were having fun. Sofa in the back? yea! let's here it for our redneck friends! 48D
-
This is how I do it. download your photos to the internet site Photobucket. Put it in a file/album you're happy with, cuz if you move it after posting it, it will break the link. Open photobucket and the forum window in seperate windows. cover the picture you want to post in from photobucket right click the "direct link" code and copy it go to the Forum/"reply to thread" window click the yellow box with the mountain and sun in it you might have to "allow" if your computer blocks it a small window with a highlighted "http" will show in the middle of the screen...paste the code right ON THE HIGHLIGHTED "http" it will show the code (not a picture yet) in your "reply to thread" window click on "preview post" to check the photo before posting That's what I do. Good luck Bill 48D
-
Is high build primer needed if body good
48Dodger replied to Frank Blackstone's topic in P15-D24 Forum
Your right Tim....chaos. Magazines are fun, and the Forum is even funner. But really, get a mentor and learn a method. You'll learn more, do more, and not fear the best part of many projects...the paint. Of course just my 2 cents, but I'll never fault a guy for tryin something different or bitting off more than he can chew. 48D -
Is high build primer needed if body good
48Dodger replied to Frank Blackstone's topic in P15-D24 Forum
Thanks for the kind words in your PM Frank. I've learned more about the different products used from members of this forum. Its amazing the number of paths a guy can take to paint his car/truck. In most areas in California now shops must use water base paints. I work out of my shop at home and can still use the "old" paints. So yet, another method to learn, painting with water. lol. 48D -
Painting With Auto Paint vs Rust Type Paints
48Dodger replied to Norm's Coupe's topic in P15-D24 Forum
I agree with Rockwood. The flash time on single stage can be under 10 minutes....at that point you've got sticky paint. Granted I've never done a roller paint job with either types of paint, but experience with the single stage makes me believe it would be a mess. When painting with single stage in a gun, you have to be quick with your first two coats to get your "wet" right. The two stage paints are different in that your shine comes from the clear coat. Could you brush on a two stage? Maybe the base coat...but the clear is some sticky stuff, it would be almost like rolling on thin honey. I think your question was "Has anyone ever tried painting a car or truck using a roller with regular automotive paint?" The answer from me.......nope. 48D