


Dodgeb4ya
-
Posts
9,962 -
Joined
-
Last visited
-
Days Won
174
Content Type
Links Directory
Profiles
Articles
Forums
Downloads
Store
Gallery
Blogs
Events
Classifieds
Everything posted by Dodgeb4ya
-
AMS MoPar in Georgia....
-
I'd use #1 for no confusion. I'd also just worry about the timing being checked at idle speed. You can see what you get at higher rpm's but it will probably be in spec...I have never had any issues with these very plain and simple distributors. I have checkef a couple of mine on a Sun machine...none out of calibration issues. The centrifical weights cannot be stuck and the shaft bushings cannot be worn. Yes each mark is 2 degree's on the dizzy. Each mark on the crank pulley is 1 degree.
-
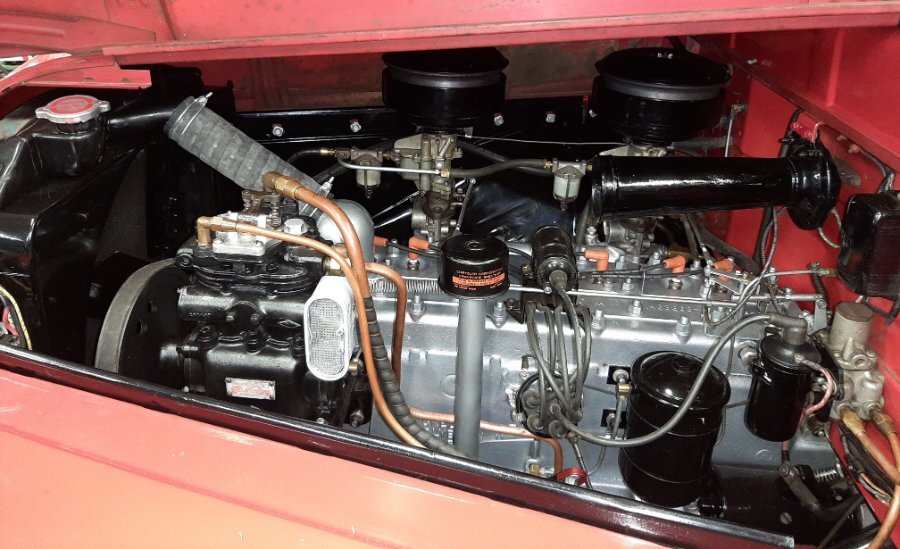
Hardest part of timing one of these engines is bringing up the timing marks located on the center of the dual pulleys....you have to sand this hard to access area between the pulley grooves. Belts are in the way. Shown is a picture of of the timing marks... Adjusting the idle fuel mixture is pretty basic.. Engine fully warmed up...you then slowly turn the mixture screw CW inward till engine the engine just starts to slow down/ idles rougher just a bit. Then back out the screw CCW 1/2 TO 1 turn to obtain the smoothest idle. Repeat on the other carb. Might have to repeat this on both carbs again ...Simple. One thing to note though is both carburetor throttle plates at closed idle need to be set exactly the same for both carbs. Properly adjusted throttle linkages are also critical when setting base idle throttle plates. If they are not exactly the same opening at slow idle it affects how smooth the engine idles. These engines normally idle perfectly smooth... smooth...smooth if the carbs are set right. A Uni-Syn sync tool can do wonders setting up multple carbs but not necessary if you follow the shop manual procedure. There's a techie learning curve setting up dual carbs 100% correctly. So for now I think you should only set timing at a slow 450-600 RPM idle speed. As mentioned above by Merle a bit advanced 2-4 degree's before TDC. Probably 4degree's. This because of todays fuel. Then set both idle mixtures for now best you can. Get clean fuel in it and new plug wires...then hopefully get some driving time on it. You have enough on your plate as is right now. Get it driving good enough and later go back and do more difficult fine tuning. Once right it's set for good.

-
There were a couple guys on here a few years back ...Gene aka "AustinSailer" and Charlie Stephenson who were yearning for and finding a 413 Flathead six. The 413 is a really rare and low production engine.....The largest most powerful flathead six Chrysler Corp ever made. Used only in low production model "Y" 4 ton 1953-55/56 Dodge Trucks.
-
Water in the gas! If so you better drain the tank 100% and get all traces of it out. Add some gas drter upon refill. I remember now a friend had a old econoline back in the late 70's that ran erractically... We finally figured out it was maybe a gas issue. He had recently filled the tank. Started draing the tank. Ended up that there was about a half gallon on water in it..
-
Those are really sooted up. 306's should be fine to run...just a resistor plug...heat range is near the same as a 295. Those plugs are not hardly firing. The exhaust must be blowing black smoke some what? If so are the carbs flooding excess fuel onto the top of the throttle plates while idling...? Those plugs are black and sooty from too much fuel and or oil. Looks mostly like excess fuel. Have you run it with new plugs yet to see if it runs normal...? The crazy loud back firing you have is obviously caused by excess unburned fuel in the exhaust being ignited. Not being there and hearing the engine run in person is tough to quickly try to help you out. Standing back at the tail pipes while the engine is fully warmed up and idling or revved up the exhaust should sound very smooth with NO misfiring. These Moly big blocks normally just run and run and run....perfectly smooth and reliably. Yours will too...just a small battle to get there.
-
I have been using Autolite 295 plugs in my Moly Block engines for many years.
-


-
I temember seeing the spark plug porcelain's glowing blueish in the dark as a teenager working on my Cranbrook....I'm sure now days (nights) they still do.?
-
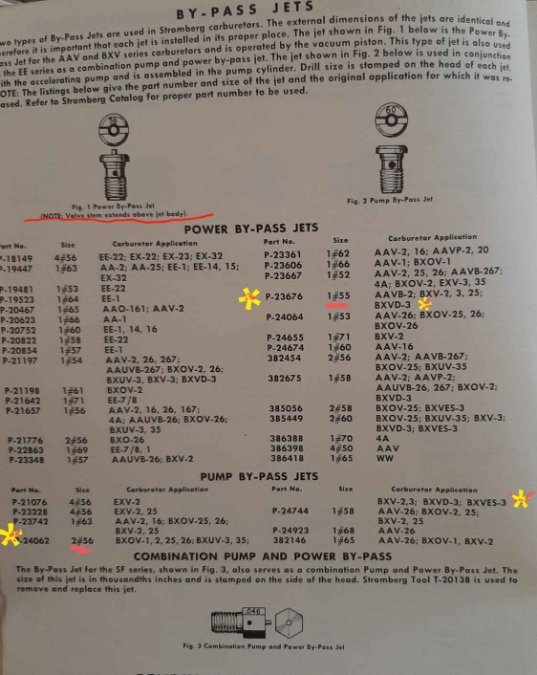
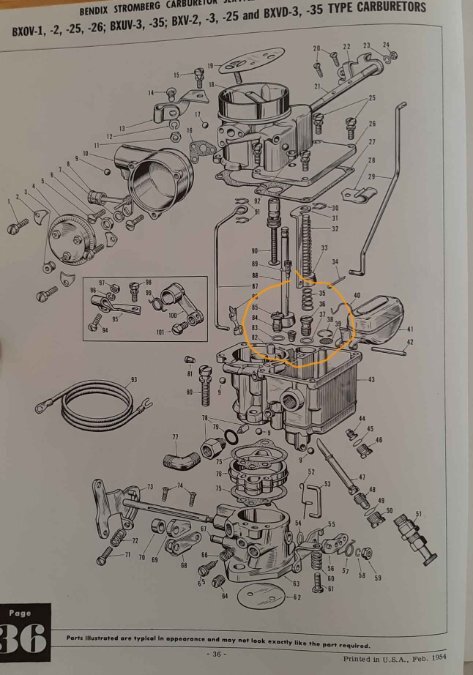
Your BXVD-3 accelerator by pass pump jet... drill #56 is the correct . Stromberg part #P24062. Also the pin on that jet is supposed to stay down below the jet top surface. Your power by pass drill #55 jet is also the correct jet and size. Part # P23676. Pin stays up above the jet surface.
-
The E-brake shoes inside the trans brake drum are grabbing and hanging up... This if you have a late 1950 model Dodge using the internal E-brake shoes. Early models use a external brake drum brake band. They generally never hang/lock up when backing up.
-
The factory parts book... "1948-53 Dodge Truck Parts" book...has most every part listed for B1-2-3 and 4 trucks. 1/2 thru 4 ton. Power Wagon and Route Van have separate parts books.
-
Too bad they won't work? Reason? 7/16" - 20tpi.
-
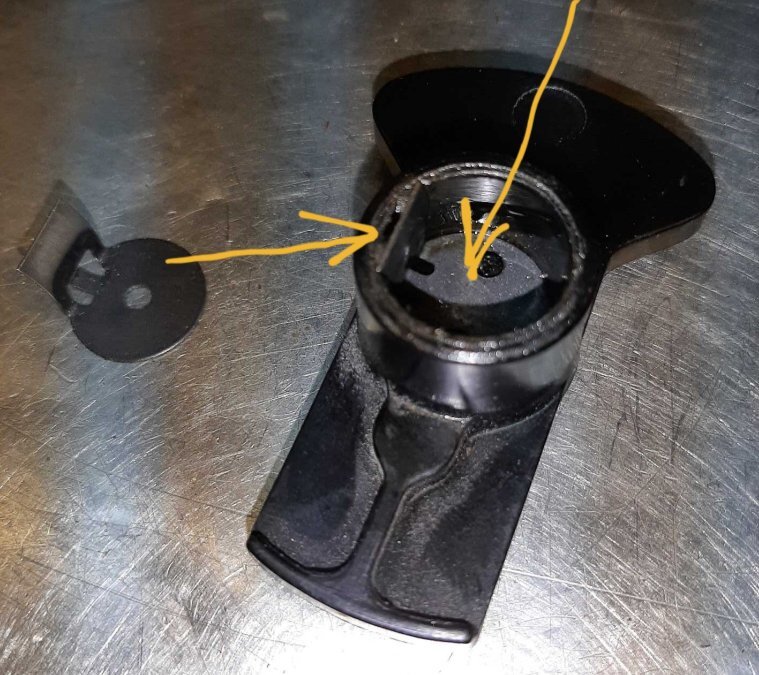
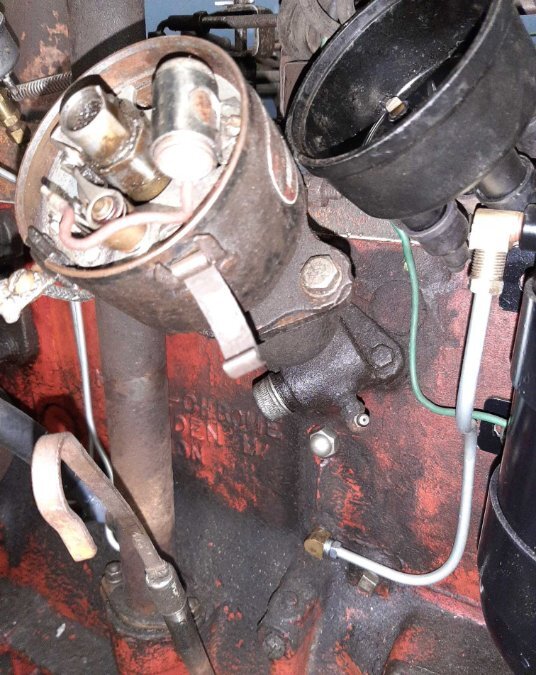
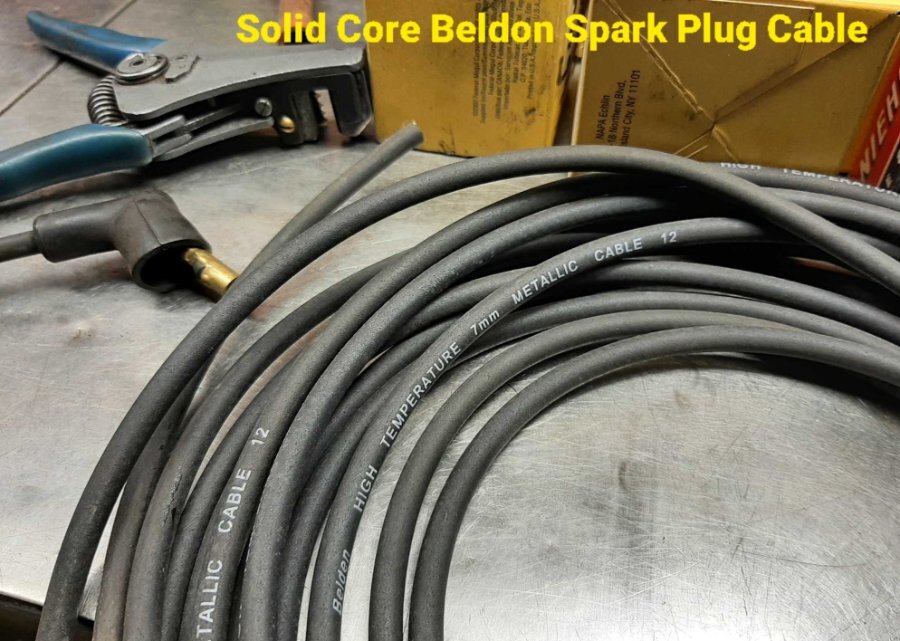
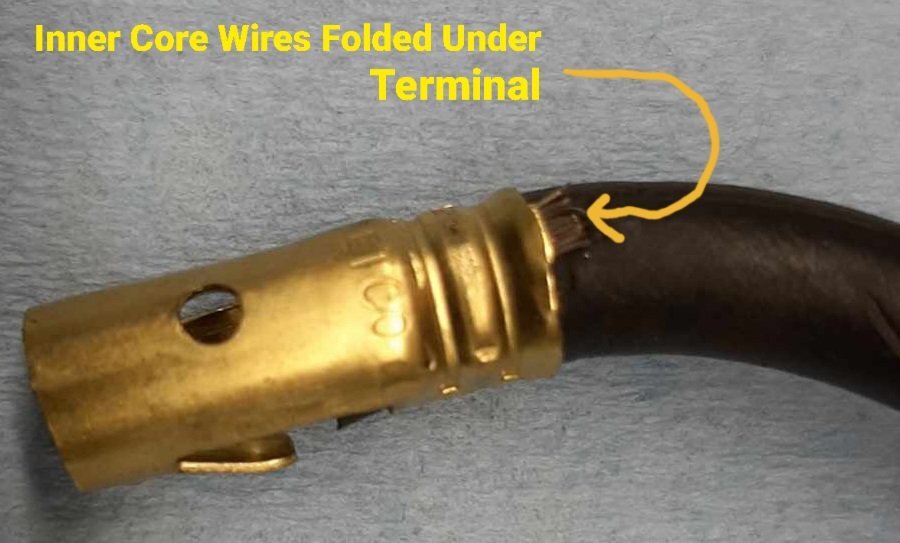
⁰Sometimes engines that sat for a long time can get corrosion where the distributor mounts high up on the block asittle oil splash gets up there. Yes carefully note the posution of the distributor mounting plate and rotor postions. Remove the two 7/16" mount bolts to remove the distributor. I'd clean up the mounting surfaces to be sure of a good ground. And inspect the distributor on the bench as long as it's already out. ***Check the distributor shaft for any looseness in the housing bushings... ***recheck the points for .020" gap and look at condition of the point contacts- being new they still could be of low quality and be slightly pitted or dis-colored..maybe replace them.. ***that new condensor possibly is offshore? Or Shorted....Install another one. *** make sure the round and "L" shaped spring clip is still pushed up in the rotor see pic. ***I cannot say who to purchase wires from. I have always used the correct crimpers and strippers to make up high quality plug wire sets for my and other peoples engines. I have never liked the cheap wire sets sold for most of our MoPar flatheads. ***I assume you are using solid core wire? ***IDK what distributor cap terminal wire ends you have on your wires...hopefully something better than the cheap brass style with the three triangle points you use pliers to sqeeze them tight to the wire cable ends. See terminal pics.. Make sure you spark plug cable inner core strands make a good connection to the terminal ends and are crimped well. Pics just show the way I do the plug wires...most don't have this capability...I get that. I don't think spark plug wires are causing your issue as long as they are dry and are firmly attached at each end. Be sure that the ignition switch wire going to the engine ignition coil is tight at the switch and coil.


-
I think it's an ignition/electrical issue. Good distributor housing to block ground? Primary wiring feeding coil and distributor 100%? Also back to points condensor issue.. These big blocks really do start and run well...
-
Carbon is hard...
-
Back in 2016 there was a core/soft and welch plug thread... Yes the 1-5/8" brass plugs for the flatheads and Hemi's are kinda tough to easily find now days.

-
On a flathead the oil pump has a drive gear meshed with the camshaft. You cannot turn the oil pump with with any type of driven shaft unless you strip the gear teeth off the pump. I made a priming oil pump by cutting the teeth off the pumps. Now days I use a oil priming pressure tank.
-
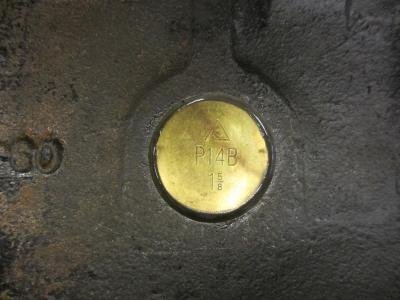
That's a factory timing gauge hole. See the removable hex plug above it.
-
Std. 3/16" steel brake tube is the factory vacuum advance line size ... A 3/16" tube nut at each end.
-
Brass plugs are used in all MoPar flat head marine applications. Chrysler straight eight engines front and rear non accessable block core plugs are brass from the factory. Silly wives tales as to flatheads having corrosion issues using brass. Shown are a couple Ply/Chrysler original car engines with rear and front of block brass plugs.. A reason MoPar used brass...


-

ISO Components to Mount 1950 - '52 Steering Wheel - Help!!!
Dodgeb4ya replied to Stargrinder's topic in P15-D24 Forum
You have a real challenge mixing and matching 1949/50 and 1951/52 wheels and horn parts. I did the same on a 1950 Chrysler. I was lucky as I had saved plenty of parts from Chrysler parts cars. Still was not a easy to figure out job. Good luck.? -
ANSWERED Shifting problems on 1950 Dodge B-2 three speed.
Dodgeb4ya replied to Bucko's topic in Mopar Flathead Truck Forum
S.L. Savidge Chrysler Plymouth....downtown Seattle. Has been closed for 40 years sadly. -
Looks to be a 1953 Dodge...because of the brake drum ball and trunnion U-joint companion flange. Next to the side cover is the model of car it came out of and the build date. Looks like someone used a blue tip torch to cut the shift rod and speedo cable...then a very pretty over done paint job ? It would fit swapping the brake drum...but... I'd be very wary of condition.
-
ANSWERED Shifting problems on 1950 Dodge B-2 three speed.
Dodgeb4ya replied to Bucko's topic in Mopar Flathead Truck Forum
Had a 1950 panel years ago that too many times locked into 2nd gear...cause was the top loader detent ball springs were weak. New balls and springs...fixed. The ball detent plates can wear and add to this issue too. I'd check shift fork wear, all bearings and syncro's too.


