


jmooner3
-
Posts
272 -
Joined
-
Last visited
-
Days Won
4
Content Type
Links Directory
Profiles
Articles
Forums
Downloads
Store
Gallery
Blogs
Events
Classifieds
Posts posted by jmooner3
-
-
It is a 4x8 sheet of 1/8” abs. It does have texture on one side and smooth on other. I left the textured side out. The SEM paint is at our local Napa, you prob can get it on line. It’s cordovan brown.
-
Thanks guys. My truck had some desktop car parts so maybe they’re from a desoto, the brackets look like yours and screw holes line up. I’m going to revamp them and make em work. Appreciate the feedback!
-
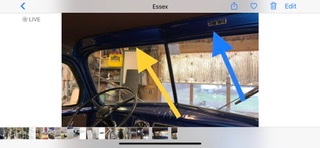
Above the windshield there are Holes for a small tag, one side had the seat instructions, looks like there are holes for same size tag on other side... any idea what goes there?

-
I have a set of sun visors, look to be original. Seems the passenger side is rare. I’ve cleaned up the steel to a pretty good luster, pulled the visors off the metal rod, the visor material is a perforated cardboard/ vinyl type material and there was a nasty crumbling wood grain contact paper glued over it. I was able to heat and peel the paper off. I’m curious if these would have been original. The mounting looks like the pics that others have posted. I’m interested in your thoughts on how to refurbish them. Thx.


-
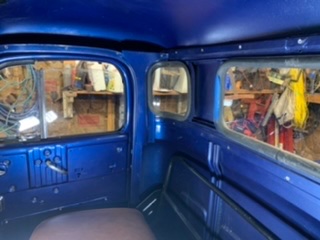
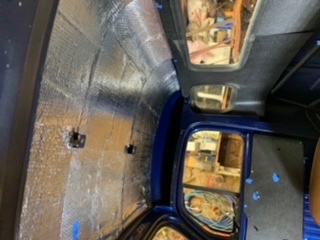
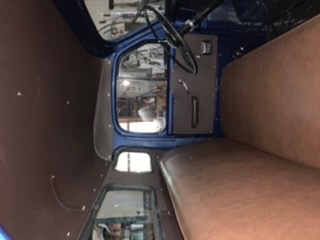
I finally got interior into Ol Blue. Reg had sent me his pattern and I was going to copy and cover with vinyl... instead I altered it a bit when I found a sheet of 1/8” abs. I made the two door cards and the two piece back for our 5 window rigs, but given that ABS can be heated and bent I tried making top and wing panels out of one piece. Bent it and glued the corners with acetone and abs chunks melted to make a one piece head liner. I cut a small relief at back center to give it right curve in 2 dimensions. I did a small seam at back. I had to install back piece at windows first then top so not as it was from factory but it went together with some choice words. I could use a matching set of window cranks if anyone knows s source. I used rivnuts and 10-24 stainless screws with finish washers to fasten. ABS panel was black so I painted with SEM brown, snagged some arm rests from an 80s Toyota painted and voila... what d ya think?

-
 7
7
-
-
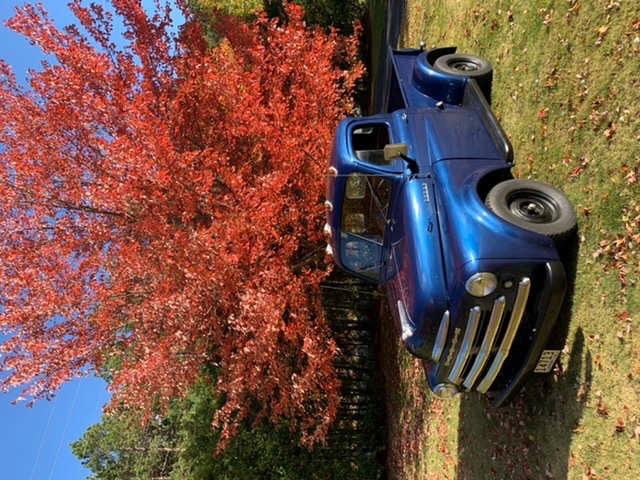
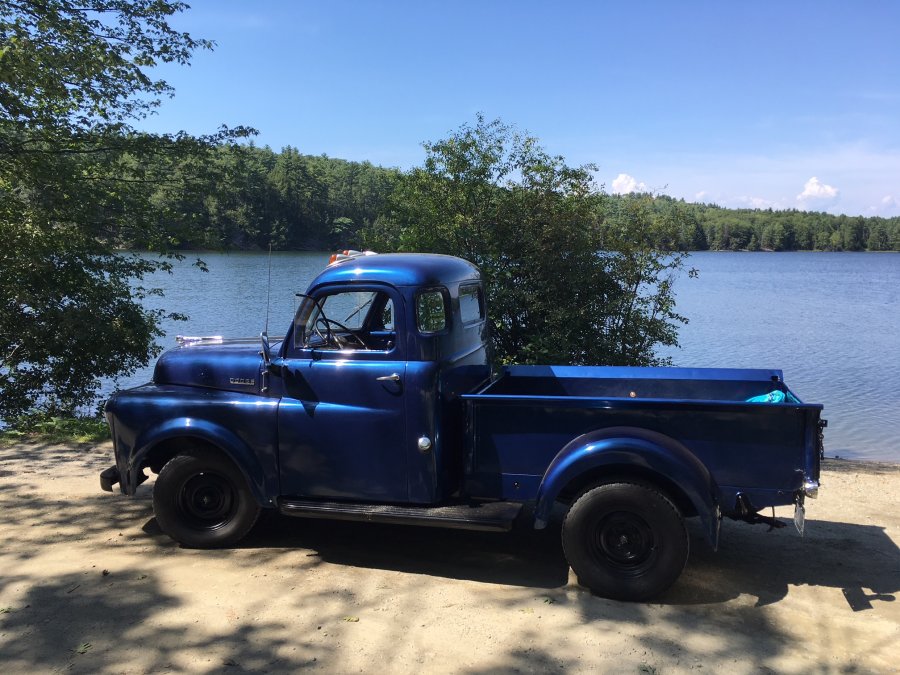
wrapping up another summer of running Ol blue around and had a great drive today, figured I’d share a pic on this thread of fall in Vt.

-
3
-
-
Here’s one from my front yard today, it’s hard to beat a fall B1B pilothouse drive in VT. ?
-
3
-
-
230 flattie in 1949 B1B mated to 3speed tranny.
Yep the stock set up is about 45 top end for me too. I don’t need to pass everyone on the road but it’d be nice to be able to keep up. I just plan ahead to be on time, stay on the secondary roads, and enjoy the ride!
cheers,
jay
-
Thanks Plymouthy -I've got an engine block that I'm tearing down and going to rebuild, once I have it gutted I'm hauling it in this truck to the machine shop to get it bored and ready to pump again. Can't wait to pull up in this thing to give them that greasy old block... I decided when I made the call to go with the finished boards that I'm still going to use it. I might throw a piece of plywood in and probably not going to haul cow manure in it as I have a trailer for that, but I did haul kayaks, a paddle board, and my bride to the local reservoir. (One of them rode in the front, the rest in the back). :-0
-
1
-
 1
1
-
-
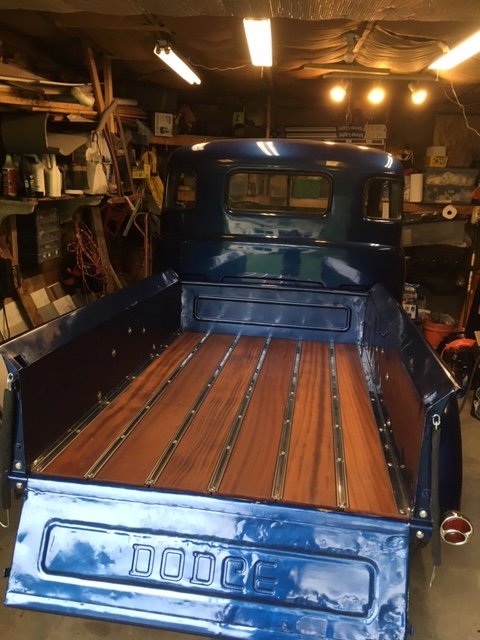
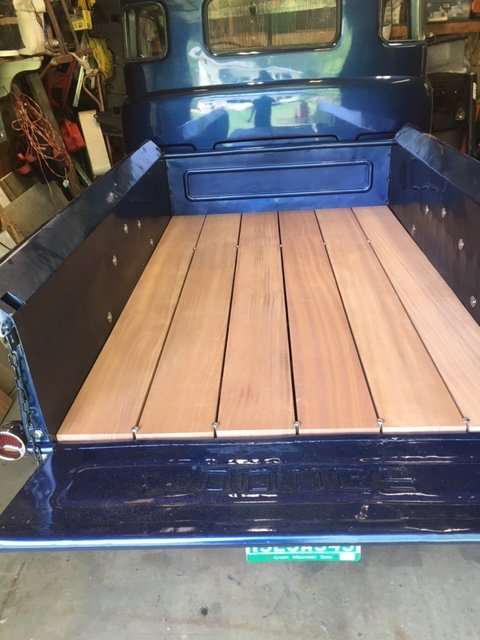
Here's the update on Ol Blue's journey, I finished the bed this week. I hauled home some rough cut mahogany, planed, milled rabbited to accept the metal strips, oiled it and installed....what-dya think?
-
6
-
-
Agreed, pull the floor pans - the engine, bell housing, pedals and all come out... there are four bolts horizontal into the housing at rear of engine and then the two up front. The engine can be manipulated to get pedals to clear under the firwall. Up and out...The whole enchilada comes out as one. I did mine after pulling the "doghouse" off. Estrada motor sports has some videos showing how to do it.
-
Nice job and happy to see another Mopar running the roads of the NorthEast!
-
Hey Mark, agreed rough cut would probably fit my truck better, I have rough cut Oak too, but I skip planed one of the mahogany boards and it's beautiful! Hek boats use Mahogany out in the weather, I'm a woodworker too so I think I'm going to plane, clean the boards up, and just oil them to let the grain show. I still use it as a truck, if I haul nasty junk maybe I'll put a piece of plywood over it, but each ding ads character ;-). Whatya think of your running boards reworked, revived, shortened, and in service...
-
1
-
-
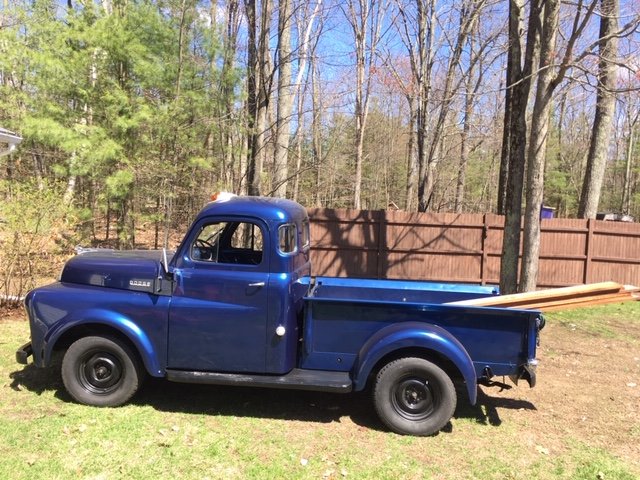
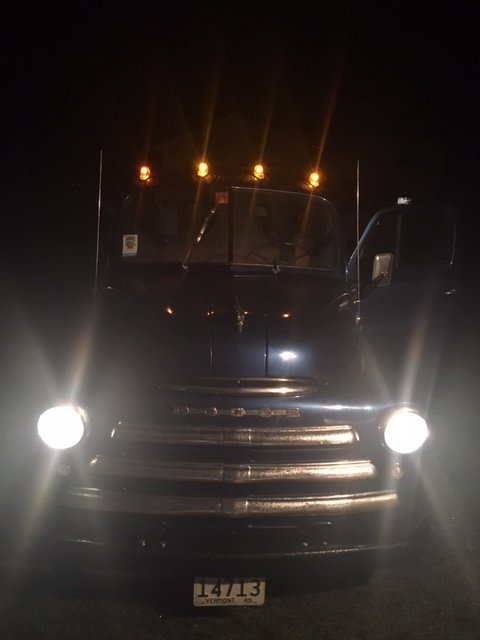
Fixed running boards, fixed overheat, and been driving daily, built a back bumper, hauled some rough cut mahogany home this week to make a bed for ol blue. Also took my first night run in the rain the other night. Lights worked and so did the wipers....


-
7
-
-
Thanks guys! Got a lead on some mahogany wood, rough cut 5/4. Have to break out my planer and get to milling. Going to get 6 - 8” boards Monday. Old blue is going to have a respectable bed soon. took a ride Thursday afternoon, ended up coming home late in the rain. My first night run, lights worked great hi beams even worked nice. Of course at top speed of 35 it’s hard to overdrive headlights ?
-
1
-
-
Thanks, it's been a fun process of learning for me!
-
I like the POR 15, it's very durable, but I do agree the finish when brushed is not the same as a sprayed finish from other products. I brushed parts of the frame and the floor and the self leveling is great but the finish is not the same as sprayed. I've never tried spraying POR through a gun. I did find POR topcoat in an aerosol can and I hit my running boards with it. It made a nice satin finish, I'll have to see how it wears. The other POR products I've used have been really good and worked as they were intended. This includes the gas tank system - I just sealed mine and so far it's doing it's job...time will tell.
J
-
Hello Guys - I've been busy, got a few updates:
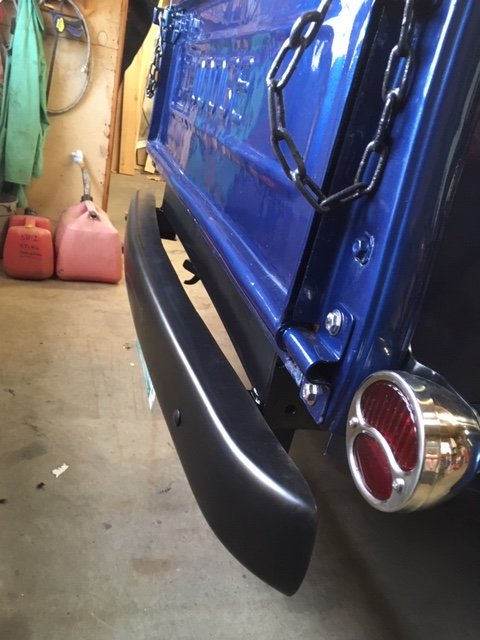
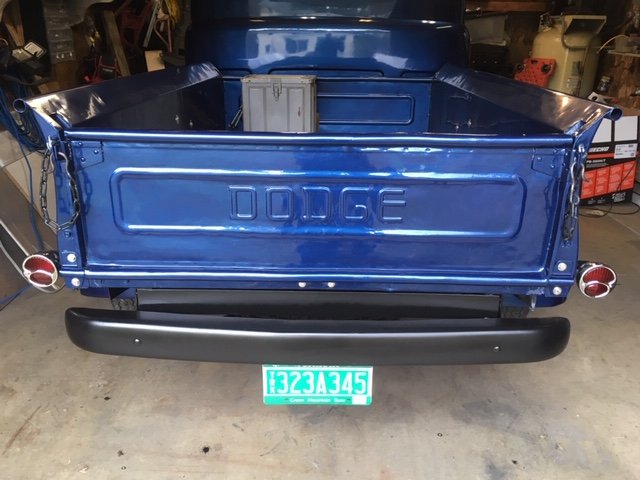
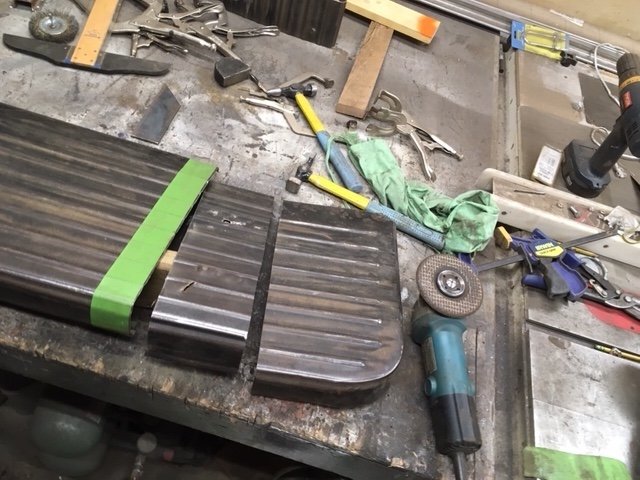
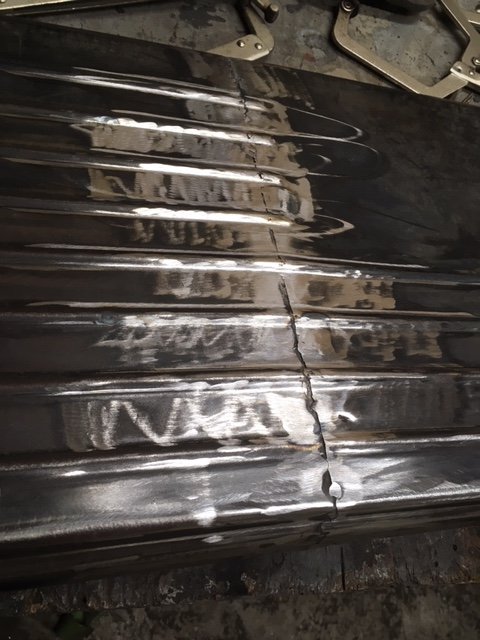
first thing was the gas tank leak. I chose to take the inexpensive route first, I bought a tank refurb kit from Amazon made by POR (ive had great luck with their chassis paint) so I thought I'd give it a shot. Followed the directions to the letter and put tank back in truck last week. no leaks so far. Truck started up and drove great. I still need to replace the rear end as Merle suggested in this link, I've got to go find a set of 373s. The engine over heat appears to be good to go following the clean up, machining of head, and new head gasket. I also replaced my running boards, I had a set that were 4 inches too short and had installed a spacer. found a set that were about the same too long but bought them anyway, bent them back to shape, chased all threads, cut them down and welded them to size. installed and they look good. Also my truck did not have a rear bumper, I was going to make one out of box steel but decided to cut down and cut the curved ends off my parts truck front bumper, so I shortened it welded it up built a bracket and popped that on today. whatdya think?


-
7
-
-
Mines a 49 dodge but looks similar. have done it solo. Like bisquick said I ran tape along hinge where painted surface might hit painted surface when open. I opened both sides and tied the two latch handles together so the whole enchilada moved as one. Two bolts front 2 aft slid it off. Then I put it flat on a piece of plywood and until it to let it lay flat. When my son helped it was a breeze, suggest you get a helper. It’s not heavy at all just a bit awkward. God luck!
-
Thanks all, update- I did get the 68” boards straightened and cut about 4” out then welded them back up to the 64” size, welded a couple brackets, retapped, painted with POR rust inhibitor and topcoat... they’re not perfect but they fit right and look good on the truck. Sounds like the 60” ones I have are for b4b or c series from what I can find on the forum and google, But for anyone wondering the 1949 b1b 108 wheelbase uses the 64” version. Couldn’t upload pics from my phone, will updat when have access to computer.
-
1
-
-
We've got a couple of seasons up here in Vermont.... Beautiful summer for a week, winter for 7 months, mud season from April til June and of course the perfect weather for a drive in ol blue in the fall!

-
10
-
-
Here's some info for you to consider... I did the sleeve and seal as called out int Jpartington's post below - I added a pic of the SKF parts(with partnumbers on boxes) - bought through Amazon--worked great, still going strong.

-
I have a B!B (1/2 ton) and the number was in the same spot. I scraped off the crud and did some light sanding to reveal large stamped numbers that matched my door tag.
-
Good input guys so we have good results with the Bill Hirsch system any others on the redkote...?
any pitfalls or things to avoid if I go this route? The price is right but the "new" tank is pretty appealing as the process seems pretty straight forward but quite a lot of swinging the tank around three times to strip, etch, and then coat with a good long dry time in between...
http://www.hirschauto.com/AUTOMOTIVE-FUEL-TANK-REPAIR-KIT/productinfo/ARK-01/
Interior ABS one piece headliner.
in Mopar Flathead Truck Forum
Posted
The one in my 50 parts truck had a seam, it was rotted out and it was nasty. The seam was hanging open, I guess it was ventilation for the mice family living in there. I decided to try a one piece, on my 49 and it came out alright. Im happy with it, I’m always interested in what others have done. Most of what was needed done on this truck- I did research and then just winged it. Rather than several hundred dollars to buy the pre fabbed Kit, Im all in for ~$100.... saved a few bucks, it turned out ok AND I got to spend another couple days in old blue. ?