jmooner3
-
Posts
272 -
Joined
-
Last visited
-
Days Won
4
Content Type
Links Directory
Profiles
Articles
Forums
Downloads
Store
Gallery
Blogs
Events
Classifieds
Everything posted by jmooner3
-
Thanks Merle, compression test makes great sense rather'n pulling the head. How many pounds should each cyl be? Is there a range that is good or a level that if below I should rebuild? As for the rod and main bearings what is the spec for go / no-go, if I measure with plastiguage. Thanks
-
Thanks for the help guys! Engine came out just as you said it would. It's stripped to the block mounted on a stand and now I'm changing gears on my plan to rebuild this one... I may not rebuild this motor as I'm going to pick up a parts truck Monday that has a runner in it! The smile on my face is worth the cost of a rebuild. I'll know better when I get it here, but I'm thinking I ought to at least pop welch plugs and peek into the "new" engine to be sure the water jacket is clear. While I don't want to disrupt a running engine too much, what items would I be a fool not to check while I have it out? I was thinking I should clean it up and paint it after I check it out...Does it make sense to pull the head check cylinder taper, inspect water distribution tube or just spray it, pop it in and go... Advice welcome on how deep a peek I should take as I swap in a motor. Other than the fact that it runs the previous owner does not know what has been done to date he got it just as is.
-
Great post! Thanks for sharing. Has anyone found a dual master cylinder that will fit in place of our single? Having redundancy in breaking just makes sense. I've got a 49 1/2 ton that I want to swap to discs at some point too. The brake lines are all pretty ripe on my truck. I'm thinking of replacing it all. Anyone have any advice on that? What size are the lines? It looks like mine have some splices and such..the one from the MC to what looks like a 4 way fitting looks bigger than the others but with all the rust I can't tell what size they are... Any sources for new brake hoses at the four corners? If I'm going to swap to discs should I buy something that fits the calipers rather than adapting a larger one if I'm going to buy them anyway? As always any advice and pitfall avoidance welcome! thanks;)
-
Hello Guys. My boys and I have stripped the engine down to the block, pulled the floor panels to clear pedals, pulled the master cyl and the steering box... Front mounts are loose. What is the right way (easiest way works too) to free the motor from the tranny and rear mounts. The tranny looks like just 4 bolts - is this correct? I suspect just jack it up pull the four bolts to the clutch...Is there a better way or something to look out for? The rear motor mounts got me wondering... Do you pull the one vertical bolt from each side through the rubber mount(seems this still wont clear the frame. Or do you pull the four bolts in through the sides (2 each side)... A little help from you guys with those rear mounts and I'll have this thing swinging. Thanks!
-
Thanks Merle! Any ideas on width of the wheel stance?
-
Guys - I'm still working on getting the 50 1 ton parts truck. Not sure if it rolls well or not so rather than counting on a tow dolly I have a buddy with a trailer that may work. The 1 ton is a "rolling" frame. No box or front clip. It's just frame, cab and a running motor! Anyone have any idea what it might weigh in this condition and how wide/long of a trailer I need to haul it. This is a 1 ton 1950 with single rear wheels - no duallys. If anyone has one to measure or can point me to the spec sheet on this truck I'll go measure my buddy's trailer and maybe I'll have a parts truck en route before the next big snowstorm...we just got nearly 3 feet!
-
1950 1Ton parts truck-what will fit my 49 1/2 ton???
jmooner3 replied to jmooner3's topic in Mopar Flathead Truck Forum
I have not seen the 1950 -1ton truck in several years, as I recall it was in better shape than mine last I saw it. I think all the brakes were done on it (mine are not ), not sure about the wiring, but the engine runs (mine is stripped to the block waiting boring) there was no front clip as I believe it was sent out to be professionally done there was a snafu that caused the parts to be "misplaced" so the partially done truck is front tin-less. It sounds like It's further along than mine. As I recall the 50 is not the 5 window cab and is the long box. I really like the idea of driving the little 1/2 ton pilot house. However it may make sense for me to swap what I have to the 1950 1ton as it's closer to done. Ploping my front clip on that truck puts me wayyyyahead of the game. Still I started with this 49 1/2 ton and I think that's what I want to build...so it might get done with the 50's engine and parts. Sounds like I may be able to use some of the brakes? I believe the 1 ton is not a duelly, are the wheels/tires bigger in diameter than the 1/2 ton's... Could I just swap hubs & wheels to take advantage of the new brakes? Or even axles hubs, brakes all together, or some combination of that onto the 49? With a longer box I assume the wheel base is different. If not, I could swap cabs and build the 1/2 ton short box body on the 50 1ton frame... First step is to actually get the truck and then I'll be able to make a plan..Keep the ideas flowing. Your collective advice and council will help me get something on the road! And at the end of the day ther'll be parts for the forum-folks. Paying it forward sounds great, I love the idea of helping others while growing my project towards the finish line! -
I have an opportunity to get a 1950 1TON parts truck. the motor is good:D, new carb and brakes. No front clip and some parts missing. Question for the forum, what from this one ton will fit on my 1/2 ton 49 pilot house? Motor probably yes, seat, transmission etc... I think I read wheels are different size for 1 Ton, are the brakes different 1/2 ton to 1ton? My boys are helping type this posting(and will read the reply), Luke asked to add that Santa brought us some parts this year.. The original hood ornament, a beautiful new horn, and handles!!! Once I'm done using what I can for my 1/2 ton, the remaining parts will likely be up for grabs to you guys with one tons... I have an engine hoist poised and ready to pull the engine, was going to machine it for cyl taper...and now, might just swap the parts engine in... I don't yet have the "parts truck" but hopefully before spring I can pick it up and get to the next phase of this project! Any insight on what will fit is welcome!
-
Thanks guys. So it looks like I need to drop the tranny (4 bolts I think) disconnect front mounts (already off here) rear mounts? Does whole mount come with bell? Bolt go in sidways or top to bottom? What to do with steering? Pitman arm is disconnected from crosslink just need to unbolt box and bracket in cab and it's freewilly- does that go up and out after the floor panel is out? what about the master cyl stay or go? Anything else need to move before the engine does? Thanks
-
Dave - THANKS! Going to make some happy little fellers on christmas morning, somhow opening gifts that are old and worn is like a breath of fresh air into this old truck! Whata I owe ya? Well Dave I liked your idea of "overhauling" in the truck, so much so I was ready to pull the trigger today and order parts............ 41 posts ago I started with the question about pulling the engine and my boys and I have learned a ton to date. I have hapily headed down the "overhaul" in the frame route - parts list together and ready to order..These cylindars still have hone marks from previous owner and crank had been machined to 20 under...One could have assumed that the cyls were bored true at the time that work was done. But I noticed only half the valves were flat top and the others were slightly dome shaped:rolleyes: Could this mean that someone only "half baked" this motor? Short story is I couldn't rent a bore guage but the machine shop made a house call to measure up before I went ahead with ordering std. rings.....survey says............over 20 thousanths of taper in my cyls... Sooooo now 42 posts later I'm back to that question - at the top of this thread........how to pull a motor. What I get so far is it can come out with the clutch and pedals or not. Not sounds good. I see the bolts on the tranny and I see the clearance issues with pedals through brake master and stearing... How tough and how does just the engine come out? Esentially all I need is the block, all sheet metal is off I can get to every inch of the motor and tranny as the truck is about a foot off the ground and in a 16 by 20 space...Best way to finishs this job I started is to get this motor out and to Vermont Engine Service http://vermontengine.com/ (great guys!!!!). Is it hard to leave the trans and flywheel in the truck and pull just the block? IF I don't "need" to pull the whole enchilada why bother...If I do for some reason I'm game....I'm in this far I am NOT backing down now...My daddy didn't raise no quitter and I aint about to show my boy the easy way out. So here is my ploy for help yet again - Oh gods of Mopar, I need your wisdom yet again:o
-
Thanks guys - drilled the hole, threaded in screw, grabbed with vise grips, and popped them out.
-
Great wealth of knowledge here for a newbie like me. I'm learning that this engine has been worked on previously crank has been turned, cyl were honed (prior to the big rust festival in ol' #6 that precipitated the whole learning process). I wonder if they did the dist tube too...Clearly nobody thought to look in the engine through the side plugs, it was chuck full of nasty sludge, whatever the tube was bringing to the back wasn't going anywhere good. I wonder if the radiator is giving up the ghost and all the sludge is her innards? Anyone have thoughts on the waterpump...It is tight and moves freely, do I need to rebuild? If so how? What about starters or generators, I have them off and asside from looking like hell they both work. The starter was no pleasure to remove, so I'm likley going to bring that to the shop for new brushes at least. The water distribution tube looks to be in good shape(left side looks like a capital D?), I shoved my pressure washer right up in there and it came clean, I can't see any holes from the outside looking in. I didn't know it came out, I'll have to give it a tug and see...Any tricks to getting it out? Cheers!
-
Thanks for the tip and for the pictures Don. All of the valves seem tight - no wiggle and the seats are not in bad shape, I'll need to have a closer look tomorrow. The plugs were no match for the screw! Drilled a hole, threaded in a small lag bolt, grabbed it with vise crips and poped them all out. there was sludge 3/4 of the way up both bottom holes! I cut down a small hose and worked it around in there full pressure, then got an idea...I modified my pressure washer and shoved it in the holes...damn the sludge was moving then! A few iterations of brake clean and then pressure washer - The block is sparkling inside! The shop on the other hand looks like I slayed an oil pig despite all the tarps I hung to keep it contained...O well. Picked up the head from the machine shop today, no cracks and it was way out of true. That would likely explain the water/antifreeze in #6. Next is reassembly. The machine shop said there is excessive play in the wrist pins and the pistons are in rough shape... Looks like I'm shopping again...Pistons, to go with my rings, gasekets etc.. The crank must have been machined once...the rod bearings are .002 over... My boy is excited(so am I!!!)! Hey were making progress here.
-
Anyone got a trick - Best way to get freeze plugs out?
-
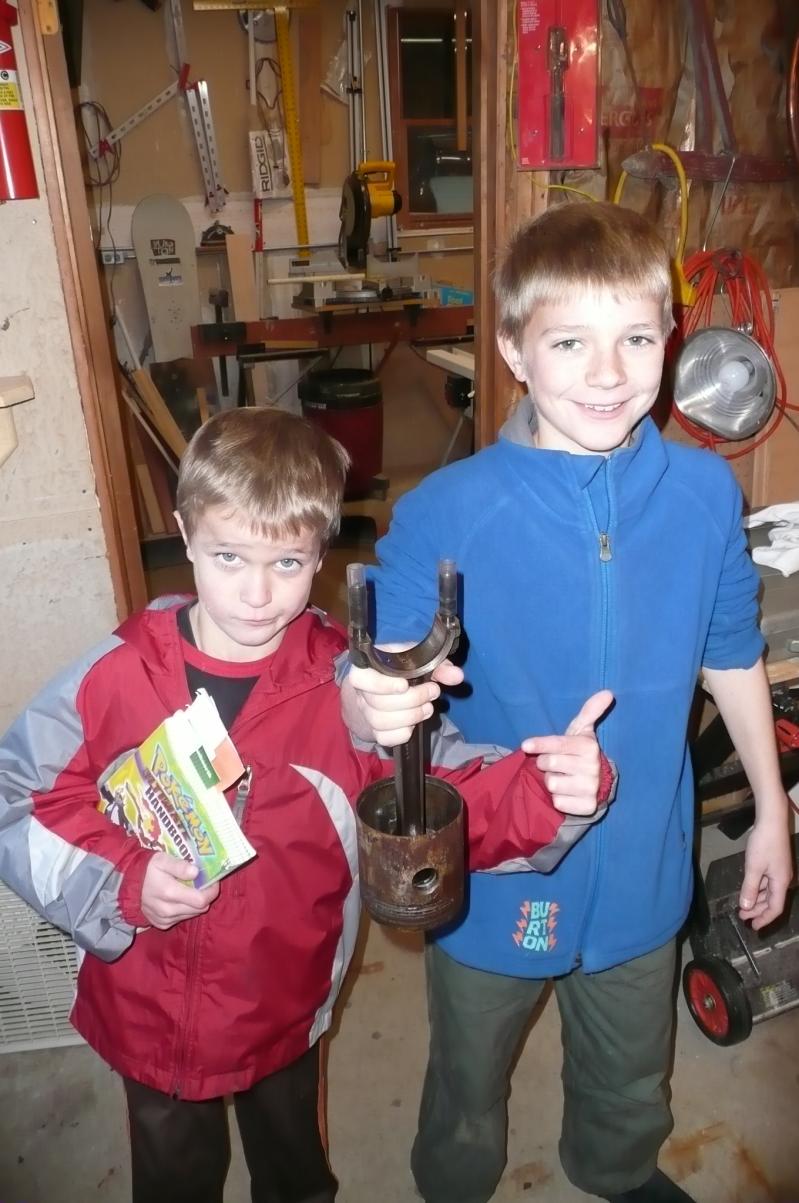
Glad to give someone else a chuckle - they keep me in stitches. The little one is Luke and he is a ticket, the older one is Jake, he has been my right hand in this project. Time is tough to come by! I've done some of the work late night while he is sleeping he gets a little ticked at me because he is really into it! Dave - I'm not yet to the valves or timing - how do you get the valves out? I imagine you need to use a special spring compresion tool? The one I've seen doesnt look like it would fit..is there a special tool, or tricks to get the keepers off? Do valves need to be kept in same guides like rod caps need to stay with rods or can I just yank them all? When you say lap them does that mean to put special abrasive between the valve and seat and spin them in place? Today was productve in the shop, only a few beers and we got all 6 pistons out , pulled the waterpump, and brought the head to the machine shop to get magnafluxed and machined flat too. Next is the water distribution, I pulled the water pump and a couplle little melted metal chuncks fell out (looked like little solder balls)the water pump spins smooth, there is no play in the shaft, and all looks ok...is there any need to rebuild or tear down any further? The block is FULL of sludge I hosed out a bunch through the drain hole but want to get into the freeze plugs to get it really clean. I thought freeze plugs were "thin" metal...I pounded with a punch and a chisel, the chisel shattered! I finally drilled a hole and busted a screwdriver trying to pry...Any tricks to get freeze/welsh plugs out?
-
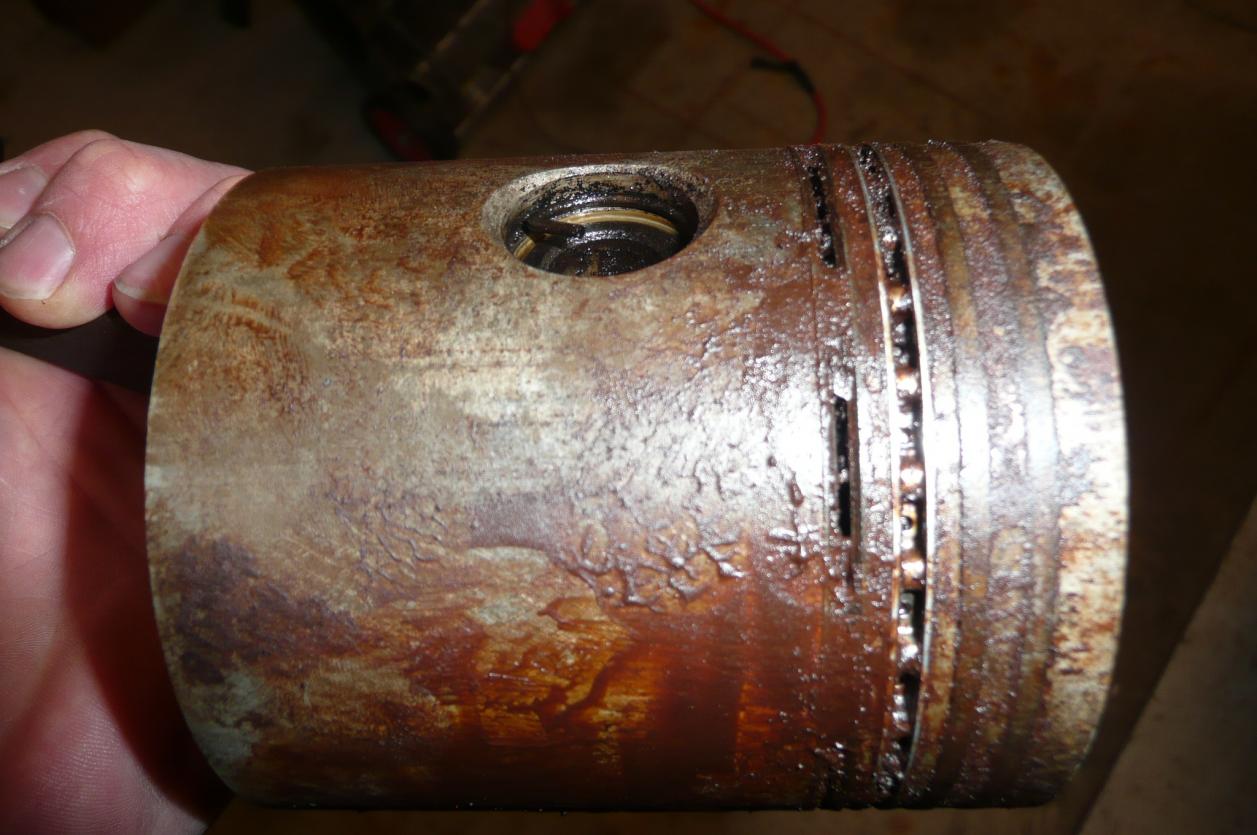
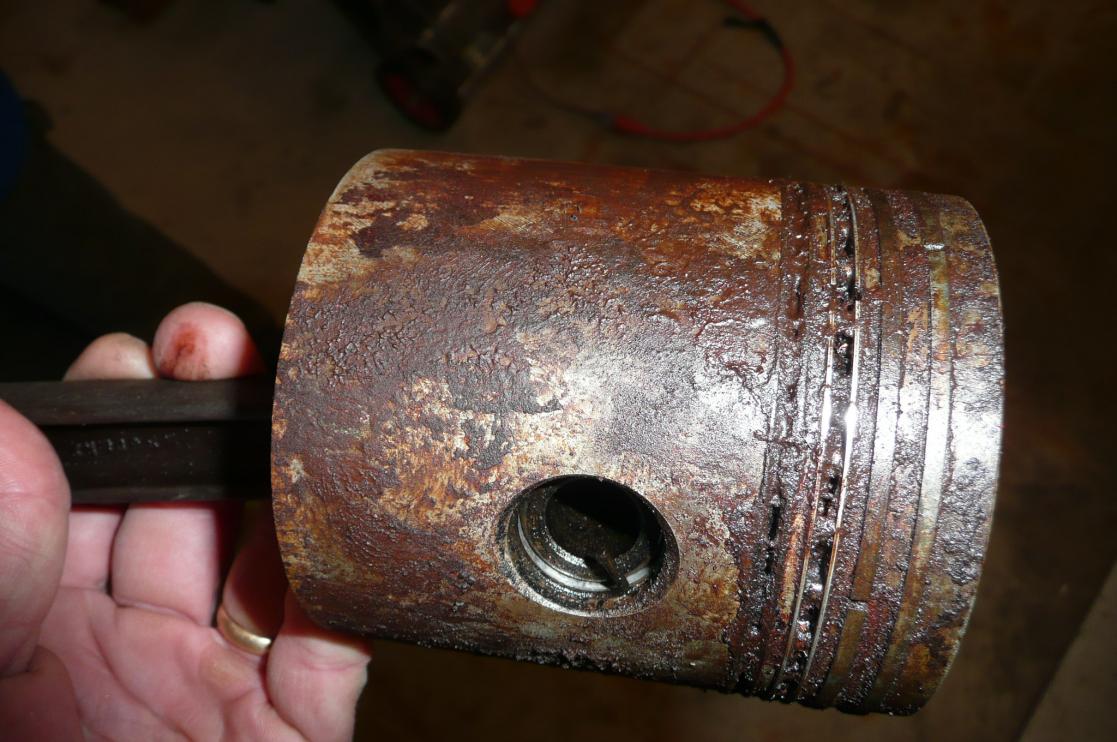
:DFigured I'd re-post the success for this stuck piston on this link in case someone searches while trying to coax out one of theirs- Great advice from the forum got that offending piston out. Dropped the pan (Thanks for the tip Joel). Jacked up the frame, lifted the engine about and inch, pulled the draglink, and the pan slithered out. Popped off the #6 rod cap and rolled the crank down a bit. progressive persuation on the stuck cylinder. tapping to all out pounding with a 3lb sledge. it moved a bit down, wirebushed the scale out of the cyl and crawled under with a 3/4 inch black iron pipe and my new favorite sledge. got the piston to the top, my boy crawled under and pounded up while I grabbed the piston...We-Win!


-
Great. thanks for the words of wisdom. I figure I could easily slap new rings on after cleaning up the piston and pop it right back in...While I have the pan off and head off, wondering if it makes sense to do the lot of them at once...Regardless I still need to douch out the 2 inches of sludge in the cooling path...literally stuck a long screwdriver in from the head holes and there is a pile of junk in there. Jake and I will be popping freeze plugs and harvesting "block mud" the next time I have a few hours to play in the dirt.
-
53 flathead engine available - just passing on
jmooner3 replied to Jim Gaspard's topic in Mopar Flathead Truck Forum
out of curiosity, I called skip in NH. The parts are all still available it's a three speed column trans looks in good condition, states that the engine is not seized. It does not have a head on it and it has been sitting in the back of a truck...? For $150 bucks I'll take my chances on the pitted cylinder I have now with a head instead of the headless unknown...Regardless - Thanks for the lead! -
Thanks Ed, Did you and dad do rings and bearings on all cylinders? I'm at the crossroads of doing all 6 or just the one bad one... Anyone have input ? Any idea what the cost might be for a set of rings and a bearing... (Desoto motor not dodge but should be simillar price) I'm thinking, I've got it appart I might as well "freshen" the whole engine with rings and bearings all the way around. Don Coatney and Dave Erb suggest Terrill Machine out of texas for parts any others suggestions or known pitfalls. If all else fails, Jim and Joel found me a "new" motor near by! Still want to get this one running but nice to have options... thanks J
-
53 flathead engine available - just passing on
jmooner3 replied to Jim Gaspard's topic in Mopar Flathead Truck Forum
Thanks guys, I'd like to make the one I got go...kinda made it personal when my boy and I took out the "big" hammer! If I can't get compression I'll look up the guy in NH. Not a far drive at all from here! Did I say I love this forum!!! -
53 flathead engine available - just passing on
jmooner3 replied to Jim Gaspard's topic in Mopar Flathead Truck Forum
Will a 53 fit a 49 B1B? -
Guys - pulled the cap off my distributor, what is the wire directly to the right of the "blue"wire in the picture. It looks like it once had insulation on it and now is bare..? should I be replacing this? I'm not even close to putting spark to this truck yet, (head and pan still off) but curiousity while I sort out and order rings, gaskets, bearings etc... How would I go about pulling off the distributor? I read somewhere to roll engine to #1 TDC. Is there more then the one screw to pull distributor? Theres the adjustment screw located at about "7o-clock? There is a pivot screw on the back about 2o-clock but it is on the same bracket that looks like it should come with the distributor. If I do pull it, What to be careful of? Thanks J

-
Hey guys - Great advice from the forum got that offending piston out. Dropped the pan (Thanks for the tip Joel). Jacked up the frame, lifted the engine about and inch, pulled the draglink, and the pan slithered out. Popped off the #6 rod cap and rolled the crank down a bit. progressive persuation on the stuck cylinder. tapping to all out pounding with a 3lb sledge. it moved a bit down, wirebushed the scale out of the cyl and crawled under with a 3/4 inch black iron pipe and my new favorite sledge. got the piston to the top, my boy crawled under and pounded up while I grabbed the piston...We-Win! Check the pix, this piston was plenty rusted. I lightly honed the cyl and there is still pitting.... The question is what next... If I was looking to make a race car I'd have pulled the engine already for a full boring and overhaul. My goal still remains, get enough compression to get this thing running. Should I hone a bit more - just re-assemble the one piston or pull the other 5 and do rings bearings on all 6? Is a little pitting in a cyl going to be a show stopper? Again I'm trying to avoid a big spend and do the "right" things to get this truck running wihtout breaking the bank. If I have to hone a bunch more on the one cyl could I go oversized rings on just one cyl??? I'm going to borrow a bore mic to measure the cylindars this week, I'll know what the taper is and how different they really are then. Any advice here is welcome. Also stuck a screwdriver into the water dist holes, there is about 2 inches of sludge at the bottom! Next stop -scoop and flush then repeat...


-
Thanks Ed, I'll look for bolt holes when I get home. Any idea about the insulator. Looks like it just disintegrated, maybe beause that engine was hopping and bouncing around in there :-) J
-
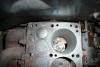
Hey Guys - Thanks for all the help with tips to pull the "doghouse" hell of a lot easier to get at this seized pain in my backside without all that sheet metal in the way! While I begin looking at pullin the pan - I Need some help understanding what "should" have been the mounting scheme for this 49 PH. The truck is a 49 B1B with a 25 inch 1950 Desoto FH6 dropped into the spot the original 23" block once lived. The spot where the motor front plate originally mounted to cross member is extended with a couple pieces of chanel stock, (to gain the 2" to accomodate the 2" longer block). They also raise the front of the engine a bit(see pic), is this a problem? Were there originally some kind of mounts there and these are just replacing them? Anyone with a pic of how their front mounts sit-please send it over. The motor plate is bolted to these extensions, funny thing is this channel stock is not welded to the frame. Front part of motor is just has these extensions resting on the frame??? Also (maybe as a result the insulator that sits between the top of plate and motor (just below waterpump in pic) is cracked and coming apart. Anyone have an insulator to sell or know where I can find one? also should I just weld the chanel stock where it is or change the way it is mounted...? Thanks, J