

Bobacuda
-
Posts
651 -
Joined
-
Last visited
-
Days Won
16
Content Type
Links Directory
Profiles
Articles
Forums
Downloads
Store
Gallery
Blogs
Events
Classifieds
Everything posted by Bobacuda
-
Pumped the brakes today, mashed down on the brake pedal - NO LEAKS! Hopefully, it isn’t just holding back so it can crush me tomorrow.
-
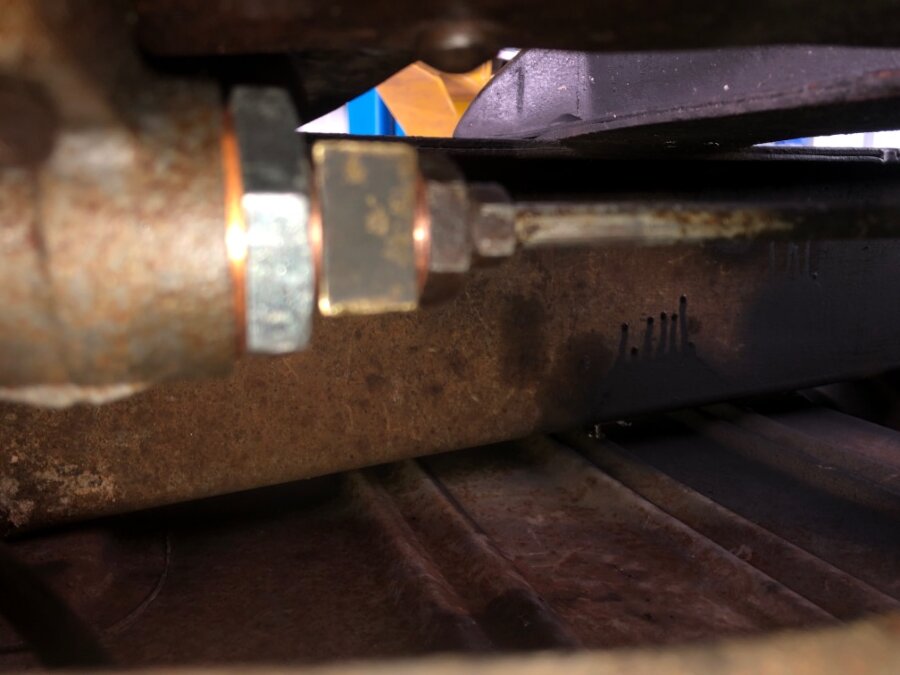
There is a copper washer under the part that looks like a nut. That part goes through the distribution block, and another copper washer, then connects to the back of the MC. Neither the new MC or either rebuild kit had those washers. Parts store looked at me like I was nuts, so I got an assortment pack from Harbor Freight. The washer closest to the MC fit great. The one under the nut head needed a larger opening. Another gift from a GM engineer… how to make a 30 minute job into a 3.5 hr job. Using a round file, it took damn near 3 hrs to open the hole and keep the opening round. In the photo, you can see the new copper washers. Did not leak so far. Should have a better idea tomorrow. Interesting, the photo is upside down, looking like a mirror image.
-
The leak now appears to be from the steel line (on the right) to where it screws in to the part that looks like a nut head. If not that, it could be at the copper washer between that “nut head” and the cooper washer under it. At least I can get to those without having to pull the MC, again (I hope).
-
The master cylinder on this ‘54 Chevy wagon never misses a chance to frustrate me. Original MC rusted and frozen, so I took the leap and bought a new, Centric MC. Even with a lift, it’s roughly a 6 hr job to remove and replace. And the new one leaked like a pig. Pulled the new MC out and bought a rebuild kit that the parts vendor guaranteed fit - wrong. The kit fits a 1” bore and the MC’s for this car have 7/8” bore. Tried repositioning the rubber parts, reassembled with the new MC’s parts and installed. Didn’t leak UNTIL the brakes are pressed hard, and it did not hold pressure. Finally found a vendor with 7/8” rebuild kit, put it in and reinstalled. Did not leak and held pressure! And the leak showed up 3 days later, but from a new location.
-
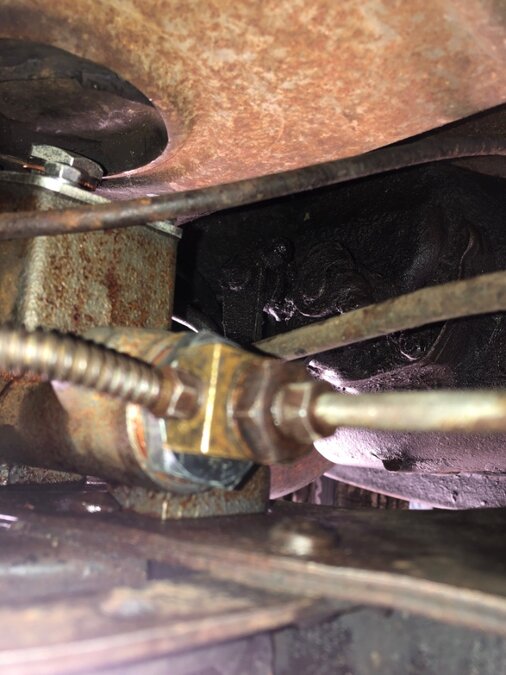
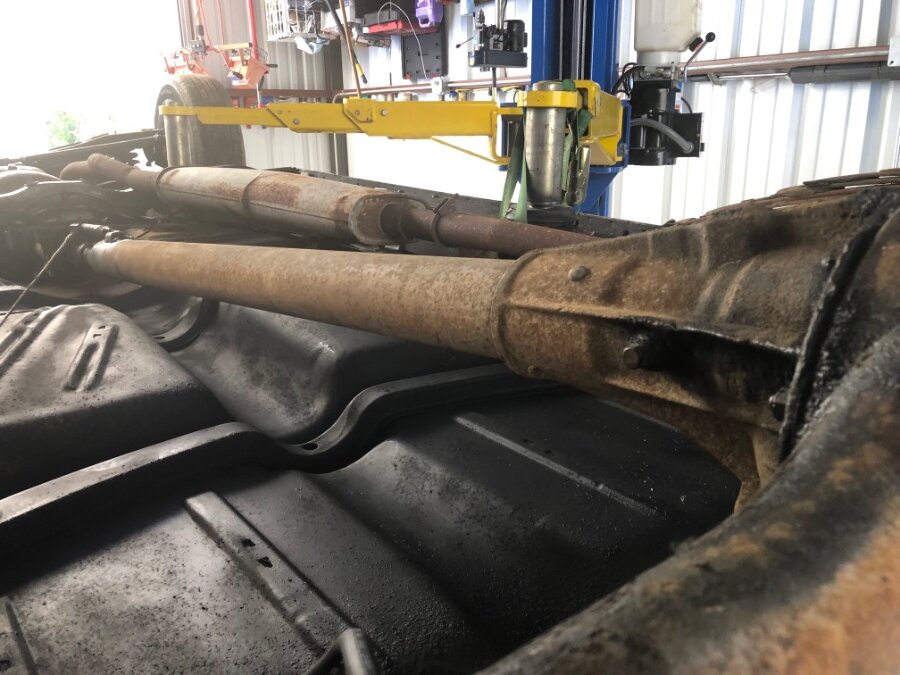
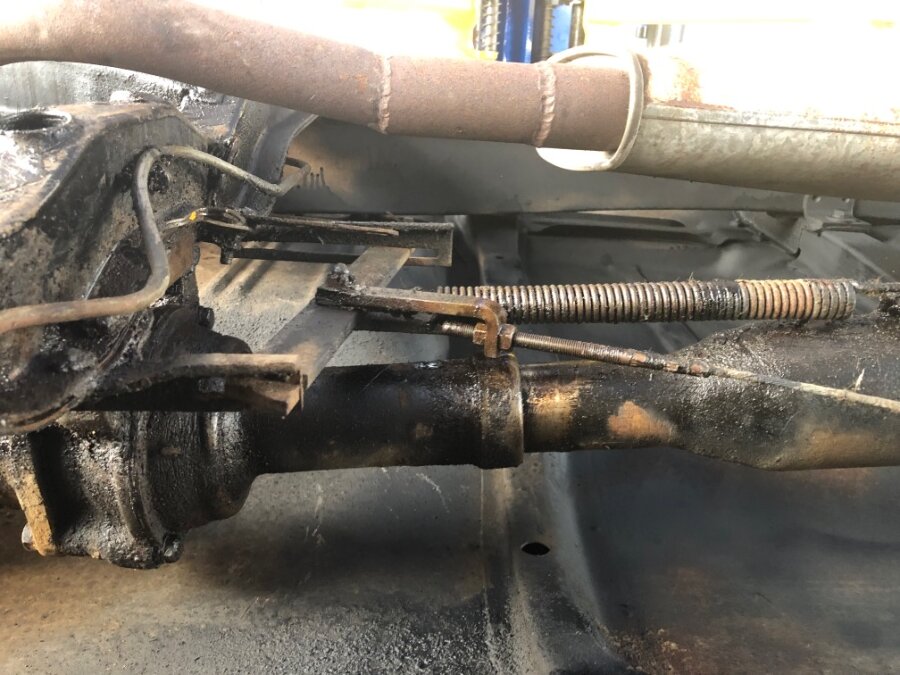
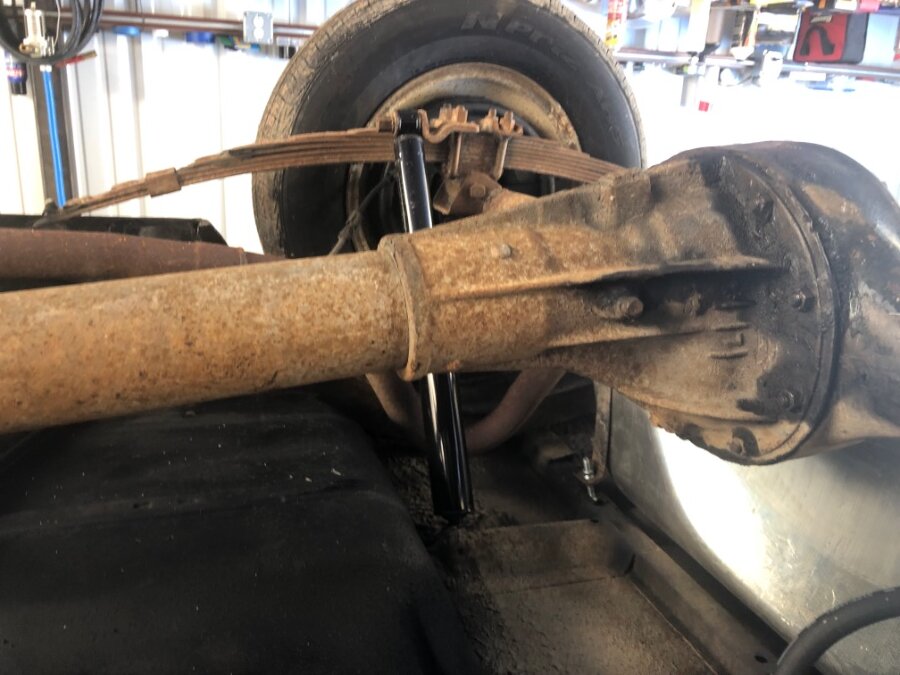
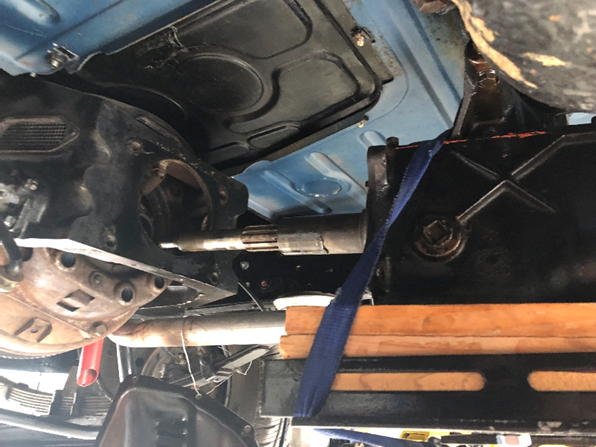
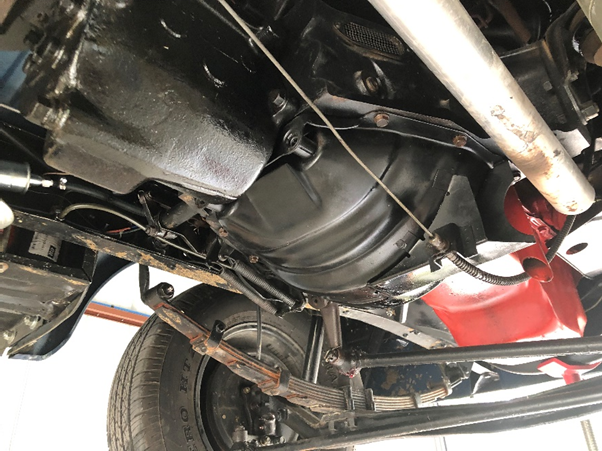
For those of you that have not experienced a torque tube, here are some photos. There is a ball and trunion u-joint in the housing behind the trans. Inside that tube is a long axle-like shaft to connect the drive train. Want to remove the torque tube to remove the diff housing and pull the pumpkin? You have to open the diff and pull the axles first. Not shade tree mechanic friendly. and my phone flipped the photos - would be easier to pull if the car was on its roof…
-
Installed a new (Centric) MC, then had hell bleeding and adjusting the brakes. That’s when I discovered the new MC leaks - dammit! I live in a rural area, so I took a short test drive, squirting brake fluid every time I used them. Pretty sure the clutch and throwout are pretty much shot. The diff is quiet on acceleration, growls like a deranged junkyard dog on deceleration. My FIL was deaf and never heard this. Oh boy, more weird GM engineering to learn about - the torque tube (no driveshaft).
-
After working on this Chevy, I totally understand why the military preferred Mopars. Easier to maintain. if you don’t know or agree, look up how to change the master cylinder in. 49-54 Chevy. The brake and clutch levers pivot in the MC. Total SNAFU. And to make it worse, the Chevy does not have removable toe-boards. Lots of stuff in the way and no room to work. Changing the MC in an old Mope isn’t fun, but you can do it fairly easy on a dirt driveway. I have this Chevy on a rack and 4 hrs later, the MC is still is not out. Good thing I’m retired. ?
-
Got it started today! Been about 28 yrs. New fuel tank, flush the line, new fuel pump, rebuild the carb, new coil & wires, clean plugs and sand the points. Blew acorns, rust, and degrading mud dauber nests out of the exhaust pipe. Brakes next!
-
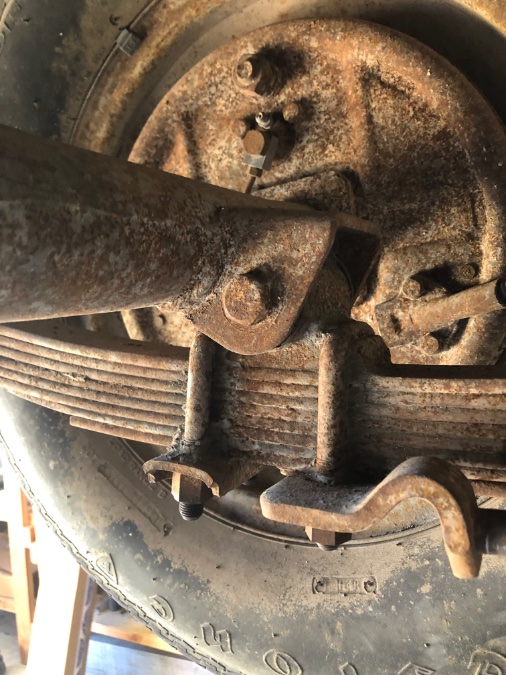
Several things this Chevy has taught me that make me appreciate my old Mopars even more. 1. Carter B&B is a lot easier to clean and rebuild than a Rochester carb. 2. To drop the gas tank, you have to drop the rear end by disconnecting the shackles. 3. The springs and shackles use rubber bushings that deteriorate, not greaseable bushings. 4. The axle does not bolt directly to the springs - it connects to a rubberized eye similar to the front springeye. No one makes that rear axle seat anymore, but Steele Rubber will rebuild the pair for $300. I’ll try to post a photo.
-
-
Maybe I can figure out how to get a couple of more posted.
-
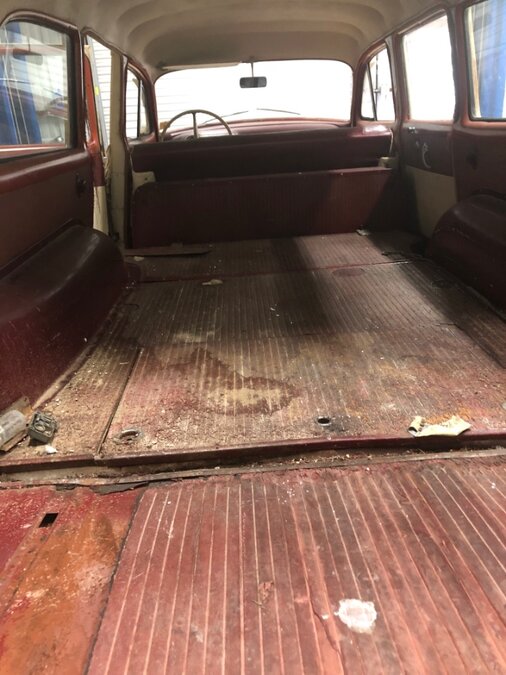
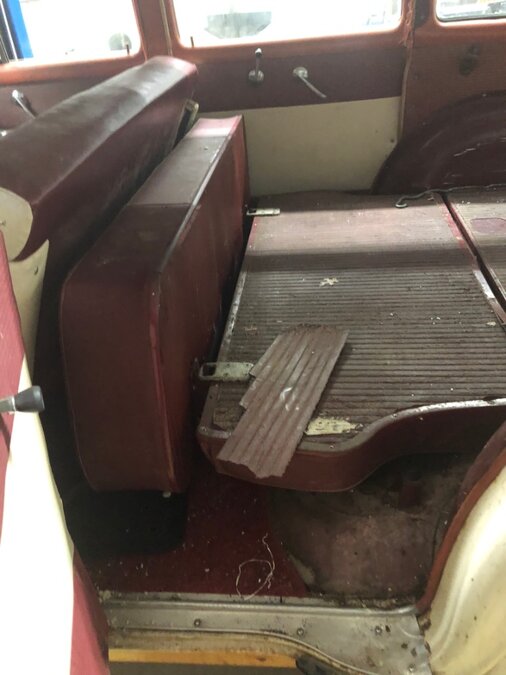
Interior photos, if the web decides to play nice with my phone. Looks like the web rolled the car…

-
I’ll get some interior photos later today or most likely tomorrow. The backseat folds and tucks to make the cargo area larger. This is least optioned of the line. No radio or heater. Over the years, I have obtained a couple of radios that will need reworking. In the winter of 1980, I put a heater from a ‘52 Dodge truck in it - made my FIL’s day.
-
-
-
Nope. Will try again later from my computer. Site does not like my phone photos.
-
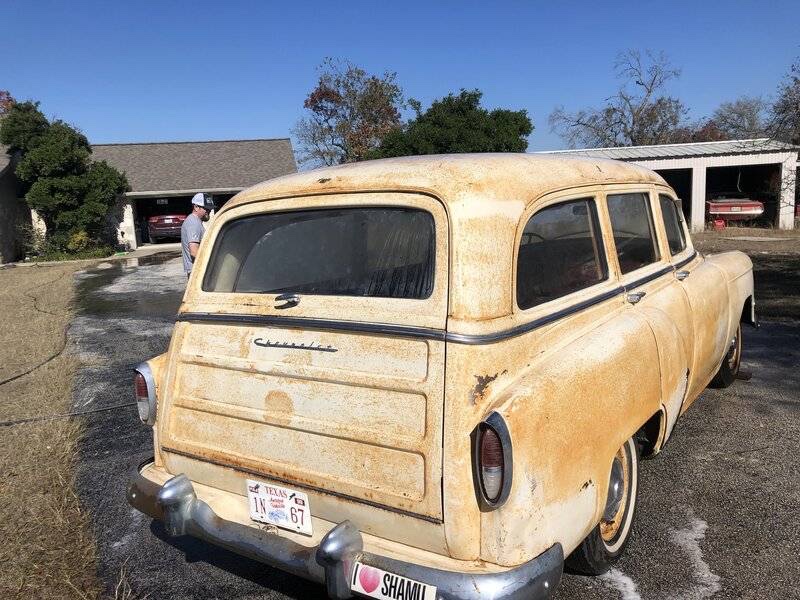
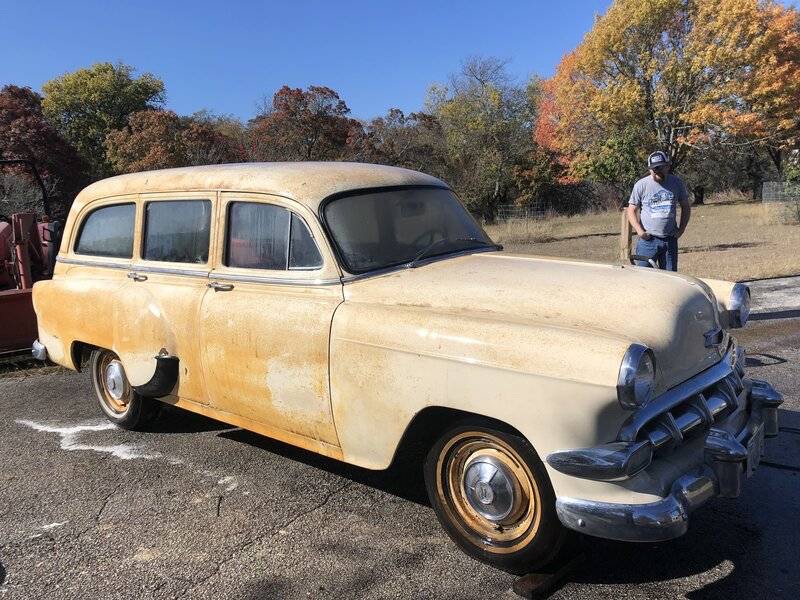
Does it count as a barn find if it comes from my own shed? My ‘53 B4B is done, our ‘67 Barracuda ‘Vert goes in for a top and interior, so I now have room in my big shed to start on my late FIL’s ‘54 Chevy 150 wagon. My FIL bought the car in ‘69 for $295. It was his favorite car to drive. Now, every member of the family wants to see it in all its glory once again after its 25yr barn-nap. And before anyone asks, it will be painted- no one in the family is a fan of the patina. it’s a 235, Blue Flame, 3 on the tree - original drivetrain (and it’s staying). No big dents, only light surface rust in the cracks of the crappy paint job, AND NO MICE! However, when pressure washing I probably made 500+ mud daubers homeless. And the forum is not letting me add a photo. Will try that separately.
-
When you get it mounted, it will be top heavy. Be careful when flipping the engine or you will also flip the stand. Don’t ask me how I know…
-
Another thought. When I rebuilt my B4B, the 16” rims were rotted. Since I wanted to use my original hub caps, I had “The Wheelsmith” remove the centers from my wheels and put the old centers in new barrels. I can run tubeless tires now. Maybe this would work for you. Cost me $800. That was for 4 wheels - shipping, stripping, old barrel removal, new barrels put on, trued and balanced, powder coated and shipped back. Shipping was a big cost (TX to CA and back to TX).
-
I fixed lots of flats on those in my youth. The most dangerous seemed to always be the rims that had a “small” ring that held the larger ring to the rest of the rim and the one that truly split the rim close to the middle. Those were almost always on Chevys. Dodge, International and Fords had a large split ring that held the tire to the rim - probably what yours is. Most semi trucks used this type. We used a 10 lb duckbill hammer, a 10 lb sledge hammer, a couple of spoons, lots of rubber lube and labor to take them apart. We would set a leg of the lift on top, ring side down, when airing it up in case it blew apart- never happened where I worked. If you have never done it, or watched and learned, don’t try it yourself. Check places that work on semi truck and construction machinery tires. They may not have the tires, but they will have the tools and the know how.
-
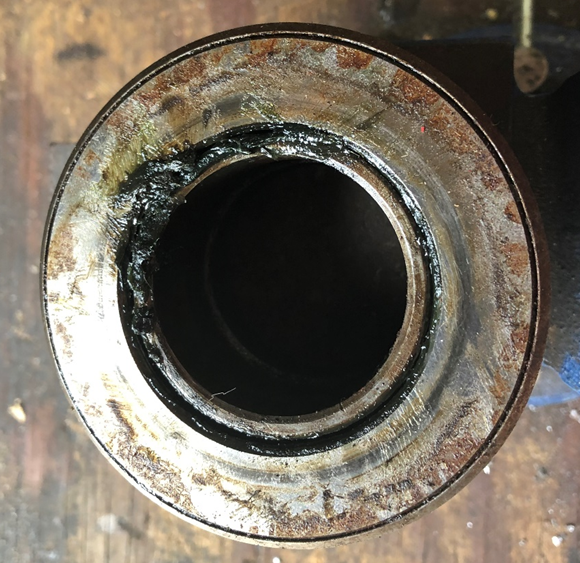
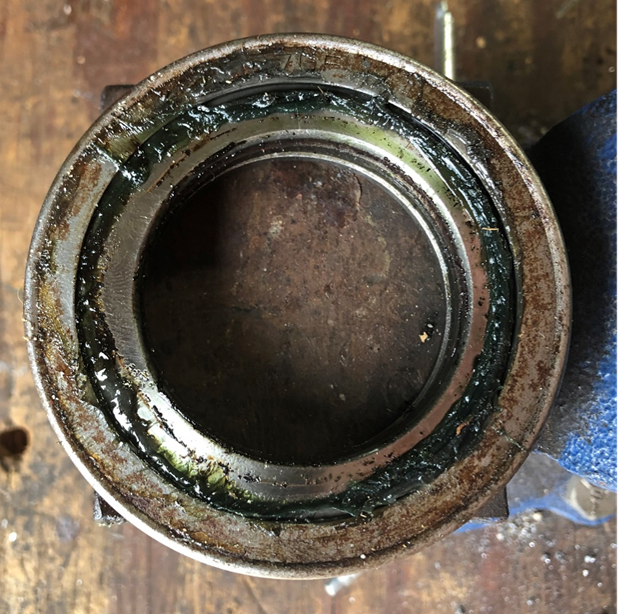
 The bearing housing would move at least 1/8' side to side, and back and forth. When turned by hand it felt like it was full of rough gravel. So, I tapped it off and pressed the new bearing on. After that, it was put everything back together, and double check it all to make certain I did not forget anything. Since I had to take the levers off of the parking brake, I had to adjust it. This usually takes at least 2 adjustments. One when its put it back together, the second after some test driving (and parking brake usage) so that all of the parts settle back in place. Overall, I have about 10 hours of time in this project. If you need to do it, I highly recommend: 1. A concrete floor to work on 2. A lift (if you have access to one). 3. A trans jack (with wheels) and a homemade wood transmission cradle, with a short rachet strap to fasten it down. Since I bought the trans jack, I now have a new, large tool that is in the way most of the time, but already one of my friends has decided my concrete floor, lift and trans jack are perfect for replacing clutch in his farm truck... And for those of you interested in the cost, the National 2065 bearing was $23 and the lift was $270 (Amazon - $293 total). That is tax and delivery included. It took 4 hours for me to assemble the trans jack - no directions & the pedal to operate the jack is a royal bitch to install. Anyhow, I did not count tool assembly in the time for this job. Had I taken my truck to a mechanic to do job, the project would have cost at least 10 hrs labor X $75 = $750. Other than all of the damage I did to my head by constantly hitting things, I saved $457 in labor. And the good news is, took it on a 150 mile road trip -worked great and no chattering. Hope this helps anyone else needing to do this.
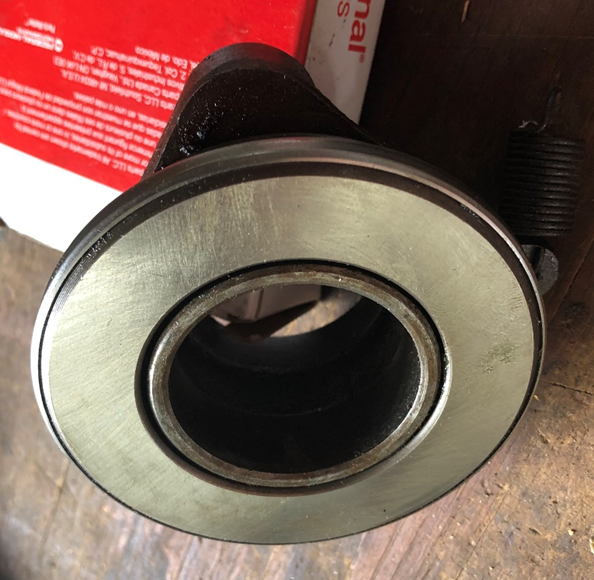
-
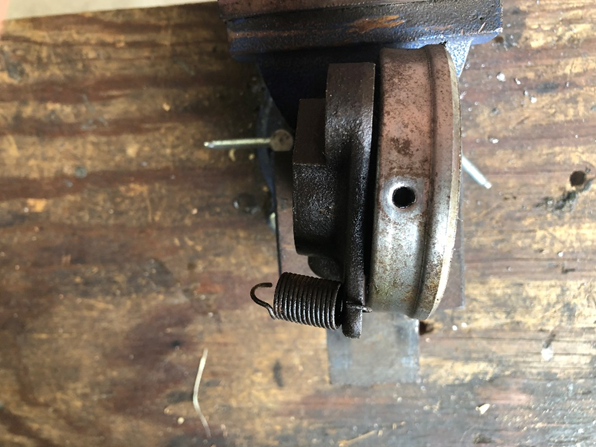
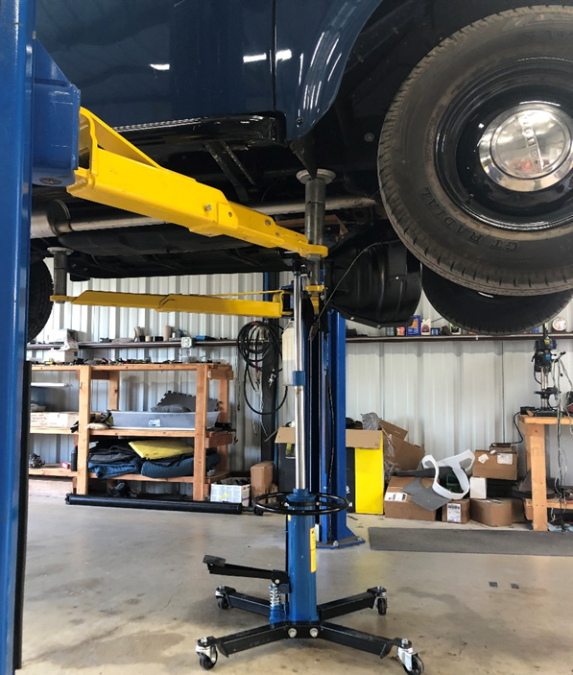
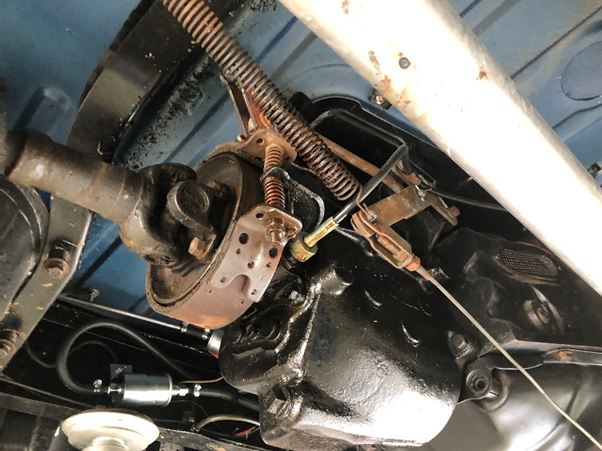
With the trans lift, I was able to safely move the trans back and out of the way. That allowed an easy removal of the throwout bearing. In this photo, you can see the hole where a grease zerk was at one time. That bearing was a bad choice for this application - too much crap to remove to routinely grease it. Clutch side Trans side
-
With the necessary stuff removed, I raised the jack to the trans for tying down with rachet strap. I had loosened the 4 bolts that hold the trans to the bell housing prior to this to make it easier to remove them with the tie down strap in the way. Bolts out, a bit of wiggling and adjusting height, it slid right out. Had to lower it a bit as it came out to clear the cross member (behind the parking brake).

-
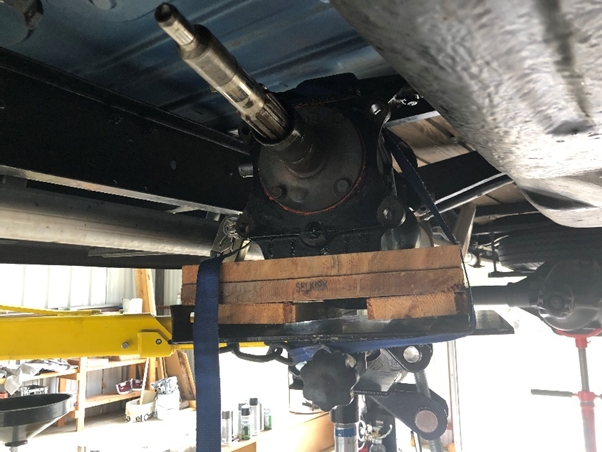
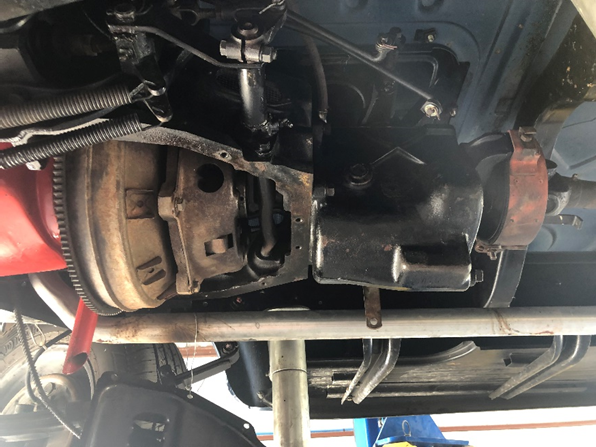
I made some previous posts on this topic. I have finished the job, so I thought I would give a brief write up for anyone else facing this problem. I will probably have to make several posts to get the photos in. I ordered a National 2065 bearing as recommended by others on this site - correct choice. The bearing that failed had a grease zerk - it did not survive with annual greasing. it was falling apart and chattering like a spastic monkey on meth. I also ordered a "high lift transmission jack" so I would not have to dead lift the weight of the trans over my head while moving the trans in and out - also the correct choice. It allowed me to do this job totally by myself. I have previously done this task on my back, on the ground, and it totally sucked. Underside with all the stuff still attached that would have to come off. The parking brake arms had to be removed to clear the cross member. Note the bottom of the transmission. it is not flat and will not work well with the flat surface of a trans jack. I made a wood cradle that was shaped to match the sides - worked great. It allowed me to use a rachet strap to hold the trans firmly upright on the trans jack.
-
Greetings, proud new owner of 1953 Dodge pickup
Bobacuda replied to Wild Jimmy's topic in Mopar Flathead Truck Forum
When I rebuilt my B4B, I made my own wiring harnesses. I removed each old harness and mounted it on plywood. I labeled the ends of each wire so I would know where they attached. I used 6V wires, knowing if I switch to 12v, that is not a problem. I also used the wiring diagrams from this forum. I bought the wires and connectors from Rhode Island Wiring (riwiring.com). Cost about $250 5 yrs ago. I used uninsulated connectors, crushed on and soldered, insulated with heat shrink. Took me about a week of after my job work. RIWiring also sell ready made harnesses, but they won’t have every harness for your truck If you make your own harnesses, make everything behind the dash about a foot longer. It’s a lot easier to pull something than to crawl under the dash (don’t ask how I know).
