


Sam Buchanan
-
Posts
2,258 -
Joined
-
Last visited
-
Days Won
60
Content Type
Links Directory
Profiles
Articles
Forums
Downloads
Store
Gallery
Blogs
Events
Classifieds
Everything posted by Sam Buchanan
-
My recall is a bit fuzzy on this but I think it is necessary to remove the brass fitting in order to access the needle valve on the B&B carb. While JB Weld is wonderful stuff and can permanently fix the threads removing the needle valve may no longer be possible.
-

ANSWERED tappet adjuster thread size/pitch
Sam Buchanan replied to Dartgame's topic in P15-D24 Forum
I like this....clever. I suspect some of the rocker arms on my TR6 may be slightly dished, may try this next time as a reality check. -
Remove the distributor cap and try moving the rotor laterally. Most likely you will feel some play as you move the shaft side-to-side. Worn bushings on the shaft will allow the timing to wander. Timing jumping one degree probably isn't enough to worry about, when it starts wandering several degrees it's time for a distributor rebuild.
-
1949 Special Delux transmission help plz
Sam Buchanan replied to Oliver Klozoff's topic in P15-D24 Forum
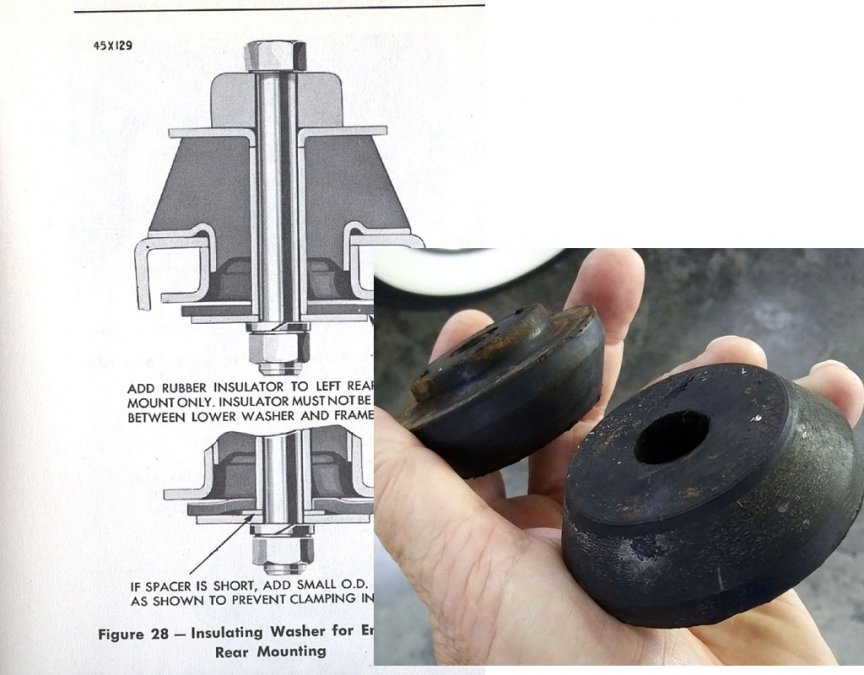
A thread on motor mounts for your reading pleasure: https://p15-d24.com/topic/50844-engine-mounts-p15-caution/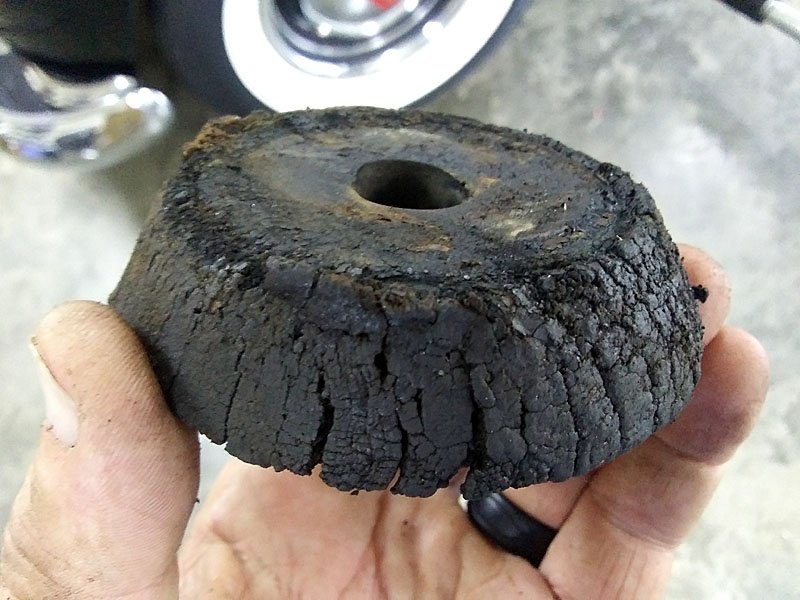
-
1949 Special Delux transmission help plz
Sam Buchanan replied to Oliver Klozoff's topic in P15-D24 Forum
Go through the adjustment process described in the manual. The linkage is a bit finicky, but I suspect once it is adjusted your tranny will be fine. If you adjust it too far you won't be able to get 1st and reverse. -
Yep, if that is a pretty old regulator it'll most likely be more reliable than the sketchy new stuff we get today. Repair the wire.
-
The float needle valve may have stuck open for some reason. If this is an unusual occurrence it might have been due to a tiny piece of trash getting hung in the valve. Another reason it could overflow is the float getting hung up on the bowl due to a worn float or pin or the needle valve itself may be in the process of failing. The choke, even if fully closed, won't cause the float bowl to overflow. Also, make sure the screws holding the top of the carb to the bowl are secure. Glad you avoided the tow fee.
-
first start rebuilt engine , water in oil
Sam Buchanan replied to Jc Deluxe P20's topic in P15-D24 Forum
So how is water getting into the pan?? More questions than answers..... -
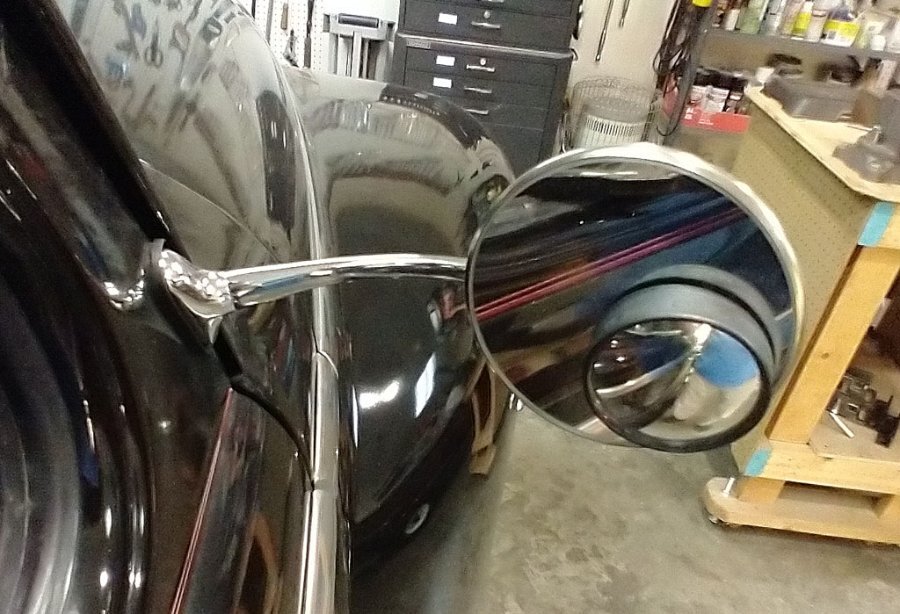
Here is my solution, some may not like how it looks but it works pretty well. Stick-on blind spot mirrors are available nearly anywhere accessories are sold, mine came from Harbor Freight.
-
snarky text deleted....
-
If you have just an engine on a pallet, it won't matter which way the battery is connected, it'll start and run either way. Just wire it up the same way you would for a negative ground engine, then reverse the battery and start it...or don't reverse the battery. The starter will work either way and the ignition will work either way. You can leave the generator disconnected to simplify things.
-
Rubber would definitely not be my first choice but if you use rubber be sure it is Viton, otherwise ethanol fuel will make short work of the gasket. I would use a copper crush washer similar to what is used on the oil pan drain plug.
-
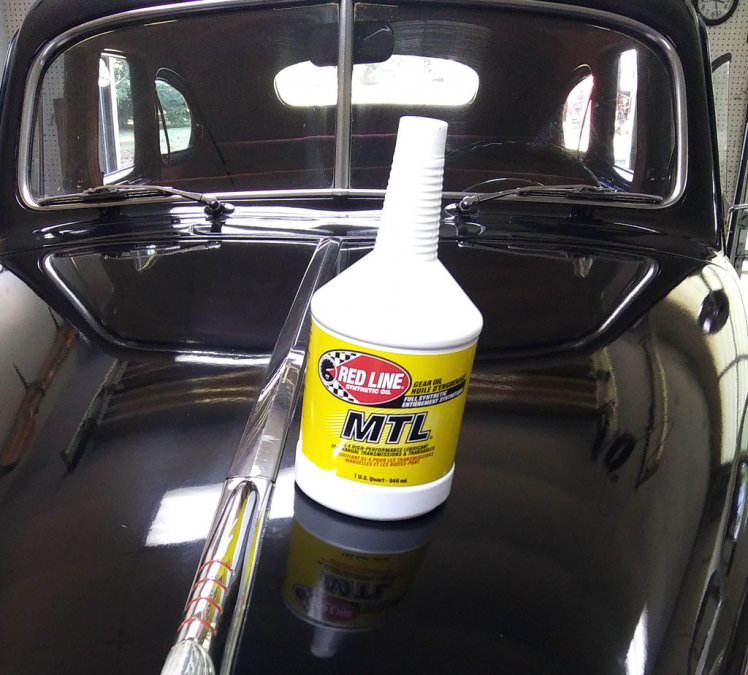
GL-4 presented crunchy 2nd gear shifts with a cold transmission. Red Line MTL fixed the crunchies and is formulated for brass synchros. The cost is worth every penny in my opinion.
-
48 p 15 master cylinder removal and install help PLEASE!!
Sam Buchanan replied to whippersnapper48's topic in P15-D24 Forum
The spring tension must be released. Get under the car, clamp a large Vice-grip on the lower end of the spring and pull it out of the hole where it is anchored in the frame rail. -
Most of us are old enough to remember the Fram (?) commercial where the grizzled old mechanic says "You can pay me now or you can pay me later...". Very true, and a rule I learned the hard way. I now find it easier to just pay up front and be done with it.
-
I "repaired" my tank with a VISA card...... https://vansauto.com/product/41-48-dodge-plymouth-desoto-chrysler-6-cylinder-gas-tank/
-
Here is the tank I put in my '48 Plymouth, it is a near perfect replacement but doesn't have the trouble-prone pickup filter: https://vansauto.com/product/41-48-dodge-plymouth-desoto-chrysler-6-cylinder-gas-tank/ A suggestion....if you replace the tank, replace the entire fuel system....lines, filter, hoses and pump. This is an area where if one component has gone bad the rest of the system is suspect. Just rip it all out, start over, and not have to deal with a car stranded due to faulty fuel delivery. No need to ask me how I figured this out.......
-
It is possible (likely?) that the fitting is NPT tapered threads. Try screwing a pipe thread fitting into the tank to see if it threads in easily and then tightens. If that is the case, an easy transition is to use a NPT barb fitting with a short length of rubber fuel line between the fitting and hard line. This was the case with my replacement tank. If the NPT fitting doesn't work then you might need the small brass insert that was used in the original tank to form the proper flare connection.
-
Check at a tractor dealership, I found axle nuts at the local John Deere store.
-
ANSWERED "One of these things is not like the others..."
Sam Buchanan replied to Bob Riding's topic in P15-D24 Forum
That is one gorgeous engine! -
I can’t recall the details of the gauge bulb sockets but wonder if the larger envelope of the 81’s would be a problem. Also, the 63’s are plenty bright, anything brighter would probably need a dimmer.
-
I'm in the middle of a several-days-long job of installing a new engine monitor (see photo below) in the RV-6 airplane. The installation is FAA/PMA approved and the wiring hardware included with the monitor has crimped harness connectors which I install on the sender ends of the harnesses. These are AMP plastic-insulated ring terminals and I use a ratcheting crimper. This is standard practice in aviation and has been blessed by the FAA certification process. The 24 year-old monitor I removed also had crimped connections (like nearly every wiring terminal in the airplane) and all were just as tight as they were when I installed them two and a half decades ago. Properly crimped plastic-insulated terminals are just fine for my P15. Wonder if I could find room in the dash of the Plymouth for one of these! ?
-
ANSWERED 1951 Plymouth stall issue when stopping
Sam Buchanan replied to hep2jive's topic in P15-D24 Forum
Redneck exhaust cutout.... -
I think that means "he is on vacation"........ ? The page says he will be back today, 5/14.
-
https://p15-d24.com/topic/51306-new-dash-light-bulbs-bright/ Looks like the bulbs are still available. https://www.ebay.com/itm/Plymouth-1946-1947-1948-extra-bright-tail-light-bulb-63-replacement-6-volt-63/161410757417?ssPageName=STRK%3AMEBIDX%3AIT&_trksid=p2060353.m1438.l2649


