-
Posts
190 -
Joined
-
Last visited
-
Days Won
7
Content Type
Links Directory
Profiles
Articles
Forums
Downloads
Store
Gallery
Blogs
Events
Classifieds
Everything posted by Jomani
-
Setting up a rear end is probably one of my least favorite things to do - probably because I have only done a couple. I wonder if what you are seeing is a shadow. I gave it a quick look during disassembly and couldn’t see a wear pattern. I need to get some marking compound and check the contact. I did find another picture that I took that might offer a slightly better view. I also need to pull out the dial indicator and check backlash. Feels a little loose but specs call for .002-.009” (relatively broad range). With 120,000 miles pushing a heavy motor home, I would expect to see more wear than I am.
-
The rain came back so I spent the afternoon pulling the Dana 60 apart. As with everything that came off the old motor home, I was very happy to see the condition of the rear end. I will probably only replace seals and and wheel cylinders.
-
I was able to hang the front axel on the frame today. Not sure I like the way the front hanger bushings fit - there seems to be a lot of movement in the hangers. All the spring packs went together with liners. A little more work, but I really like the way they came together.
-
I had a hard time finding someone local who could/would fit the kingpin bushings. The first guy I tried ended up messing up the bushings - didn’t get the reamer properly aligned. I contacted Gary at Roberts Motor Parts and he hooked me up with a spare set of bushings without having to buy another kit. This time I decided to fit them myself. I turned an aluminum shaft down so that it easily slid through the bushings. I cut a groove the length of the shaft and slid a half sheet of 320 grit sand paper into the groove. Wrapping the paper around the shaft, I made a flap disk that slid through both bushings at the same time. I was able to slowly work the bushings to just over a .001” fit. Very happy with the fit and the way everything went together.
-
It rained on and off all day so I spent the day assembling the front axel. Got the king pins fitted and installed, spring packs assembled with liners, and new tie rod ends. All new bushings and spring hardware - ready to hang back on the frame.
-
Hole in the bottom of the oil pan repaired with silicone.
-

512 cid C series on Dakota chassis- build thread
Jomani replied to Radarsonwheels's topic in Mopar Flathead Truck Forum
Looking good. How did the weld through primer work for you? I have been tempted, but never tried it. -
I have been pleasantly surprised by this one. The deeper I get into it, the more I think it needs to go back 100% original. Unfortunately, I already blew a big chunk of my budget on the drive train. With the exception of one modification for the transmission tunnel, I plan to leave the frame as unmolested as possible. My first build was back in the 70s when I lived in Southern Minnesota. 51 Ford F1 covered in black primer. I fought the rust on that truck for the better part of a year. Hat’s off to you guys saving these gems back in the rust belt ?
-
The steering box is back on the frame. It will come back off to put the cab back on, just mocking everything up to see how for to the right the engine will have to go.
-
I was able to get the steering box cleaned up and reassembled. To ensure that all the abrasive media is completely removed from parts, they always get a bath in soapy water and throughly blown out. Everything went together nicely - followed the process that is detailed on a number of threads here for making the final adjustments.
-
I was able to make a little more progress on the build yesterday. Just about finished media blasting parts. Sure makes it nice to be able to load the blast cabinet up with a bunch of parts and blast for hours without stopping.
-
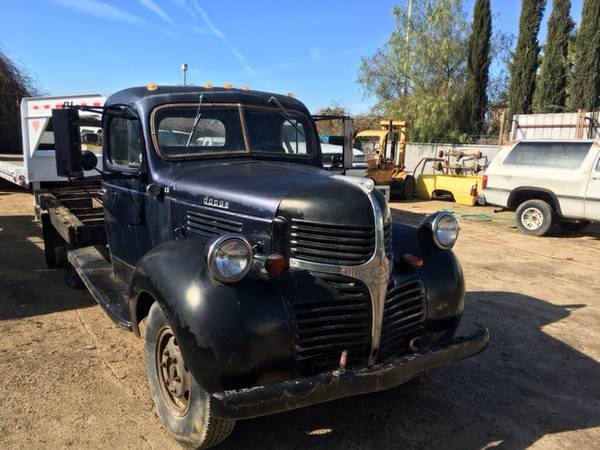
I am knee deep into putting a 360 with 727 automatic in my 47 one ton WD21 (Cabbage Hauler). I have read a lot of different forums and articles and I can tell you firsthand that it isn’t any “easy” upgrade. I probably went a little overboard with my build - took it down to the bare frame and just started back together this last weekend. Because the starter on a 360 is on the driver’s side, it interferes with the steering. That is one reason some opt for a small block Chevy. I don’t want to change the steering, so I will offset the engine to the passenger side. Another consideration is the fact that you will lose the factory parking brake. For me, the easiest solution for that was to change out the rear differential. I found a doner 1974 Dodge Motor Home and used the engine, trans and Dana 60 rear differential from it. Without that, the cost would have been too much for me. Fabrication will include; motor mounts, trans mount, modifying the first cross member to accommodate the engine shift to the right, hanging brake pedal, parking brake, shifter, new spring perches and spring hangers for rear, possibly narrow the Dana 60 (I will wait to see what it looks like first), push the radiator forward to avoid cutting into the firewall (if at all possible), and minor brackets as required. This is all fairly straightforward stuff but will require welding, cutting, bending, etc.
-
I pulled the steering box apart today and ran into something very unexpected. After determining that I have the second generation steering box for the “W” series, I expected to see this steering gear shaft (#8). Instead I found this. Seems to be a much better design. Is it possible this is Power Wagon? Can’t find anything like it in my W Series parts or service manuals.
-
Generally only out front on Saturdays. Definately have some understanding neighbors. Most of them are curious and stop in to see how things are progressing.
-
I hit a big milestone today. I actually started going back together with the truck. I got the king pin bushings pressed into the spindles - ready for the machine shop to ream to size. I got one of the rear spring packs back together and the bushings pressed in. Actually hung the springs - great to see it going back together. I did end up going with the liner between the springs. It added about a half inch to the total spring pack height. I removed two springs hoping for a little better ride - the extra height from the liner should keep the overall height about the same.
-
After the acid wash, I hit the whole frame with scotch bright pads and lacquer thinner. A final wipe down with lacquer thinner and the epoxy primer went on. The clouds are rolling in - hopefully the rain holds off until the primer dries.
-
We got a break from the rain so I decided to get to work prepping the frame for primer. Scraping, wire brush, sanding, then an acid wash.
-
I had a productive weekend on the build. Front end parts are all primed and painted.
-

512 cid C series on Dakota chassis- build thread
Jomani replied to Radarsonwheels's topic in Mopar Flathead Truck Forum
The before and after pictures say it all. What a difference. Stance looks great. Test drive should be coming very soon. ? -
I was afraid of that. I am going to look into having one made. From what I can gather, the ball end is readily available on many other applications. I have access to a great machinist who wants to look at it. He thinks he can make the splines and fit the ball end to what he fabricates.
-
Good to see that you are back at it. Not a lot a “W” series activity here so I have been hoping to see some updates. Gotta love those MN winters. I grew up south of you in Austin and spent my high school days patching up rust on my buddies cars.
-
I finished dismantling and cleaning all of the front end parts today. Pitman arm and tie rod ends need replacing - I already have new tie rod ends. Time to start looking for a new pitman arm. Also need to see if I can find a drag link repair kit. Everything else came out looking very nice.
-
I would love to see your Plymouth - definately let me know if you make the trip. I am not as old as I am worn out...
-
Thanks. These things are a labor of love. It has been a while since I have taken on a project this large - I keep forgetting just how much work goes into it. Getting older doesn’t help either.
-
It was a tight fit but made it at an angle. I actually wish it were smaller - won’t fit in the garage so I have to leave it outside under a tarp. The price was right though - was originally a dental production cabinet that was fully automated (dentures placed on a turntable and fed through automatically) with a cyclone dust separator/collector designed for continuous operation. I couldn’t resist bidding a penny for it and ended up getting it. I removed all of the automation (except turntable) and added glass and gloves. The cyclone unit does a great job filtering out the 70 year old grease and grime and leaves the aluminum oxide looking like new.


