bamfordsgarage
-
Posts
917 -
Joined
-
Last visited
-
Days Won
13
Content Type
Links Directory
Profiles
Articles
Forums
Downloads
Store
Gallery
Blogs
Events
Classifieds
Everything posted by bamfordsgarage
-
This is a common procedure with Model T Ford rear hubs, which like your car are mounted to tapered and keyed axle shafts. Diversion --> there are pullers for Model T hubs as well, but often the hub/axle bond is very strong due to age and corrosion, and the Model T pullers only latch onto very fine hubcap threads — not to sturdy log nuts or bolts like your Mopar. Anyway, my emphatic advice is do not back off the axle nut by anything like 1/4". One turn is more than enough and put the cotter pin back in. Once the hub breaks loose it will ride out to meet the nut and you're set. If you back the nut off too far, the hub will wobble around on the axles by the time you get home and may damage the taper and/or key.
-
Hey Fred, could do us a favour and measure the horizontal distance from the mounting flange to the end of the legs? Thanks.
-
Those legs look long enough to reach comfortably past the centre of a 25" block, and all that weight in the post end will pull the centre of gravity back (safer) even further. I wouldn't mind the legs to be a few inches further apart but that stand looks pretty good to go as as.
-
Yes, and perfect signage too!
- 1 reply
-
- 1
-

-
We had two hand-held GPS. Our problem was we started down the wrong logging road which meant we had to bush walk a mile further each way than expected — we turned back approx 3/4 mile shy of the destination in order to have enough daylight to turn the car around and drive back to civilization.
-
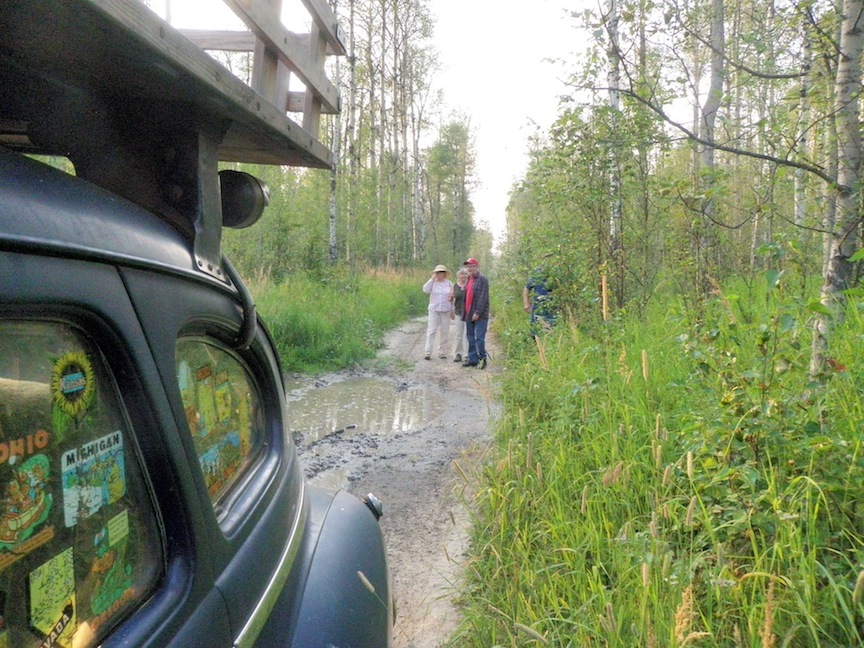
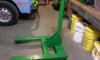
Thanks Bob, yes back together and in regular use. Last weekend the Edmonton Antique Car Club had our annual "Oldies Tour", with distances and roads more suited to prewar vehicles. Lady Michelle and I went in my '24 Ford T Speedster and friend Jerry and Darlene took the old Dodge. 420 miles total with no problems, either car. One the first evening, Jerry, Michelle, two others and myself set out in the Dodge in search for the Whitecourt Meteor Crater: http://en.wikipedia.org/wiki/Whitecourt_crater We took gravel and then logging roads as far as possible then walked in the rest of the way. Ultimately the search was unsuccessful (we plan another expedition in late September) but it made for a nice evening and some fun driving. There were a bunch of mud holes like the first pic below that were no problem, but we did not attempt the one in the second photo — which is where we parked and walked in.


-

Not a Mopar....but pretty darn cool just the same
bamfordsgarage replied to Jeff Balazs's topic in Off Topic (OT)
I'll take three, please, in assorted colours. -
Ring gear came off flywheel! Any easy fix?
bamfordsgarage replied to bamfordsgarage's topic in P15-D24 Forum
Hmmmm... where were you on Monday?? -
That was me. See posts #1 and #13 for photos. http://p15-d24.com/topic/36273-ring-gear-came-off-flywheel-any-easy-fix/
-
Ring gear came off flywheel! Any easy fix?
bamfordsgarage replied to bamfordsgarage's topic in P15-D24 Forum
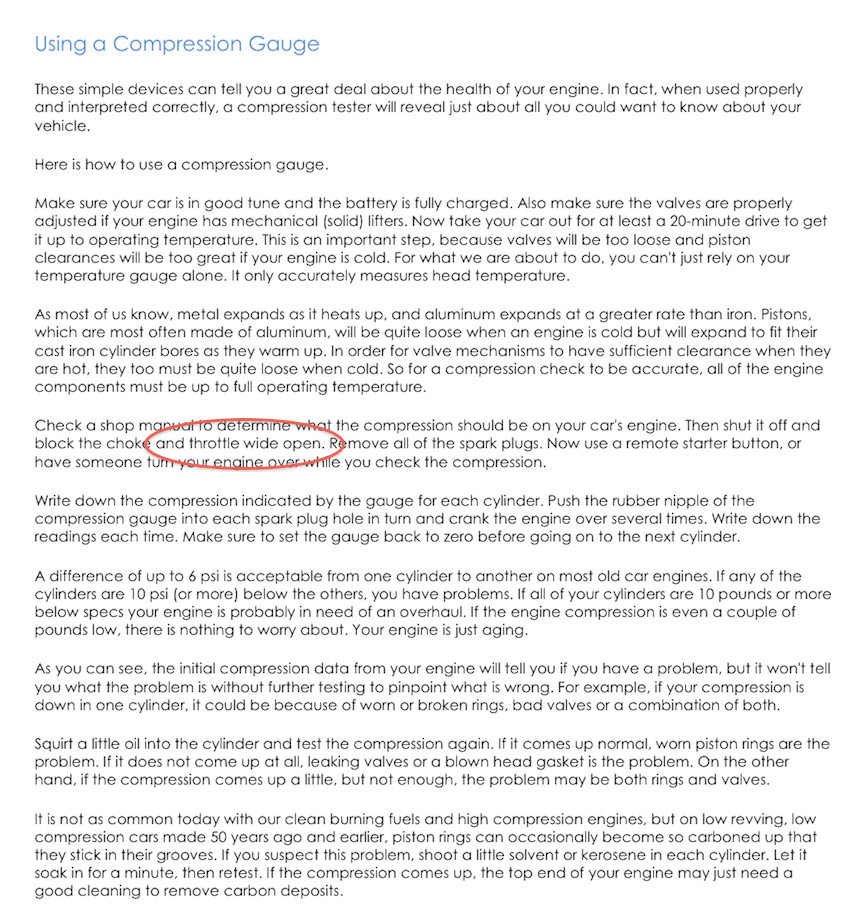
So I always understood that the throttle and choke ought to be fully open in order to do an accurate compression test. A few minutes ago I went looking for that page Don Coatney pastes every now and again about C T procedure and wouldn't you know it says as long as all the spark plugs are out it doesn't matter about the throttle. The beauty of the Internet, however, is that one can always find some website that agrees with one's particular truth — hence Exhibit One below that states the choke and throttle are to be blocked open. I must have mis-installed the throttle cable after replacing the head gasket because, upon pushing in the throttle knob the linkage hit its stop while the knob was still out from the dash. I kept on pushing and the throttle cable sheath pulled out from the crimped tube behind the dash. In order to repair the cable assembly we needed to get the throttle cable on the bench. Every 5/8" wrench I had would not work in that tight spot behind the dash/beside the lightswitch/above the dash curl/beneath the instrument cluster. All the while of course with my head between the pedals and my feet over the seat. The slit 5/8" socket took a 3/4" open end wrench on the opposite end flats and worked perfectly out and in. Once the cable was on the bench, several tight wraps of 0.030 stainless steel safety wire compressed and secured the outer tube to the sheath nicely (also cleaned and lubricated the cable so it glides smoothly in and out). I mentioned this morning that Don might have encountered this 5/8" fastener recently — based on a recent post by pflaming which advised Don to remove the dashboard to help his re-wiring job go easier.
-
Ring gear came off flywheel! Any easy fix?
bamfordsgarage replied to bamfordsgarage's topic in P15-D24 Forum
Not coolant related, and heater shutoff not involved in a compression test. -
Ring gear came off flywheel! Any easy fix?
bamfordsgarage replied to bamfordsgarage's topic in P15-D24 Forum
Funny you should say that, Don. I am thinking you might be one guy who encountered this particular 5/8" size recently. -
Ring gear came off flywheel! Any easy fix?
bamfordsgarage replied to bamfordsgarage's topic in P15-D24 Forum
Not oil-related and my compression tester is just fine. -
Ring gear came off flywheel! Any easy fix?
bamfordsgarage replied to bamfordsgarage's topic in P15-D24 Forum
So to recap and add one more hint. I'll post the answer tomorrow. • Tool required after head gasket replacement and compression test were completed • Not electrical-related • Not cooling-related • 5/8" socket _ _ _ _ _ _ • We busted something whilst following the recommended procedure for doing a compression test. This tool was very helpful with the repair. -
Ring gear came off flywheel! Any easy fix?
bamfordsgarage replied to bamfordsgarage's topic in P15-D24 Forum
5/8" socket. And not for electrical neither. -
Ring gear came off flywheel! Any easy fix?
bamfordsgarage replied to bamfordsgarage's topic in P15-D24 Forum
Nuttin to do with temperature... -
Ring gear came off flywheel! Any easy fix?
bamfordsgarage replied to bamfordsgarage's topic in P15-D24 Forum
Interesting notion, but the tool was created after the compression test was completed. -
Ring gear came off flywheel! Any easy fix?
bamfordsgarage replied to bamfordsgarage's topic in P15-D24 Forum
And on a related matter, who can identify the purpose of this special tool? It was required following the head gasket replacement and subsequent compression test... -
Ring gear came off flywheel! Any easy fix?
bamfordsgarage replied to bamfordsgarage's topic in P15-D24 Forum
Hi Bob, thanks for asking. Ring gear is changed out, head gasket replaced, compression is good, radiator has been repaired. With the transmission out anyway for the ring gear replacement it seemed like a good time to install the R-7 overdrive I bought last year and have procrastinated on putting in. I'd put the car on the back burner in favour of other projects in July, but Jerry and I plan to be at it again tomorrow. The next (minor) adventure is on the calendar for Aug 14-17. -
Sand lines disappear when Whileyeratititis shows up.
-
Ring gear came off flywheel! Any easy fix?
bamfordsgarage replied to bamfordsgarage's topic in P15-D24 Forum
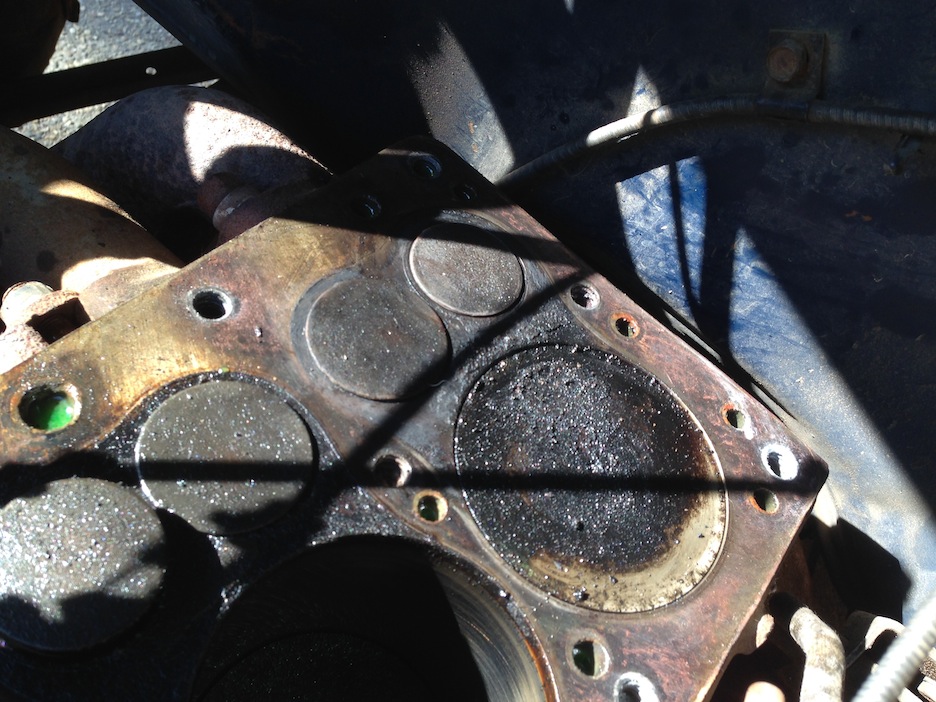
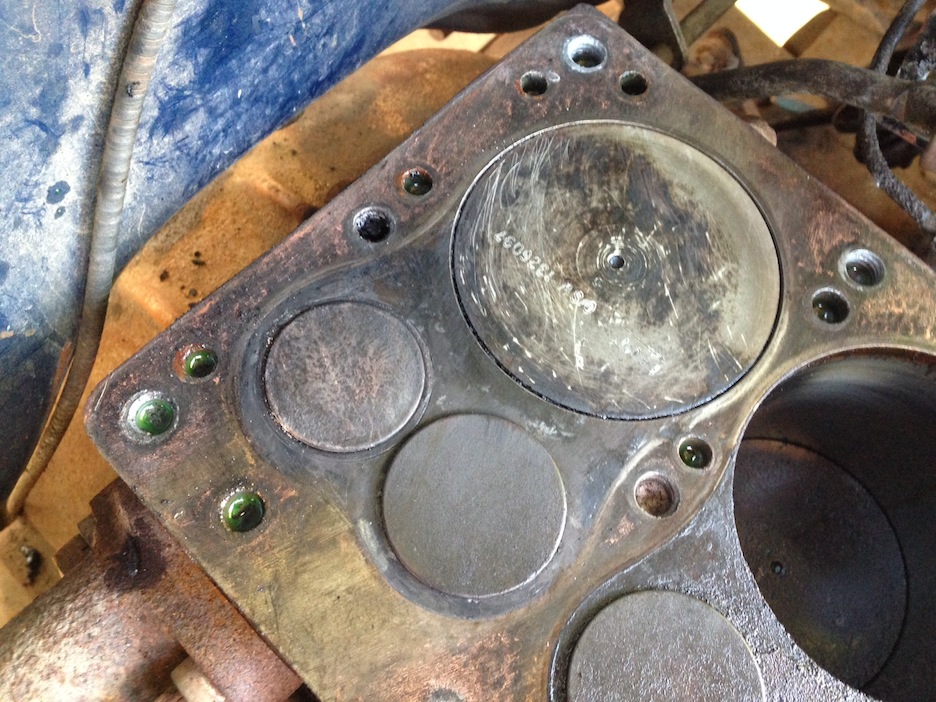
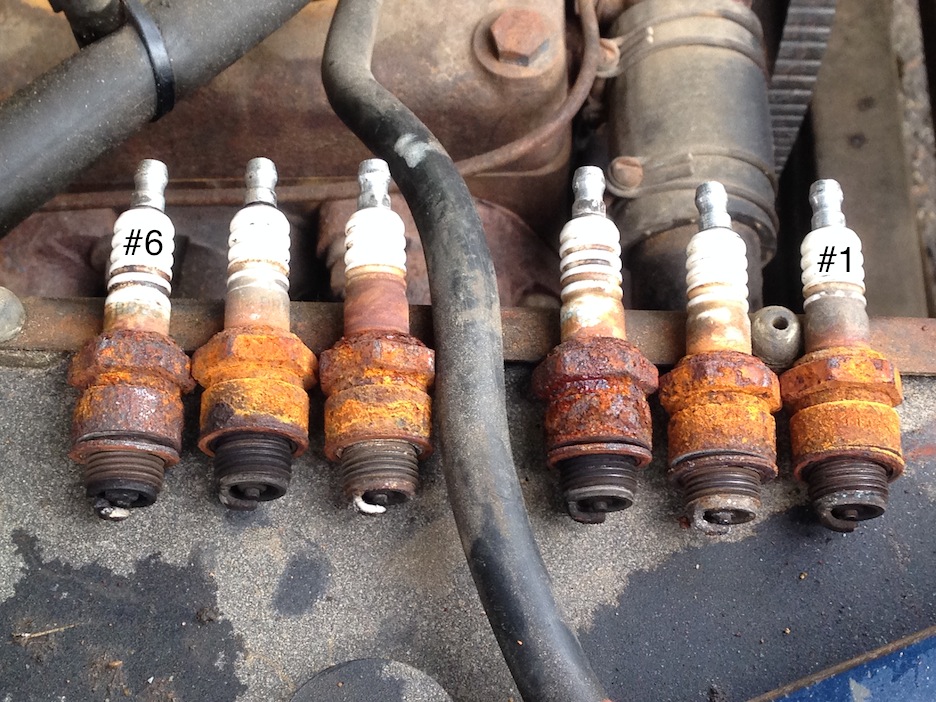
I am such a dummy. Had I spent half the time thinking about that #6 hole yesterday that I spent crafting my post, I would have figured out what it was and why. My feeble excuse is they don't have 'em on Model Ts and Model Ts are the only cars I claim any expertise with. Such a dummy twice in fact — careful cleaning and examination revealed no communication between the timing hole and the water jacket so that easy explanation is out. I do appreciate the absence of on-line mockery. _ _ _ _ _ _ _ _ _ _ _ _ _ _ _ _ _ Moving on, I did locate a probable leakage path between the gasket and head, from #6 to the water jacket (photo 1). That's a very small path though and seems too small to bring compression down to 30 psi. There was more carbon junk in #6 than the others (photo 2) but the piston and deck cleaned up nicely with no obvious faults (photo 3). The plugs are surely a clue (photos 4 & 5), #6 was heavily gunged up with black and grey residue. To address other recent questions & comments: Don't recall/didn't check for rad bubbles that night in March. Oops. We were losing a gallon every 200 miles or less, and seemed to have a whiter exhaust than usual, although it can be difficult to tell at 20°—30° below. No obvious foaming/coolant on the dipstick, and the oil looked normal when I drained it this week. There was no obvious misfire/rough running when last driven. Piston #6 looked anything but "steam-cleaned". I'm going to examine the valves and seats later today when the direct sunlight goes away. Right now I have a 50-mile round trip in my '24 T Speedster to help another guy get his transmission linkage set up correctly. Yippee!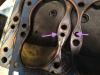


-
Ring gear came off flywheel! Any easy fix?
bamfordsgarage replied to bamfordsgarage's topic in P15-D24 Forum
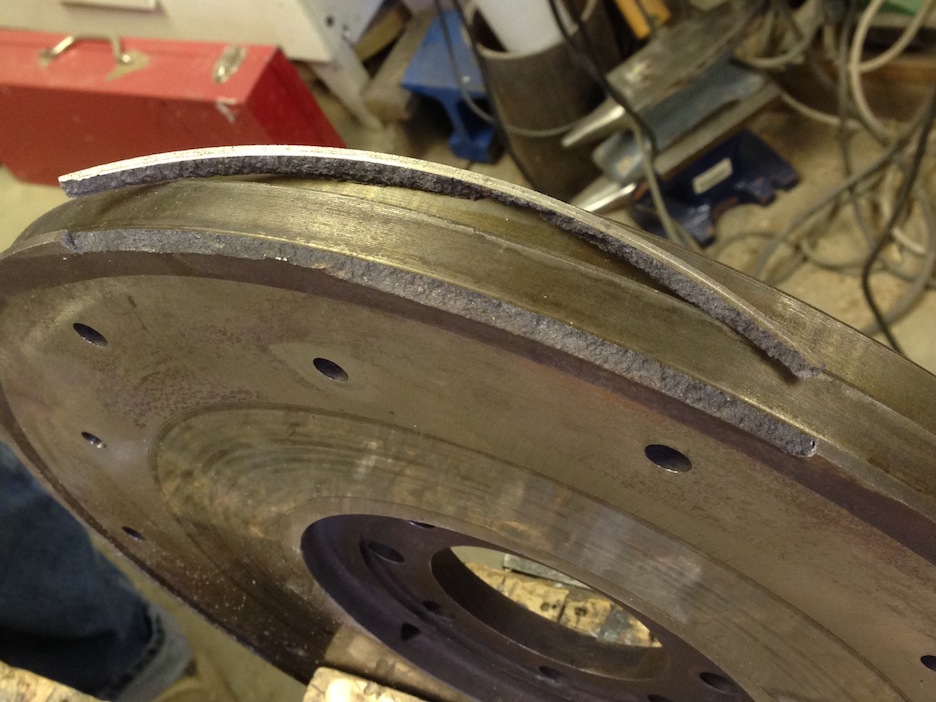
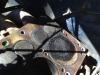
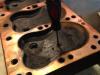
We had expected to replace the ring gear with the one from my low-mileage parts car engine, but after discovering the flywheel rim lip was cracked in two places (photo 1 shows one), the decision was make to replace the entire flywheel and ring gear assembly with that from the parts car. Not only was that ring gear in one piece and firmly anchored, the teeth are in much better condition (photo 2). The rebuilt starter spun the engine over splendidly and it was on to the compression test. We had suspected a bad head gasket, possibly toward the rear of the engine based on the behaviour of the temperature gauge the last day it was running. As expected, #6 was a very low at 30 psi, which did not come up after oiling the cylinder and jived nicely with the very gunky #6 spark plug. Cylinder #5 was just fine however, so could there be a gasket failure to the water jacket and not to the adjoining cylinder? When the head was removed, the gasket looked just fine and there was no sign of leakage on the block or head. Upon scraping an aberration in the cylinder head carbon, I couldn't believe my eyes. The screwdriver went right through the combustion chamber into the water jacket! Further cleaning and investigation revealed a neat hole just over 3/16" diameter and 1/2"+ long, right through the combustion chamber into the water jacket, and located directly below a brass plug screwed into a cast boss in the head. What is this all about? My parts car engine has that same boss and plug, and after looking at the Engine Pictures thread, I see it on Fargos-Go-Far's '55 Fargo 251, Dodgeb4ya's Plymouth 230 and Don Coatney's Spitfire head and others. So clearly this is a common feature, but... — What is the purpose of the boss and plug? — Why is mine drilled right through to the combustion chamber? Manufacturing boo-boo or...? — How was my hole plugged and what happened to that plug? and finally — Is there any reason I shouldn't just tap the hole, run in a long set screw, peen up each end and call it good? Inquiring minds want to know!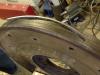


-
Ring gear came off flywheel! Any easy fix?
bamfordsgarage replied to bamfordsgarage's topic in P15-D24 Forum
So whaddya all think... Contact cement be enough or should I go with Crazy Glue?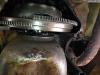
-
Ring gear came off flywheel! Any easy fix?
bamfordsgarage replied to bamfordsgarage's topic in P15-D24 Forum
Thanks everyone, for your comments and suggestions. I don't remember if I flipped or simply rotated the ring gear to get better teeth into the active zones, but I do recall heating the gear for a few minutes on top of my garage space heater while the flywheel sat outside in the snow. Friend Jerry postulated that perhaps the ring gear broke under the strain, which would be OK as I have another on a spare engine. The way it rattles around on the flywheel he could be right. There should be no flywheel-to-ring-gear wear as I'll bet that engine has not turned two revolutions since the failure. Good point about post-welding balance — if we do tack the gear to the flywheel it will be evenly-spaced (say, every 90° or 120°) to minimize any imbalance. I'll start the repair tomorrow so will know what's what fairly soon... -
Ring gear came off flywheel! Any easy fix?
bamfordsgarage replied to bamfordsgarage's topic in P15-D24 Forum
Thanks Don, that sounds encouraging — if only the driveshaft and transmission have to come out that will be a big plus. From what you say, the flywheel can be unbolted and slid down and out. If I'd thought this through before posting I expect that's the procedure when refacing the flywheel during a clutch overhaul. It was probably something to do with cold weather. The folks we were staying with were very energy conscious and asked me not to plug the car in (oil pan and water heaters) overnight — I plugged it in early in the AM and tried starting it maybe 1-1/2 hours later, not really long enough to get things warm enough to turn easily. So maybe a bit of flywheel shrinkage added to thick oil resistance caused the starter to dislodge the ring gear.