


bamfordsgarage
-
Posts
917 -
Joined
-
Last visited
-
Days Won
13
Content Type
Links Directory
Profiles
Articles
Forums
Downloads
Store
Gallery
Blogs
Events
Classifieds
Everything posted by bamfordsgarage
-

Generator gave up the ghost, alternator suggestions?
bamfordsgarage replied to Sean Jackson's topic in P15-D24 Forum
It wouldn't take a competent auto-electric shop long to repair your generator. I'll bet you could have it fixed and back on the car in less time than it takes to: figure out what 6-vt alternator to use; find it; buy it; 'drop it in' (as if?); and sort out the wiring. How much driving are you going to do while the generator is in the shop? A fully charged battery will start the car multiple times and run your ignition, signals, brake lights and so on for hundreds of miles. If you need to use the head and tail lights in a pinch, they will do OK... dimmer than usual and your spark intensity will be down, but the vehicle will be functional. Top up the charge every night and you're set. Maybe this is the time to replace your old battery with a shiny new one using some of the money you saved by not buying an alternator. Your old battery can live in the trunk for the time being with a pair of booster cables 'just in case'. -
Brake drum removal - what the Shop Manual doesn't tell me.
bamfordsgarage replied to DonaldSmith's topic in P15-D24 Forum
Would anti-seize reduce the friction between axle and hub and put more stress on the key? My main experience with tapered axles is on Model T Fords. Lots of worn axles, keys and hubs in that crowd, and these are often attributed to insufficient axle nut torque — and grease etc on the taper. -
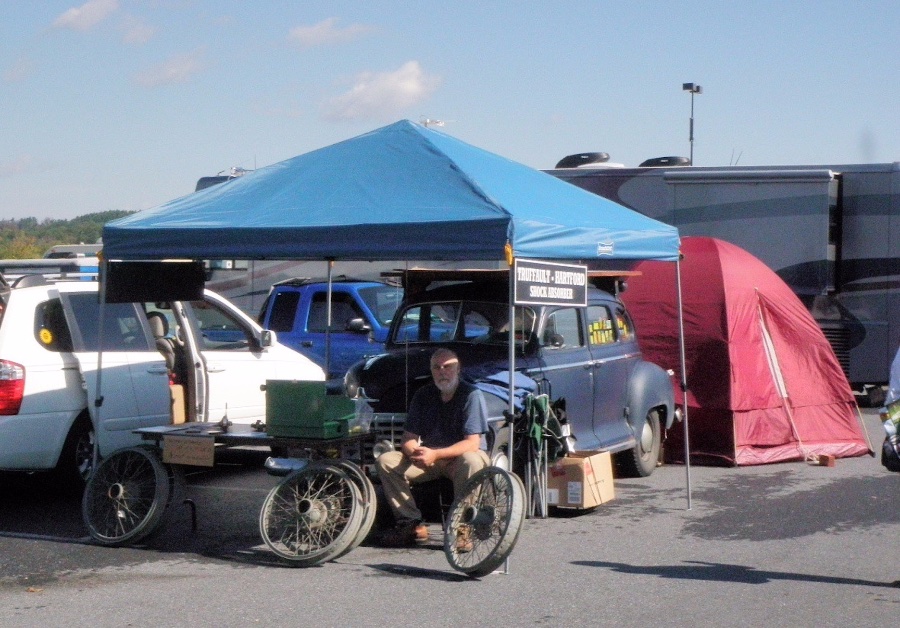
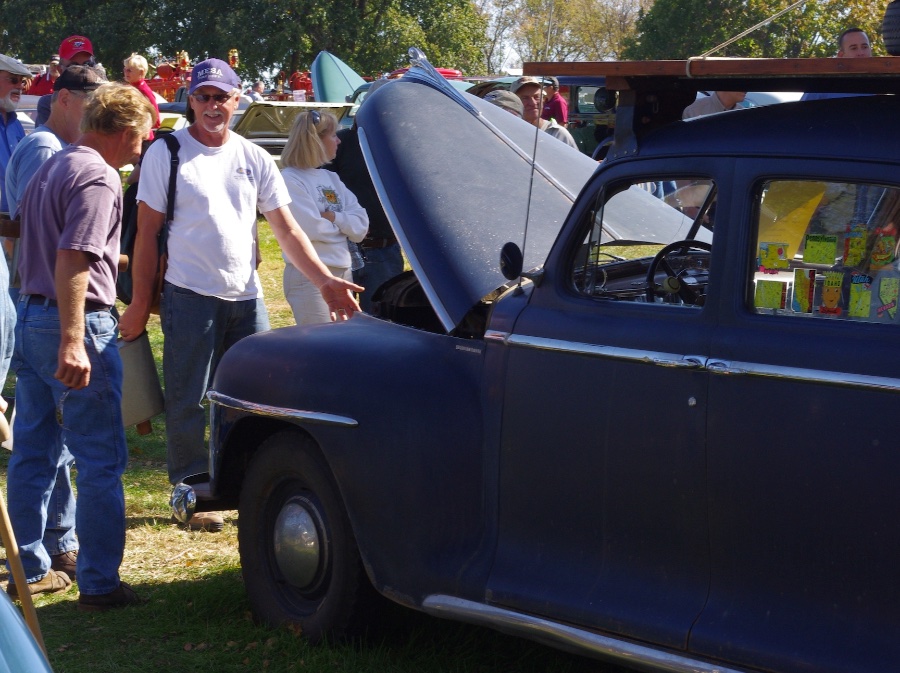
I'll be at Hershey in October assuming the border is open — my 4th time and according Rich Hartung's source, maybe the last ? In 2010 my friend and I drove the '47 D25 from Edmonton AB (roughly 400 miles N of Montana) to Hershey and camped in our stall right on the show field. On Saturday we entered the old heap in AACA's massive judged show, category "Historical Preservation of Original Features". Originality was all important, condition hardly at all. Perfect for this car. HPOF cars were judged against a standard, not each other. Anyway, it would be just great to have a gathering of P15-D24 Members at Hershey 2021, especially since this might be the end of the run for the biggest swap meet on earth. Or at least this version of it. A lot of groups have theei major—or only—gathering at Hershey. The others I attend are a major Model T Forum get-together (at a T club tent Thursday afternoon) and the Horseless Carriage Club of America (big BBQ lunch for one and all on Friday at their club tent). Any of us planning a stall at Hershey we could use for a home base? Or anyone nearby Hershey that wants to coordinate something? Who's In? Photos: the '47 at Camp Dodge, Hershey 2010, and in the HPOF field at the big Saturday show... guy in front is explaining that Canadian-market Dodges are Plymouth body shells with Dodge grilles and other trim. Plodges.
-
Norman, you might be over-thinking this replacement roller thing... PlymouthCranbrook found something usable at the hardware store, an auto-glass shop could easily have what you need in their junk pile, there could be dozens of equivalents in the breaker's yard, or a local machinist could carve you one from billet in less than an hour. A $45 kit that includes stuff I don't need — plus $55 shipping — plus waiting who knows how long for it to arrive? Not for me. Buying on-line can be and often is the best way to go. This doesn't sound like one of them.
-
Nope...My Old Mopar Will Not Leave The Garage This Week!
bamfordsgarage replied to keithb7's topic in Off Topic (OT)
It’s only 81 in Sundre AB right now, but getting hotter. We’re just having an ice cream then saddling up for the 180 mile drive to Edmonton, where temps in the 90s await. My 1926 Model T (far car) still has the original rad… hood off helps and I’ll probably be OK. Buddy’s Model A was vapour licking something fierce yesterday, we hope pulling the hood and insulating the fuel lines will control it.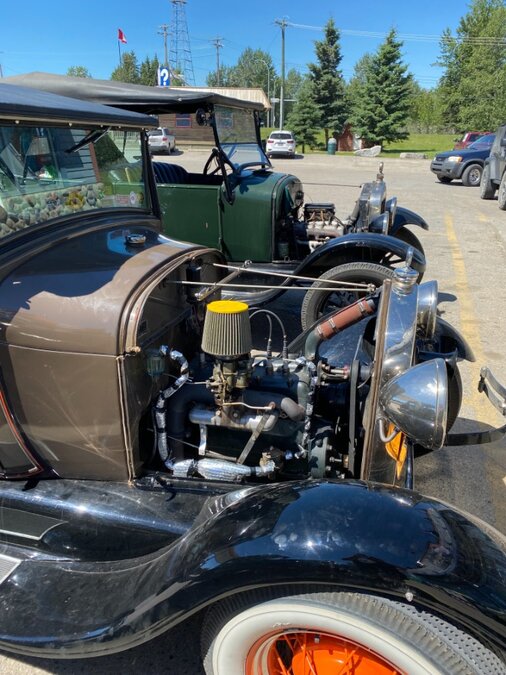
-
Nope...My Old Mopar Will Not Leave The Garage This Week!
bamfordsgarage replied to keithb7's topic in Off Topic (OT)
Our hometown of Edmonton Alberta, roughly 400 miles north of Montana…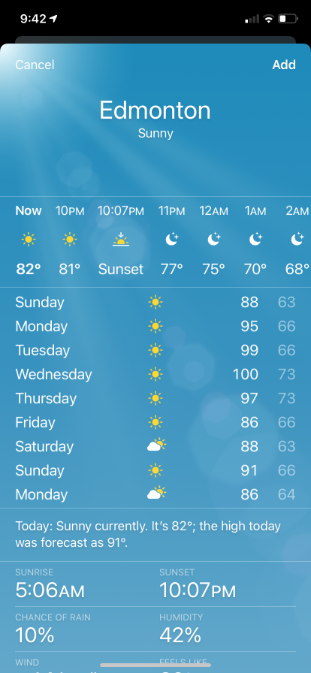
-
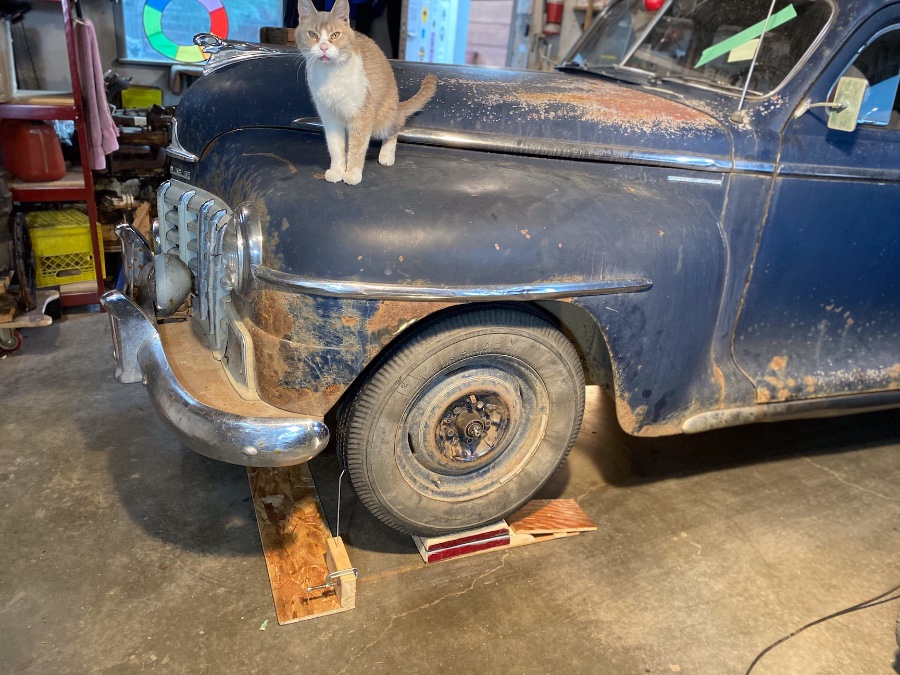
Now that’s a new expression to my ears. Mind you, I’ve always been a cat person…
-
Very slick. I have a particular appreciation for shop-made specialized tools. Thanks for posting.
-
DIY Wheel alignment with home-made equipment
bamfordsgarage replied to bamfordsgarage's topic in P15-D24 Forum
Good morning Tim... I didn't check for caster or camber: assumed/hoped it was unchanged from my last professional alignment, couldn't conceive of DIYing that apparatus and process, and will get the full meal alignment deal after new tires are installed. For now, it seems to track and drive pretty well. FYI, my only other experience with alignments is on Ford's Mighty Model T... castor and camber are baked into the front axle and can only be adjusted by bending same, and ideal toe-in is about 3/16" -
DIY Wheel alignment with home-made equipment
bamfordsgarage replied to bamfordsgarage's topic in P15-D24 Forum
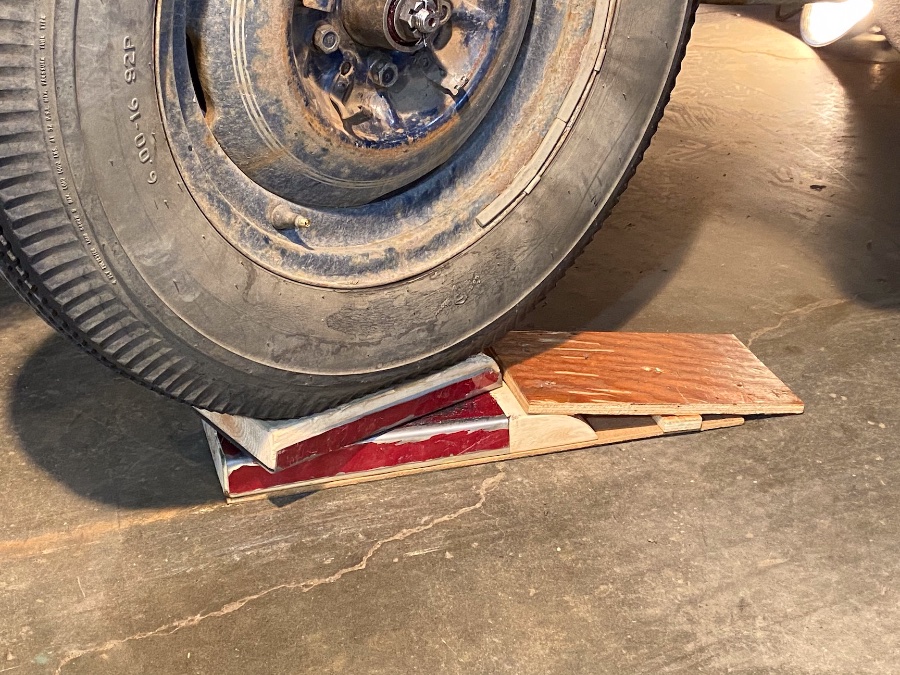
Post 2 of 2... Photo 6: One pointer is lined up dead-on the line at the RF tire, front. Photo 7: Other pointer is about 1/16" outside the line on the LF tire. This indicates about 1/16" toe-in; factory spec is 0-1/16" toe-in. Success! Photo 8: Turntables are required to enable the front wheels to turn freely no matter how small the adjustment. Photo 9: Exploded view of turntable. Auto body sheet metal, 2x6 top and bottom, carriage bolt pivot, washer between top and bottom at the pivot point, lotsa grease. Out of pocket expense: $0. Time to research, develop, build equipment, probably 5-6 hours over a week. Time to do alignment and adjustments, about two hours. It is easy to jar the trammel points out of position while moving the apparatus out from behind the tires and into position at the front. Once I had the toe-in apparently correct, I slid the trammel back under the car and took another reading at the back of the tires just to be sure my measurements were repeatable. This work was done in conjunction with ensuring the steering wheel cross-bar was level when the wheels are straight ahead. I first pointed the wheels straight ahead by sighting along each front tire, front-to-back, at hub height, to see where my line of sight fell back at the corresponding rear tire. After getting the wheels straight, I set the toe-in by turning the tie-rods against each other, then levelled the steering wheel by turning the tie rods together. Finished up by double checking the toe-in and called it a day.

-
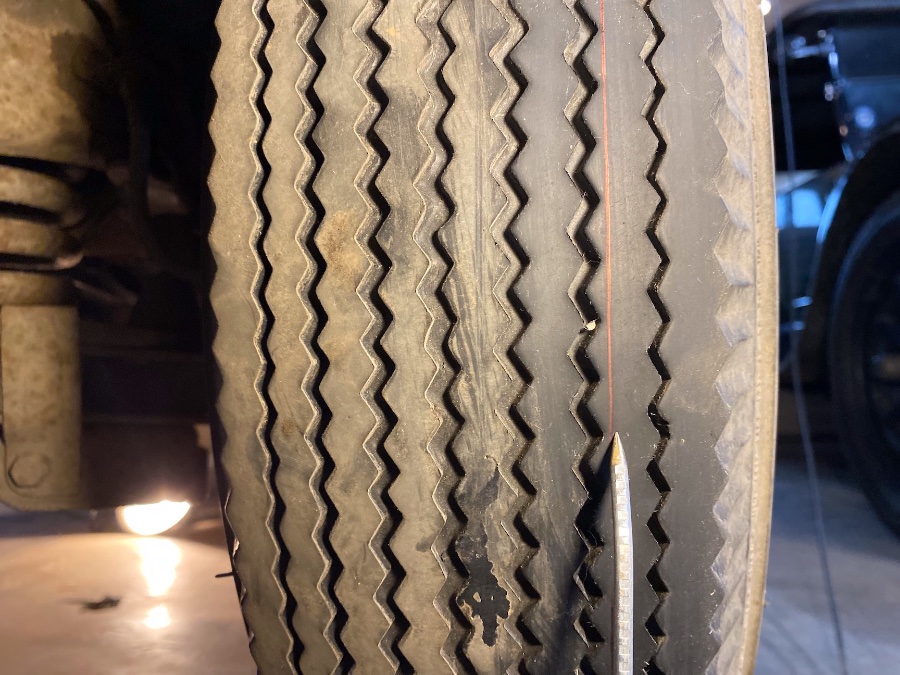
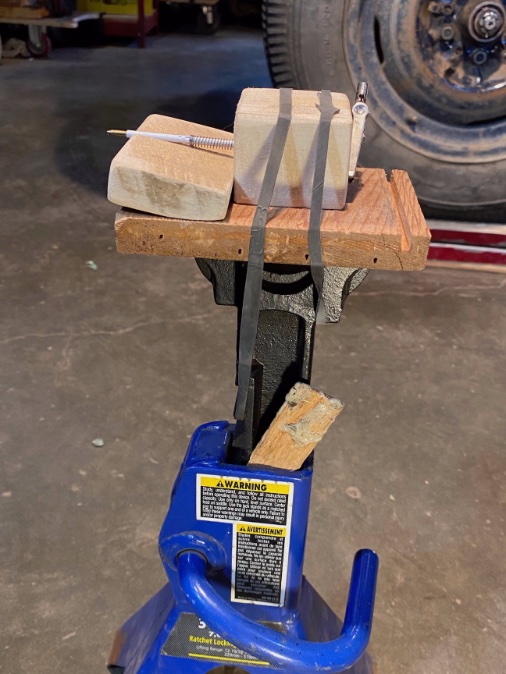
I recently replaced the steering box in my '47 D25 Sedan and needed to centre the steering wheel and set the toe-in. After reading up on the procedure in the factory service manual and a '60s auto mechanics text, I built some crude but serviceable equipment from stuff lying around the garage. It seemed to work pretty well. When I replace these tires, I'll have the shop double-check my work... Photo 1: First task was marking/scribing a circumferential line all 'round the tread. This gizmo uses a ball-point pen refill, spring loaded against the tire to compensate for minor out-of-round. Mount gizmo on jack stand, rotate tire 360°, marvel that the start and finish of the line matches up! Photo 2: Closeup of marking process. Tire is spun down in relation to the refill. Arrow points at the circumferential scribe line (kind of hard to see). Photo 3: Home-made trammel points are set to exactly the width of the scribe lines at the back of each front tire, same height as the centre of the hub. Photo 4: Close up of trammel point, rear on LF tire, bang on the line. The other trammel point behind the RF tire is set the same. Photo 5: Trammel moved to the front of the tire, very carefully so as to not disturb the position of the points. Continued next post...


-
Really? That’s a pretty definitive statement if Matt Wilson‘s suggestion to short out the plugs hasn’t been tried, or the head removed to look for debris. I had a similar noise in my D25 and it was a bit of broken piston ring partly imbedded in the piston top.
-
Bamfordsgarage is a Video Star
bamfordsgarage replied to 1950 Special Deluxe's topic in P15-D24 Forum
Hey, that was fun to see again — thanks for posting. The video is from an open garage for our local club last October. The Harley owner/builder is Jay Mauer, who has an equally cool ‘40s Harley and what may be the world’s smoothest-running Model T. -
How about a picture or two?
-
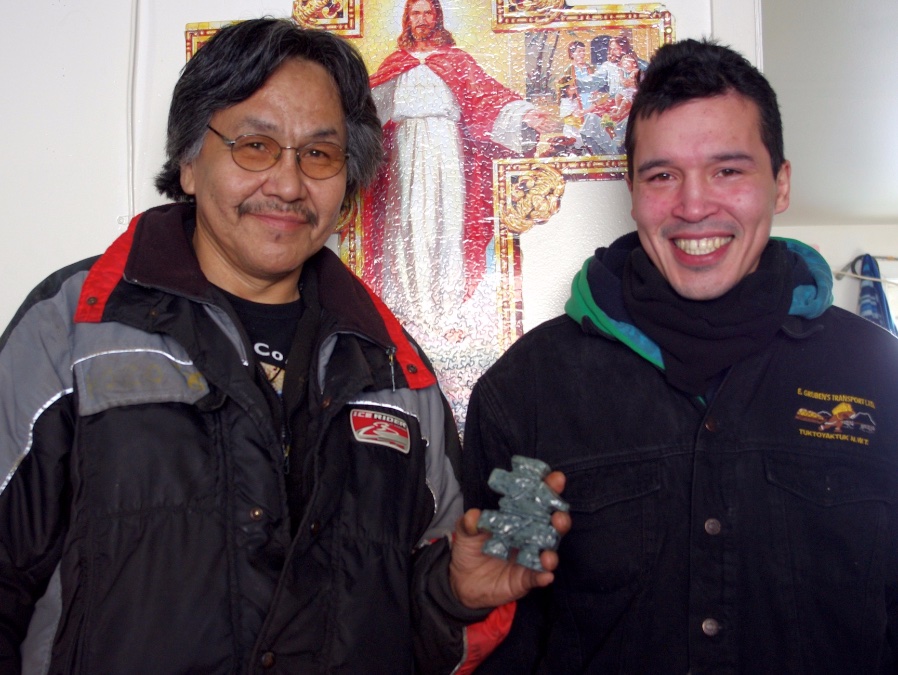
Hi Fleiter — that is an INUKSHUK. These are man-made stone landmarks or cairns, historically used by some northern indigenous peoples for way-finding, cache markers and so on. They are found above the Arctic Circle in Canada, Alaska and Greenland. More HERE. We acquired this souvenir Inukshuk in Canada's Yukon Territory, on our way to another road less travelled — the winter ice road to Tuktoyaktuk, furthest north one can drive in mainland Canada. Photo below is the old heap at the end of that road, a picnic spot on the shore of the Beaufort Sea. Second photo are two Tuk natives: the artist on the left who carved this Inukshuk for Lady Michelle, and his friend and ours (through an exchange program) Sam.

-
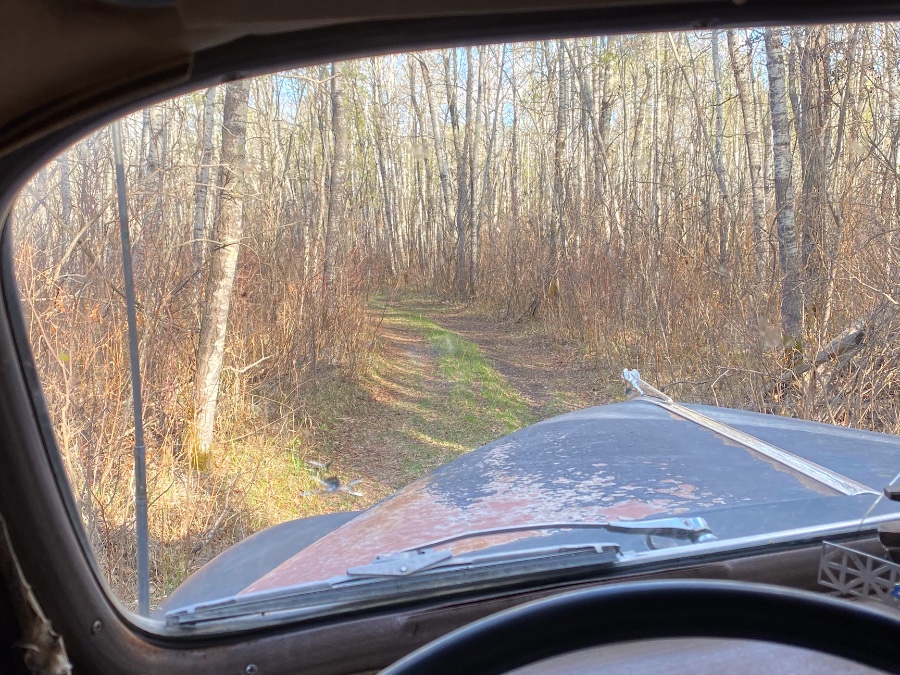
Nice photo and road, Robert, and great job on the '51. Lady Michelle and I took some roads less travelled today in the D25. Visited a friend 60 miles north of Edmonton and enjoyed a picnic in the Bridge Lake Natural Area on the way home...


-
I pulled the steering box and shaft out from under my D25 (like a P15) after raising the front end about a foot. But please use the floor jack only to lift the car, and put sturdy supports under the frame or front wheels before you crawl under. As Robert says, the steering column tube can stay in place (detach the bracket under the dash) and the pitman arm and steering wheel. My pitman arm took some doing to remove — impact wrench on the nut and specialized puller on the arm.
-
Rocker frame pictures diagram help
bamfordsgarage replied to bartenderfloyd's topic in P15-D24 Forum
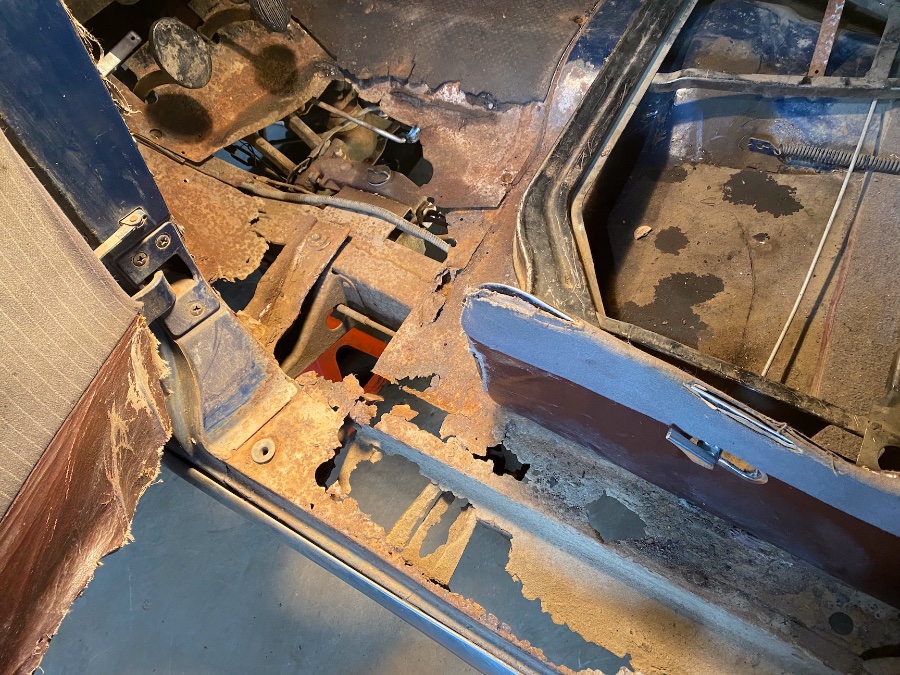
Here are some "through-floor" photos of the body and rocker supports at the driver's front door of my 1947 D25 (same as P15). Third photo is passenger side. These might be helpful, particularly the last one looking forward from underneath, driver's side.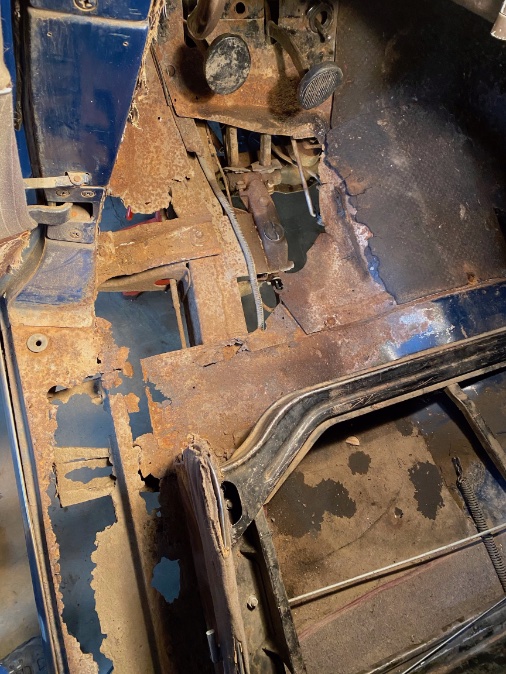


-
ANSWERED Another brake adjustment tool
bamfordsgarage replied to insaneradio's topic in P15-D24 Forum
Nice job. Thanks for posting. I made one of a different design but used it the way you describe. Kind of fussy to get the adjustments right but it seems to do OK. A worthwhile improvement would be a brace to reduce/eliminate the tendency of the arm to flex.
-
The 1940-1947 parts book shows a standard, not-tanged, washer on the rear axles — part #50652 as TodFitch noted above. The way I see it, no tang is required as there is zero chance of relative movement if the nut is firmly torqued tight (factory spec is 142 ft-lb minimum) and cotter-pinned. Mind you, most of my rear axle experience is with Model T Fords, not this modern stuff...
-
Our old Mopars were built tough! In March 2012, my good friend Jerry de Jong and I loaded up the '47 D25 (Canadian) and set out from Edmonton, AB for Tuktoyaktuk, Northwest Territories, the furthest north one can drive in mainland Canada. They finally built an all-weather road into Tuk a few years ago; when we did this run, the last 112 miles were a four-month ice road up the Mackenzie River and along the Beaufort Sea. Four years earlier, we had driven down to Wyoming to meet up with a few cross-country vintage cars and convoy with them to San Francisco. In 2010 we drove the old heap to Hershey, PA then on to New Jersey, more or less down the east coast to Florida, and back home via TX and Pike's Peak. We connected with a few Forum members along the way, and particularly enjoyed a grand Southern Forum Gathering at Plymouthy Adams' Georgia Estate (P.A. was also kind enough to put up the Dodge for a bit when I had to scoot home for family business.) Anyway, having visited three of North America's four coasts, the only logical next thing was to give the old flathead its first ever rebuild then set our sights on Canada's Far North. I do a one-hour presentation on our journey to Tuktoyaktuk, including a bit of the car's history, the 2011 engine rebuild, our preparations for extended travel in remote areas at -30° temperatures, and various sights and characters of interest along the way. I've told the story numerous times, live, over the years; Thursday will be the first on Zoom. I hope you can tune in this Thursday evening at 7:00 Pacific Time. For more details and how to access through Zoom, click the Blue Banner above or here. Chris Bamford Teaser photos: Double glazing the windshield; Are the gas cans full?; Car show at Canada's northernmost gas bar; We tour this building.


- 1 reply
-
- 5
-

-

-
Your best bet is to pull the steering box and shaft out together. From below. I’ve just done this on my D24 which I believe is the same box as yours. Not difficult. Hardest part was pulling the pitman arm off the output shaft. Auto parts store puller and an impact wrench on the puller. With the box and shaft on the bench you can do a thorough inspection and all your adjustments. At the same time, you can cut the shaft and do whatever to bench fit the Power Steering on the bench. I imagine this will save you time and aggravation under the hood. Edit: In fairness, I know nothing about electric power steering installation so that comment could be way off base. Steering shaft and box removal is discussed and illustrated in the workshop manual. Do you have one?
-
Pancho, 14 D25, 1947

-
Thank you all for the comments, photos and suggestions. JB’s link also yielded an easier-to-follow wiring diagram. The horn is finally sorted, — terminal corrosion was an issue and it took some head scratching to figure out that my newly-installed steering column was not grounding reliably until the pitman arm went on.
-
I've just swapped a replacement steering box into my '47 Dodge D25 (P15). One related task was adding a few inches to the horn wire and a plug in connector between the steering tube and main wiring harness. Now the horn no longer blows when the horn ring is pressed. Logic, and the way things often go in this garage, would suggest I've screwed something up with the horn wire/contact/ring, etc (basically, the last things I "fixed"). But this time, maybe not. The wiring appears to check out and I suspect the relay. Relay photo is attached, and as I understand it: - top terminals are the switched circuit - Bottom terminals are the control circuit - Bottom terminals should have continuity through the relay coil (they do not). - An audible click should be heard when 6-volts are applied across the bottom terminals (it is not) I have confirmed that the horn wire has continuity from the relay to the horn ring, and does ground when the horn ring is pressed. The horns honk loud when the top terminals are jumped and less loud when the upper left and lower right terminals are jumped. It seems very unlikely that the relay would fail, right now, by chance. So, maybe I've damaged it somehow, or maybe my assumptions are incorrect and the problem lies elsewhere. I endeavoured to get it apart for a look inside, but that composite base is very reluctant to come out of the housing. There's a chance of damage if I force it, and I don't want to go further in that direction until I'm more confident that the relay is faulty. Comments and suggestions most welcome!

