Leaderboard


Popular Content
Showing content with the highest reputation on 10/11/2019 in all areas
-
IMO, a flat, or slightly domed center finished to match the wheel spokes would be a better fit.2 points
-
I am all packed and will be heading to MECA or ortherwise know as Hershey in the morning. Heard that we might have some good weather for the next few days. Will take some picture with my phone to post on the forum. Already heard from Clayton from Ct and here is already there today and he stated that about 50% of the vendors are already doing business. This will be my 32nd year of attending and I fondly remember all of the mud and ruts when waling in the fields after it had rained even watching people slip and slide down the red field hil and then after they got allmuddly they became little kids again and then went back up to the top of the hill to on purpose fall and slide down on their buts and or stomachs. Oh the thrills of getting muddy and wet. Those were the good times. Now every field is paved and it is harder on your feet and the blacktop gets hot when the sun is out but who is complaining when you are amongst 8000 car vendors. Rich HArtung2 points
-
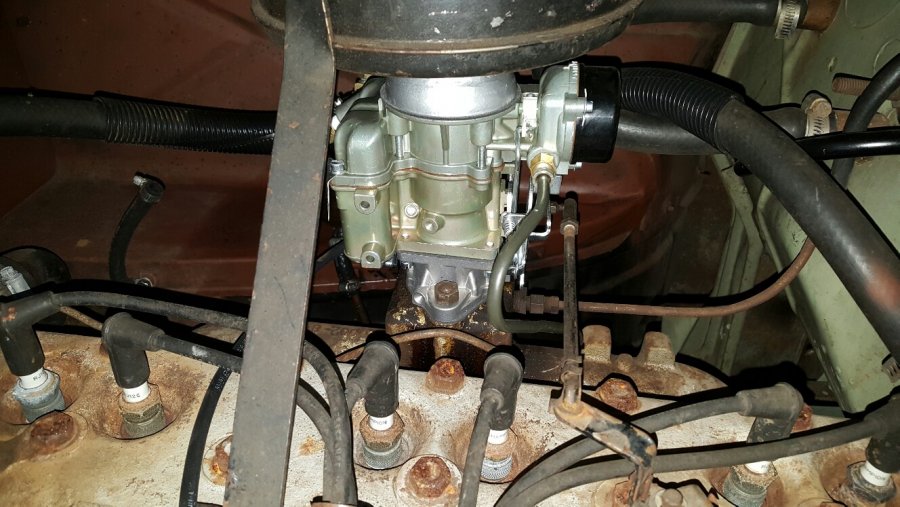
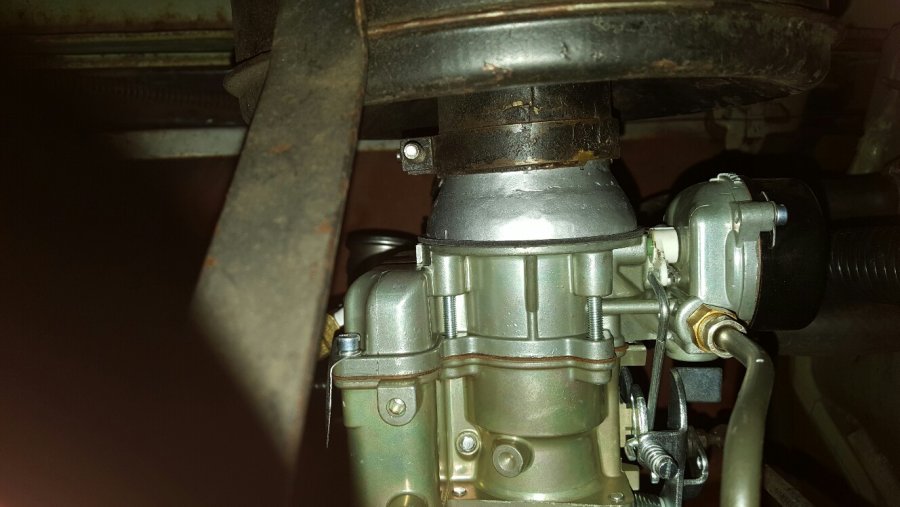
The only modifications I needed to make was elongate the holes in the gasket. For the linkage, I elected to grind off the ball fitting on the yf carb and open up the hole to bolt the dodge fitting to the yf carb. That's not necessarily, I found a quick release type ball fitting with the correct threads that would screw onto the factory linkage. As far as the choke, it has a automatic choke. There is a fitting on the choke housing to pull heated air across the choke spring. I used a brake line routed down around the exhaust. Actually, some previous owner put a small heat shield on the exhaust.
 2 points
 -
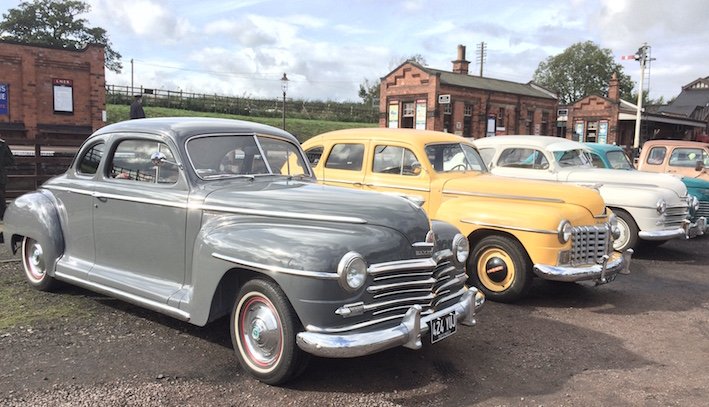
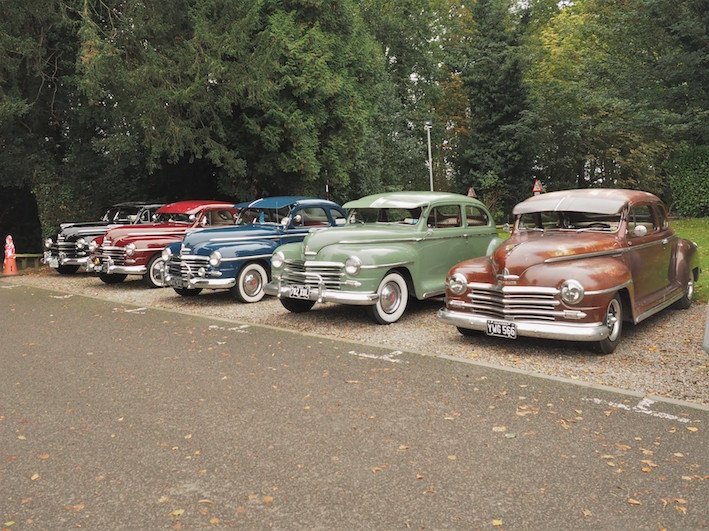
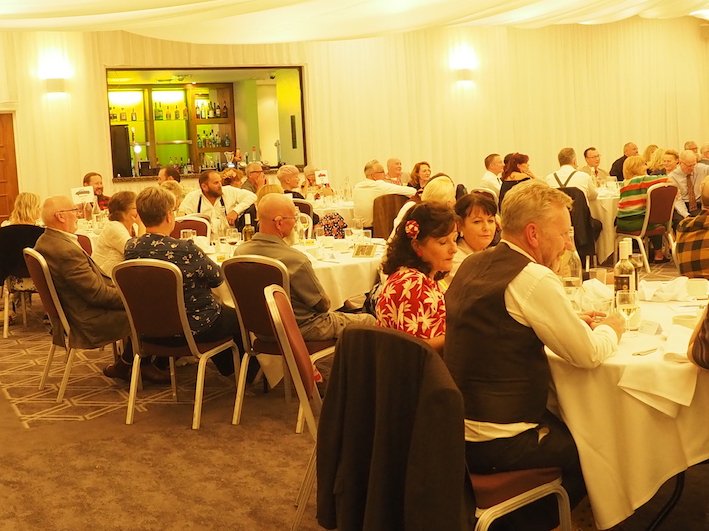
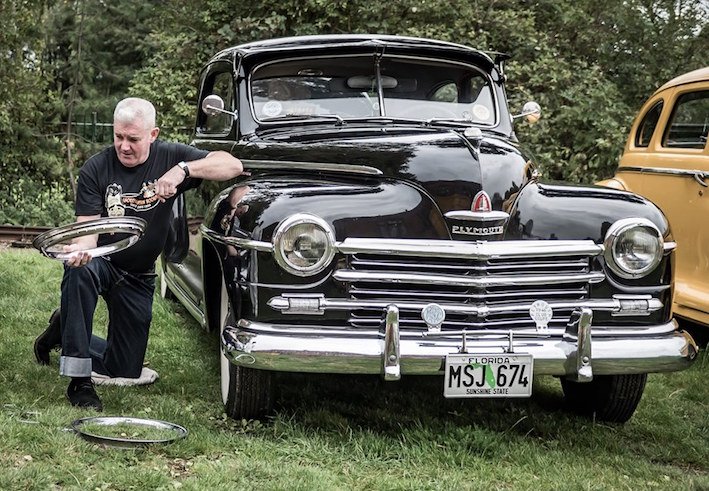
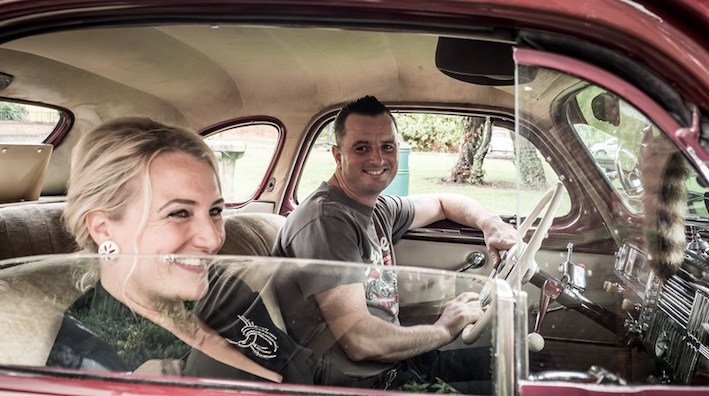
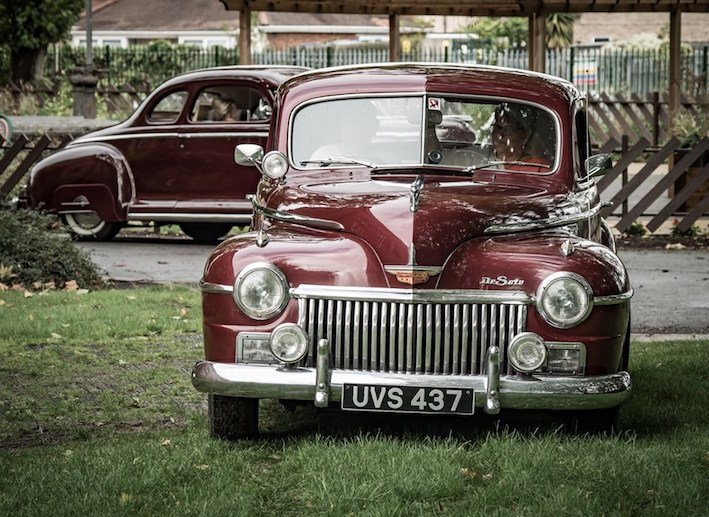
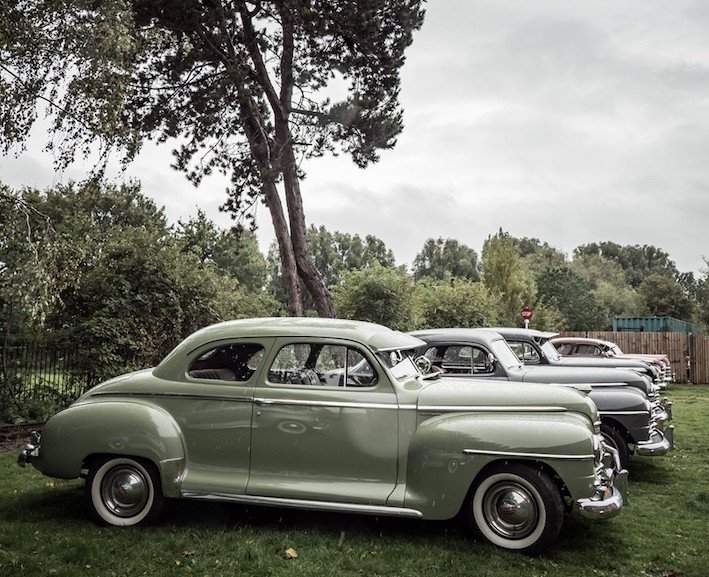
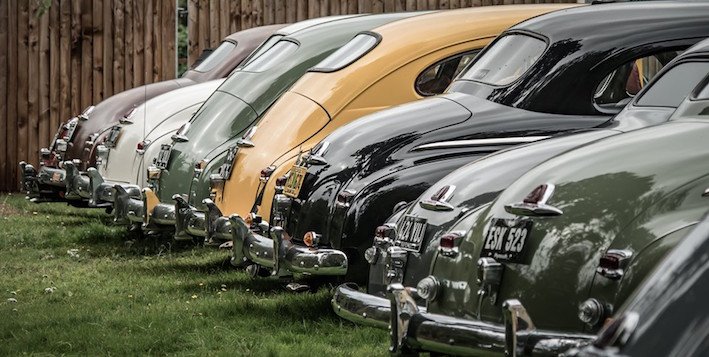
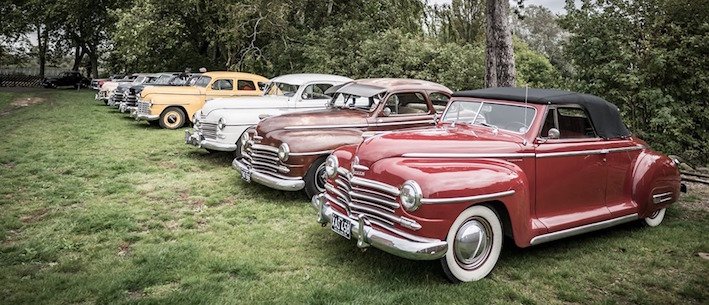
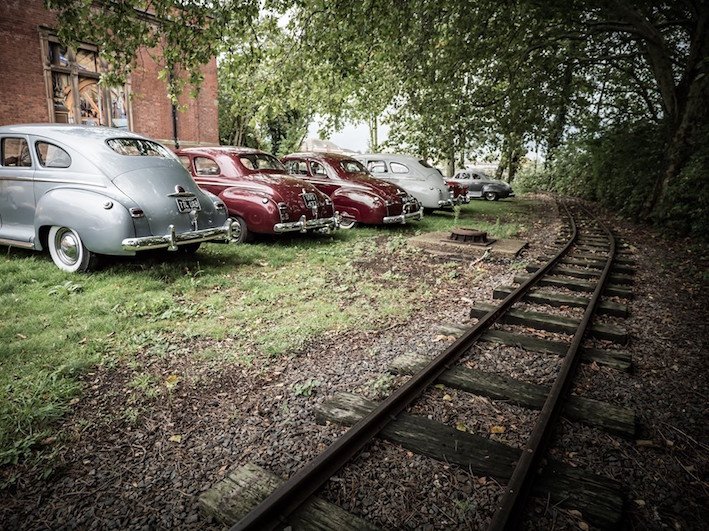
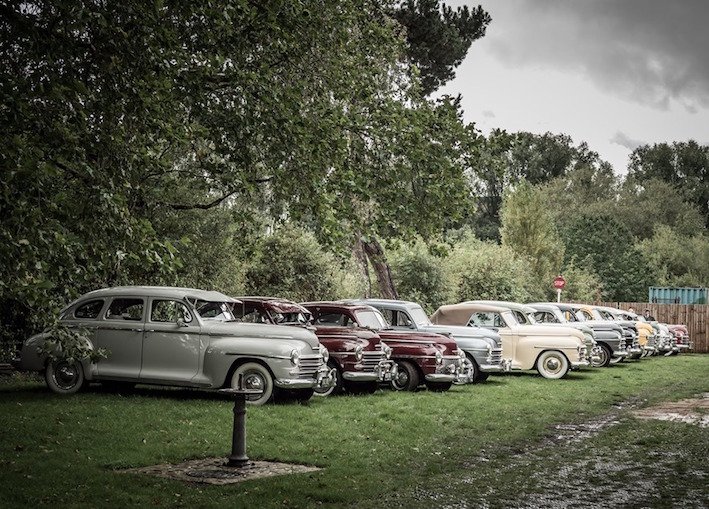
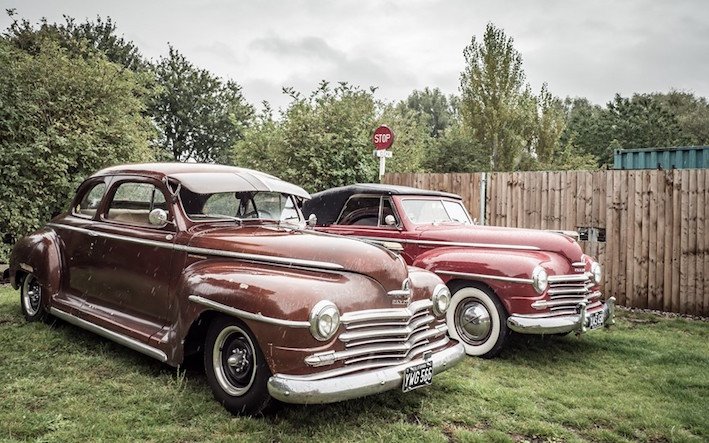
We just held our 5th Annual P-15 Picnic in England and were delighted to welcome a record number of owners and cars for two days of Plymouth-filled fun. With Mark joining us from the USA, Tommi travelling from Finland, Martin from Sweden and cars gathering from all over the UK, it was a very special weekend. The weather wasn't great, but the atmosphere was superb, with cruise-outs to two local museums and a lovely dinner and dancing at the hotel. The line-up of cars was truly impressive, with a total of fifteen P15s or derivatives and several 'guest' classics. We'll be doing it all again in September 2020... you're all welcome to join us! Here's the roll of honor: 1946–1948 Plymouth and Derivatives: 242 UYE - 4-Door Sedan - John & Elly 424 YUJ - Business Coupe – Simon & Julie 562 YUG – Convertible Coupe – Chris & Rebecca 763 UYX – 4-Door Sedan (D25) - Richard & Karen 774 UXB – 4-Door Sedan - Garry & Gaynor 782 XUL – 2-Door Sedan - Dean & Joyce 977 XUP – Club Coupe - Colin & Liz ESK 523 – Club Coupe – Mel & Sue MSJ 674 – Club Coupe - Ian & Marie UVS 437 – Club Coupe (SP15) - Dusty & Deb WXG 507 – Business Coupe – Tony & Dawna WXG 932 - Business Coupe – Alan & Annette XAS 458 – Convertible Coupe – Robin & Colette YVL 306 – Business Coupe - Terry & Amanda YWG 566 – Club Coupe - Steve & Hayley 1946–1948 Chrysler: 268 XUR - Club Coupe – William Guest Cars: 1927 Ford T Hot Rod 1937 Plymouth – Russ & Steph 1938 Ford 1939 Dodge – Simon 1940 Plymouth – Nigel & Jan 1947 Nash – Bob & Irene 1948 Chevrolet – Richard & Lynne 1953 Buick 1953 Plymouth Convertible – Paul & Rita 1953 Chevrolet – Rob & Sue 1975(?) Dodge Truck – Spud & Katie


 1 point
 -
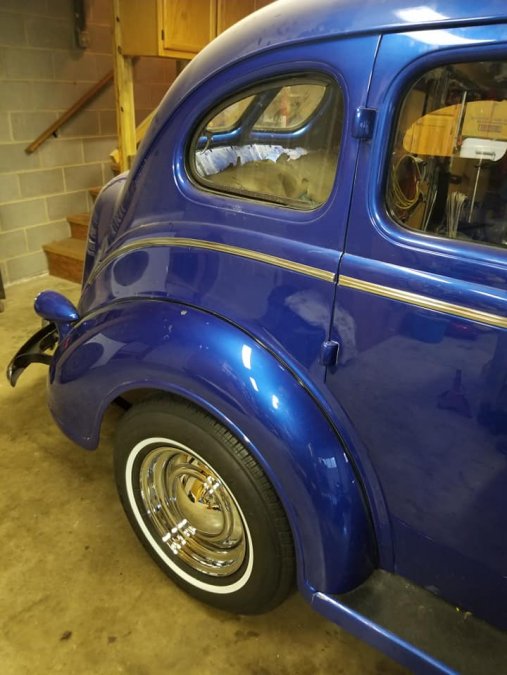
Dad, Back brakes done, everything is new. First wheel and tire is on and looking sharp. Plenty of clearance to the frame and inner fender well. Bulge of the tire sits just inside the lip of the fender and plenty of clearance for the axle to move up and down over the deep NC pot holes and off road when running through streams and over logs when we go hunting in the old gal. Additional wheels arrive next week, we'll get the remaining tires and the spare then. Tank straps and supplies are ordered, so I can get the tank in place. So, gotta do the dirty job cleaning , sealing and painting the floor pan underside....I'll slow boat that so maybe when you get here you can get your eyes and hair fulla rusty crap too. Barring any issues, we'll pull the sheet metal and perhaps pull the engine and transmission while you are here this month!


 1 point
 -
Right in front of the stage today
 1 point
 -
I hear a low pitch noise under certain conditions in my ‘53. Could be gears. Could be a bearing. I have an interesting howl in my ‘38 drivetrain too. I do hope this tool helps me narrow it down. I’d rather not spray parts at various systems and hope I get it. This is why I commented that I look forward to using it. I have two good opportunities in front of me, for it to earn a spot in my tool box.1 point
-
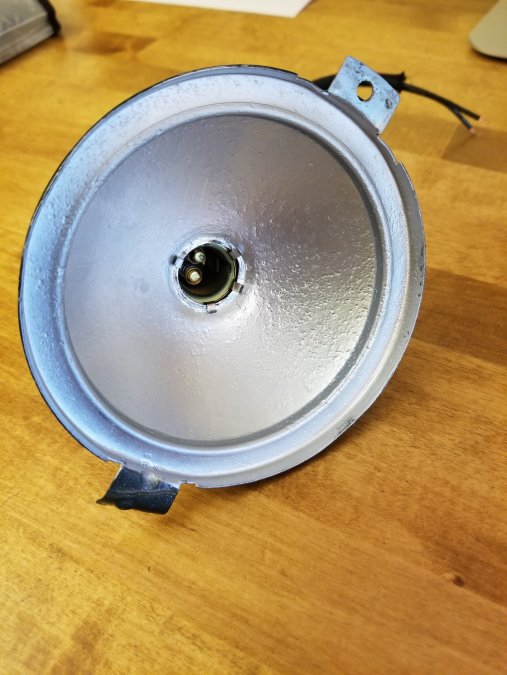
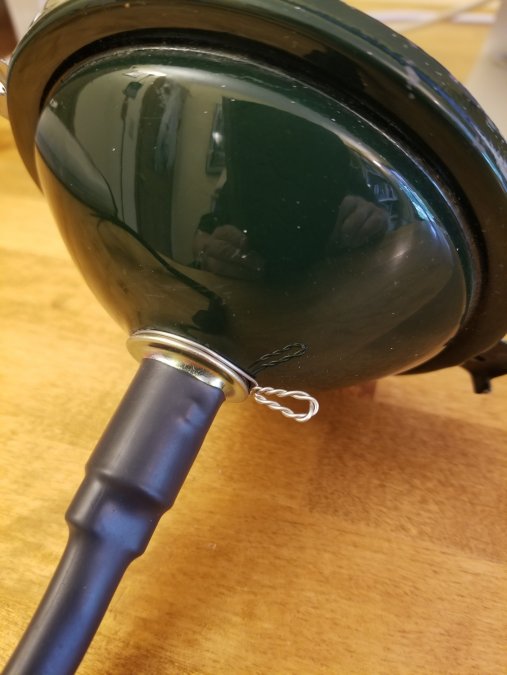
My markers were in rough shape as you can tell from the pitting. I don't think that silver or white makes too much difference so I went with metallic Rustoleum. I'm going to use the marker lights as turn signals too so I replaced the original 1156 sockets with 1157's which can accommodate two filament type bulbs. I got the 1157s (socket, wiring, and bulb included) from DCM. The only problem with the replacement sockets was that I wasn't able to be secure them tightly enough to the reflectors at first. Looseness caused the sockets to twist when removing or replacing a bulb. To fix that, I wrapped a turn or two of safety wire around the back of the socket to snug it down good and tight to the back of the reflector. Problem solved.
 1 point
 -
I was thinking the same thing too. John1 point
-
The discussion on the KD tool 2203 for removing fan blade bolts was perfect timing for me. I have an upcoming project in which will be taking the fan off of my 39 Ply. and space is tight. Was able to purchase one of the tools on e bay. Many Thanks1 point
-
Found thi diagnostic tool for $3.50 today. Pretty happy about it. Works really well! Very sensitive. I look forward to trying it out on a noisy bearing.1 point
-
Thank You, Simon and Robin. It doesn't seem as expensive to get parts, between England and the USA, as it does to get parts between the USA and Canada. My wife and I dressed in period correct clothing, sometimes, when she owned her Black 1936 Terraplane suicide 4dr. The dinner pictures reminded me of that. So, I have a dinner date with my wife on her Birthday 11/26. If I can't drive my 49 P-15, depends on the weather, we'll be dressed to the nine, anyway. I'll start my own thread to show my car's to you and others, soon. Thank's again.1 point
-
For front end of leaf springs, "Volga" blocks can be used. 4 are needed because one eye uses two half - bushings. They are full rubber, unlike original ones, which were steel/rubber. Rear requires much thinner ones; I bought mine in "Rockauto" for 2 $ per two and around 10$ for postage. Also two per side required (two in box). (edited, I've posted something stupid first time)
 1 point
 -
Car is doing great in ctc traffic. The temp did climb to 190 last night after an hour in stop and go traffic but that's not hot.1 point
-
In Europe it would be easier to obtain GAZ - 21, Gaz - 69, Żuk or UAZ silent blocks, also used in many trailers. Inside and outside diameters are the same as P-15; they are about 1 cm longer, but can be shortened with hacksaw. They are very cheap - about 1 € per one or even less, 4 required per car. http://sovietcarparts.com/shop/gaz-21/undercarriage/tagumise-lehtvedru-puks-uus/?lang=en https://allegro.pl/oferta/tuleja-resora-zuk-35mm-84169584021 point
-
I recently changed mine (49 Plymouth woodie). I took my springs to a place that specializes in truck (you may be more familiar if I say lorry ?) suspension as when I did my Daimler SP250 they were able to supply and install them but unfortunately they were not able to do so for the Plymouth (strange). They said they were a very odd size and asked me to order them from the specialist (Andy Bernbaum in my case) and then they would press out the old and press the new in. Just my experience, hope you can find them locally. If you have to get them from the states, you may consider getting an extra just in case something goes wrong1 point
-
unless you happen to have some of these in your hand, they are not ordered by dimension here either but by application. I would suggest a message to a supplier like AB or the likes as they are the most likely folks to have in hand to measure and actually supply if you efforts in your neck of the woods fall on failure. Most forward bushing for the English cars I have and am familiar with will have plain or poly bushings and at best a center sleeve...the silent blocks in these cars are metal encased sleeve and case with rubber isolation material. I have never been able to press one out in any matter without damage and well, destroying it beyond any reuse. I must also admit that many I have changed has been for peace of mind over necessity.1 point
-
Greg, Your current wiring bypasses the ammeter, which isn't a big deal, but I tend to use the ammeter to check that my brake light switch is working. After having a few failed switches I will often check that my switch is working before starting up my truck. With the key off I will step on the brake pedal. If the ammeter needle moves towards the negative side I know that I am sending current to the lights. No ammeter movements means it's time to dig out my spare switch...1 point
-
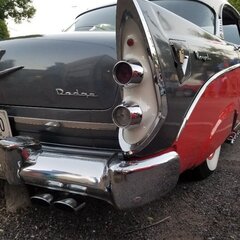
Trunk latch from a P15 won't fit on the D24. I tried that once...it'll bolt on, but the shaft on the lever is too short.1 point
-
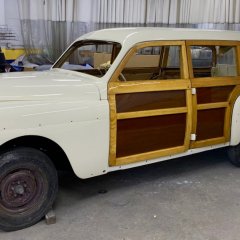
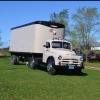
Mostly original, I added the stainless wheel simulators and radial tires. All new sheet metal and wood floor on trailer1 point
-
Here's the glovebox notebook that everyone got as a souvenir...
 1 point
 -
I could have done a Fatman cross member. I could have done a Mustang II front end. I could have done any number of after market x-members, but I decided to experience the Volare for myself. The front end is in. The final steps are being carried out this week, so I thought I'd share some of the "not so covered points" in putting one of these guys in. I leveled the frame according to the build sheet. 2 feet. I not trying to "slam" the truck down, but excepting the normal drop by virtue of notching the frame for the cross member. The frame height is based on 29" tires according to the build sheet on the DPETCA Knowledge page. Then we checked the frame for cracks, etc. I measured the frame 35" 29/32 from the rear to the rear axle centerline. From there, 108" to the front centerline. At this point we used the frame guage to check for squareness. That's me double checking the junior hot rodders. I leveled the frontend using three differnet refererence points. I noticed in a Ford build, the store bought template had an angle build into the design. The Ford build doesn't use the original motor mounts and seems to assume the engine is level to the front end. The original Volare motor mounts have roughly a 2 deg downward angle buildt in. I haven't measured this yet, but with that in mind, I put the crossmember in level to the frame. The centerline for the the front end can be referenced to the zerk fitting on the upper control arm. After stripping down the front end, leaving the UCA on, I scribed a dozen or so marks on it til I established the centerline of the crossmember.1 point
-
the pic of the steering joint I just posted show the frame also Boxed in1 point
-
To varify the location of the centerline to the fender, we put the cab and doghouse back on and made a few more measurments. I apologize, the tape is standing in for me in this picture. There was no one to fire the camera off with all our hands working! So we kinda mocked things up to show what we were doing. I was looking for centerline, not ride height. when the bars are back in, the center of the wheel will be lower. With everything in place, we all took turns welding it up. My son made a nice ugly tack or two. My nephew took on the lions share, and I had fun bossing everyone around. So that's my story. I have 3 parts to my "jig", and feel confident I can repeat the job with little problem. The frame will get boxed back to the trans x-member, and the rear will see a 4-link in the near future (i'm working on a custom design for the 50' dodge with a shop that builds Grand American Modifieds) or, I may use a late 80's IRS from a T-bird (it ain't mopar, so i'm not sure yet..lol). I plan on having this truck ready for September. If all goes well...I'll be racing it at Bonneville, with members of this site, looking to join the 130 mph club under the name of DPETCA. 48D1 point
-
I didn't strip the frame before all this because I wanted to keep the frames exposure to heat down to a minimum. The idea with the primer paint was to show me where to grind. For the actual cut I used a sharpie pen. I raised the jig up uniformally to locate my notch. after the cut, I rechecked it with the jig. I cleaned up the edges with a grinder and high speed sander (24 grit). I was pretty happy with the tightness of the cut.1 point
-
This the first template in place. I then made the otherside, checked all my measurements and welded the 2 together for an easy drop in stituation for the Dodge frames. This silly looking thing represents a lot of work on my part, but I had a blast. To test my "jig", I pulled everything off, and use it alone to map the cuts I wanted. It worked awesome.1 point
-
From this point, I started leveling the crossmember to the bottom of the frame. The two cross bars are helping me center the crossmember. the rear bar is over the wheel centerline, and the front bar over the "floor" of the cross member. Once I was close, I had to do math. The towers are toe'd out. The frame is toe'd in. I measured and re-measured to get the space down between the frame and the tower. I carefully cut 2 "identical" wedges to act as spacers to hold the crossmember in place. I have since had these blocks cnc'd into aluminum for future use. I would like to thank my 5th grade math teacher. I then clamped everything down so I could begin making my templates. It was important to do this so I could create a template following the right profile of the crossmember. This isn't the actual paper template I used, it took a few tries. But this is how I made the steel templates, taping the paper down and cutting away.1 point
-
The rivets are stubburned evil little b*stards. I sent serveral flying across the shop, and I'm sure some are in orbit around the sun. I had to really bang the crossmember out of the frame rails even after it was cut free. Like i said, this is my experience. I'm sure there's a few ways to rip those buggers out, but in the end it was a fun sweat, considering the direction my frame is going. 48D1 point
-
At this point, we (me and my son) welded a support for the frame, and the removed the crossmember. Quick story. That hole you see is a perfect critter hole. Remember, that's the bottom of the truck. As I was grinding I smelled a "grass like" smell. Turned out to be a huge mouse nest. I forgot about it, until I turned the frame back over and set the nest on fire with the plasma cutter. Wehoo!1 point
-
I used several marks to find the center, and then tranfered the info to the towers. From this point I was able to center the front end to the frame and the mark for the front axle centerline. This of course is my personal experience, and hope everyone can enjoy it that way. 48D1 point