Leaderboard


Popular Content
Showing content with the highest reputation on 09/02/2019 in all areas
-
I took a 6 month hiatus to deal with several slow motion disasters that continue to unfold in my neck of the woods...we had a wet winter and soggy spring that had me trimming trees all the way into August, when it is boiling hot and the yellowjackets + bees are hiding behind every obscured object that ya might inadvertently bump into, not to mention the ravenous skeeters + chiggers that caused an insane amount of night itching, and that was only one of the minor problems I had to deal with...the tsunami of issues earlier this year were very stress-inducing, and I figured if a hobby-based community that I liked to participate in was gonna have my concerns ignored then get talked down to then maybe I should focus on other things that have turned my life into the basis for a country song. I was able to spend a few hours last week digging a couple of my parts trucks out of the black dirt that their blocks had sunken 6" into, made some larger-based blocks that are less likely to sink, and pulled the tie-vines out from all of the fenders...been doing some other preparation work that isn't too exciting (such as upgrading lights and electrical in the barn) but has taken a LOT of time to accomplish and I'm in a better position to get some interesting work done in the future. The way things are going, I don't expect to be able to get any major restoration work done this year, but I'm still gonna chip away at the little stuff on the side to get my mind off of all the daily drudgery that gets flung in my direction3 points
-
in my experience, the 40 was the only car to use the lower mounts as pictured. all the others had a plain flat runner washer. I felt that the lower mount was a good idea but you must extend the metal tube so the mounts are not compressed at all.1 point
-
I still have my bottle of lead additive from 18 years ago. Neophyte purchase. I soon heard that the valve seats are hardened, and lead additive is not needed, for the Chrysler family of engines. True for a 51 DeSoto? .1 point
-
The Coronet won best in class at the Highlands car cruise at Seven Springs. Of course it was the only one in its class but technically I still won. LOL! About a125 mile round trip or so. I’m really pleased with how well it performed. That’s the longest trip I’ve taken since the engine rebuild.1 point
-
If you saw them arc through the wires onto the engine anywhere - then it doesn't matter if you installed them this morning - they are no good.1 point
-
only one solution. do not run it anymore. remove all six pistons and the cause of the knock will be revealed. In 60 years , I have rarely heard such a terrifying knock and when I did it was quickly followed by catastrophic failure. you never forget.1 point
-
1 point
-
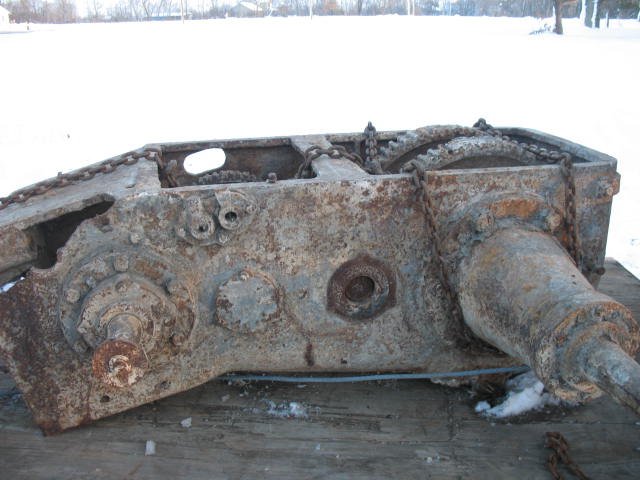
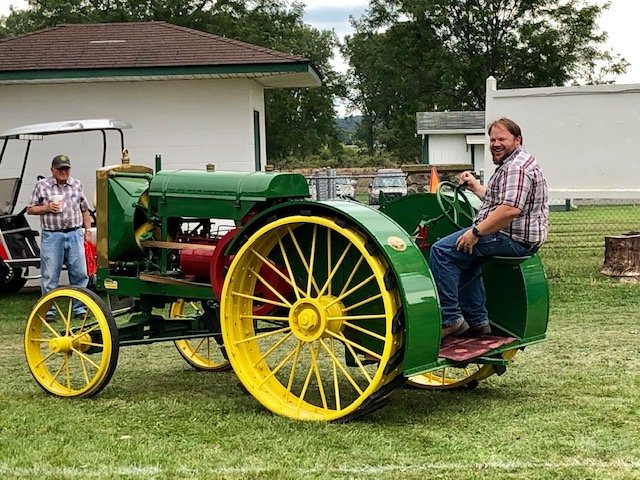
I had the great honor of driving a very special tractor for a few minutes at our local Labor Day Festival in West Liberty Ohio. Here I am on the "Bathtub D": This was a prototype tractor built in 1917 by the Waterloo Gas Engine Company before John Deere purchased them in 1918. This tractor is literally the first in a long line of prototypes that spanned years and gave birth the iconic John Deere D. This tractor was believed to be destroyed like all of the rest of the prototypes - except the transmission case with gears, axles, and the crankshaft was unearthed in 1992 during the excavation of a parking lot - it was used as fill material.
 1 point
 -
No photos easily available to me but I had 1937 JD A when I was in high school, (cough, cough) years ago. It was a basket case that I reassembled and got running. I’d show it at the Kenosha(WI)County Fair Antique Engine Exhibit until I sold it my senior year to a gent who restored it. He continued to show it until he passed away a few years ago. I think it is still in his family. According to my Dad, our family farm was a testing ground for McCormick-Deering tractors in the 30s to the 50s (could be BS, too).1 point
-
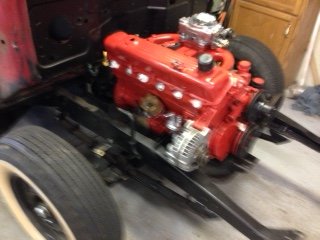
Thanks Jeff I have the axel in and when it cools off a little this evening i will set the pinion angel, and weld it in. The rear had 5 leafs i took out 2 leaving 3, also added 1954 wills shackles . The rear fender sets about even with the top of the tire looks ok but might add one back. i have the slant six setting up front and it fits like a glove thanks to Cliford it has some added power. No cutting fire wall and if the car version is used no oil pan change. I will try to post some pictures for show and tell. thanks.
 1 point
 -
That is a great bit of history. Five years ago we found or fathers 1934 model D bought it and restored it. I remember when Dad poured the concrete into these rims. Those are the names of the three brothers, proof it was Dad’s tractor.1 point
-
QR does good work1 point
-
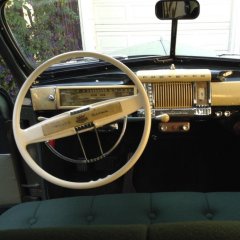
Here is the interior of my B3B with the Quiet ride kit installed. I had to paint it before installation. I am very satisfied with the way it looks.
 1 point
 -
I just wanted to share the latest problem so that others could benefit from my stupidity experience. I had been chasing a performance problem for a couple of months which had prevented me from driving my 1941 Chrysler New Yorker very often. It had a moderately rough idle, difficult hot-starting, a bad stumble when coming off idle once it was warm, and it kept getting worse over time. It had started stalling when coming off idle once in a while. These fluid drive cars with the throttle guard are supposed to be impossible to stall, so that was the final straw. I had been avoiding driving it because of the lack of power when taking off from traffic lights -- couldn't guarantee it would actually go. I tried a lot of different things -- initially I worked on plugs and timing, cleaning plugs which were still relatively low miles, but admittedly 10 years old and had minor fouling. Tweaked the timing to try to advance it to get a little more power -- that just made it tough to start. Cleaned and re-gapped points, which seemed like they should still have plenty of life left in the wear block and the points dressed up nicely. Nope. Checked fuel system to see if was starving for fuel in coming off of idle. Had to run the idle speed a bit high to keep it from stalling, and it required a lot of nursing the throttle while stopped in traffic. I had replaced the fuel tank over the winter, mostly because the drain plug had been frozen in place forever, yet it dripped pretty steadily ... And the tank was not in terrible shape, but I could really never properly drain it easily, and it was pretty nasty on the outside, with some minor dirty stuff on the inside. Replaced scungy fuel line; replaced old fuel filter, realized I was doing the glass bowl fuel filter wrong; re-installed fuel filter; checked the carb, which had only a small amount of sediment in the bowl, but I had thought that a clogged accelerator pump circuit could have been the source of the stumble. Even though I could visually see that the accelerator pump was giving a squirt. Nope, that wasn't it either. Carb is now very nice, but tuning the (2bbl) carb with the idle mix screws was puzzlingly not responsive. Was it fuel flow problem? Did the new gas cap I got (after I left one on the pump last year after a fill-up) vent properly (i.e. prevent a vacuum in the tank from working against the fuel pump)? Nope, gas cap is properly vented for vacuum. Gas caps taste pretty nasty, too. Fuel bowl level? Nope. Checked distributor some more. Free play acceptable. Cleaned vacuum advance, it was basically working, if dirty, and the diaphragm was sound and the spring good. Mechanical advance was basically within spec using a timing light. Distributor slightly dirty inside. Condenser checked out okay with a multimeter. It's about 300 nF, for those who want to know. Finally went to poke around more with timing and I said to myself, "You know, self, what do you really know about that ignition coil? How long's that been in there?" and I figured I didn't have much to lose checking that out. It does require crawling under the dash to get the coil out, because it's got one of those coils through the firewall with the ignition lead to the coil primary on the back side of the coil inside the car. So I pulled that out, and put the coil on the bench with the voltmeter, and it looked "funny". The primary read unsteadily at between 0.3 and 1.3 ohms, rather than a steady value somewhere around 1.5 ohms. The primary-to-secondary resistance was not the expected 7000 - 10,000 ohms, either. It was mega-ohms or open-circuit. It wasn't really a definitive answer that the coil was bad -- I mean I had checked spark previously, and while it might have been intermittent or missing a bit, it still put out a basically good spark, I thought. One of those cheap spark-gap checkers is a nice tool instead of zapping yourself by holding the lead near the engine block. But the local auto parts joint had a 6 volt coil in stock for only $20, so I figured I may as well just check that out, for all the time I'd been dumping into this. It required a little gimcrackery to get the ignition lead to the front of the coil in the engine bay. But it just fired right up and I could not believe how smooth the idle sounded. Quick check to tweak the timing back to TDC. I let it warm up for several minutes, come off the fast idle cam on the choke, and it runs much nicer now. Drove it for a half-hour on a warm day, and it just pounces off the idle now. Whole different car, seriously. Drove it straight up the hill that has the stop sign in the middle of it and no hesitation or stumble now. Where did all this power come from? It's still a heavy car and underpowered by modern standards, but it drove like I remember it running. Practically leaps off the line. Finally. Now re-check the carb tune, and it is very much more responsive to carb adjustment, and the idle speed can be adjusted all the way down to the 500 rpm given in the manual without any trouble. What's the moral of the story? Well, "99% of carburetor problems are electrical," that's for sure. And the coil check was simple, but the annoying firewall installation of the coil discouraged me from checking it earlier. Have to stop getting suckered into checking and fixing things just because they're easy and accessible. I think I'd do almost anything to avoid crawling under the dash. And I also should have trusted my ear when it was telling me that it was missing intermittently (and not on any one cylinder). Smooth running is a good thing to pay attention to. But also, I want to thank the forum for being here and full of questions and for the people who have the good sense to answer "Just keep at it, you'll figure it out. Track it down, these cars aren't rocket science." Of course, I went down some blind alleys based on irrelevant questions... Now I have to make the coil install look a little prettier. There are a few people on the web who have the original style 6 volt coils with the primary lead on the back, but boy, do they want serious money for them. Cheapest I saw was $140, and it's NOS, so who knows how sound it is and how long it'll last? Others want $200. I'm gonna stay with the off-the-rack coil, I reckon.1 point
-
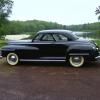
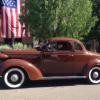
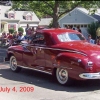
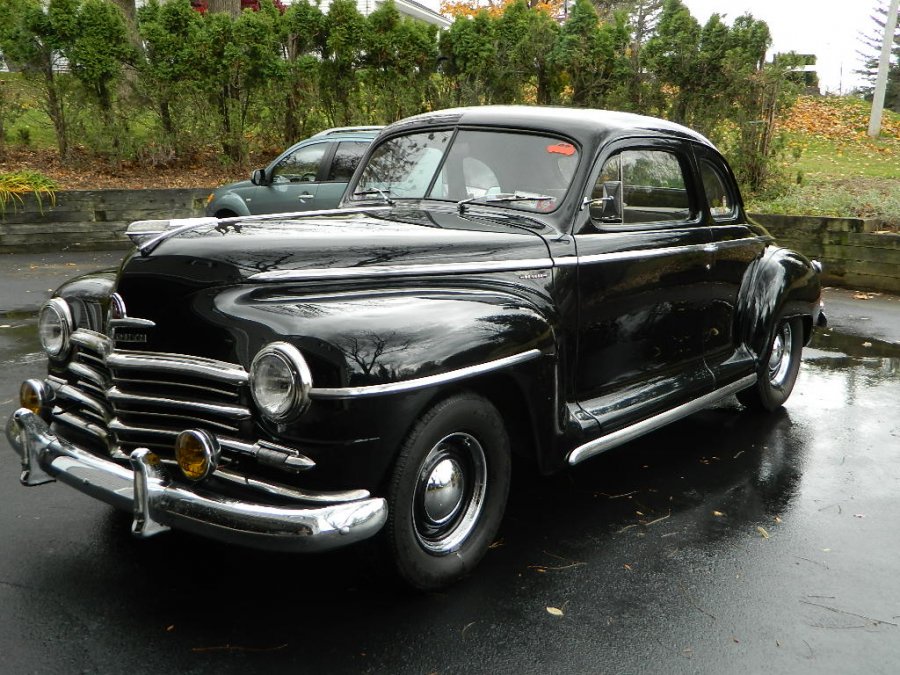
Bizzy coupes are cool. Had mine for 49 years.
 1 point
 -
Here are some turkeys in my yard. It's from mating season a couple of years ago. I took these from my living room window.

 1 point
 -
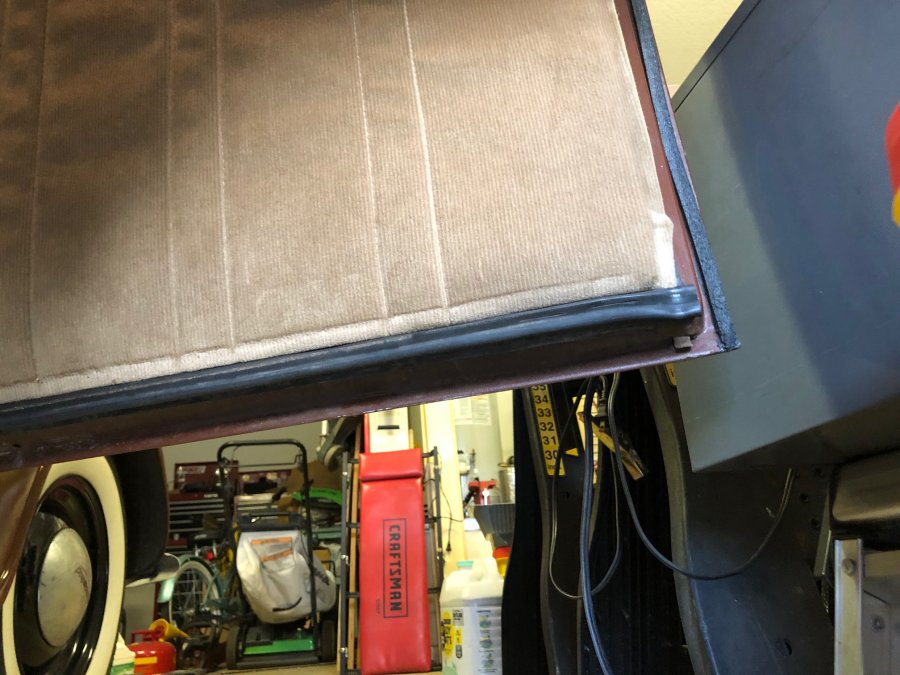
All I have is a seal along the bottom of the door panel held in place by... the door panel.
 1 point
 -
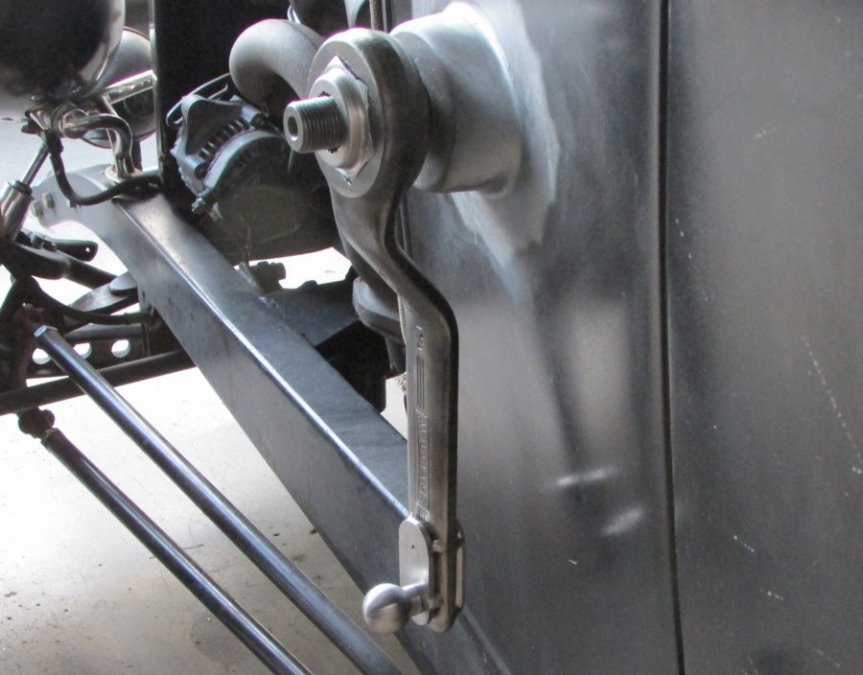
This tool has been improved and updated and can be found in this thread. Like many newbies to the P15, I'm finding the brakes to be the most frustrating aspect of an otherwise simple vehicle. The absence of a factory adjustment tool certainly adds to the uncertainty of setting up the brakes in addition to not having prior experience with the Lockheed brakes. I filed flats on the ends of the anchor bolts so they can be adjusted with the drums in place but I just wasn't confident the shoes were concentric with the drums. The tool below is one I fabricated from scrap material in the shop and it provided visual confirmation that the shoe adjustment was close to what it needed to be. This is not an original idea and many of you may already have something similar, just want to toss this out for those who are struggling with brake adjustment. The tool is just a length of .875"x.059" steel tube with some 1/4" all-thread welded to it. A short length of aluminum angle forms a pointer than can be adjusted via the nuts on the all-thread. The tube is a close fit on the 3/4" spindle. With the drum in place one minor adjustment cam was set so the toe of the shoe barely dragged. The drum was removed and the pointer on the tool adjusted so it barely touched the toe of that shoe which is a close approximation of the ID of the drum. It is then just a matter of sweeping the tool over the shoes to adjust them so they are concentric to the drum. It turns out the method I had used to adjust the anchors and cams with the drums in place was pretty close but this added visual confirmation. I don't have the rear brakes opened at the moment so can't recall if the same steel tube will work on the axle. The tool could also be built by welding the all-thread to a spare axle nut.1 point
-
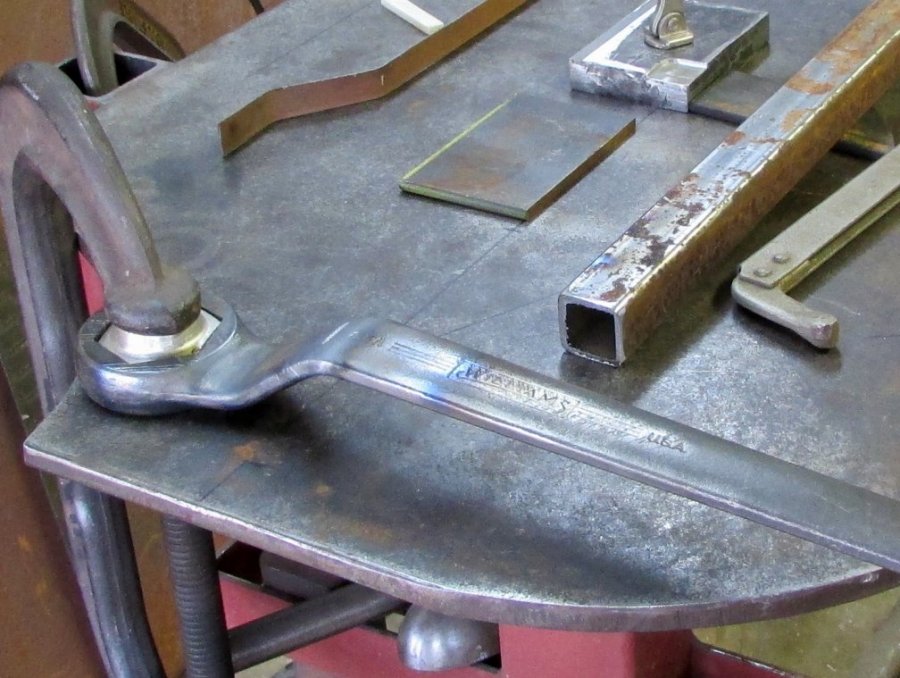
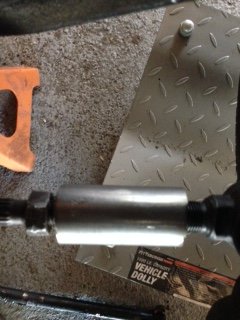
It's called a slug wrench. For tightening those huge bolts and nuts you see on bridges and light standards. Can also be used as a pitman arm.


 1 point
 -
Grandpa gave me this one. Said old cars need old tools.
 1 point
 -
My first welding rig. I slight wobble when it’s wheeling but fun to make and learn to weld
 1 point
 -
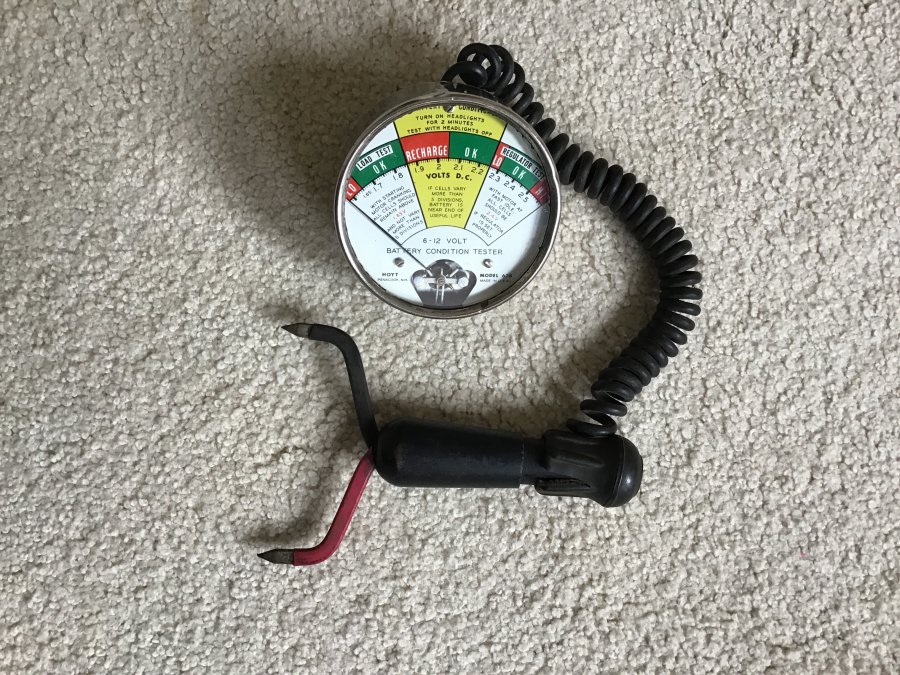
i just found this battery cell tester at a local antique shop. It is a Hoyt model 638. i can't find much about it online, but I suspect it was made in the 1960's. I will probably never use it because modern batteries do not have exposed bus bars, but it is a welcome addition to my collection of garage oddities. I already have several other old cell testers.
 1 point
 -
I have a Proto square shaft screwdriver, a Proto 1/2" to 91/16" ratcheting box end wrench, and a Proto 1 5/16" wrench. I use the screwdriver and ratcheting wrench almost daily. And an Eagle oil can (made in the USA) that I just couldn't do without. All of them do have some age to them, I think. I know I have had them since the early 60's, at least. I believe the ratcheting wrench is kinda rare...???
 1 point
 -
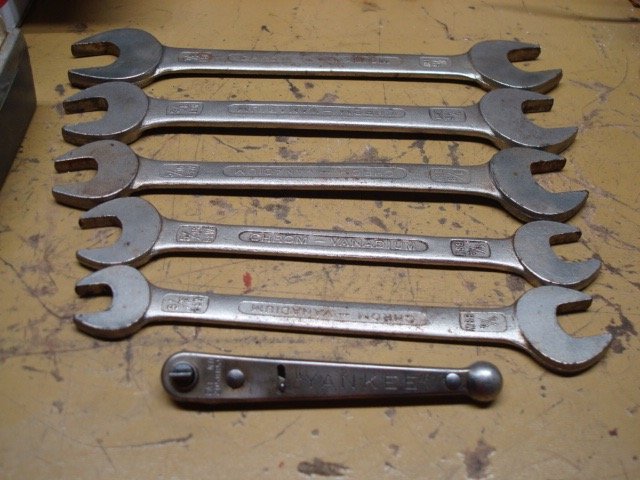
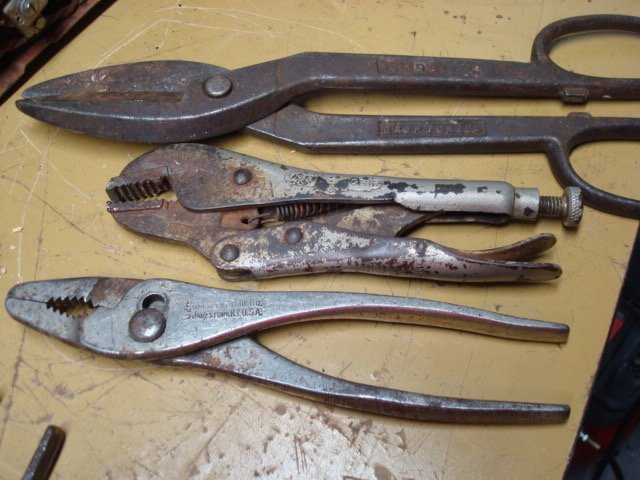
Here are my old tools. How old I do not know... 1. British Standard Whitworth wrenches, labeled "Chrom-Vanadium" - Yep, there is no "E" at the end of "Chrom"... with Yankee ratchet screwdriver. 2. "Yankee" ratchet screwdriver - North Bros. Mfg. Co., Division of Stanley Tools. I have never seen another like it.. 3. "Reese" 6 point double ended wrench, with ball ends. Unique! 4. Green colored pliers. Not labeled, but quite unusual. Anybody know if they were made for a specific use? 5. Set of 7 sockets in metal tray with hex wrench with ball detents. Sizes are not labeled on the sockets. Keystone Mfg. Co. Buffalo, N.Y. 6. Forged steel pliers, not labeled. 7. Pliers by Crescent Tool Co., Jamestown, N. Y. Model L28. 8. Vice Grip Pliers, Petersen Mfg. Co. De Witt, Nebraska. 9. Metal shears, labeled "Solid Steel" and Drop Forged", heavy duty for sure!


 1 point