Leaderboard


Popular Content
Showing content with the highest reputation on 03/02/2019 in all areas
-
My truck’s front panel was bondo molded on (maybe leaded? I never dug in to find out and who knows how long ago). With this piece installed my truck would be totally free of bondo sculptured panels and all steel. Maybe someday I’ll find a clean windshield- the 54 is a one year only piece of glass since 55 wraps around the corners more and 53 is still the split B series...
 2 points
 -
I have a Simpson Analog multimeter somewhere in the garage, I won't tell you where it came from but if you yell "Attention on Deck!" it'll pop right up.....lol.2 points
-
Some Fluke meters.....2 points
-
Eneto.........nope we had to drill the holes, the area where the bracket lined up is in front of the original brake hose brackets but was really the only spot to fit it......we started with cardboard then made one in light sheet metal then the 3/16th plate........andyd2 points
-
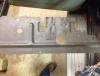
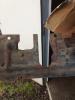
Took the car out for a short drive around town yesterday, seems to work o/k, will have a further drive around the block again this weekend and then recheck everything.........and it seems to be handling o/k...........one thing that I didn't mention was that attaching the upper mounts onto the chassis was a bit fiddly because the area where the brackets bolt on was where there was an open section of both inner and outer chassis rails it was still rather difficult to get access to the inside plates ......what i did was make 2 x 3 inch long pieces of 5/16th all thread and thread one piece onto the threaded plate about 6 turns, I then inserted this plate and long "bolt" in thru the access hole with the "bolt" protruding thru the hole in the chassis............once this was done I could grab the "Bolt" and hold the plate tight against the inside of the chassis lined up with the 2nd bolt hole then I screwed the 2nd piece of allthread into the 2nd hole..........I then had 2 pieces of allthread 3" long sticking out from the chassis......as these did not have a nut or bolt head on them I could then slide the shock brackets onto the 2 "bolts" and position the brackets against the outer side of the chassis.............I then undid one piece of allthread and inserted a 5/16th UNC bolt and tightened it........I then undid the 2nd piece of all thread and inserted the 2nd 5/16th bolt and did it up...........once the bracket was tight against the chassis I was able to hold another piece of plate against the inside top chassis edge and thread the 3rd 5/16th bolt(this 3rd bolt hole is not shown in the above pics but can be seen in this attached pic)............sounds fiddly and it was but seems to be o/k so far................andyd.
 2 points
 -
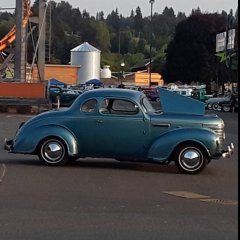
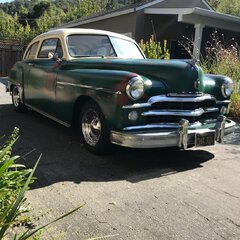
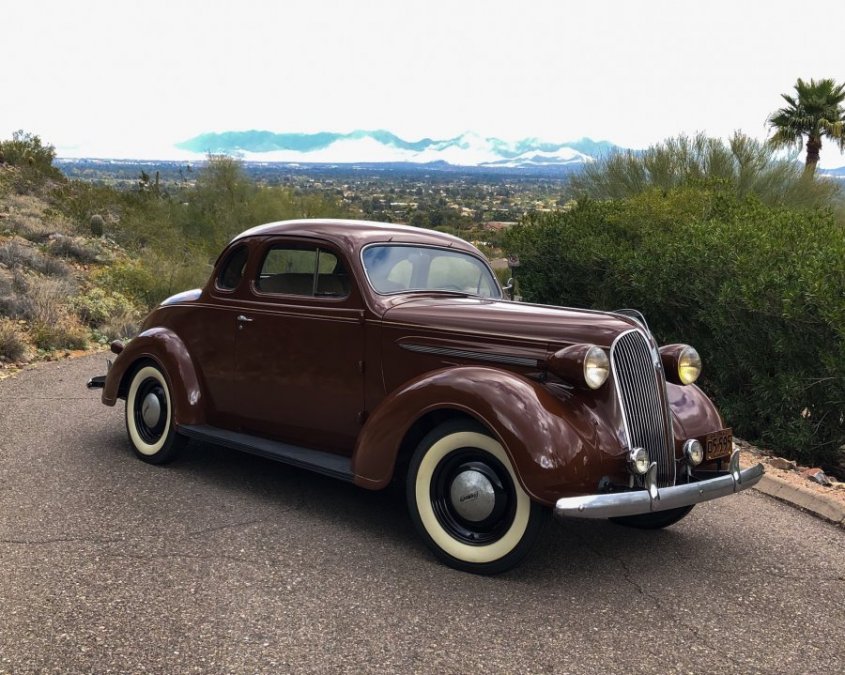
Hey everybody. I recently acquired a 1948 P15 and am really enjoying it. It's a driver with alot of great qualities including a great interior and exterior. I currently addressing a few little details prior to the local car show season startup. I've had an issue with the headlights and taillights not working so after disassembling the switch and cleaning it the lights now work. with the exception of the front left signal now flashes slowly and in unison with the right front signal. I'm sure I'll straighten that out tho. My question is regarding the toggle switch under the dash near the radio. There is no response at all when the switch is flicked. Also, there is a slide switch on the driver's door pillar between both doors that also does nothing when operated. I've searched and come to believe that the dash switch is tied to the dash lights but not too sure of the details on haw or is supposed to work. and the slide switch is a mystery to me. there is no cab light visible otherwise I would think it was for that. I'm sure everybody on this site is aware of these switches and their purpose lol but I'm in the "dark" lol. I'm thoroughly enjoying the wealth of information presented on this forum and thank the mods for opening the door for me! I've attached a pic of my car.
 1 point
 -
I have read that for a starter you can run a 6 volt one on 12 volts without harm if you don't crank a lot. Have no personal experience with it but you might want to look into it.1 point
-
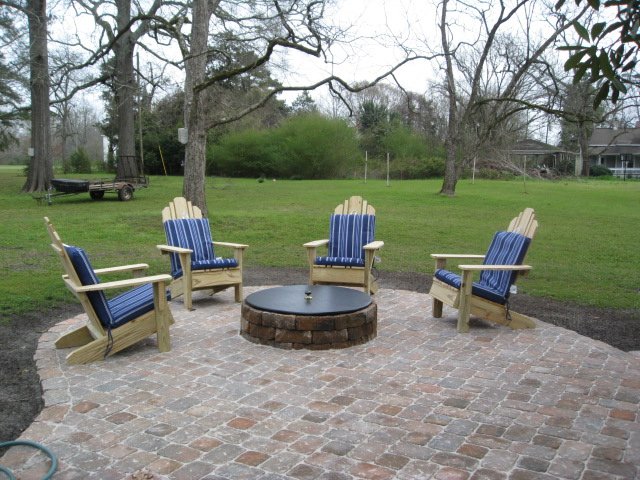
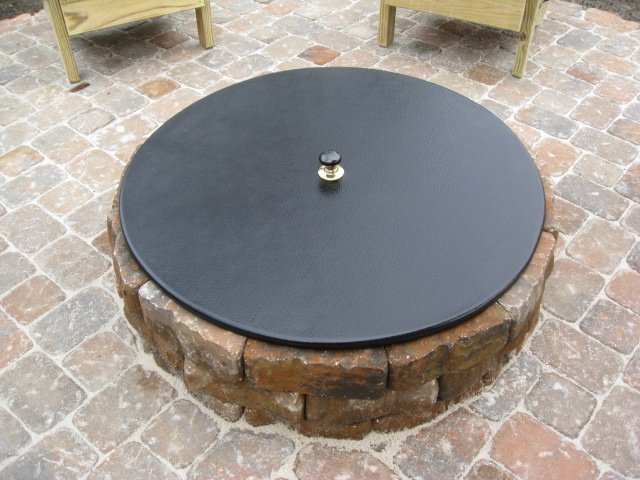
calling it done for now...... fire pit cover courtesy of a neighbor cleaning his yard......repurposed an old glass door knob for a lift handle....cleaned and painted the table top, it's made of aluminum....I like this....! Mums contribution to the project, she snagged a set of cushions for the chairs.....am thinking hamburgers tonight.....
 1 point
 -
dress out right, proper respirator and protective clothing.....use sand...best over all media for this use....the other media is more expensive and worth it in a recirculation style cabinet blaster. Most large compressor repair companies also sell sand blasting sand.....it is the better price, it is correct graded grit. You can use a tarp back drop and collect and reutilize your sand a few times....basically when it drifts away in the air...it is too small to reuse. Again, dress out....with this style blaster you will want to modify it for good clog free operation and do KEEP your air supply clean and dry. I recommend that you always cut your sand flow off at the bottom of the tank with a ball valve over use of the dead man….the dead man will allow the hose to fill with sand and spurt and clog and waste sand like nobody's business....1 point
-
Bidding ends Friday the 15th.1 point
-
Yahoo! We have gobs of marvelous heat blowing in the cab today! Oh so warm sitting here in the back seat warming up as I type this. -10C here this morning.1 point
-
it is my understanding that fresh coolant displaces oxygen to limit oxidation...the aftermarket heater in my '49 only has a manual shutoff valve, stuck in the open position...on cool days below 70, it gets the cab toasty enough I can keep the window open to give my (legal) hand signals for turning and whutnot...but on most days that it's well over 70, I am reminded just how much I don't need a heater in that truck for 6 months out of the year1 point
-
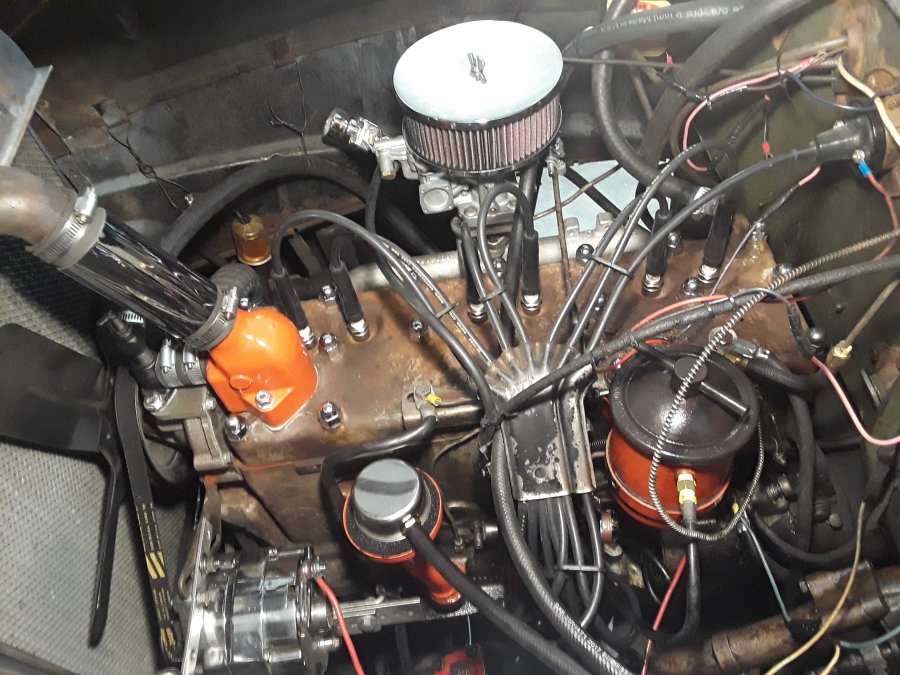
Every Jasper motor I ever came across was Green.1 point
-
After thinking about relocating the upper front shocks on my car for the past few years I bit the bullet and with a mate recently relocated the upper shock mount on my Oz 1940 Dodge, this car uses the 1940 Plymouth chassis and wheelbase.......my car is a hotrod, using vented front discs and an Austin 1800 narrowed 9" rack & pinion so none of those things will be much help to those in the USA however we used Monro Matic shock absorbers that had the following numbers on them........PK14 and 1009, these shocks had an extended length of 12 & 1/2 inches and a compressed length of 8 & 1/2 inches....they are VERY short shock absorbers and use the large rubber eyes at each end.........the front end of this car uses 1955/56 Ford coil springs with one coil removed and we were able to make upper shock mounts from 3/16th plate that wrapped around the top edge of the chassis with a pair of brackets of the same 3/16th material projecting out between which the upper shock eye fitted..........the upper mounts were bolted to the chassis using 5/16th x 3/4" long high tensile UNC bolts, the bolts screwing into short plates with welded nuts inserted via an access hole against the rear of the outside and upper chassis rail..............I also replaced the heim jointed front sway bar links that had worn excessively with new greaseable heim joints and replaced both upper & lower rebound rubbers.............the attached pics hopefully may help others, my original intention was to use a pair of Dodge pickup truck front shock mount brackets however as the Munro shocks were available they allowed the manufacture of shorter bracketry...............and the blue noellothane sway bar bushes shown in some pics were replaced with better fitting pieces................I haven't had the opportunity to take the car out for a drive as yet as I have a few other jobs being done at the same time and am awaiting the return of some parts from the chrome platers, the steering wheel collapseable section being the main piece........hopefully in a week or two............happy to answer any questions if any.........Andy Douglas.


 1 point
 -
Here is a pair of dead blow hammers.1 point
-
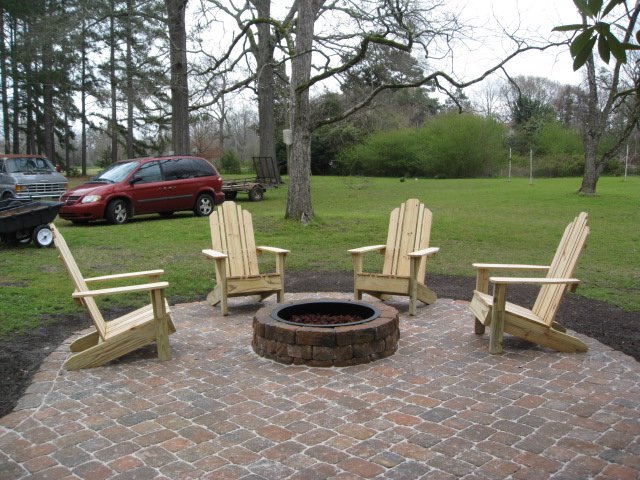
well, I got my chairs made.....though not shown I have a round metal cover for the fire pit opening that I am going to paint black and install a lifting handle onto.... I am almost to the point to return to the garage for a bit of work....
 1 point
 -
When I had my battery cables made I specified a 00 lug that went to a starter mounting bolt, and a pair of size 2 jumpers that went to a bolt on the frame and another bolt on the body. Guaranteed to have ground paths! Marty1 point
-
I have a chrome 6 volt positive ground on mine. Bought bracket and alternator at www.qualitypowerauto.com. Alternator Part #71276V with 5/8" pulley Bracket Part #GB-1 The chrome one is $185 but the non-chrome is $135. Bracket was $45
 1 point
 -
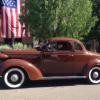
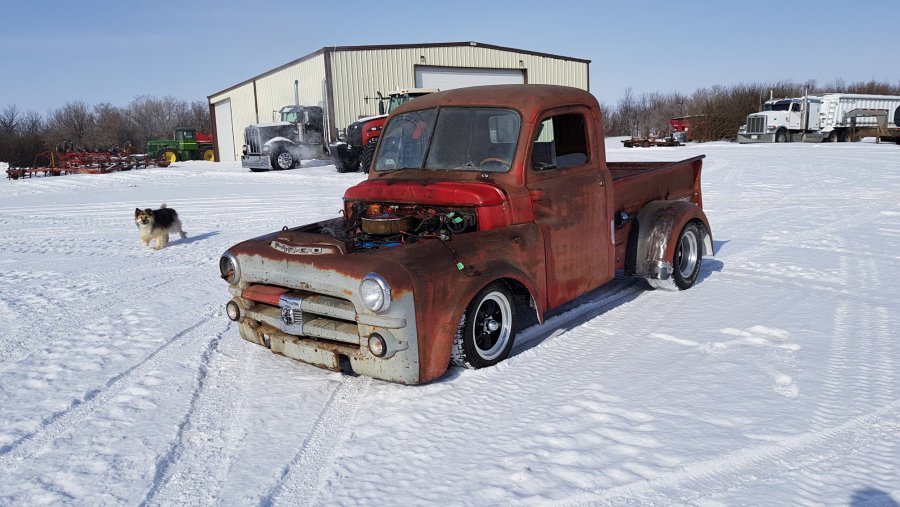
It is low but that pic makes it look like it's on the ground, there's about 4" clearance actually. But still, I gotta put a little larger tire on the front, it's too low.1 point
-
he set up an R&P on a non power steering vehicle. is that possible? not sure how that would work. but sounds great. the power steering idea I have thought about, talked to a shop and they saiad they can do it, but never called back with a price. at this point, I just want the stock steering to work before I go modifying things like crazy otherwise, I might as well full customer the whole dang car. so the steering was not bad, it just needs to be adjusted and I am not the best at figuring that out. we tried to adjust it but there was no room to adjust. guess I will be sending it back in next week for the 3rd rebuild. shitty situation, should have just left it alone.1 point
-
I read that it is good to raise the front end in the air slightly...ramps?....in order to let the air escape easier.....the radiator cap is already the highest point but this makes it burp easier like a drain/waste vent system in your house, leaving room in the system for the coolant to force the air to the top of the passages and ultimately out of the radiator neck. It couldn't hurt.1 point
-
It's drivable! Little more to do yet I just had to beat radar to the punch! Haha
 1 point
 -
Jocko; I don't remember if mine has those slits. I don't think they would have much effect on the system though. Could even be there as a sort of "Freeze" protection for the system? I have another manual shut off valve on top of the water pump housing so the system can be isolated during the hot months. The whole things looks and functions period and for most of us that is good enough. Jeff1 point
-
Imperial supplies .com has 12 volt with pictures. A 53 is -1 candle, 67- 4 candle 89- 6 candle. The larger 12 volt miniature bulbs are 57 and 1895. Mac's auto also has 6 and 12 volt bulbs, with a picture. I hope that helps you 5027 Steve. I've never seen a 6v to 12v chart, just 6v replacements or 12v replacements, ptwothree. I'd use the 53 in the high beam indicator, so it isn't to bright. If these numbers work for you. This information is in the downloads section also.1 point
-
I looked they sell stock type and ARP studs, washers and nuts. Arp make the highest quality bolts,studs, etc on the automobile market yet not too high $$. JMO. You will find Arp products at Summit Racing and others for less $$, maybe?? Worth a look?? https://arp-bolts.com/kits/Product.php?PL=29 DJ1 point
-
am at a stopping point...got a bit other work to do about the house....cut out the Adirondack chairs and sanded the pieces today for 4 chairs. Looks a bit different with the sand in the cracks and the birdbath addition. Walkway to the fountain and other steps later.....also planted a bit of grass seed on the apron today.
 1 point
 -
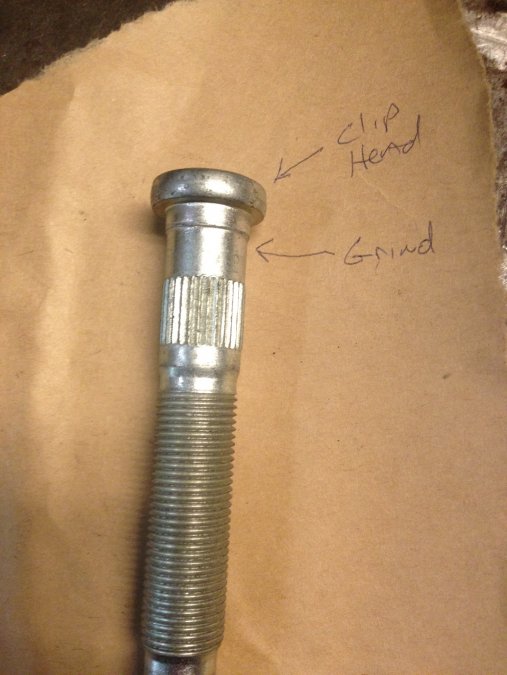
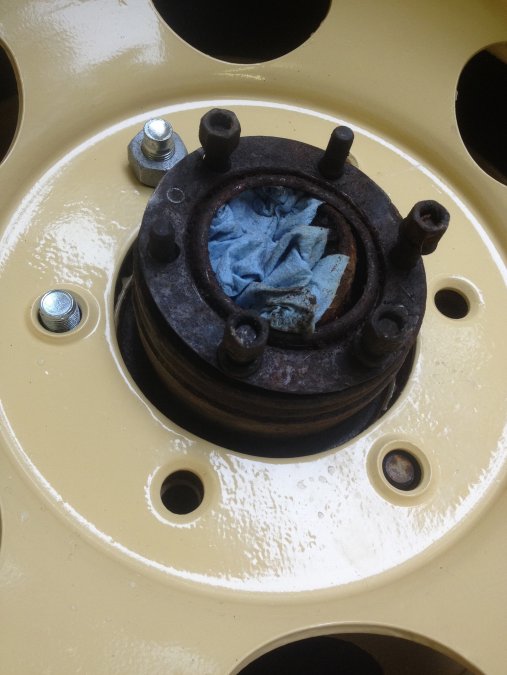
my one ton were/are 5/8" studs just to make it more confusing, (cause that's what I do ) I replaced my bias tires with radials and needed the longer 2-1/2" studs in the rear. (found at my local "ma & pops" auto parts) (5 o'clock = original stud, 9 o'clock =2" stud, 11 o'clock = 2-1/2" stud) I looked for 2-1/2" reverse threads and didn't find any at the time. so I just clipped the heads like Mike mentioned and ground down the "nubbin" (shhh, don't tell anyone)
 1 point
 -
Most rebuilders attached a tag to the block. Two small drilled holes with drive rivets to hold the metal tag. It had the over/under sized for bearings and bore as well as ID of the builder. I've never encountered a altered factory id pad. As a matter of fact, that was (maybe still is) illegal in some states as that number was used to register and title vehicles. There is a special identification used for industrial and farm usage engines. I've seen several for irrigation pumps, combines, airport tugs and even tractors.1 point
-
Took a drive over to Scottsdale for the afternoon. Car is running fine... Needing shocks though...
 1 point
 -
Ok Keven I we’ll keep my Eye open for some instruments and speedo what’s the dead line for getting them to ya.? It’s a little muddy out there in the wrecking yards right now.1 point
-
Thanks Mark! I finding some people buy these trucks and they're missing speedo's and gauges.1 point
-
I’ll bid $1001 point
-
I got a couple of speedo's I could donate to the cause as well....and an instrument cluster...1 point
-
I drive mine all the time, I can't say daily but an average of 2 days per week, rain or shine. I have about $8K in it not including bartering and trading stuff, it never sees the garage and 50% of the time it lives on the street. Mostly stock flathead except for a head shave and intake/exhaust mods. It is my daily when one of my kids come home from college and I loose my pick up and I commute 70 miles per day in San Francisco Bay Area traffic. This is usually all summer long and a month at Christmas + 1-2 days per week when I just want to drive it. Your list looks sound and is basically what I did, couple of comments/suggestions on your list: --Disc brakes/dual pot MC - I used Rusty Hope's kit and was very pleased but there is some drilling and tapping involved, still have the single pot MC --Electronic ignition - DO YOUR HOMEWORK! If you're upgrading to 12v, there are choices out there, some are MUCH more reliable than others! --Electric wipers/maybe one of those Vintage Air setups for heat/AC - I still have my vacuum wipers but I use a vacuum reservoir, no more issues. --12-volt conversion (if necessary/really helpful) - YES, I kept the 6v for a year to "keep the faith" but I ran into issues stuck with long idling periods with heater fan and headlights on (traffic) --Radials --Shoulder belts Adam
 1 point
 -
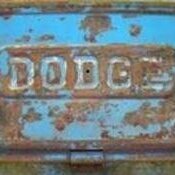
Thanks for asking about this Barry, i have the same part. i thought it was something sombody made up but it looks the same I also picked up another panel from Keven a couple weeks ago and it had the same screw holes but no blank
 1 point
 -
I bought this one a couple of weeks ago from the local NAPA auto parts store for my 38 bizzy coupe. They have a seperate truck department in the rear with some old timers manning the counter. The hose bib handle makes it easy to open and close unlike those little wing nut type.1 point