Leaderboard


Popular Content
Showing content with the highest reputation on 08/08/2018 in all areas
-
Made it today on my breaks at work. Its 3”x2” about 20” long. 1/8” wall. Had square plates welded on the end and I ground it down and rounded he corners to match the tubing. Milled ‘fins’ on all sides and the holes line up with the carb mount on the header.4 points
-
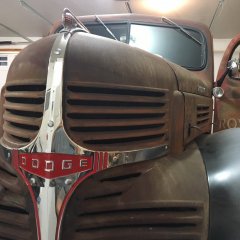
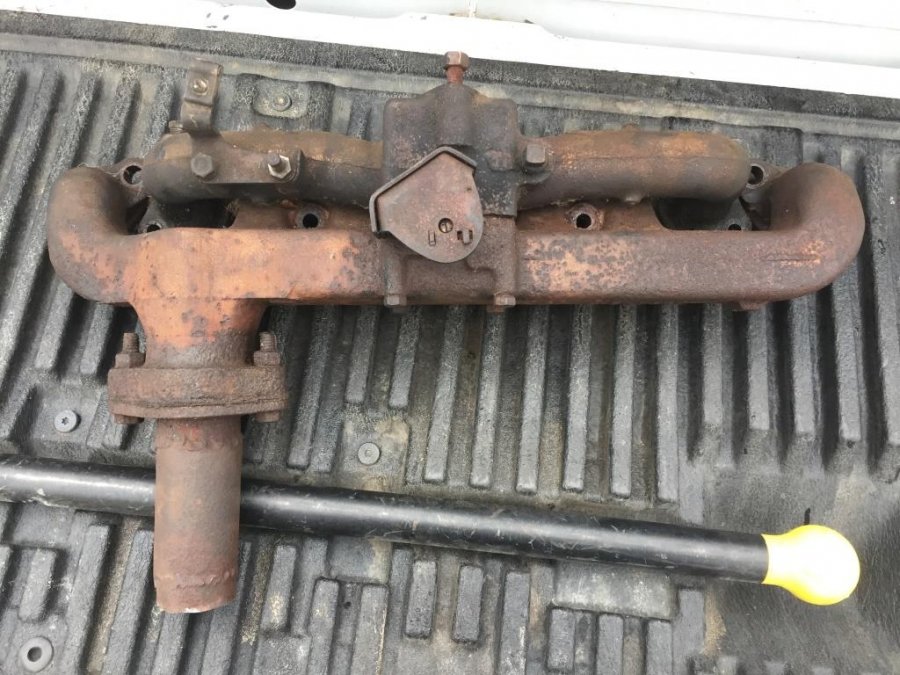
Hello all. Been working making the old girl breath. While the head is out getting milled down 0.060” I been tackling the and intake and exhaust. Here’s some pictures!
 3 points
 -
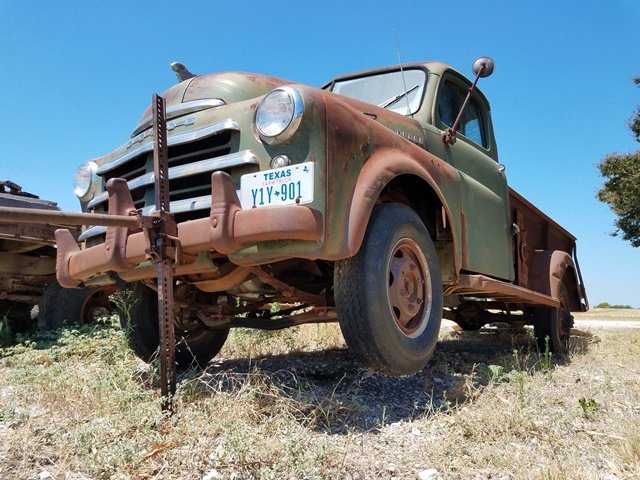
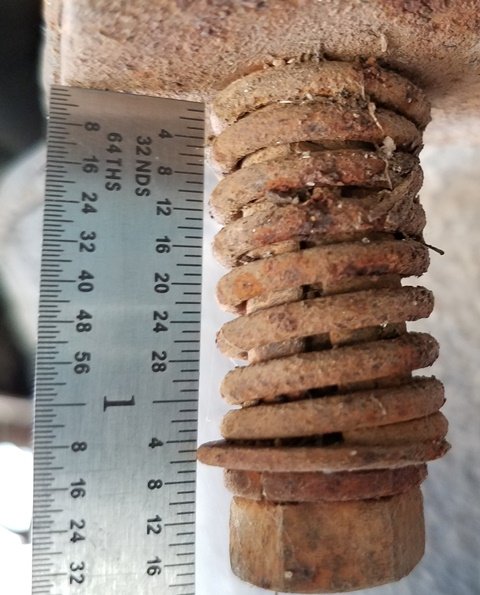
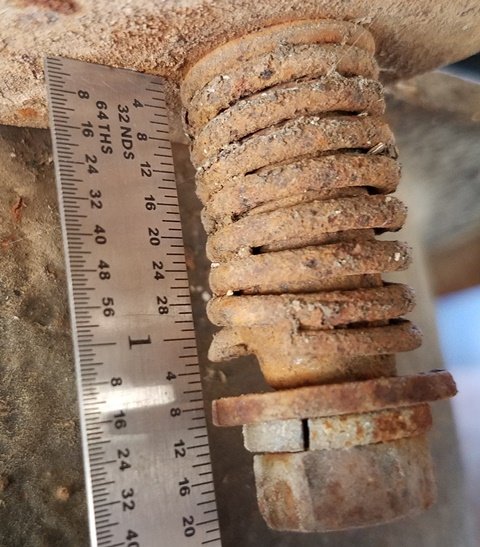
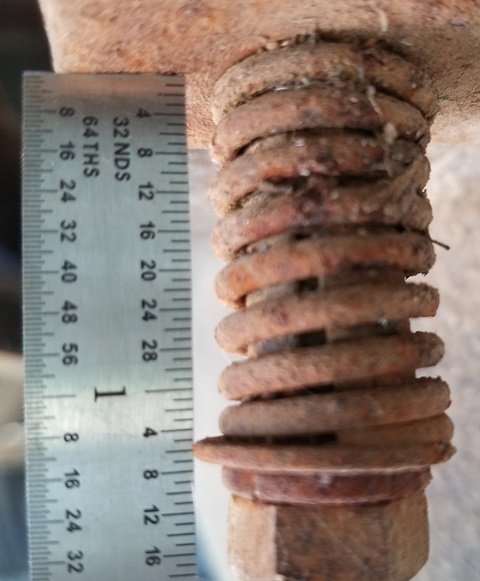
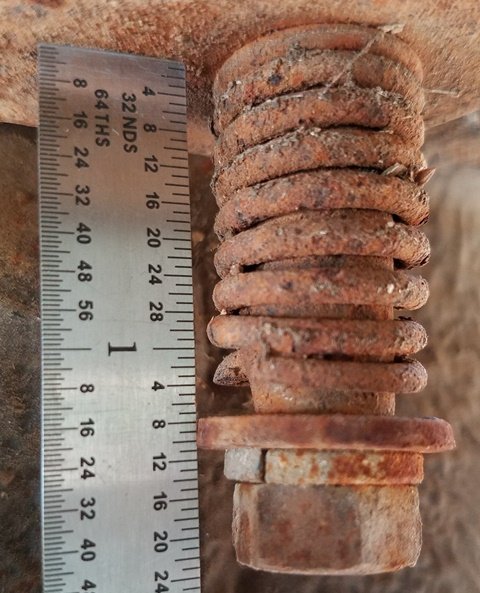
I took a break to test the frame on the 1-ton, just to see if those springs on the fuel tank moved as much as some folks think. So I oiled up the tractor jack and eased up the beast high enough on one frame rail to just pick the opposite side front tire off the ground. The bumper measured to be 25" at the driver frame rail and 22" at the passenger frame rail. The rear axle was firmly planted. I then measured the tank mounting springs as shown: I then lowered the truck carefully to the ground...by the 4th downstroke, the jack leaned over and sat the truck firmly on the ground a tire width south of where it had started...WEEEEE DOGGIES...this put the bumper about 16" above the ground. I then measured the tank springs again: After I took these measurements, I kinda wondered if the rear bolts were canting over as the frame rails were no longer on the same plane. But that angle is small enough that I do not have an accurate way to measure this movement. At any rate, the Dodge Truck engineers put these springs on here for a reason, so keeping them in place is a safe bet
 3 points
 -
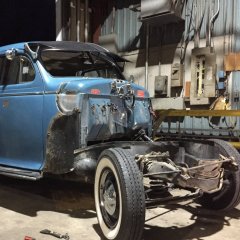
Just started working on this...
 2 points
 -
Just another day on the forum.....?
 2 points
 -
So I have not posted in a long time. I was busy with daily driver repairs for customers, the wife getting a new hip and working like crazy to get the Suburban ready for its first long road trip. We made the trip to the Street Rod Nationals in Louisville Ky. The throttle cable broke on the way down and luckily we found a small garage to help us out with the repair. Fifty bucks later we were on the road again. We entered the car into Mopar Country and were picked with five other cars for their award. Here is a picture of the car on the floor at the award ceremony. We were thrilled!
 2 points
 -
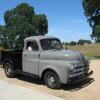
Well I KNOW there is a thread on Pilot House trucks and survival of them, but since we've expanded to beyond JUST PH trucks I figured a thread for NON PH trucks may be in order. After the dentist today I stopped for lunch and found this in the parking lot:1 point
-
Finally have the new aluminum radiator painted (around the edges) -- left the core unpainted. Have it installed and hoses attached. Replaced the top hose with one about an inch longer than the old hose.....reused the bottom hose. Used the ridged hose because the angle of the neck on the tank was still not quite in line with the neck on the engine. Tried a smooth hose and the only preformed angle hose I could find kinked too much. This ribbed hose is tough stuff and will bend a bit without kinking. I know some fellows on here do not favor the ribbed hose as it was not an original style. But....sometimes you gotta do different stuff. Have not driven the car yet to see how it performs on the heat gauge. Will have to do that in a few days. I did notice my fan is farther away from the back side of the new radiator......on the old one you could just barely insert a finger between the two. Now you can insert a couple fingers between. I guess this new unit is a bit thinner. I had to purchase an overflow hose at a local auto supply.......it was a pre packaged thing about 36 inches long.... which is just right.....but it was very flexible.......so I had to make a couple guides to run it thru to keep it in place. Even though the manufacturer sends a 14 pound pressure cap with the rad, Mr. Coatney advised me to replace it with a 4 pound cap from NAPA........which I did. They had to order from the warehouse and it arrived the next day. I covered the cap with my lovely chrome Cal Custom dressup cover. Have had it a long time.....looked for another on eBay and discovered one just like it for sale for $99.99 opening bid. Sure didn't realize they had gotten that valuable.1 point
-
I have spacers in between the aluminum plenum to support the tube and not get crushed when I use bolts1 point
-
Makes sense to me. I'm typically a classic rock guy, but when I'm cruising around in the Ol' Dodge I like to tune into '50's music.1 point
-
Shite............lol..............YOU get the prize big time...........lol..............I am impressed.............and am rather speechless actually.....wow!!.................lol................andyd1 point
-
Yes! I love that thing. Can we put at least one or two Pink Floyd tunes in it? 48Dark side of the Moon....1 point
-
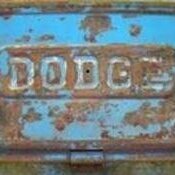
Recently I put a wanted add for park lite bezzles with no luck.while on line I found some crome bezzles for 20 bucks each. I ordered two to see what they would be. I put them on my truck and I like them.if anyone needs any I ordered them from dcm classics. they have a lot of stuff for our old trucks . check em out.1 point
-
50-51 Jeep truck and Jeepster bezels are the same as the 48-50 Dodge trucks only chrome. He also sells new glass lenses. https://www.kaiserwillys.com/nsearch/?q=parking light#/?keywords=parking+light&search_return=all&page=21 point
-
We need you to be safe and be able to entertain us for a long time!1 point
-
My '56 C-3B needed new rear drums, one having been welded by a previous owner and consequently cracked. Anyone who's ever tried to find drums for a C series will know that they're rarer than hens' teeth, and there isn't a direct substitute. I've come up with a solution that might help. After much measuring of my old drums and digging around online, I found a drum intended for the rear of a '59 Chevy Impala (and possibly a few other vehicles besides), which had broadly similar dimensions and, with some machining, could be adapted to fit. The drums are a Centric 123.62000, which cost a mere £20/$26 a piece from Rock Auto. (Shipping to the UK and import charges were another matter...!) They have a slightly too small centre bore, the bolt circle is 4.75" rather than the 4.5" of the Dodge, and the drum is a little too deep - only by maybe 1/8" or thereabouts. But crucially, they have the correct 11" internal diameter. I took these drums, plus an old drum and hub for use as a template (separated by drilling the rivets out) along to a local machine shop, who slotted the bolt holes, enlarged the centre bore and trimmed the back edge of the drums for me at a cost of £100 (about $130). I also replaced the old wheel bolts with M14 studs, which are knocked into the hub. The drum now slips on to the hub and is clamped in place by the wheel studs, as on a lot of more modern vehicles. End result was a pair of drums that fit perfectly over my rear brakes, which I fully refurbished while the drums were at the machine shop - new shoes, new cylinders, all the fittings thoroughly cleaned, and the backplates cleaned and painted. Once I've finished replacing all the brake lines with cupronickel ones, I'll be able to tell you how well they work! https://www.rockauto.com/en/parts/centric,12362000,drum,1744
 1 point
 -
Back in the early 80’s I had a Dodge Charger and I bought magnesium wheels for it. They were actually slotted like that so you could use it on different makes. Loosened up the first time but once I torqued them probably they stayed tight. They self center themselves, I don’t see that being a problem.1 point
-
Well here it is fully roadworthy now. I've got to get used to drum brakes and the steering is quite worn but it is a lovely old thing. The Peugeot turbo diesel sounds like a taxi but I can put up with that for the improved fuel consumption. Mike has done a great job as always.
 1 point
 -
This past Sunday i attended the Macungie,PA car show which that been running for approximately 50 years. Sunday is car club day and the local chapter of the national Desoto club has there annual meeting and we also gather together to show off the Desoto brand. the Blue Coupe that is seen in the background on the last photo is a 1938 Desoto I have posted several of the pictures that a local newspaper reporter took of several of our Desotos. This show is a 2 day event and hosts approximately 1100 cars on saturday and Sunday. A great day in the community park with entertainment and lots of crafts for the women and a great day for the family with children. The show is held every August and is also known as the Das Awskt Fest or the August festival. This isa pre-registration car show so no day of show registration. If you are ever in the area around Allentown PA come to the show. Next Years feature cars will be Chrysler's and the main tent will be showing Chrysler's, Desoto, Dodge and Plymouth and Dodge trucks should be a very interesting show next year. If anyone wants registration information I can send them the info Rich Hartung Desoto1939@aol.com1 point
-
I found this gas pump last winter from a pub that went out of business, the outside was finished but had no face and was gutted. It was missing a handle and hose as well. So there it sat...looking at me for help. I came up with an idea to repurpose it as a jukebox. I built a new computer for it from scratch and bought both a touch screen monitor and real jukebox software. It took me about a month or so to build it in my spare time. I absolutely love it, the garage is my man cave. I have over a thousand songs on it and it can stream via wifi, so you can listen to just about anything.
 1 point
 -
Here's what lies behind those drums. Much nicer than the rusty, half-complete, seized, leaky and generally broken brakes that the truck arrived with.
 1 point
 -
As Merle said the hose should not be restricted. I have no issue with the 180 degree thermostat but I also have a new 3 core aluminum radiator that is much more efficient than the original radiator. If you have not yet done so I suggest you remove the water distribution tube and clean or replace it. Also remove all the freeze plugs and flush out the block.1 point
-
I love my Pilot House friends!!!! Todd hooked me up yesterday. But knowing that Tim was waiting in the wings to back him up was awesome. I was expecting a little work, after work, to get a manifold off one of Todd's "yard art" trucks. But before I could even get out of work I got a text from Todd that he had it off already. ? So after supper I took a drive up by him (just under an hour from my house to his) to pick it up. We chatted for a while, and he showed me his newly acquired '67 Buick Skylark convertible. (Very Nice!) On the way home I stopped at Fleet Farm for a can of high temp paint (Aluminum color) and a couple other items. (can anyone in the upper Midwest go to Fleet Farm for just one item?) My Mother is visiting this week, so I probably won't get much garage time until the weekend, but I'm hoping to at least clean it up and give it a coat of paint before the swap on Saturday.
 1 point
 -
a friend of mine recently built this. if you decide to use lake pipes, it's imperative to lower the car as much as possible to make it look good, imho. i think his car is gorgeous, but surely some might disagree.1 point
-
I got mine from greybeard....he was a character1 point
-
I just got a drag link from DCM Classics. They are having them made with tie rod ends instead of fixed ball joints. This makes them adjustable. I just installed it this past weekend, making it 1/4" shorter than the original one to offset the Rusty Hope disc brake bracket, to center up my steering wheel.1 point
-
Nice car! I'm pretty partial to the 40 sedans myself. Were any modifications made to the suspension?
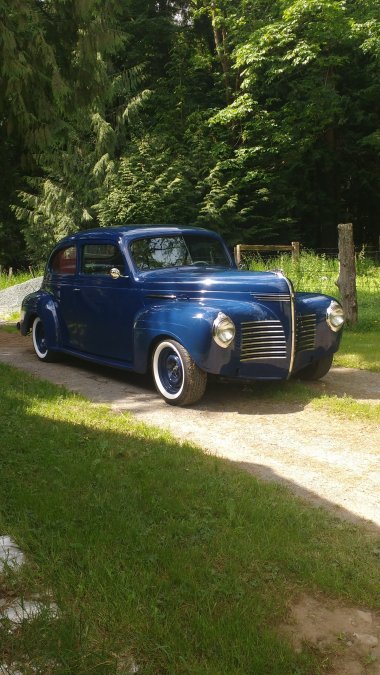 1 point
 -
Okay now I think its just mess with the new kid on the block time -- the 47 dash photos look more like min ethane the 42 dash photos. How do you tell the difference? My dad just told me to go to DTW and ask for a yard of flight line too tie down the bows on the headliner -- is he just messing with me too?1 point
-
Labeling and bagging in small sections as we go
 1 point
 -
Well to muddy this up a bit.......the opening through the floor in mine clearly had 4 holes around it which looked like they were made at the factory. I just reused them when I made my cover plate from 1/8" aluminum. I made a gasket from inner tube material and the whole thing is as close to watertight as is possible. The advantage of doing it this way....above the floor .... is that any moisture which might make its way to the top of the tank is not trapped in this location by a thick piece of rubber,etc. Having replaced a few below deck fuel tanks in boats......the worst external corrosion is always found where they are supported or restrained by thick rubber, etc.. pads. Jeff1 point
-
good info Ed, i love learning the little differences in these vehicles. i really love showing off to my wife what i think i know, often she is not impressed0 points