Leaderboard


Popular Content
Showing content with the highest reputation on 07/25/2018 in all areas
-
Factory ground to the transmission is prone to increased impedance as bolt and tapped threads corrode over time, as the voltage path to ground passes thru more mechanical attachments. My generator / starter guy suggested grounding the battery at a starter mounting bolt, as the starter has the most current draw...this should improve cranking and reduce impedance as the chassis ground is placed closer to the current load.2 points
-
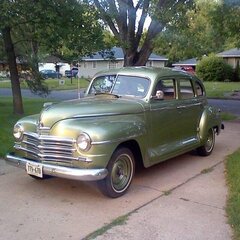
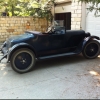
Hi John, Nice truck. I appreciate the blackwall tires. Very few if any were ordered with whitewalls. After all, these were working trucks, not commuter or show vehicles. Whitewalls on old pickups have never looked "correct" to me, and I don't have them on my '38 Dodge Brothers pickup. I once had to shift tires between my '39 Plymouth (whitewalls) and the blackwalls on the '38 pickup (both are 16/600). I changed back as soon as I could. To me whitewalls on an old pickup are equivalent to seeing spiked high heels on a defensive tackle. My 2 cents, Pete2 points
-
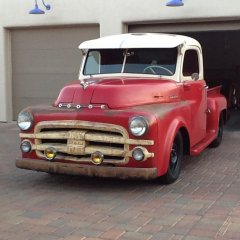
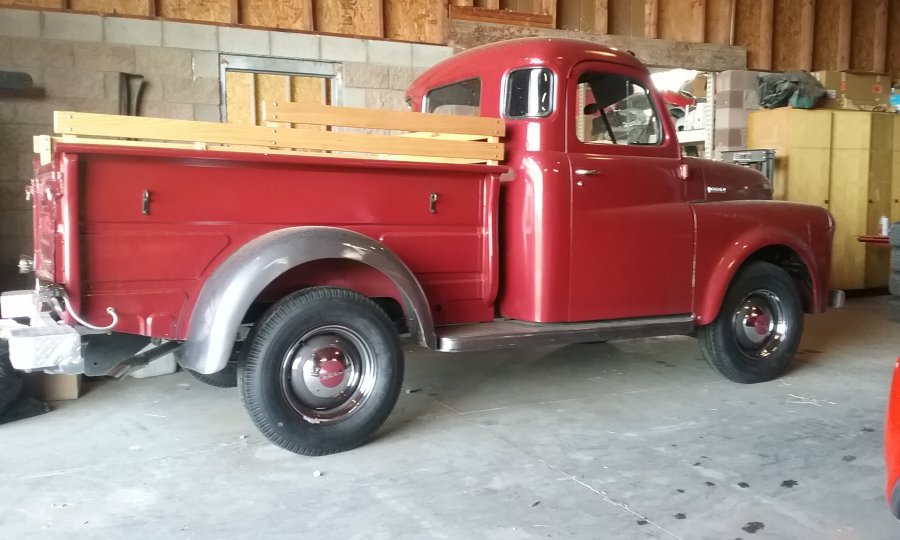
There's something to be said about the original set of wheels. Even though the mags had a modern look, it still wasn't quite right in my opinion. I finally broke down and ordered the hub caps, beauty rings, and tires. I painted the wheels the same as the running boards and here you have it. So here is my truck back to original form with the exclusion of metallic paint and my preferred paint scheme. At some point I will look for a set of tires to fit my 15" X 6" mag rims that have the same diameter or close as the 6.50-16's.

 1 point
 -
Hey it is only about 14 hrs. of My time! ? I only use powered boats! Not my power! ?1 point
-
Yes, ground to the engine. It is preferable NOT to ground under a bolt that is used to hold or assemble a subassembly. The cable/strap acts as a soft washer under the bolt head which is a no-no.1 point
-
Did you install the oil pan and valve cover gaskets or did the rebuilder ? The pan cork end gaskets are supposed to be left about an 1/8 inch long on each corner. I did mine that way and zero leaks.1 point
-
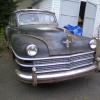
Welcome, my first car is a 48 Plymouth 4-door Special Deluxe, the one on the left. Unlike yours mine was only 20-years-old when my mother bought it in 1968. Trust me you don't need to make your car "BREAK" it will do that all by itself. You want to stop your car with brakes. With all the information and advice here you will also get sarcasm and wit. My car sat for 25 years while I was in the ARMY. First I got the engine running, you got that. I rebuilt the original brakes, I don't think Disc kits were available 25 years ago. Then I just worked on the car one system at a time. Invest in a service manual and a parts catalog. https://www.ebay.com/itm/Factory-Service-Manual-for-1946-1954-Plymouth/321982621366?fits=Year%3A1948|Make%3APlymouth&hash=item4af7a8e6b6%3Ag%3AkNIAAOSwcwhVKei4&_sacat=6000&_nkw=1948+plymouth+manual&_from=R40&rt=nc&LH_TitleDesc=0|0 good luck1 point
-
The pin you are trying to get out is not threaded. It’s just held in but the cross bolt that is already removed in your picture. Might try some heat or an air hammer if it is that stuck.1 point
-
Per Google, two spellings for "tinker's dam", or "-damn". "Tinker's-dam: a wall of dough raised around a place which a plumber desires to flood with a coat of solder. The material can be but once used; being consequently thrown away as worthless". -or no damn good.1 point
-
You know what they say, practice makes perfect! LOL1 point
-
Sitting there after being serviced was - a 1950 Desoto. 1 family car, originally bought by his Grandmother.

 1 point
 -
A lawyer. For somebody who supposedly passed the bar, he couldn't spell worth a tinkers damn.1 point
-
There is no secret here. A link to the seller is in the first post. The individuals name is not needed. The business name was also in post #171 point
-
I was scrounging around on our computer, as I recalled having saved some information on this very subject. Here it is: the studs from Jegs, part# 718-823,. ½''-20 x 1½" (UNF) .615'' Knurl. Use a 39/64" drill bit. Be very careful when drilling, as when (not “if” . . .) the bit grabs the hole in the drum, it’ll either spin the drum (if it’s not secured in some manner), or twist the drill right out of your hands (not good either). Use a good cutting-oil, not just motor oil. Patience and perseverance = success. Regards to you . . . PS—Doorman # 610-258.1 97001.1 wheel stud work, but may be abit short with original wheels (the lug studs may not reach all the way thru the lug nuts . . .).1 point
-
Carter B&B Problems & Solutions Carter B&B, BBR Carburetor Problems & Solutions Below you will find questions that users have asked about the Rochester 1 barrel carburetor. The questions are followed by our best guess answer. We say best guess, because we don't have the carburetor in front of us and users often leave out important information. Engine Only Runs When Choked I bought a rebuild kit from you almost a month ago. after rebuilding my Carburetor i can only get the engine to run with the carburetor on full choke. I have tried adjusting the idle set screw, but it does not make a noticeable difference. I watched your video on BBR carbs and followed the instructions carefully. What can i check or do to make it work again? This is an indication of one of two things. 1 - There is too much air, possibly caused by a vacuum leak. Using a spray carburetor cleaner (be sure you get the straw that connect to the spray nozzle), spray around the throttle body, both where it mounts and where the throttle body connects to the float bowl. If the RPM changes, then you found a vacuum leak. Check other possible connections for a vacuum leak. The intake manifold is one of these. If the problem is new since you did the rebuild, then you could probably concentrate on the carburetor. Most of the kits have multiple throttle body gaskets and it would be easy to install the wrong gasket. This is a common mistake I have made more than once. Carefully inspect to make sure air isn't being allowed to enter the carburetor at that point. 2 - There isn't enough fuel. Recheck the float level. Make sure the needle isn't sticking closed. Cleaning the viton tip with mineral spirits can help with this. Poor fuel pump pressure could also be the cause. Test the pressure and compare with what is printed in your engine manual. I don't know what is should be and would have to refer to a manual myself. Look for any restrictions in the fuel line. Where there is rubber line, replace with high quality fuel injection hose. Ethanol will eat the inside of any rubber line. Did you run thin wire down all passages. Ethanol leaves residue behind that cleaners can't get out. Gas Leaks Out Throttle Shaft This situation probably indicates that the carburetor is flooding (too much fuel). Excess gas runs down the carburetor throat, hits the throttle valve and runs out the throttle shaft. This does not necessarily indicate that the throttle shaft needs to be bushed. It does indicate that the carburetor is putting out too much gas. Probably dirty and needs cleaning. Can I get main jets? Main jets are no longer being produced that we know of. Your solution to different jet sizes are to drill the existing hole to a larger size, or if you need to reduce the size solder the hole shut and drill out to a smaller size. Not the perfect solution, but does work. Excessive Fuel in the Bore You are probably flooding (getting too much fuel in the bowl). Test the fuel pump to be sure it isn't putting out too much pressure. Check your motors manual for the specification, but probably around 4 lbs. Make sure the needle & seat has the gasket installed and that it isn't damaged in some way. Make sure the old needle & seat gasket is removed. Any problem with the gasket would allow fuel to flow around the seat. Test the brass float - heat up water and immerse the float. Any bubbles indicates a leak. Make sure the float isn't sticking when moving it up and down. A worn float pin would do this. The needle may have been damaged when installing. They are easily damaged. With the float up and the needle closed see if you can blow through the needle & seat. Look at the needle to see if there are any marks on the needle.1 point
-
This be the stuff.
 1 point
 -
Brings back memories. In 1957 our family drove a 1950 DeSoto from Illinois to Fort Dix, NJ to see my brother enlisted there. Farthest away from home I'd ever been at about 15 years old. Still remember how smooth that old car was. Actually only 7 years old at the time. Highlight for me was going through the tunnels in PA on the PA turnpike. Not much in the way of Interstates then. Just learned yesterday that two of those tunnels were abandoned in 1968. Rays Tunnel and Sideling Hill Tunnel.. https://www.youtube.com/watch?v=7s4c0CkCPng1 point
-
they make a product called paint mask. It's liquid. Brush it on where you don't want paint and peel it off later.1 point
-
The way i painted my caps (which is probably the wrong way) is to "paint" where you don't want the paint to be with Elmer's glue. After that dries, either brush on or spray the color. After your color paint dries (24 hours or so), wipe off dried glue with a rag dampened with water. This does a pretty good job.1 point
-
Make sure you check the freedom of movement of the step up jet. Located internally, it functions t provide enrichment for power after the initial shot provided by the accelerator pump. Its default is to be open due to its internal spring. A manifold vacuum signal holds it closed at high vacuum periods like idle and part throttle cross. When vacuum drops, when you increase and hold open the throttle, the spring pulls the tapered needle out of the jet. Make sure when you remount the carb that the slot in the gasket lines up with the small hole in the base of the carb, that is the vacuumvacuum path for the step up circuit.1 point
-
My son in law went to an auction sale recently for the Crown taxi cab company in Kansas City who has gone out of business. They were selling everything including 8 Studebaker Larks (5 still running) which had been used as cabs at one time. I think the current fleet had been Ford sedans. Guess he didn't get a picture of one. He did buy me and himself "taxi" signs that go on the car roof.....brand new and unused.1 point
-
I won't disagree. I seem to suffer from "not being able to pay someone to fix something that I can learn to do". A Every time I do a new job I learn more, and 9 times out of 10 I save more than enough money to pay for any tools needed. The next time I put the tools to use again, then it really feels good. The experience to me, is invaluable. I know this is not everyone's mantra. There are times when I look around at all the vehicles, mechanical toys with engines, lawn mowers, leaf blowers, weed whackers, and more around here, I second guess what the heck l I am doing. Trying to keep everything maintained and well serviced. I get 'er done. It keeps me out of trouble while my neighbours hit the gym and buy a new car every 5 years. LOL. I digress, it makes me happy.1 point
-
Went back to leave the Vette this evening, snapped a picture of the Studebaker "police car".
 1 point
 -
They were just trying to class the joint up a little.1 point
-
I didnt like to open my hood until it was detailed and cleaned a little better than the 40years of grime. Now I usually open my hood, even just half way and if anyone is interested I will open all the way. My one car isn’t that nice under hood but now my Plymouth......she is shiny. As for bone stock verses “custom”, I drive my cars and stock brakes and 98 horsepower engines don’t blend well with modern traffic at least in larger centres. I can understand upgrading these components.1 point
-
Rear main seal replacement is tricky. I'd pull the motor, mainly because I'm sick of laying on the ground. You'd have to unbolt the transmission and remove the bellhousing and flywheel for proper access. You have to remove the timing chain so that the crank can be moved down for clearance. The good news is that you can leave the connecting rods bolted in place, and the pistons will all slide down in their cylinders. Trick is not to move the crank to the point of the rings snapping out! This is at least for a two-piece modern seal. You need to take these steps so that the seal can be properly glued into place. Without sealant, it's a waste of time. Also, I'm Not sure about a rope seal, that's a different animal. See pics below for a recent rear main seal replacement on a 251.

 1 point