Leaderboard


Popular Content
Showing content with the highest reputation on 07/10/2018 in all areas
-
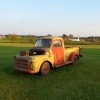
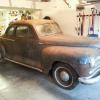
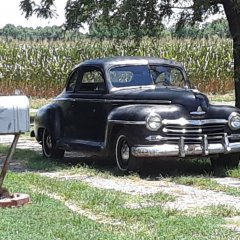
Got her out cleaned her up and took her for a spin on the 4th. Just like my dad used to do.
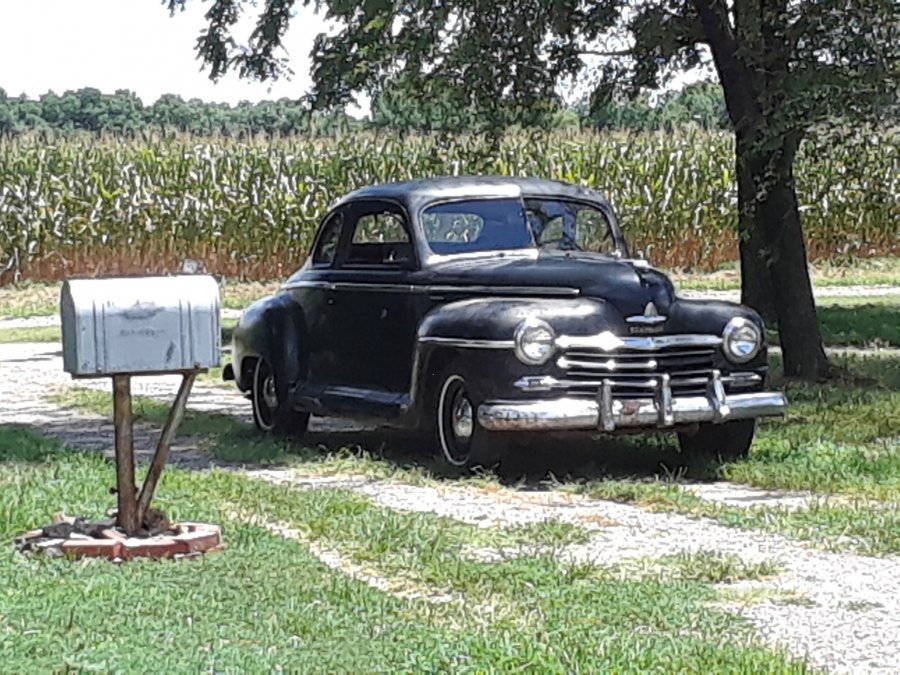 2 points
 -
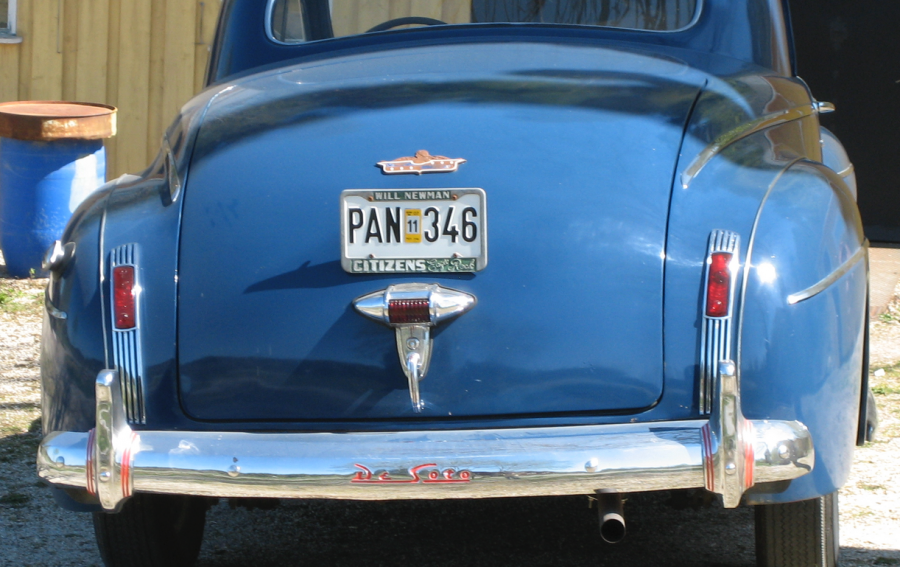
Just slap this on the bumper and drive... ”did you see those Plymouth’s take off??!!!”
 2 points
 -
Congrats on your project. My first car was a P15 and I still have it. I just got it back on the road after 30 years in a barn. These things come apart much easier than they go back together. In a weekend, I blew it pretty apart and it sat for over 3 years in pieces because it was a bit overwhelming once I was staring at a pile of parts. It really wasn't a car at that point. As others are saying, resist the temptation to turn a manageable project into a massive project. What I finally decided to do was go with the Roadkill philosophy and just get it running, and only fix structural rust and then figure out what I really want to do with it and then work on that part. Don't care what car looks like, just get it on the road. As soon as I got it running, it was a car again instead of a pile of parts. It motivates you. Now I drive it around with a piece of cardboard covering the master cylinder hole, zip ties to hold open the vent window and I work on smaller projects of a running car. I have the parts to fix both, but neither stop me from going to the parts store in it. One day I may even paint it. :) IMG_1615.mov.mp42 points
-
I think it is too late now to do anything about it. It would cost him a couple of grand to get the chrome redone and get a shiny paint job on it,and that doesn't include new springs,spindles to raise it and original seat covers. He would be money ahead to to take the 8 grand if he really needs or just wants to sell it. Otherwise his best bet is to just keep driving and enjoying it,and taking it to every rod run,swap meet,etc,etc,etc he can atttend,with a For Sale Sign in the window with his phone number and the price. There IS someone out there who would be happy to spend 10 grand for a car like that he can just hop into and go riding. Let's face it,10 grand ain't what it used to be,and to someone who wants a early Plymouth wagon it is a good buy when they consider all year or two,or more,that it would take them to turn the average project wagon into a driver that nice and reliable. You can and will get more money. You will never get more time.2 points
-
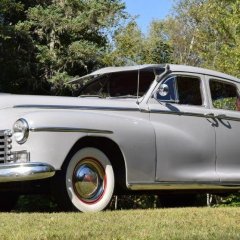
After a couple of years of searching I finally found a half decent reasonably priced Airflow. 1936 Chrylser Imperial Airflow
.jpg.3f0355af383bbe7069d6a637497b951f.jpg) 2 points
2 points -
I guess it is fortunate that I am able to shoot paint.....there is no way on this earth I could ever justify the cost of a paint job at the prices you folks mention....1 point
-
I have a history of unsticking "stuck" engines when dealing with antique tractors. I start with a mixture of 50/50 ATF and acetone - the acetone thins the ATF to get it into spots you normally couldn't get it, and it eventually evaporates. I fill all the cylinders right to the top and let it sit at least over night (up to your judgement/discretion as to how "stuck" something is). On a flathead engine such as these - I then make a "best guess" at what cylinder has the valves closed (fastest way is to just use a rubber tipped air gun and hit each spark plug hole until you have resistance). Once I have my cylinder chosen - I top it off with diesel fuel (cheaper than oil and also soaks and lubricates). I then have an adapter I made that screws into the spark plug hole for that cylinder and allows me to attach a manual grease gun hose to it. With all the other spark plugs removed I start pumping - if I hit a lot of resistance I will let it sit for a while and see if it dissipates - if it doesn't, I find a different spark plug hole and try again. You have to be careful and methodical - but the pressure with either push fluid down past the rings and free it up, or it will start to turn the engine over. Be wary of cylinders that are at top or bottom dead center - they are no good to put pressure on. A manual grease gun can provide up to 3500-4000psi of nice smooth even pressure in a cylinder. Its also enough to brake things - so be cautious. On an engine that isn't a flathead its easier - just remove the rocker arms and make sure the valves are closed. It takes a VERY stuck engine, or a mechanically failed engine for this method to fail. In 20 some years and just as many engines - I've only not succeeded once.1 point
-
I know what you mean John, if l had a flat rate book it would be in days, not hours! And l am a lot less reluctant to write a check these days.1 point
-
Bob, i had my trimmer sew up replacements for the springs on my convertible last fall when the new top went on. I suspect also this was an a simple solution to eliminate road vibration and harmonics. This top was not meant to be hand operated, and I don’t believe the designers had hand operation in mind as the considered all the parts of the system involved. This top gold design was very ingenious. The simple physics of the fold are really ingenious. Aided by the springs, the vacuum assemblies begin the pull until they reach a fulcrum point where the spring tension is removed and the vacuum cylinders snug the top down. A little overlooked, one thing that is important to call attention to is the actuator “switch”. Not only does the switch open one side of the vacuum circuit for action, but it also relieves pressure on the other side of the cylinder. I am still amazed to watch that 71 year old tech do its job so well.1 point
-
The only one I know who could correctly answer that question would be Scarebird. Give them a call.1 point
-
t Testors also makes a felt tip paint pen which I have used on certain occasions......its pretty handy. I have a rag with some paint thinner handy to clean off any excesses.1 point
-
Aren't they beautiful?
 1 point
 -
That $12 spent at Harbor Freight for the brake spring tool was money well spent. I cannot imagine being strong enough to string them across with channel locks. Got all the shoes set with the drums and then bled the brakes. Everything went well except for the brake indicator switch attached to the front of the master cylinder that leaks around the electrical connect pins. ? Thankfully Steve at DCM Classics is sending a replacement free of charge. Next I will again align the shoes with the drums then tighten and secure the castle nuts with cotter pins. How much drag should the shoes have against the drums?
 1 point
 -
I'll ditto the Testor's and a small paint brush made for modeling for the lines and script. Since I did mine, I've wondered of a pin striping brush may work better, since they flow better and are easier to make consistent straight lines with. For my hubcaps I applied good quality masking tape, burnished the edges of the design down with a wood dowel, and cut the design out with an X-acto knife. Then spray paint, used Rustoleum and two light coats. The newer Krylon 2X paint may only need one coat. I did ours going on 20 years ago now, and they are holding up really well. I didn't sand or otherwise rough up any of the surfaces, although chrome may be too slick not to. If I was doing chrome, I'd ever so slightly rough it up with walnut shell in a sand blaster, mask off appropriately same as with paint. If it's something your going to keep painted anyway, it won't hurt. As long as you use readily available colors, it's a simple matter to touch up, or re-do it when necessary.1 point
-
Tim's idea sounds good. I have always used Testor's red model car paint and a model car small paint brush. It has held up pretty well over the years. The ring around the hubcap script is NOT painted red.....just the letters and ship picture.1 point
-
I agree with the fellows about the P15 Deluxe. They were the less expensive model and therefore had no arm rests, the cheaper dash parts, etc.......and they also had only 9 inch diameter hubcaps whereas the Spec. Deluxe had 10 inch caps.1 point
-
I used thick paint,only one layer.Wipe off excess paint whit thinner soaked cloth.
 1 point
 -
Welcome! My advice is similar. Looks to be a solid car to start on. Get a service manual, check out the resource area of this web site. If it were mine, l would concentrate on the starting, running, driving and stopping systems. Get it in condition to start run and drive, then worry about the appearance items. Read up on how to do a compression gauge check and what the readings mean, when you get it running, do a vacuum gauge reading and see what that will tell you. Learn how to trouble shoot when things are not quite right. These are good well engineered vehicles that will start and run even when a lot of things are not right. Wish you luck with it.1 point
-
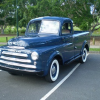
I saw this Town & Country today at fairly good sized car show yesterday here. Then we passed it on the drive home later that day. I tried to talk to the owner as I was pretty into his car. I had hoped to see under the hood. He wasn't into talking much or popping the hood. Cool car though. https://youtu.be/Dhkz5MV5P1k If someone could teach me how to properly embed a YT video that would appreciated. Thanks.1 point
-
This milestone has taken 20 months. When the mood struck I’d spend a night or weekend afternoons working on it. I was hoping to be further along but I’m pretty happy with this. Many thanks to several members of this site in providing answers and guidance. 39DEBBC0-698F-419C-A440-078BCE4124AE.MOV1 point
-
1 point
-
As CSGM Bill Edge,one of my friends and heroes from my army days used to say after he retired,"Getting old ain't for sissies!"0 points

.thumb.jpg.52b659814cb5758b70f78e52ab046bdd.jpg)