Leaderboard


Popular Content
Showing content with the highest reputation on 04/21/2018 in all areas
-
The corner has been turned as I have gotten my 53 B4C frame cleaned and painted. My friend decided to have a car sandblasted and offered to have my frame done at his shop at the same time. The mobile sandblaster actually used a dustless system with glass and it made the metal actually sparkle. After cleaning I found a cross member had some hidden rust damage so it was removed, patched and will be bolted back on. I then painted por-15 and am really happy with the results. When I get it back to my garage I can actually start putting parts back on instead of taking them off! Here are some pics of the frame from dirty to clean to painted. (by the way for you sharp eyed people, some repair work was done on the frame in the past as the driver's side running board supports had the rivets removed and replace with bolts - they will be put back on later along with the cab supports and cross members you see missing in the pictures)
 2 points
 -
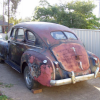
Hi I have a 1939 Ply Business Coupe, all stock. It was restored body off about 8 years ago. For safety currently in the process of upgrading front brakes to disk and change to dual master cylinder. Also considering adding a Mitchell's overdrive 1000 with a push / pull lever. Any one had any experience with this set-up? Two gear ratio's are offered: 26% and 36%. I live in N.J. , basically flat. Need the over drive when I run on intestates. The car will currently run at 50 - 55 mph comfortable and 60 for short periods however engine is starting to get tight and wouldn't want to run at that speed long. Inorder to keep up with traffic, would like to run 60 - 65 for 10 to 20 miles. Any thoughts on which ratio would be best. I contacted Gear Vendors several times, however have been unable to even get dimensions of their product. Figure if they won't send me dimensions, if I ever had problems they wouldn't be much help. Appreciate your thoughts. Regards, Richard2 points
-
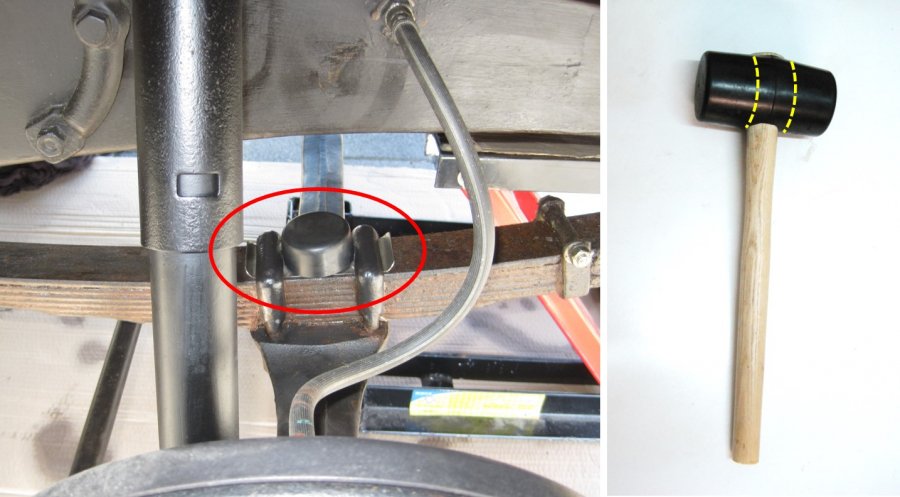
Leaf spring rubber bumper Today I changed the tires and got a look onto the rubber bumpers which are mounted on the front leaf springs. These were completely gone when I did restore my PT81 four years ago. Back then I wanted to order new ones at Bernbaums but they told me they don`t have any on stock and new ones are only available in six month or seven, maybe in nine. Repos which I saw on other providers sides (for my type of truck !) had a completely different dimensioning as my originals. Since I anyway did lower the truck a bit, I was looking for other ones on swap meets and the www. Nothing, too large, too small, too different, pretty expensive … Some days later in the hardware store, looking for something for the house. Had a bit time and still that rubber thing in my mind. Walked through every single shelf row. Garden section, domestic things, sanitary, tools … stop, what`s that ??!!! Rubber hammers. A lot of rubber hammers ! And in different sizes ! And even cheap, 2 to 4 € each. Took some, cut them into pieces, fabricated two plates of stainless sheet metal, fixed the rubber pieces with a silicon adhesive to them. And they do their job perfect, not too hard, not too soft. No month-long waiting, no longer searching, no shipping, no customs fees, … Sometimes it is so easy, but you don `t see that the source is so close to you … (Pics shows the suspension without load, distance between rubber and frame is much less when the truck is standing on its wheels)
 2 points
 -
I hear ya Dav....I just think, "If there was ever a guy who should paint..." It'd be you. You're a guy who cares about these old trucks and your eye for detail is outstanding! I realize it takes time to develop skills, but I believe you could fast track those skills better than anyone....so in the spirit of the American way of getting someone's resolve up...." I dare you...I double dog dare you!"...:D 48D2 points
-
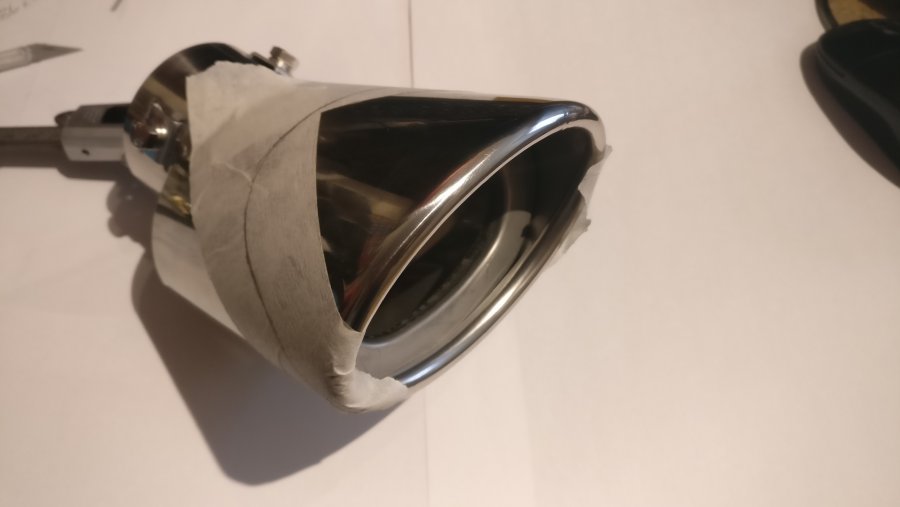
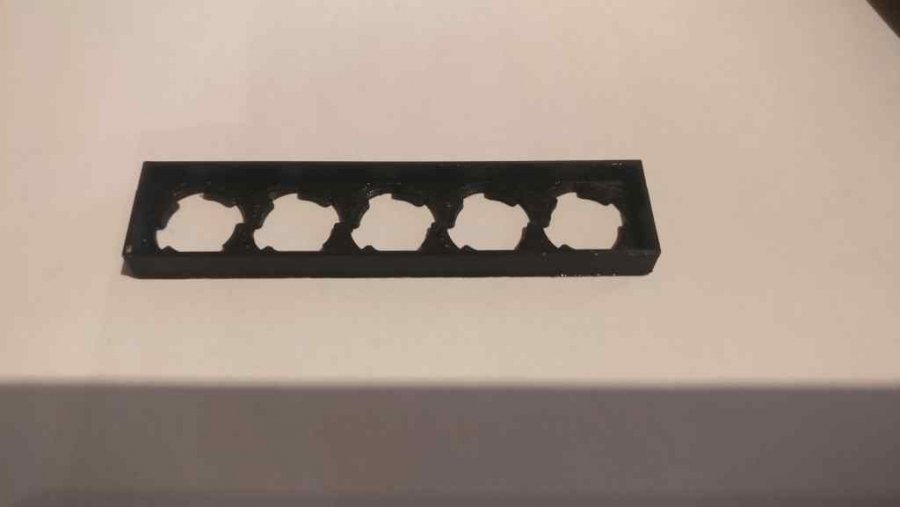
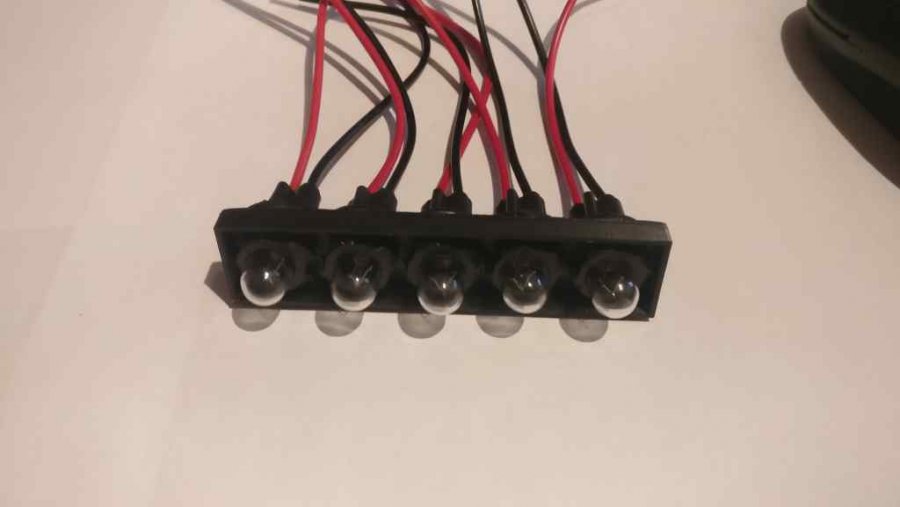
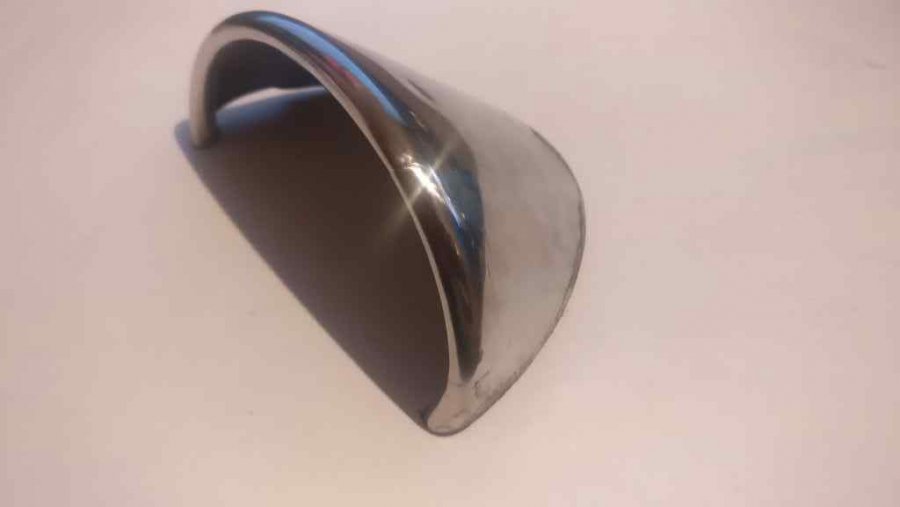
OK, so I'm rewiring the D20 and the dash has no idiot lights. I wanted repeaters for the indicators, because the relay is very, very quiet, and I wanted an oil pressure and ignition warning, as well as main beam. Five simple lights, and nowhere to put them... So, this is a cheapo exhaust tip. It will become a polished stainless steel housing... Back to Autodesk to design a display and bulb holder: And an hour on the 3D printer... Cut the exhaust tip to the right profile... Fit the light holder: A bit of trimming to do still, but it should work...


 1 point
 -
exacto knife, nice gasket punch set and a sharp set of small scissors, I like the stainless scissors that is surplus medical as they are sharp, nimble and can cut rear nice small inner circles1 point
-
None of the wiring under the dash is directly connected to the transmission wiring circuit. The transmission wiring harness is a completely separate engine compartment harness. I have a 1946-48 Chrysler dash with the wiring still connected to it. I will look later this weekend. The reason the relay clicks when you power up the red is it is back feeding voltage through the IGN switch making the trans relay energize. There is a red wire bullet terminal wire that connects to the turn signal three wire connector close to the steering column. Another red wire bullet that goes to the wiper switch. Another red bullet terminal wire that connects to the two terminal E-Brake switch on the hand brake. As for that double red/yellow or brown U slot spade terminal....flasher or the map light switch ...Maybe... I'll have to look as the wiring changes slightly between 46 and eight both six and eight cylinder cars because of accessory options.1 point
-
Update: Well had the truck out for its first real cruise yesterday and I'm very very happy with the way it performs! Did it turn it into power like a small V8...no...but I can definitely tell things are a bit more responsive and I get up to speed a bit faster. I still think my B and B was the wrong size for my truck, or at least that cid of engine..but this carb has fixed that all up. Idles great, no hesitations, drop in 4th on the highway and it has good pick up to pass....all in all I'd say it was worth the relatively small investment and few changes to the truck. As for the hockey portion of this thread...I know the Minnesota guys don't want to hear anything from us Manitobans for awhile LOL1 point
-
The body of my '53 Suburban will be removed from it chassis this weekend. Then the chassis will get cleaned and painted similar to yours. I do not use POR 15. ACE has a product called Prep and Etch. The printing on the two products' containers is IDENTICAL with one exception, one says POR 15 the other says Prep and Etch. There is one other major difference, POR 15 is $15.00 a pint at NAPA while the ACE product is $5.00 a QUART! An easy decision for me.1 point
-
I think the 51/52 Wedgewood blue is one of the nicest colors available for these models. I have an original finish Wedgewood here but I am not sure I have would trust a color reader on the panels as the paint is as old as it is and suffered exposure. I know we all want to put these cars back as best we can to factory but with the paint formulas changing in resins and pigments over the years the original contents are no longer available and any paint you get today will be the 'jobbers' best rendition he can mix with todays formulas. As you have the entire body voided of original paint, there will be no parts where a difference in blended or color tweaks will show...chose your best color in a paint brand and system you wish to shoot and basically let the big dog eat....If you are not painting this car yourself, some painters will not shoot outside of their preferred system..if this is the case check with your painter and solicit his advice and lead on paint available.1 point
-
I’m restoring a 1950 Plymouth Business coupe and decided to stick with the original engine. When they ask me if I’ve got a Hemi in it I just tell em “6 in a row makes it go”...1 point
-
Just wondering to the O.P. did the noise go away with the adjustment1 point
-
Do it right one last time. Pull your distributor, pull your oil pump. Turn the engine to #1 firing position. Remount the the oil pump correctly (check the manual), then remount the distributor and the rotor should be pointing at 7 o'clock. That way the next guy who has to work on it won't be scratching his head when you forget what you originally did1 point
-
Kool man and you aint afraida work. Mind you there is not much to these trucks as we both know. They truly are simple and quite light.1 point
-
Ever think about inserting the oil pump first and then the distributor? And if the distributor is not indexed correctly then remove the oil pump and the distributor and turn the oil pump until the distributor is correctly indexed? I believe this is covered in the service manual.1 point
-
I always flare mine to fit the block. More important is to look at the plate at the back of the water pump. It is most times so far off that it is not a good match at all. I "port match" the back of the water pump to the block so that flow will not have turbulence and most of the water will go into the tube. I even had my machine shop jet cut me a few stainless steel plates for the water pumps. It is amazing how after only 5 or 6 years the back plates start to degrade inside the water pump.1 point
-
You might give it a layman's paint job, then put the truck in an abandoned building, set the building on fire and thereby give it a heat treated original patina finish! LOL Just last week I drove mine, with such a finish, to a prestigious truck show and came home a theophy winner'!
 1 point
 -
Hello, I would recommend that you sit down and read a copy of my post of many years ago. The fluid couplings work by the velocity of the fluid pushing the internal fins. They do not work passed on any pressure or on the viscosity of the oil. Also, if you do not have a dashpot in working order the car will stall often when coming off of a stop sign. In addition to all of that, I ran across a Chrysler tech note that said that a fluid coupling should not be left engaged for longer than 5 minutes at idle. So, if you are stuck in a traffic jam, put it in neutral until the traffic starts to move. *************** Technical Note on MOPAR Fluid Couplings (Fluid Torque Couplings are NOT covered by this Technical Note. Copy/Publish at will so long as you copy the entire note.) By James Douglas – San Francisco Having run several types of oil in MOPAR “Fluid Couplings” over the years and heard many recommendations, I decided to see if I could approach the issue of what lubricant to use in one of MOPAR’s Fluid Couplings by a more scientific method. As is well known, Chrysler instructed all owners to use “MOPAR Fluid Drive Fluid” only in their Fluid Couplings. Problem is, MOPAR stopped making it decades ago. My first stop was Chrysler Historical. After a month of looking, I was told that they do not have any of the original engineering information as to the specifications of the fluid. Then I headed off into internet land to hunt down anything I could find on the subject from ORIGINAL sources. I managed to find an original Chrysler Question and Answer sheet from 1939 about fluid drive from Chrysler Engineering. In it they stated: “…The proper fluid is a low viscosity mineral oil, which also servers to lubricate the bearing enclosed in the coupling. The pour point is such that the oil will pour at the lowest anticipated temperature, and has no corrosive effect on the steel parts of the unit.” All well and nice, but not enough to figure out exactly what they used as fluid. Later in the same document they talk about the types of metal used and the carbon-graphite seal. Hum, carbon-graphite seal. I did some more digging for a few months and turned up a can of unopened original MOPAR Fluid Drive Oil. An analysis of that oil, and some more literature I ran across, stated that the original fluid was a pure-base mineral oil with a Saybolt Viscosity of between 100 and 150. The fluid had a Viscosity Index of greater than 80. The fluid had anti-foaming and anti-oxidation additives. It specifically did NOT have any seal swelling agents as these can attack the carbon-graphite seal and the copper in the bellows. This last specification eliminates most modern transmission fluids. After finding several formulas to convert Saybolt Viscosities to Kinematic Viscosities, it appears that the best match to the original specification is ISO 22 or ISO 32 oil. However, the ISO 22 is just below 100 Saybolt and the ISO 32 is much higher than 100 Saybolt. Based on a period (c.1947) Lubrication Industry article on fluid couplings that had the following admonishment: “Contrary to popular supposition any attempt to use a higher viscosity fluid would actually reduce the torque transmitting ability of the coupling since torque-transmission is dependent upon a high circulation of fluid between the impeller and runner and is not caused by any viscous drag between the two.” During my continued research on the history of the Fluid Coupling, I ran across the fact that the original company that licensed the fluid coupling technology to Chrysler is still in business and still making fluid couplings for industrial applications. After a couple of weeks of digging, I found a senior engineer from that company that would have a long technical talk with me on fluid couplings. In essence, he agreed with the period information I quoted above. He added that the lowest viscosity oil that would still provide for bearing lubrication is the one to use in theory. However, he did say that unless the fluid coupling bearing has been replaced and is know to be very high quality then err on the heavy side viscosity wise. Just don’t over do it, he stated. I was also told that normal hydraulic fluid does not have large amounts of anti-foaming agents in them as they usually do not have large amounts of air in the systems to foam in the first place. A fluid coupling is only filled to 80% and as such has lots of air in it. Therefore, when looking for fluid coupling oil, one must look for an oil that is a “Circulating Oil” which has a lot of anti-foaming additives in it. I was also informed that the additives tend to have a shelf life in the can, or in use, of 5 to 7 years and it should be changed at that time. I was also told that the couplings are actually somewhat permeable and water vapor will work its way into and then back out, when hot, of a steel fluid coupling. Very little amounts, but apparently is does go on. I was also told to never use engine oil or ATF as both would cause problems in the long run. Based on the research and discussions I have come to the conclusion that ISO 32 hydraulic oil with the proper additives and VI (Viscosity Index) above 80 is a suitable replacement for the original MOPAR fluid drive fluid. ISO 22 would be a better exact match, but only if the quality and condition of the bearing is know in a particular coupling. The oil I have identified that meets the specification, with a higher general viscosity to deal with the age of the bearings, is: Mobile DTE light circulating oil ISO 32. This oil is available at Granger. I have run this oil for about six months in San Francisco city traffic as well as up steep mountains on very hot days. The coupling works well. I have noticed, and other car people have as well, that the car seems to move out from a dead stop to 10 MPH better with the fluid. Only a before and after session on a dynamometer would tell for sure, but I feel that it moves out much faster. Classic car owners are advised to use this information at their own risk. I am not a fluid coupling engineer, a bearing engineer, or a lubrication engineer. I have done my best to find out what was in the original MOPAR Fluid Drive Fluid. This effort is in essence industrial archeology and should be carefully considered prior to use. As a post scrip in 2014. I ran across and old Gyrol book that talks about the filling of the fluid couplings. In short, how much you fill it affects the torque-stall curve. Chrysler set that by the position of the hole in the bell housing. However, if one is to fill it a little less or a little more one can change the curve. Do so at you own risk and never fill it past 90% so it has air in it to compress less you blow the thing up!. James Douglas San Francisco1 point
-
LOL. I've spent 10 years combing through swap meets looking for 40 Chrysler parts, and only came up with a gearbox gasket kit. BTW Brent, I'm in Portland - Victoria... Rick1 point
-
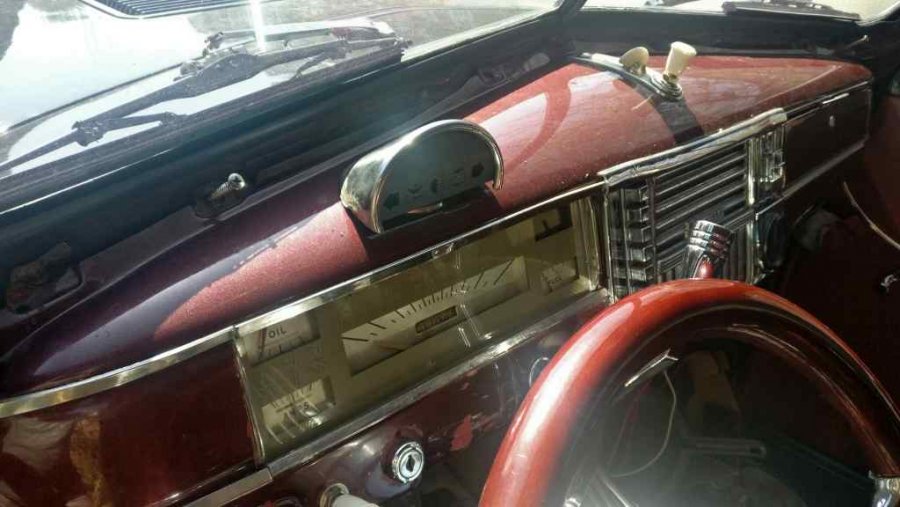
Well I solved the issue of the missing knob
 1 point
 -
Is this person very artistic or do they just have to much time on their hands?
 1 point
 -
I'm hearing you 48Dingo... I might have been a rich man by now if only I had the gift of hammer on dolly and some reasonable paint shooting skills I had actually considered undertaking a course many years ago. My biggest issue now is that I am very time poor these days with all of my work and also charity efforts going on. I am very committed to the project and we will move forward. We are actually shooting a primer coat on the truck this weekend (weather permitting) to prepare it for sitting for a few months. I'm hoping to pack and send another couple of shipping containers full of charity medical/educational items before it comes to pulling the truck out again as my shed is getting more crowded by the day. I am well satisfied that the truck will be finished to the high standard which I expect... it might just not happen now until sometime in 2019.1 point
-
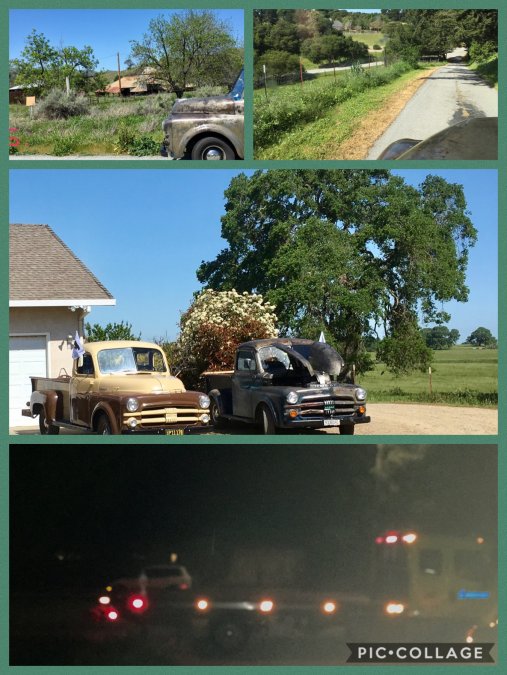
Uh oh...is that a tow truck in the "night scene" photo? Looks like you were on highway 25 on the way to Hollister... Looks familiar to me, especially the one lane portion. That's a beautiful drive.1 point
-
VIN decoder at http://t137.com/registry/help/decode.php says it’s a ‘54 C-1-D6 1 ton truck.
 1 point
 -
The Coronet made it to the BBQ! It was a blast meeting with everyone. I look forward to next year with a new project! Greg


 1 point
 -
ok here is my last post on the "Q" this year (no promises ) I think 48D got a little bored after the BBQ was over a gave a few of us a ride in his truck...... he would probably still be driving if he hadn't ran out of gas. LOL sure was fun, then he gave GGdad1951 a ride thanks again 48D and bride! you sure know to make everyone feel welcome and at home.1 point
-
here are a few photo's I took.......
(1024x768).jpg.2f34292c22b7f18fac22f1a840425445.jpg)
(1024x768).jpg.b554d5928695439fd7e135dd97fe8f87.jpg)
(1024x768).jpg.8c49c56fe5166fd9e2fd64946b68aee1.jpg)
(1024x768).jpg.00f259bcc7c7ded61980c686abab2f6f.jpg)
(1024x768).jpg.d609cdbf36487af6dfed6886c821da7a.jpg)
(1024x768).jpg.193484596b7101079fa71d6054ef4ff9.jpg) 1 point
1 point -
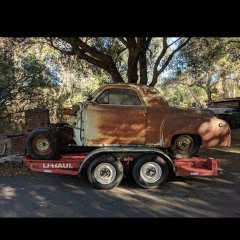
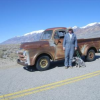
It was great to see DollyDodge at the bbq. It was inspiring to see the meticulous effort used in preserving such a beautiful old truck (and just a couple more payments befor it’s his). I hope he will make the effort to make the trip again. If not, maybe a trip to Bishop and a night at the hotel Winnedumah in Independence.
 1 point
 -
Thanks to everyone at the picnic for such a great day. I had a wonderful day, and met so many nice people. I enjoyed the BBQ a great deal, an amazing amount of wonderful food. Thanks for all the help unloading and loading Dolly. I will post more pictures, but first I have to reduce thier size and will do that tomorrow. Dolly and I left Bishop at 3:15 AM and got home at 8:30 PM, it was a grand day. Dolly loves her trophy!

 1 point
 -
I did a very quick count by twos just before the group broke up. I stoped a 56, so very possibly 70 + attendees. Names with faces? God! Since He can number the stars, He should be capable. Quick pictoral of my week end: barn back road drive, San Juan Baptista = 150 miles; Clements BBQ = add 150 miles; home, night scene, = add 145 miles. Great weak end!
 1 point
 -
You know you are on the shorter end of life when:
 1 point
 -
This is my last post on this subject,but anybody that thinks politics doesn't have anything to do with old cars has his head stuck in a hole in the ground. Politics controls every aspect of our lives.1 point
-
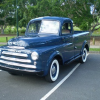
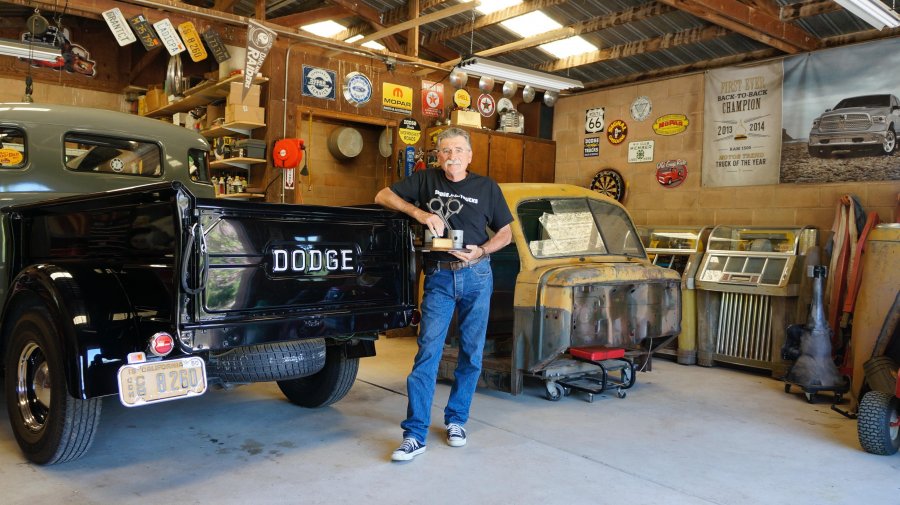
Jim Shepard and his 1950 B2B......2017 10th Annual Best Of Show. 48D
 1 point
 -
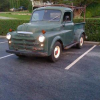
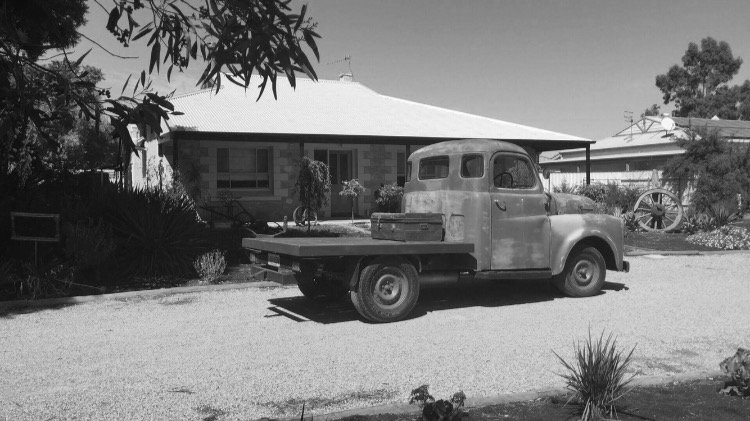
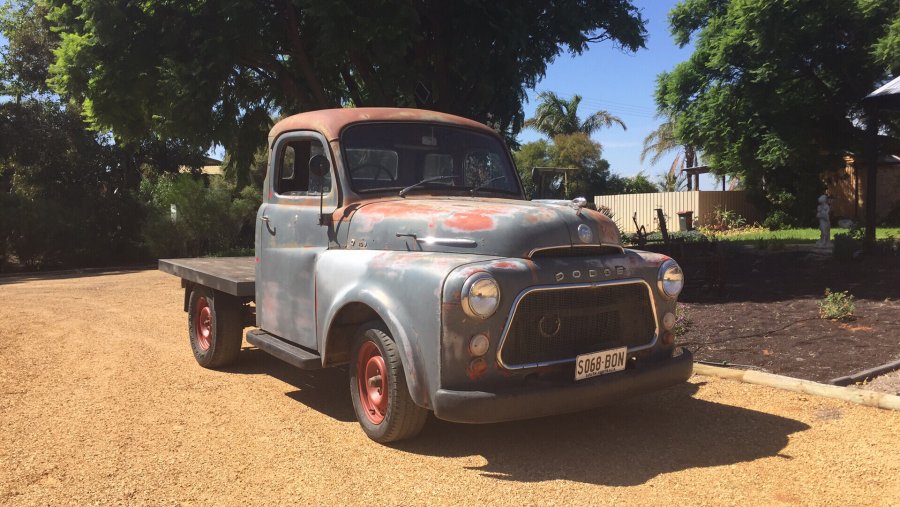
Im with you only a few years younger and a few thousand miles away Photo taken only this year out the front of our Bed and Breakfast in Barmera She is my Baby
 1 point