Leaderboard


Popular Content
Showing content with the highest reputation on 03/27/2018 in all areas
-
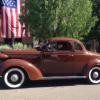
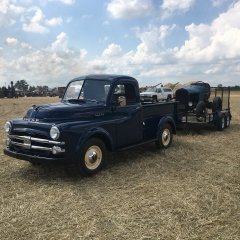
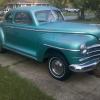
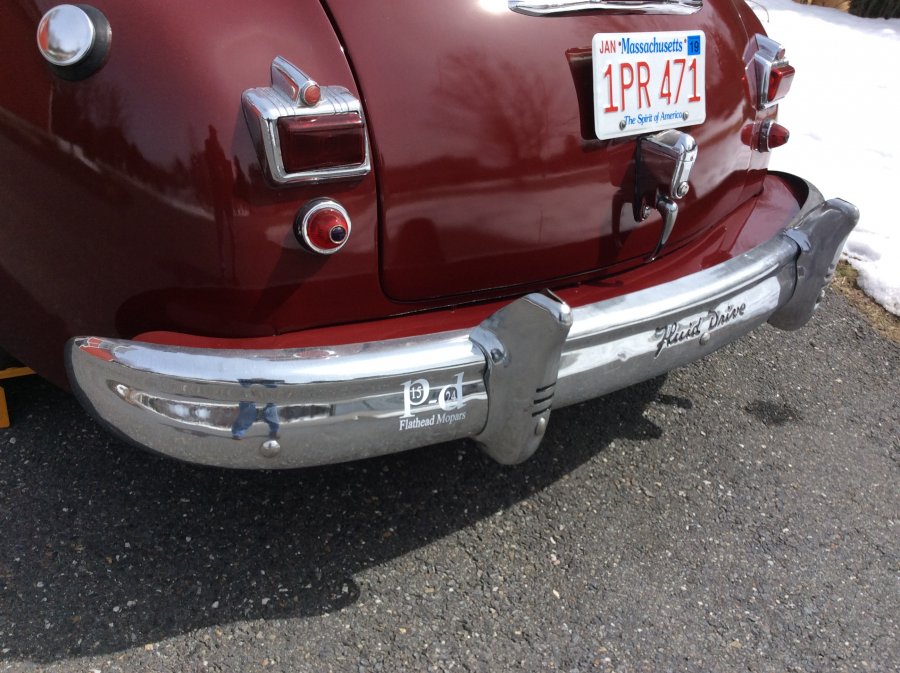
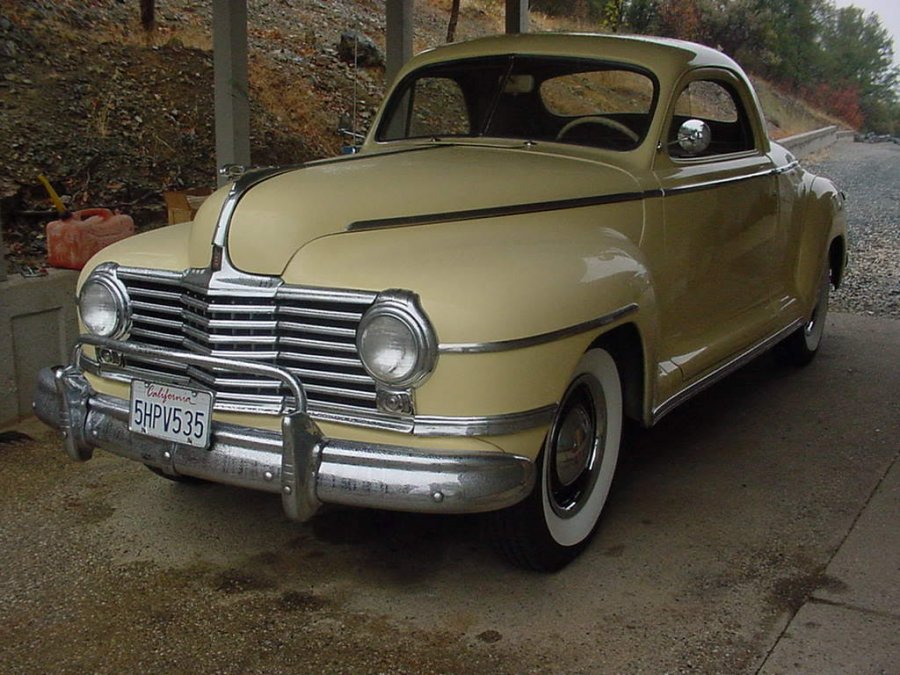
Have had my '47 P15 since 1973. Gets driven occasionally. Engine is a 1957 model flathead 6 and still have 6V electrical system. Drives better nowadays since installing a set of www radials. Has new paint, new top and new interior following our big tornado in 2011.

 5 points
 -
skinny bike tube....cut tube and connect the ends to the inlet/outlet...pressurize through the Schrader valve.....the tube will expand keeping the pressure low but viable for a submersion type leak test.3 points
-
Ralph; It is totally frustrating. But it is part of a problem that is becoming more and more common. It has to do with a general lack of quality in many replacement parts that are now being made overseas. I know you think you did the correct thing by replacing this M/C with a new one. And that certainly would have been a likely fix for the issue 30 years ago. Back then the replacements were being made here by reputable companies. But these days a name on a box doesn't begin to insure true OEM quality. Really the next one you put in may fix the problem....or just as likely not. I myself have no confidence in these sorts of replacement parts these days. Particularly anything from China. When I began building my truck I started to go down this path on the braking system. But the more I thought about it.... stuff like what you are going through now scared me off. Instead I decided to completely update the braking system on my truck. Since I planned all along to use it as my daily driver this more than justified the $1500 I put into the 4 wheel disc upgrade I did. Ten thousand miles later I am totally convinced this was the best money I spent on my truck. I am not saying you need to do everything I did but at least consider a more easily maintained solution for the braking system. One more thing I think bears mentioning is that the brake pedal linkage adjustment on these trucks can contribute to this problem. Because of the way this linkage works if it isn't adjusted very carefully you can have issues with the M/C bypassing with either an OEM M/C or a more modern type replacement like the Cherokee M/C. This is generally not a issue with most M/C's that are firewall mounted but it certainly is with the under floor mounted ones like is on our trucks. Jeff2 points
-
Your generosity is appreciated and a big thank you for being an active contributor to the site. Thank you! GT2 points
-
wait..there's a BBQ coming up? WHY WASN'T I TOLD?2 points
-
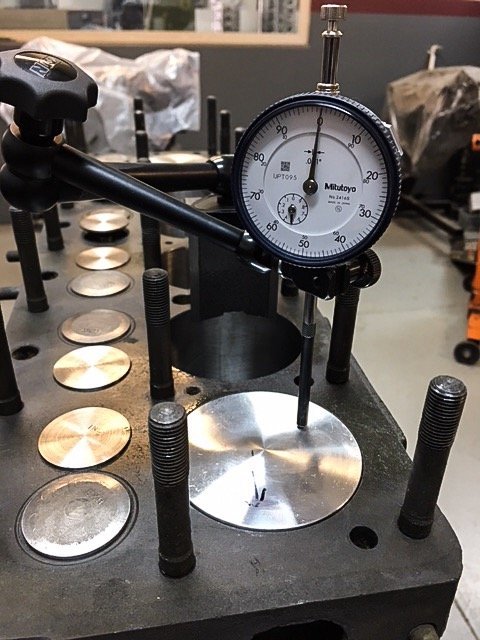
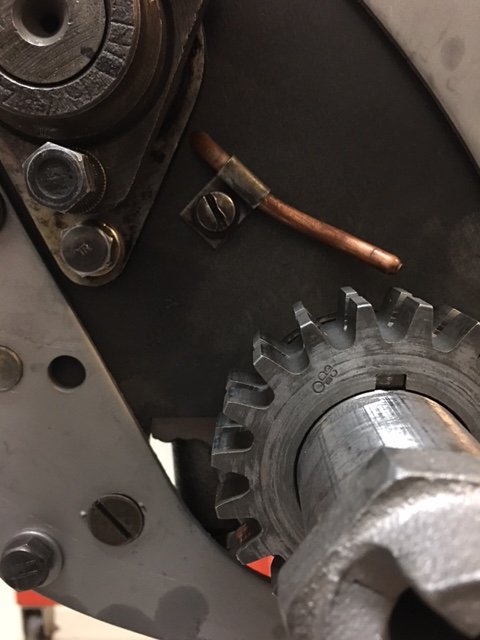
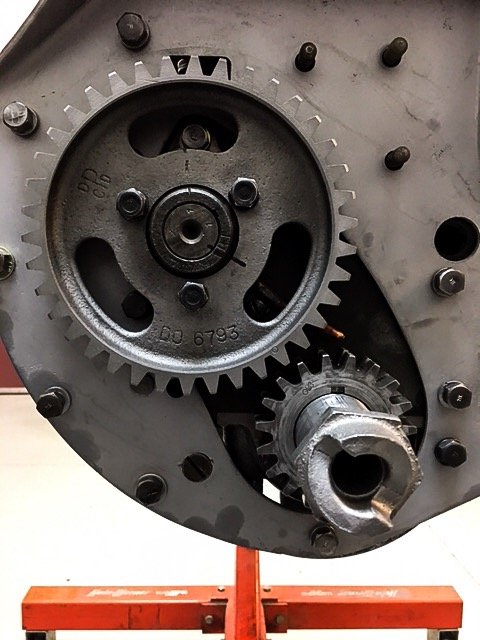
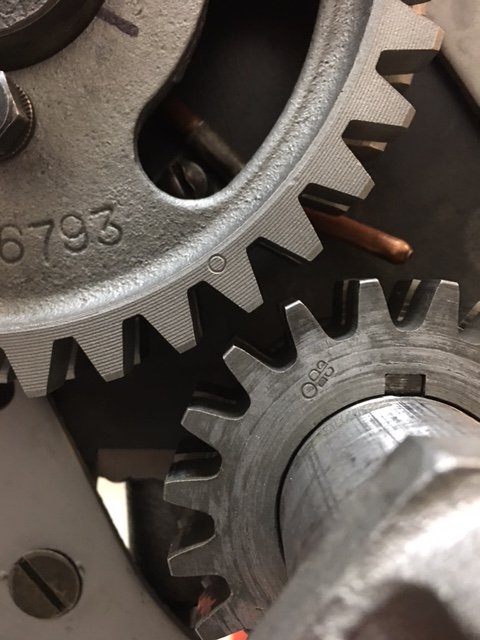
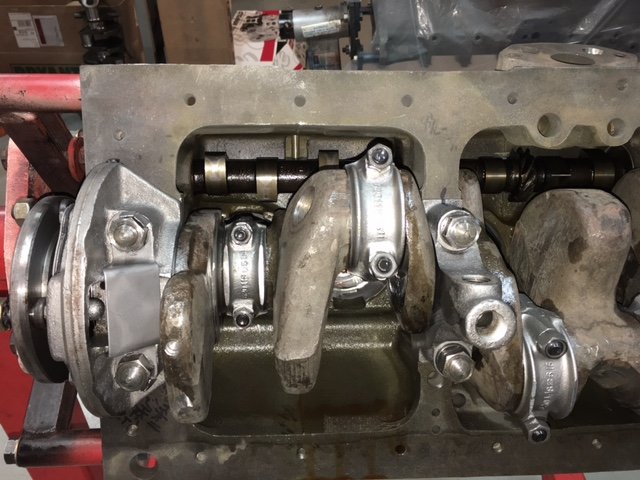
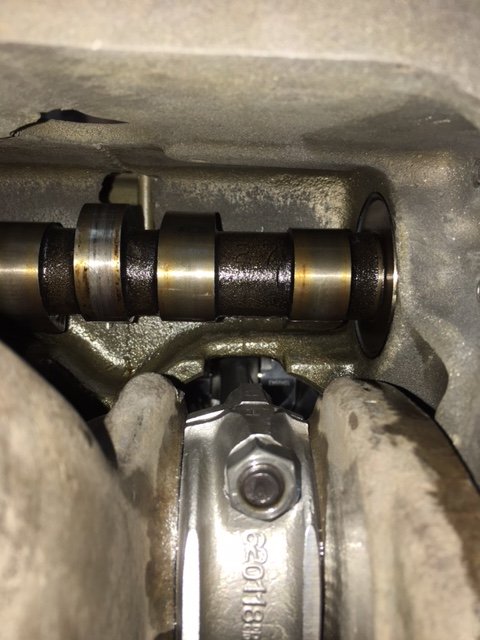
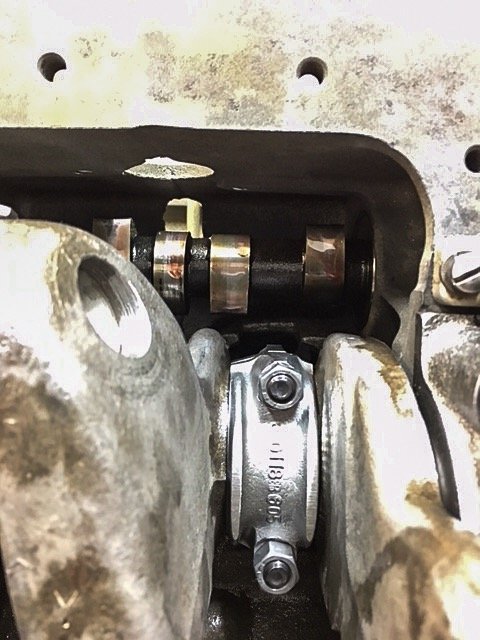
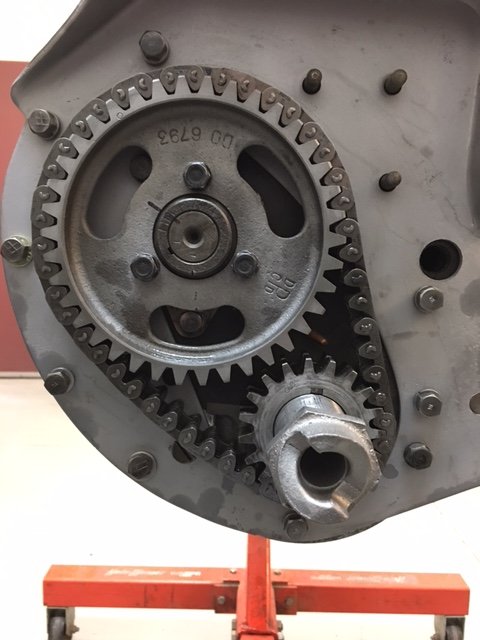
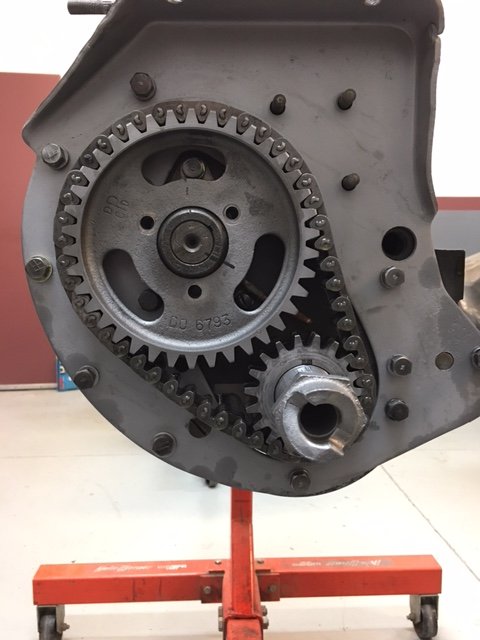
@Cpt.Fred, I hope this is helpful for you. Got the timing chain installed yesterday. Pretty basic stuff. Just match up the timing marks per the service manual. The gear teeth are pretty large, and even one tooth off either direction will make it impossible to line up the timing marks properly. Start with rotating to TDC for #1. You don't really need a dial indicator for this, but I had one. It does make it easier IMO. Timing mark will be pointing right at the cam at this point at approximately 10:30 if you imaging a clock face behind the crankshaft snout. The cam gear has an eccentric bolt pattern and can only be bolted on in one orientation. Good for me, because I need idiot-proofing just about everywhere. Orient the gear where you can finger tighten ALL THREE bolts so you don't make any assumptions about if or not they're lined up. The spring pressure on my engine is pretty light so I was able to hand rotate the cam gear to line up the timing marks. Marks will match up like this: I drew a sharpie line across the face of the cam and gear to make it obvious when I reinstalled the gear with the chain on, and that's the next step. Fit the chain to the cam gear and slip it over the crankshaft gear. Try the cam gear on the cam and see if the marks line up. If not, adjust a tooth (or several, whatever it takes) either way until the marks are back lined up. Thread the bolts in the cam face and double check the timing marks. If all is lined up torque to spec. Note that in this orientation #1 piston is not TDC on its firing stroke. The cam at #1 is actually on the overlap and #6 is firing, seen below. When you rotate the crankshaft 360° (and thus the cam gear 180°) then #1 is at TDC for its firing stroke. Last I got done yesterday was reinstalling the cover (put the balancer/pulley on before torquing the cover bolts to correctly center the balancer in the seal), and the oil tubes underneath. Had a number of tasks in the am and end of day that limited my time a bit. Core plugs installed as well.
 2 points
 -
I will never forget my visit to Tennessee Clutch. I walked in and found dirt/grease lumps on the floor and 3-4 guys sitting around a pot bellied heater drinking coffee although the stale grease burnt clutch stench out weighed the coffee smell. One fat guy sitting on a stool with a cigar stub and drool hanging out of his mouth asked me what I wanted. I thought I was had! The front office was not an office but looked more like something that you would find in the deliverance movie with no banjo playing. I once again thought I was had! I told the fat guy I wanted my pressure plate re-worked and I plopped it down on the counter. Again I thought I was had and this fat guy would rape my old fat punk butt. The fat guy hollered to the back of the shop and some young kid appeared, grabbed my pressure plate, and disappeared. The fat guy told me it would be an hour so I disappeared out the door before something dreadful happened. An hour later I returned. The kid plopped my rebuilt pressure plate down and he once again diappeared to the back of the shop. There was a girl behind the counter this time although the drolling fat cigar smooking guy was still there and very much in charge. I told the girl I needed a clutch disc just like the one I plopped down on the counter. She disappeared into the rack of shelves and I once again thought I was had by the drooling fat cigar smoking guy. She plopped the required disk on the counter and I shook as I asked the dredded question "how much"? She told me something less that one hundred dollars for the whole deal. I about fell off my stool but I know that if I had done so the fat drooling cigar smoking guy would have had his way with me. I then got brave and said I needed a pilot bushing even though I did not need one. She produced the bushing for me and I asked "how much"? She said no charge. Then I really got really balsy. I told her I want two bushings knowing the fat cigar smoking droller was still there. This is a true story and I am glad so many forum members got satisfaction from what has proven to be a great vendor.2 points
-
I just received 2 nifty stickers in the mail. One for the car, and one for the toolbox. Thanks G.K. for the quick response.

 1 point
 -
guy named Troy lived down the street just died, is that 10.00 an ounce offer still valid, family having trouble with funeral costs...1 point
-
Dodge manufactured in the USA generally used drums with the flat flange and studs. The wheels also had a different offset. The same car manufactured in Canada used bolts like the Plymouth Desoto and Chrysler.1 point
-
Sorry, KnuckleHarley I meant Reg Evans car. He posted pictures here. It looks very nice, above average from the pics I see of the outside.1 point
-
Whoever said 46-48 D-24 came with lug bolts was wrong....you're car came with studs pressed in from the factory.1 point
-
I second the "active contributor" part....you do a great job of keeping track of all your info on the site JB! 48D1 point
-
BUSTING A HUMP brother!!! Dang this weather has been brutal (as far a getting a BBQ together) but THANK GOD for the rain!!!! This California drought has got to be over now. I've hardly had a weekend to get any serious work done in the landscaping dept, but as always.... WHO CARES?!? Its the people. Again, its the people....not the trucks. I love your truck Brent, buts its your friendship. I love your crazy creations Mark, but its your friendship, I've never seen your truck Merle, but its your friendship, I may never see your trucks Davin, but its your friendship..... the list goes on...Don Coatney, Keven, Bud, Jeremiah, all you long distant travelers......all y'all.....Todd is next on that list and maybe there will be a last minute traveler...I don't know...but won't that be frickin awesome! All the bay area guys, the regulars, my family too.......and I bet no one really cares or notices if the lawn is mowed, lol....everyone will be checking out the trucks. Its getting close. *whew* Time to light up the B1BQ brother! 48D1 point
-
Frank..........not trying to upset the applecart but how do you instal 2 welch plugs?.......I would have thought that once you install one by dimpling the centre there would not be enough room around the edge for the 2nd welch plug to properly grip and by firmly tapping the 2nd one in the centre you may loosen the 1st ones grip into the edge of the hole.............happy to be told I'm wrong tho' just have never heard of using 2 plugs.........here in oz I only ever replace any welch plugs with brass plugs, mild steel is a false economy...............regards, andyd1 point
-
A pic or two of 39 Dodge tail lights......... There is a pair of lenses currently on ebay for 89.99 Link to ad: https://www.ebay.com/i/112843173406?chn=ps&dispItem=1
 1 point
 -
I ended up going back to the wires which were really bugging me. I pulled out my tubing cutter and took a shot on the plastic on the spark plugs. Now the covers fit! Just need to bend up some hard tubing to tidy up the fuel line and finish removing/hiding the rest of the wiring under the hood.
 1 point
 -
I wanted a custom look but not the typical really light colored beds many install. I used pine boards with ebony stain.
 1 point
 -
This year I'm test driving Phoenix weeks before the Q. Today a nice mostly uphill drive up into the foothills, the main pull was about 8 miles, a good climb. Truck did not stumble.
 1 point
 -
Many years ago I swapped a Dodge hemi into a '48 Plym. Notched & reboxed the frame to move the stock steering box out of the way, got a set of '48 taxi cab springs to bring the ride height back up off the floor & it rode & steered like stock. Can't imagine Welding the front half of a Chevy onto a Mopar. Would that make it a Plymolet? On the other hand, if you bought it guess you can do whatever you like, right?1 point
-
Got any more pictures? You might just of stumbled upon a bit of forgotten history there. The author Earle Stanley Gardner of Perry Mason fame was an avid desert explorer. He mounted some truly amazing expeditions into Baja in the 40's, 50's and early 60's. Roads did not exist where he wanted to go and so he funded the development of several types of off road vehicles. Everything from 2 and 3 wheelers to VW powered buggies. The well known Tote-Goat as an example was an early pet project of his. I am not 100% certain this was one of the VW based variants he had produced over the years but it sort of looks like it could be. Heck there may even be pictures of this "thing " in one of the several books he wrote about exploring Baja. If it is one then surely it would be worth serious coin to real off roaders who know about this chapter of early vehicle development. Jeff1 point
-
Great advice!1 point
-
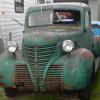
In 2001 I purchased my 1939 Plymouth pickup for $1600. My wife said I could buy if I could find a place to store it because I couldn't bring it home until I was ready to work on it. I found a storage lot that would let me store an untitled and unlicensed vehicle. That was 2001, it's now 2018 the truck is still in the storage lot, I don't even want to think what I've paid in storage fess but it's at least 4X what I paid for the truck and I still have at least 2 projects in front of the truck before I can bring it home. Now my advice, if it's not your dream car you've always wanted and could never find, file away the farmers name and let him store it for free. Check back every year or so to see if the price has come down or when you are closer to being able to start the project. Chances are it will still be there in a couple years in the same condition it's in now. If it's not then there are other 51 Plymouths out there waiting for you. Rich H1 point
-
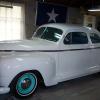
OK guys, thanks for the comments. My research has shown me that a D23 is a car produced from late 1942 to1945 that was built on a war assembly line as a war time vehicle. I have found a serial number for this Deluxe Business Coupe and it shows to be 1,317 from the last production car built by Dodge in 42. It's not Canadian built, but made in USA D22. It was 1 of 5,257 business coupes built that year, which is the second most rarest dodge business ever made. It had some stainless steel trim that could have been painted to match the front and lowers, but I have read that many employee purchased cars were taken from the factory with whatever they had to put on them before closing production. I am still missing a driver's door, so until I find one, I will have to sit on this project for a bit.
.jpg.6443e9b75d17c5e96151d4caa1f98d49.jpg) 1 point
1 point -
Agree this is getting political. I'm leaving these posts in for now but any further posts along this line will be deleted (along with the three I am leaving for now).1 point
-
Getting there slowly. Sure takes a lot of time to polish and reinstall the trim! Some of the chrome definitely needs re-plated, but that can be done in the future. Tonight I am planning to band-aid the exhaust in hopes of getting it on the road for now (and so it can be driven to a shop sometime this summer).


 1 point
 -
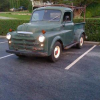
Here's my 42 D 22. The engine number starts with D 22. Maybe the D 23 was used for the later blackout models.
 1 point
 -
Package deal, Car and trailer ? Would be silly to buy an empty trailer.1 point
-
1 point
-
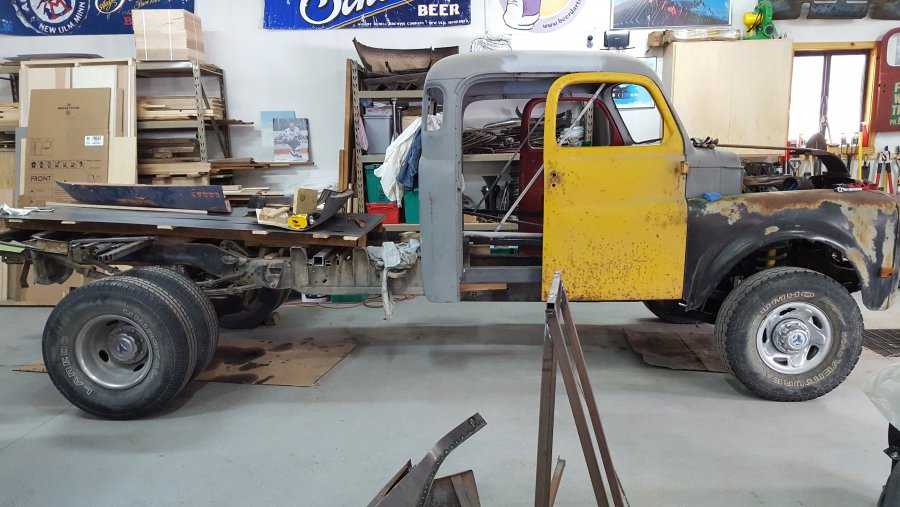
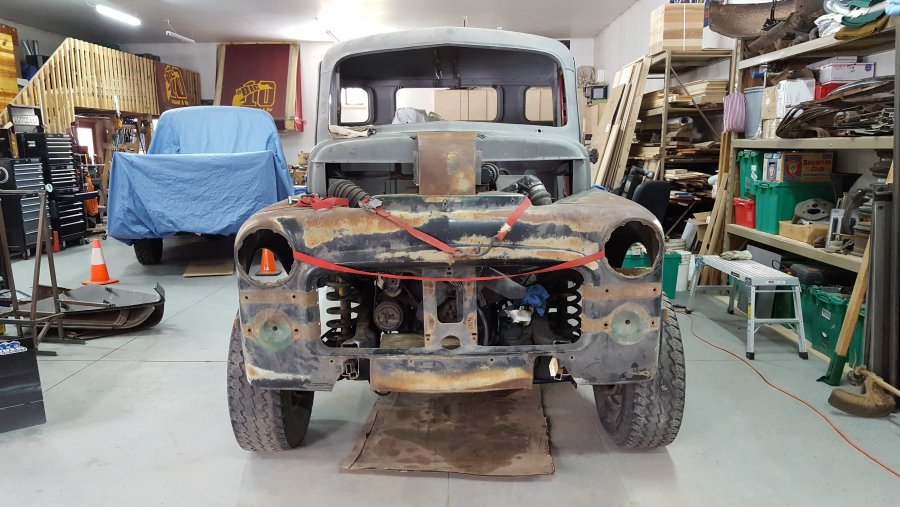
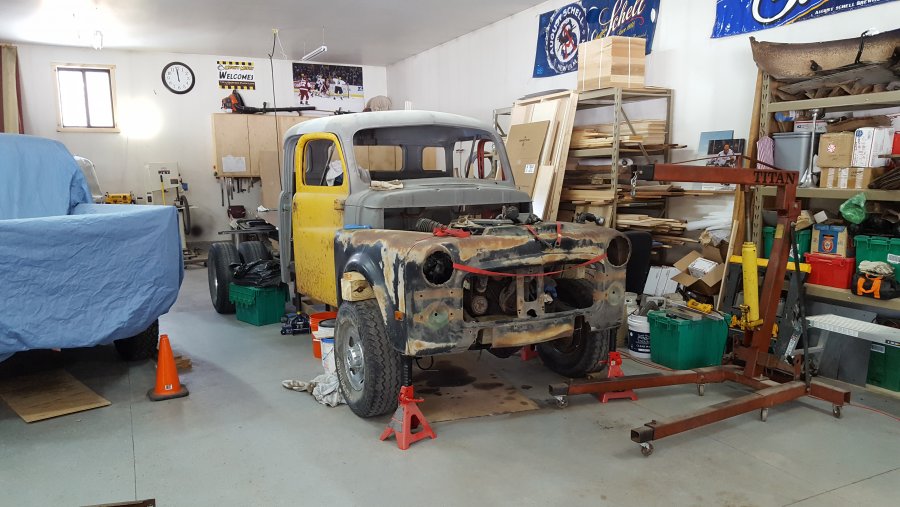
so, sitting right here now. Need more eyes at some point soon to finalize where things are for sure.

 1 point
 -
Drive mine also about 20 - 25 miles a week
 1 point
 -
yeah, go for it, we will be reading of your next doctor/hospital visit......1 point
-
There are several places that will rebuild our original parts with no issues, and usually for a lot less. I've walked into Unique in Jonesburg, Mo. and walked out 2 hours later with perfectly rebuilt pressure plate and clutch plate for under $100.1 point
-
Trying to get lost on back roads is a LOT more fun in this day of cell phone GPS and driving directions than it used to be. I get what you are saying,though. My favorite cruising is around 35 mph on back roads as I just ride along and enjoy the view.1 point
-
Mine is a rolling restoration. In other words, I had enough money to get it drivable, but not enough to paint and upholster. That being said, I drive mine at least a couple of times a week around town or to work and back. Joe Lee
 1 point
 -
I'd still bet on the disk touching the cover on the inside. Easy to fix if that's the case. If it's too thick, the clutch adjustment should be able to compensate for that unless there is just not enough travel in the cover fingers. Too bad the shop didn't do any investigation, just swapped parts again. Yeah, I know they just got paid to R&R, but still...1 point
-
Brent, I have you covered! Got to stick together! We are called "DODGE BROTHERS!
 1 point
 -
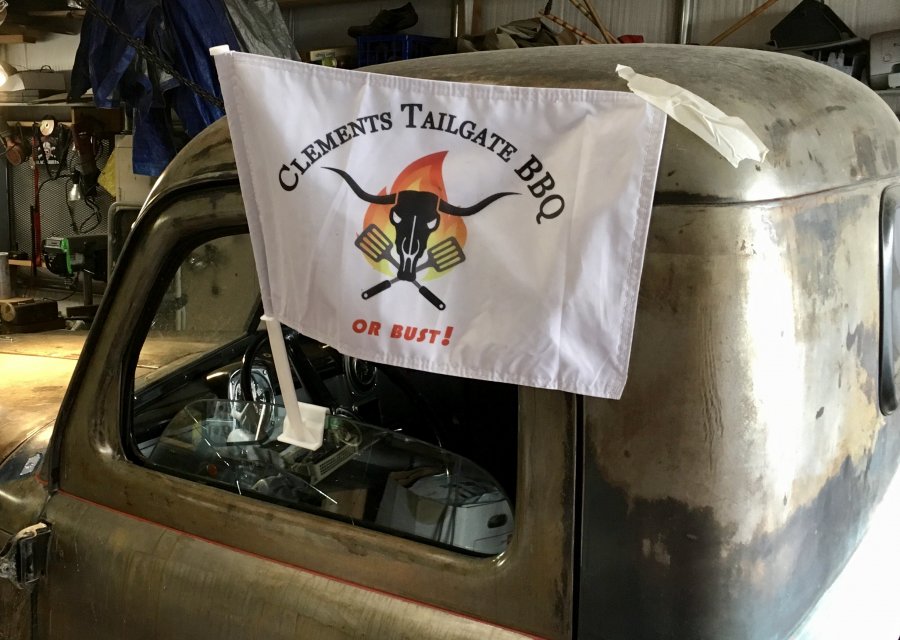
But...but....you have a flag1 point
-
Such terrible ice conditions. That must have held you up for 5 or 10... ... ... minutes at least.1 point
-
Still need to tidy up the wiring and such, but she passed break in. I havent slept in two weeks thinking about the cam going flat etc. 29279593_344839886011831_502962110838341632_n.mp41 point
-
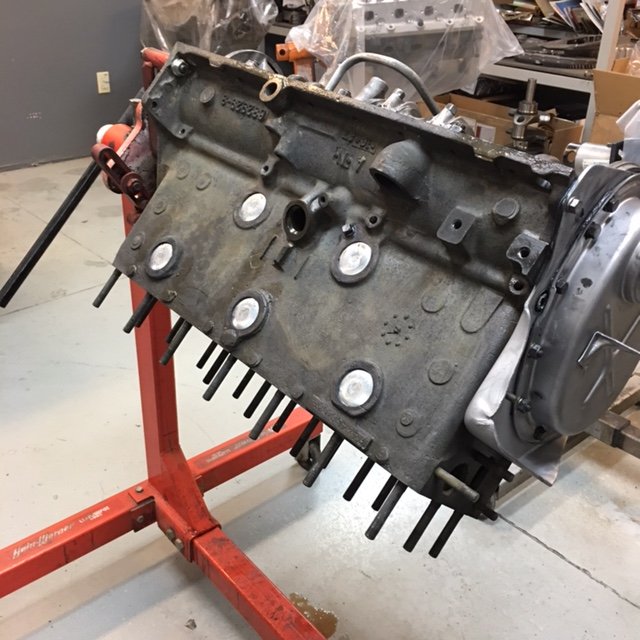
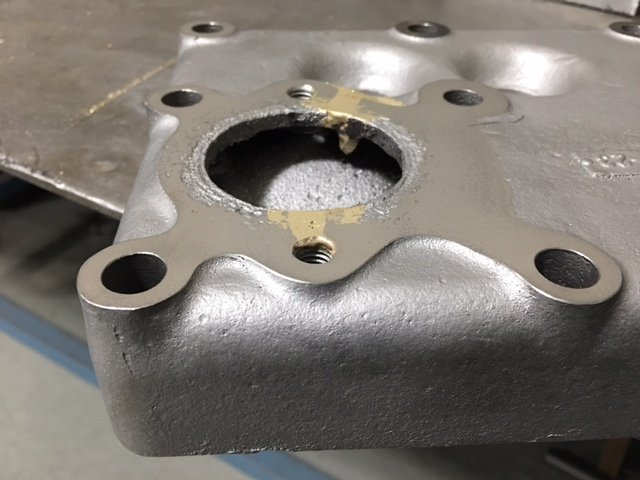
okay... images up! Got the head mounted and shaved 8mil off the top to achieve a nice, level surface for all the head bolts and water neck. Not a necessary step except that there was a fair bit of brass to level for the water neck mating surface and that had to be machined. Just did the whole thing.... Then flipped it over to surface the gasket mating surface. Took a total of 11.2 mil to get completely level.


 1 point
 -
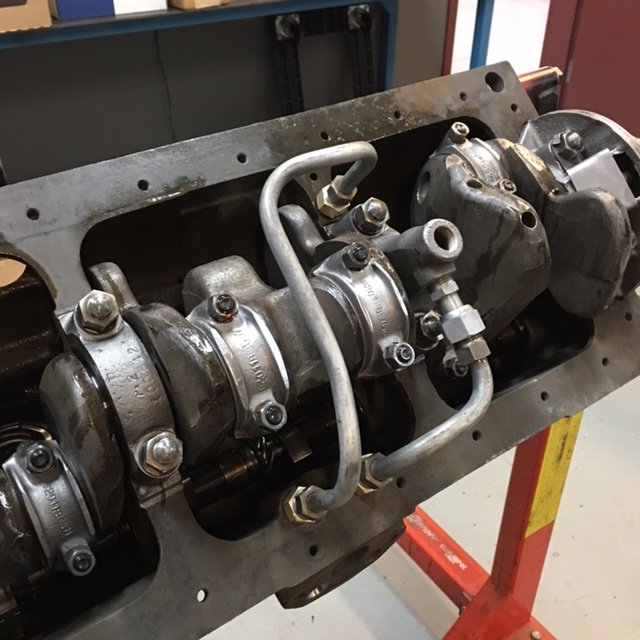
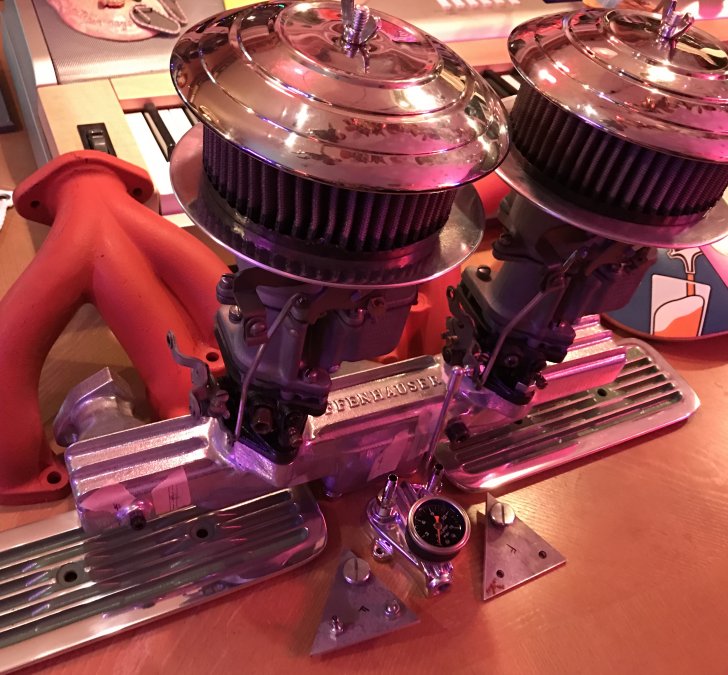
Pictured is my George Asche manifold dual conversion with a stock fuel pump on a 255 CI Desoto long block engine. The glass filter on my fuel pump sits directly below the pump as seen in the second picture.1 point
-
The photo's perspective distorts distance a bit. Pump is no lower than the bell housing, oil pan or fuel tank. No higher either though! It is isolated so seems vulnerable, especially the electrical terminals to snagging of branches and snapping turtles. Knuckleharley convinced me to install a regulator, as he described, but can only install one pressure gauge on firewall though. I'm already committed to a fuel-block mount. See bottom of photo.
 1 point
 -
I know that this post is quite old but I was facing the same issues with the plastics on my son's 1940 Chrysler Royal. Ended up having to make them myself with plexyglass. Also had to redo the instrument panel but that is another story. Working on the glove compartment (almost done) and the trims for the instrument panel.

 1 point
 -
I'd rebuilt my 40 sedan's brakes before, but with the small amount of use and a lot of sitting, they'd get pitted and I'd have to go through them again. Even though I could buy new cylinders for about $45 each, plus a hundred or so for a master, I had them sleeved, again by White Post, and in 5 years, no more problems. One mistake we make is to not flush the fluid every year or two. If we did that, we would probably not have nearly the problems we do. Regular brake fluid is designed to absorb the moisture in the system, but it eventually gets too much to do it's job and pitting and rust starts.1 point