Leaderboard


Popular Content
Showing content with the highest reputation on 03/15/2018 in all areas
-
If your main concern with the rebuild of the flat head is 'money' then that concern should still be there with an engine swap. Because you have the sbc and box doesn't mean it will be a cheap or an easy install. The best budget option would be to find a good running flat head. This would also be the fastest way of getting your Plymouth/Dodge on the road.3 points
-
Are you asking what he tells the wife he spent, or what he actually spends?2 points
-
Yup, I'm the guy with the slightly rodded, Chevy powered Bodge who also runs a bobbed Suzuki that confuses the hell out of the Harley boys.
 2 points
 -
Being the too helpful type I sent the OP a private message offering up a good engine/transmission combo. He may not know how to check private messages or just has no interest. Maybe I asked for too much $$$... Either way is fine, I have a '50 Coronet coupe that needs an engine.. That's why I bought it.. Just trying to do a solid for someone who may need some assistance.. As Red Green always said, "I'm pullin' for ya!!" All the hoopla over this reminds me of showing up at BMW motorcycle events on a Harley,,,, and vice versa.... Always good for a grin or two!!!2 points
-
Thanks Tod, and as he noted if you don't like the topic, don't post. I think it is important we are open to these type of mods because they are common and the challenges it presents may help others even if they are not using SBC. And as the header logo notes, Flathead to V8s, Stock to Custom are welcome and encouraged to start threads.2 points
-
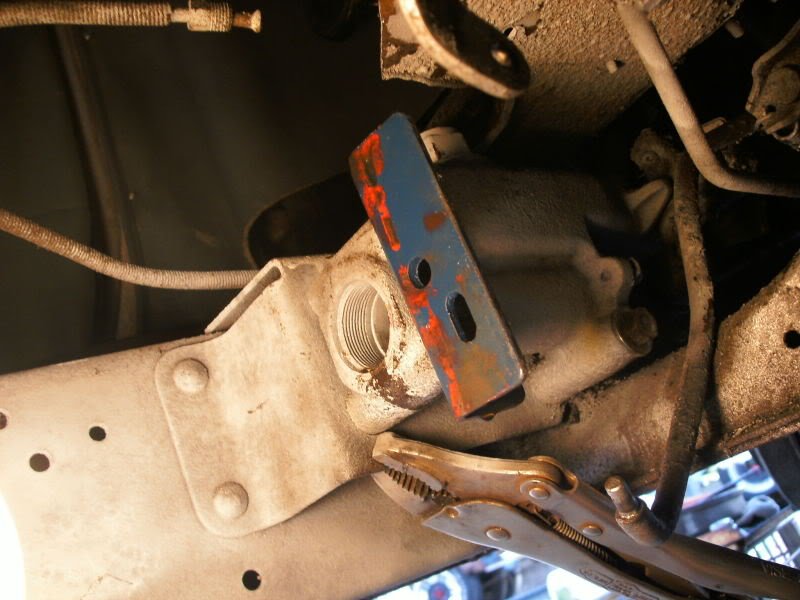
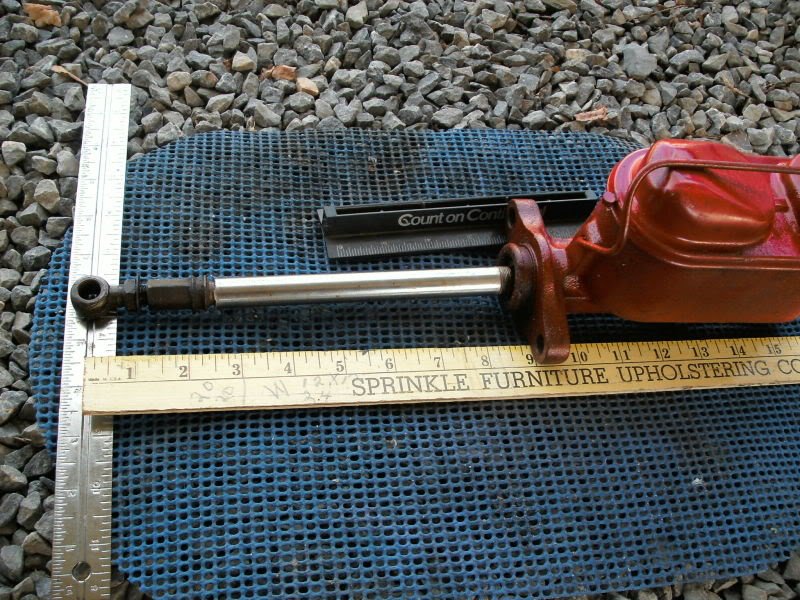
I cut some bad sections of flooring where the foot area is, and did not have to go under the seat area. The only bracket I had to install, was the blue piece. I made the push rod longer also..... The new Mustang II MC worked great....
 2 points
 -
The DOT 5 fluid in my '48 still holds pressure 19 years later... I replaced the draft tube with a PCV valve on the '49 and the engine compartment doesn't smoke nor does the engine drip oil there...I have plans to add the tube from the oil fill tube to the air filter to siphon off any other crankcase gases to further clean up the engine compartment... also added the ground stud to the fuel level sending unit to eliminate any guesswork and minimize any future surprise pedestrian activities2 points
-
I just wanted to thank you for saving the car, rather see it on the road with a sbc then in the scrap yard. Seems to me that a early 283 with the horseshoe mount would be dead simple, but any year sbc the mounts would not be difficult to fabricate. I think your big issue may be clearance with the steering box. That is where you need to research and see what others have done with the exhaust or even moving the box. Once you start getting into custom exhaust headers and or moving the steering box, A inline six could look like a good alternative. Either way, I like the idea of the sbc if I wanted to make a highway cruiser, I personally prefer a flathead to haul my arse to the lumber store and back. All about choices. ... I hope you make a build thread and keep us updated, always good to have some excitement around here Forgot to add, check clearances with the brake, clutch pedals mounted under the cab, just keep it in mind.2 points
-
While this is the "stock" section some upgrades for safety or reliability are good, especially if they are invisible to the observer. Like Dot 5 brake fluid, or factory radio upgrade with FM added. I also added an Allison/Crane optical ignition system. The control box is well hidden so when you lift the hood you think it's stock. Giveaway is when it starts instantly. What's on your truck?1 point
-
So as per my last post I got it pretty good for suggesting putting a Chevy in my 50. I personally am not fond of the idea, but sometimes you use what you have and what you can afford. A year ago I was thinking about putting my 270 Hemi in as was stated by someone else in the previous post, but it was recommended when I was asking questions then, that I not do it because of the amount of work it would take. It was recommended I stay with the 6 banger. I looked into the cost of rebuilding the 6, and it was a lot more than what I really can afford to spend on a non necessary vehicle right now or at that time. I just don't want this car to sit and rot. I really got very little help in that post a year ago but I did get a lot of opinion. Hopefully some will be happy with my decision, but I posted my issue on another site and a very good friend spoke up and has a 318 that has been built with only 58k on it and will sell it to me at a great price. Another friend has done this swap, so I have someone to ask if I run into problems. I did not mean to offend anyone! Was never my point. Just wanted to keep my old 50 going down the road!1 point
-
Well, if I'm honest, it took a bit of getting used to, but at 5'10" it's ok
 1 point
 -
Whos the Boss? Whats this ask the Wife stuff?1 point
-
Put Chevy valve covers and an HEI and take it too an all mopar show........lol!1 point
-
I replaced my driver's door latch rotor yesterday with the parts from an ebay Roto-Lokit kit yesterday - what an improvement! I went a little further and removed the latch so I could repair the protruding bar that slides over the striker and supports the door when closed. Both the bar and striker were pretty badly worn and the door didn't close or open smoothly. I welded up the worn area, and ground and filed it smooth again. The last step was installing a new striker. The door opens and latches like new. You might want to remove the latch and check for broken springs on the pawl that locks the rotor. I noticed the broken spring on a spare latch I'd planned to use. Luckily, the latch from the door was fine. Well worth the effort, just follow the directions - I used a cutoff wheel to remove the cap and rotor.


 1 point
 -
Thrashing Cows did the initial write up. I also did the conversion and posts. I will post on this in a short while with pics..1 point
-
I just talked to a guy who installed a rebuilt cover from a supplier on the east coast.... same installation problems... not easily adjustable with proper pedal feel, free play and return. Clutch didn't operate in a normal feel and way. He reused his old PP with a new disc. Worked fine. He said it was an off shore replacement. In the round file it goes. Clutch parts are becoming NG like the brake parts.1 point
-
Yep, the original still shows the surfacing grinder marks, excellent condition for reuse. I'm curious though, why did they say the replacement didn't work? What symptoms? I can't measure it for here, but I'll bet the problem is not the pressure plate portion, but the cover. Maybe the cover is slightly smaller ID than the original and touches the plate rim, so doesn't release??? In any case your seller owes you IMO. The shop didn't provide parts, so you're on the hook for the labor associated with defective parts, unless the parts supplier will assist.1 point
-
This topic bothers a number of people on the forum. Previous thread was locked due to that. This thread has been reported to the moderators and I've already had to delete a number of posts to it. Keep your posts on the topic. If you don't like the topic at all, then don't post. I strongly suspect we'll end up having to lock this thread too, but I am hoping for more civility going forward.1 point
-
Wind loading can be a PITA....any holes you drill will weaken the tube wall. What gauge tubing are you using?1 point
-
Thanks for the tip. I emailed them yesterday thanks to your post and I'm waiting to see what I hear back.1 point
-
You should alway clean off any paint, rust, or first before welding. Clean metal is much easier to weld, and will produce a better result. I also fear that your tubing is a bit light for your application, but maybe I’m wrong.1 point
-
Like Worden 18, my new exhaust is awesome, MUCH quieter and no engine fumes, double awesome!1 point
-
That's a Hy-Drive torque Converter block ...195543 Plymouth. Those oil galleys are open for use with the Hy_drive torque converter and 3 speed transmission setup. Block off the oil galley's for your use W/O the torque converter.1 point
-
Scrap it IMO1 point
-
More importantly,has ANYONE ever made a swap and came in under budget? I have a hard time rebuilding stock stuff and staying on budget. Every damn thing I try to do costs me more money than I was planning on spending.1 point
-
I came across the same issues when I posted my thoughts about the same swap and got the same negativity, keep it all original 6 cyl bla bla bla well my car came with a Chevy 6 cylinder so much for originality. My frame was also rotted in key places and I condemned it and decided on going with an S10 chassis mainly because of the cost factor and modern upgrades etc. I am going with a 4 speed behind my 355 SBC, why because I have a fresh one ready to go, just waiting on some pieces to come back from powder coat so I can do a final assemble, right now there is a mock up block resting in the frame. The great thing about the SBC is A its cost B everyone makes mounts, oil pans, headers etc. anything you may need for your swap. The ease of my choice of chassis is everything is the same as an 87 Camaro so if I want four wheel disc brakes I can shop for the best deal. One thing I will tell you is that it's not as bolt in as some say by that I mean you may encounter firewall clearance issues so I suggest removing the front clip even with a stock frame so you have plenty of room to maneuver and work in places that are normally not as accessible. Key things to remember are you need 4 degrees of down angle on the rear of the engine and four degrees of up angle on the rear end so you don't experience U joint binding. Speaking of rear ends if you are planning on using a stock P15 rear axle again limitations are the key factors.only two gear ratios were ever available and their tall like most old cars because those old cinder block 90hp 6 bangers didn't develop enough rpm's and torque to get them down the road so they had to make it up in gear ratio. So if you want to cruise on the highway and go places consider changing out the rear end. I did my research and I believe Butch's Cool Stuff (but don't quote me on that just yet) has a chart to tell you what fits what when it comes to swapping rear axles I was going with a rear from a Tri Five chevy which would have been an easy swap if you choose the route I planned. PM me anytime and I'll be glad to help u anyway I can1 point
-
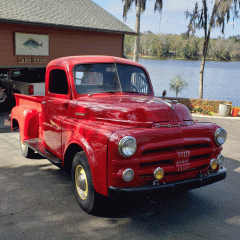
Well, look, I'm another heretic because by the time I bought my Bodge D20, someone had already dropped a 350 SBC/TH350 in there. It works. Man, is it ugly in places, though, and given the time and money I'd prefer to drop a hemi in, but I'll run what I've got for now. And it's been properly butchered...

 1 point
 -
with the addition of other pictures....I would say even if doing the work yourself you will have a major amount of time in just repairing the rust issues alone......I am not one that usually gets scared of rust but I do believe I would be sourcing another car and take the best of both to make one1 point
-
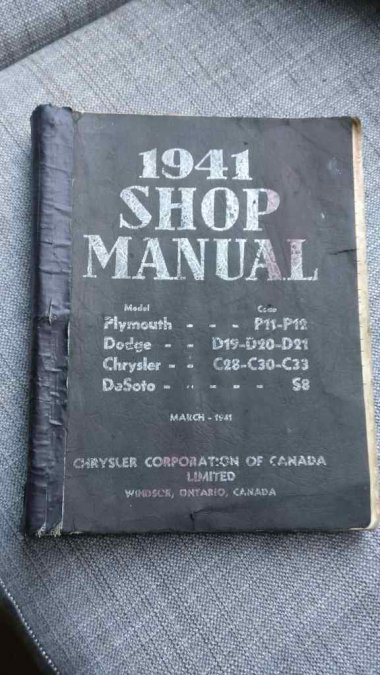
Ooof! 318 pages, it's the official Shop Manual. Ask me nicely, and I'm happy to scan and email/post specific pages, but to scan the whole thing would take a month of Sundays... This might help, too: http://www.pwchryslerclub.org/PlymouthManual_OCR.pdf
 1 point
 -
Not everybody has the skills,knowledge,and the tools to do a frame clip. If you don't have all three,don't even try it.1 point
-
I don't think you offended anyone personally ........us true blue mopar guys have sensitivity issues over transplanting the heartbeat of America into our beloved Chrysler products.....lol. Good luck with your decision, whatever it is.1 point
-
Yup,there ain't no patching that one. Send out some emails to the big junk yards out west that advertise antique car parts and ask them for a good front crossmember. The price shouldn't be high because who else is trying to buy one? Ask for the sheet metal deflector piece that pushes air to your radiator while you are at it.1 point
-
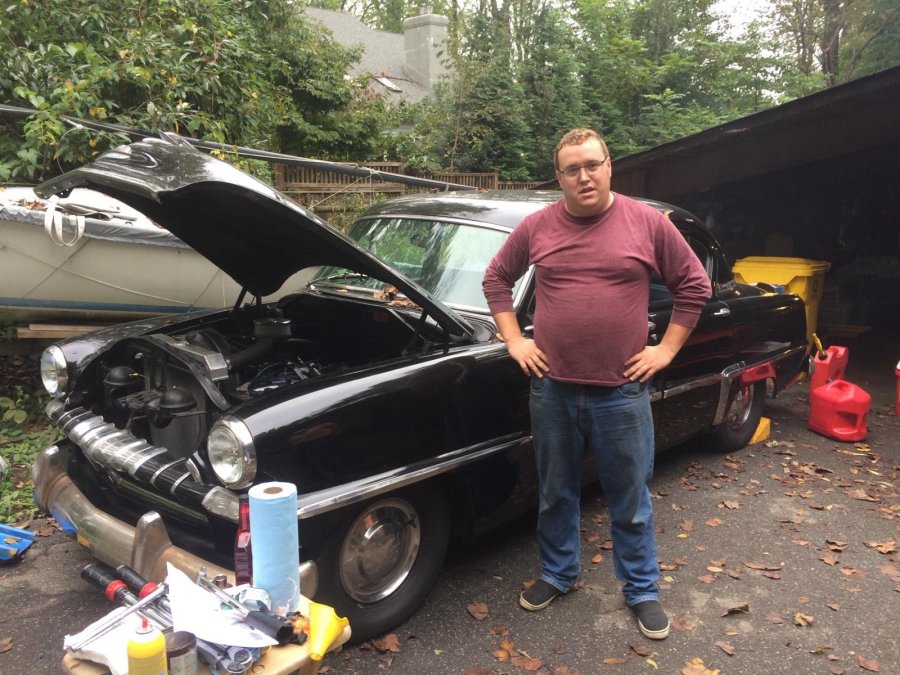
I'm 28 next month and sitting on 3 Mopars at the moment. My dad raced Porsches back in the day, so I grew up around cars. That's him in the orange 914-6. Daily Driver is a lifted Jeep Wrangler. Did all the work myself. Parents bought it for me as my first car. couple year later, a guy up the street from me was selling a '74 duster. I had just gotten, so I quickly took that off his hands. Trying to find the time to do a frame off on it. Got the '53 two years ago from a guy near me who had it for a steal on craigslist. I've had to redo most of the wiring, but she starts right correctly now. Saving up to re-chrome the bumpers now. My pops is 80, but he still will come out and hold a wrench for me if I need a hand some days. I live in an apt, so I store all my stuff at their house and go there when I need to do some work. Not the best photo of me, but I had just gotten the motor running for the first time in two years and my buddy wanted to snap a photo.

 1 point
 -
I went with the remote fill option that ECI offers.
 1 point
 -
fabbed up the "cowl" last night. Tonight I'll weld in the bracing and be ready for blast and paint.
 1 point
 -
New term in the local vocabulary, "evacuation fatigue".1 point
-
The tank unit in my 52 Fargo was hopelessly ruined. I had a nos tank unit for a 54 Plymouth so I cut the float arm from it and from my 52 Fargo. I welded the float arms together so it matched what the truck needed. My gauge now works perfectly. If fate intervenes I will eventually get another 54 Plymouth which will (of course) need a tank unit. Removal of the inner cover often knocks off the resistance cone which is well nigh impossible to repair.1 point
-
Are you saying dead people are allowed to vote? How about dead people who died in one state and lived in another? Do they get to vote twice?1 point
-
Threads for the temperature gauge bulb, threads for the oil filter mount, threads for the coil mount bracket, threads for the fill tube support, threads for the pipe plug on top of cylinder #6, and of course spark plug threaded holes.1 point
-
gray silicone [semi-rigid],, is the greatest , a light skim coat is all thats needed... over the years I learned to let the silicone dry to about 75% hardness or about 20 minutes .. no goop squish.. the oil pan at the top has a couple of problems .. somebody didn't let silicone dry enough and the block wasn't oil free.. Also keep out of blind bolt holes, it will ruin your day..1 point
-
This one is on a 218 engine I bought. Interested?
 1 point
 -
I installed the oil pan and the timing chain cover plate using a thin layer of Ultra Copper from Permatex. Very easy to use and forgiving as the setup takes a bit so you have time to do something large like the oil pan. I used the cork gaskets (uncut) from DCM for the oil pan and paper gaskets I got from Auto Zone for the timing. As you can see in the picture I have also cleaned up the distributor, why do people paint over dirt?, and made new spark plug wires with wire from Tom's engine barn. Making progress...
 1 point
 -
'40 Club, You definitely should have a vibration dampener on an automotive application! All of us, face the same clearance issues when we replace a 23" engine with a 25" one. A readily available solution is to use a Canadian passenger car dampener. It is a combination dampener and pulley, that shortens the front crankshaft area dimension by approximately 1" and also has a smaller diameter. Illustrated below is my (upside down) 265 with this set-up! Walt
 1 point
 -
just upgraded this weekend from 6.5x 16 Bias to 215/85/16 radials on our B4D
(1024x768).jpg.46915f4d16cf2229c85eb950bacefe72.jpg) 1 point
1 point -
I used grease on both sides only. No goop. On the oil pan I used gasket sealer on one side only and grease on the other side. I have removed my oil pan a couple of times without using a new gasket each time.1 point
-
I used my axle shafts. All I did was unbolt the 4.10 center section once I had the axles out and bolted the 3.54 center in as a complete unit. I had to reshim the axle shaft end play though.1 point
-
I changed the center section of my rear axle with a 3.54 from a Plymouth for better cruising speeds. I also added an AUX plug on the radio in my truck so I'm not stuck with AM radio. Other than that, I added a factory spare tire holder, I added electric wipers from a junk yard truck, I stained and varnished the bed wood, and my truck originally had a black bed that I painted body color. Everything else is stock on my truck. It drives and runs great!1 point
-
One thing I did was replace the clevis pin that secures the gas pedal rod to the bell crank with a bolt that has a machined shaft that I got at Ace hardware. It fits perfect and eliminates all the side to side slop in the gas pedal.I tried a new clevis pin but the fit was still a tad sloppy so I went with the bolt . The only other thing I can think of is the PO installed a 3:54 pumpkin in the stock housing which is great because pretty much all we have where I live is wide open level desert roads, mostly hwy with few to no real hills. I love it.

 1 point
 -
A "Hidden upgrade" i have done in my b3b would be the 3.73 gears in the rear instead of the 4.11 point
-
Well it took me a while to post it but as promised here one of the pictures with us in front of the 52. Just a couple of youngsters. Kind of a shame we covered up so much of the cab lol.
 1 point


.thumb.jpg.2939a062256d4ab25842bb553f7111d0.jpg)