Leaderboard


Popular Content
Showing content with the highest reputation on 03/11/2018 in all areas
-
I used grease on both sides only. No goop. On the oil pan I used gasket sealer on one side only and grease on the other side. I have removed my oil pan a couple of times without using a new gasket each time.2 points
-
I'm joining Worton to document my experiences with my '52 B3B. In the next four weeks I will be taking short special Pre-BBQ jaunts to shake down unknown little items. One new associated wrinkle, I'm building an Airstream style camper for overnight stays. I salvaged a hoard of tubing from a wind destroyed shade, and a large amount of quality semi-trailer, thin aluminum top skin. So will attempt to use mostly discarded materials. With two fold-down sides for sofabeds, and a mini-kitchen across the front of the bed, it will be a nice two man, husband-wife sleeper. Details to follow. Attached is the current construction of the roof. To be continued.
 1 point
 -
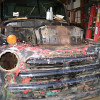
Hey all, New to the group here but I just picked up this 1941 dodge Kingsway and am looking for some more information on it. It runs and drives and has the original engine in it. I'm new to mopar vehicles but couldn't pass up the opportunity to have it. I've gone through the threads regarding brake drum removal but am looking for additional information on wiring diagrams and component names for under the hood. Appreciate any and all help.

 1 point
 -
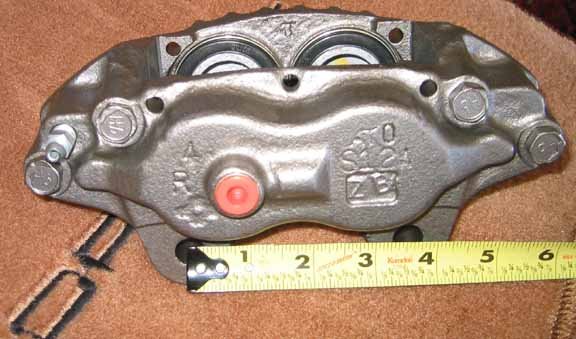
This setup seems to be a early Volvo, maybe a 88 or 89, caliper that has a mounting center bolt holes at about 3.5 inch. The Plymouth mounting holes are about 3 5/8 across the top, and about 5 5/16 from top to bottom. I believe he used the original top rear bolt hole, and drilled the bottom rear hole for the second mounting bolt for the caliper mounting.. The rotor may be an Explorer to get the 4.5 inch lug pattern....
 1 point
 -
and talking about it can be tiring...... ok ok ...I'm going back to converting my fluorescent fixtures to LED1 point
-
Well I got everything hooked up today and figured it was time for a test run....fired right up, sat on high idle perfectly, then after a few minutes I kicked it down and idles at about 7-800rpm. When you stomp on it no real hesitation, revs right up. I only wish I could actually take it for a drive, but I would say other then fine tuning once it hits the road, this seems like it’s going to work. So $88 US for the Carb, about $50 for the adapter and a bit of time...I lost more then that at the hockey game last weekend.1 point
-
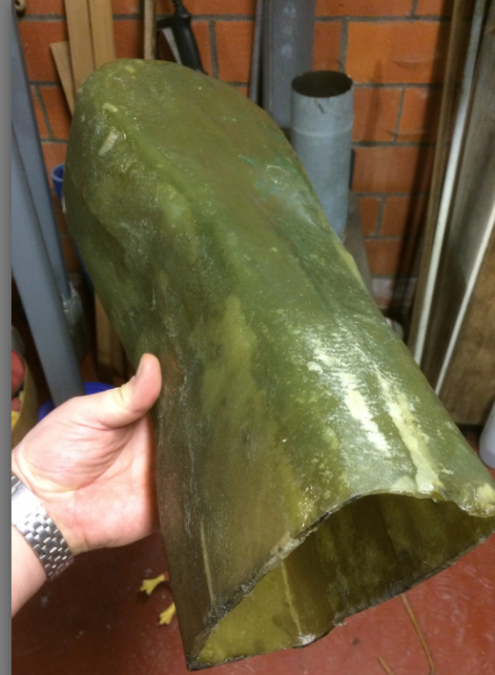
this home made duct will last longer than the car it is in I guess... :-) now curing, then cutting the opening for the ventilator and then I will paint it black.
 1 point
 -
'40 Club, You definitely should have a vibration dampener on an automotive application! All of us, face the same clearance issues when we replace a 23" engine with a 25" one. A readily available solution is to use a Canadian passenger car dampener. It is a combination dampener and pulley, that shortens the front crankshaft area dimension by approximately 1" and also has a smaller diameter. Illustrated below is my (upside down) 265 with this set-up! Walt
 1 point
 -
I understand the having the slant 6 on hand and wanting to use it...it is quite power plant overall but you just stepping forward in technology by one year.....the length of the slant 6 is as much a problem as adding any V8. Before making the call I would ask you study it a bit more before starting the transformation. It is a bit of work involved that will as I said, still limits you overall verse a more modern V6 or V8. late model Dodge V6 engines are running as much as 305 ponies from 221 cubic inches...1 point
-
A slight rake looks great also. I like those Chryslers, will be interested to know what kind of open road MPG it gets. I'm going to start a log on my Phoenix Truck. New lifestyle, much less wrenching, much more driving.1 point
-
Looking good man! If you pile some people in the back seat it will level out the car.1 point
-
That nut installed backwards so the cotter pin could be inserted would never pas a DOT inspection............ period.1 point
-
I'd want to use the damper for sure. Hire someone competent to open up the front of the frame if you cannot for clearance. It can be done with a factory look.1 point
-
The sun was out all day today. I took the opportunity to pull the car out of the garage into the light. First wash of the year. I also installed new seat belts today. 2 point lap belts. Nice dark green colour to match too. I am quite happy with the product from seatbeltsplus.com Of course we had to cruise my neighbourhood to test the seat belts. All my new neighbours seemed quite happy to see my old car out. Lots of melting today. The car sits about 2" lower overall now with the proper stock sized tires installed. I think I want to try and lower the rear end a little to have it either sit flat or a little lower than the front. Mine is about 1.5" taller at the rear compared to the front. I am thinking I will order a 2" block kit. In all the original '53 ads I have seen, the rear ends appear a little lower than the front.1 point
-
I'm so old, I remember when rims were wheels.1 point
-
The tone is what it is all about for me. If max HP was all that important,I woudn't leave the inline in the car.1 point
-
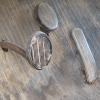
Hi Blue: Another two cents worth here. Mine is a 41 Plymouth flathead. I recommend a radiator inspection and recore if necessary. While I had my radiator done, I brought in the distribution tube. Expert radiator guy in Stockton, CA. said it was fine but put it in the boil out tank to clean it. Lookjed like new when he was done. There is no flare on my tube. Looks just like the rest of the pictures here. I went with the radiator recore job after all and am very glad that I did. Now my car can sit at idle on a hot day and not overheat. Driving, the guage is always in the middle range. What a relief!1 point
-
If any one lives in or near Livermore, Ky. there is a 1939 dodge 4dr sedan setting in a junk yard on hwy 431 between Utica and Livermore, Ky. They say it is for sale and it belongs to Phillipps Salvage yard, it looks to be pretty solid with lot of surface rust. There is also a 48 sedan with rust on lower section and a 1950 plymouth coupe with parts missing. I'd get them but no place to store them. The 39 is all there from what I could see. Good luck if you are interested.1 point
-
Of what I have seen in this thread, drilling a new hole sounds like a pretty sound solution. Another option that I haven't see mentioned is to remove the outer race from the hub and take the disc and hub to a machine shop to have the outer bearing seat cut about a quarter inch (or whatever it would take to get the setback needed) deeper. That extra depth should give the necessary clearances to use the nut as designed. You will no longer have a stock hub but if the brakes are maintained properly, you should never have to replace them in your life time. If you do, just take the new set to a machine shop for the same treatment.1 point
-
At 80 in September, I'm the oldest thus far in this thread. My first car was a 37 Ford two door sedan with mechanical brakes and a V8 engine, a bad combination so I didn't drive it very much. I paid $40 for it. My first driver car Dad bought for me, a '50 Plymouth fastback at that time the ugliest car on the road, to me. Drove it three years which included a round trip from Western Nebraska to Fresno, Ca via Las Vegas. I owned only one MOPAR a 1970 Fury III, with a huge engine. Now I have a '52 Dodge truck and building a '53 Plymouth Suburban . I'm getting too stiff and sore for this hobby, yet I really enjoy it. Til I started on the truck , the most I had ever done on a car was change tires and oil.
 1 point
 -
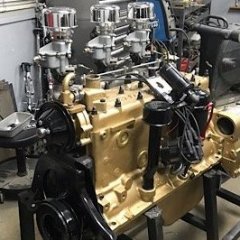
Decision made. Going the satin gold route. Note: that air breather is not going on the car
 1 point