Leaderboard


Popular Content
Showing content with the highest reputation on 12/24/2017 in all areas
-
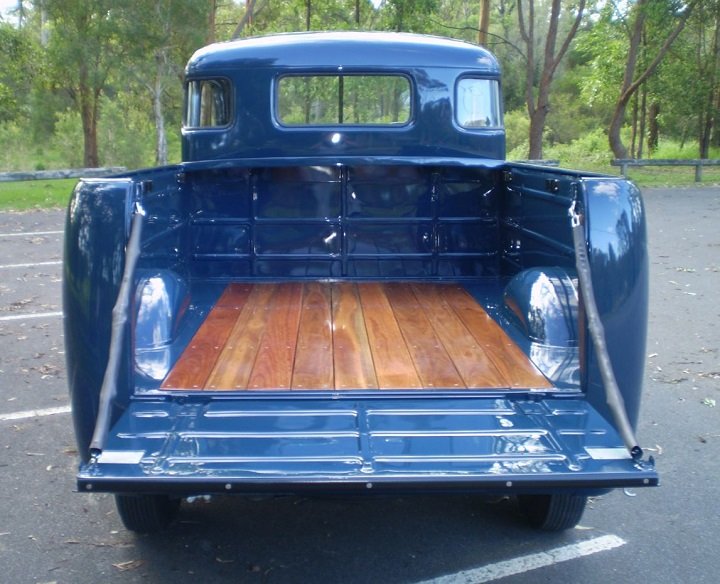
I thought about using the old floor boards in my truck bed, but they were too far gone so I ended up making a work bench with them. I ended up having some Aussie 'Spotted Gum' (hardwood) planks ripped down to the right size and painted them in 2-pack clear. They have lasted for about 6 years, but a couple of those boards are starting to show signs of deterioration so I am thinking of sanding and painting them again. I would eventually like to get rid of all of the (90) screws in the back there, so I might even consider installing new boards with bed strips. It's funny as I had a fella come up to me after looking at my truck last week and made mention of how all of the screws in the back were facing the same way... I told him that he better not look at the rest of the truck then as he might notice a lot more of the same. Things we do hey!
 3 points
 -
May all your barn find dreams come true. Out by Christmas, running by New Year.
 2 points
 -
2 points
-
When I converted my 54 f100 to 12 volts, I used these 12v to 6v reducer.for the gauges and the larger ceramic resistor type reducers for the wipers and heater blower motor2 points
-
Right away Mike Warshaw was the first poster asking for the guys number...............I just laughed when I saw that....he will probably repost it for 1.5 mil.....lol.2 points
-
Right tool helps.
 2 points
 -
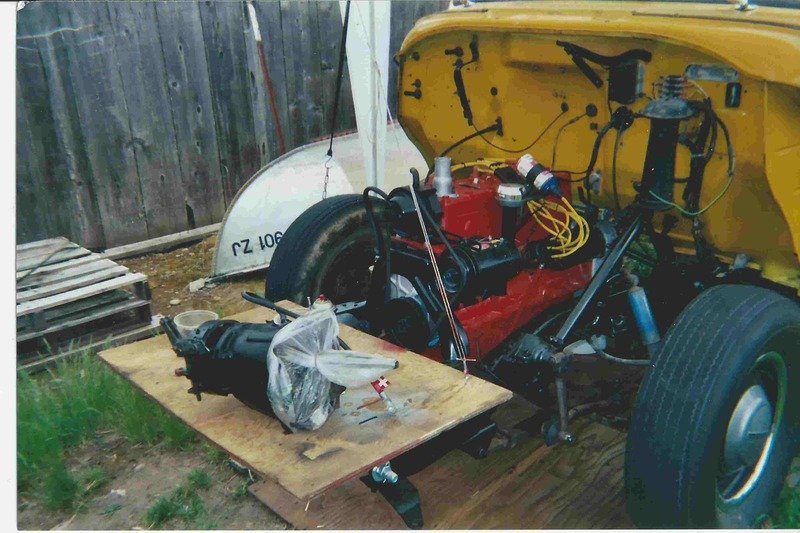
I thought I would start posting up my build thread on my 1955 C1B. My Dad bought this back in 2002. It was previously owned by the school district. It was a pretty solid start for a build and it ran!

 1 point
 -
1 point
-
to Ventura for Christmas Eve! Great news for us is the fires are OUT all along the front country to the coast and over 4,000 fireman have been sent home for the holidays! Have a great Christmas and holiday season!1 point
-
thanks Greg, ...everyone please have a safe and happy season with friends and family....the ham just came out of the oven.....rolls are in the oven...meal in just a few minutes.....we always do the Christmas eve thing....just got called to supper....1 point
-
The car is a 1937 Brauks 8 cylinder coupe. Read all about it at the link below. Terrasota. http://theoldmotor.com/?p=1520721 point
-
The 'step' must be a stop.Too deep and your'e through the pad. A drill press would be in order without. Thanks, as I often wonder what the extra vibration and noise is on start up. Just after the panic and just before the Why me, Lord?" I find my brake lever pulled.
 1 point
 -
Replace the wiper motor and heater motor with 12v equivalents, put a Runtz resistor on the fuel gauge and call it good. I did the gauge replacement to modern guts on my ammeter and though it works very well, it was a pain in the @$$1 point
-
Well - - that just proves over the years this 1.5 ton truck had a swap-out of the rear end or just the axle / hubs - - more than likely with what was available at the local salvage yard. My front wheels are five-lug. This information helps a lot when I get to taking the axle out to get to the rear brakes. Many thanks!1 point
-
There are four pics of this cut away. My tablet is acting up and I cant get the others to load up correctly. Maybe some one else could capture these for the reference or tech section. https://www.facebook.com/groups/485126171848580/?fref=nf1 point
-
Mike lists MoPar parts on Ebay and his prices are very high. He over prices the parts. Rich HArtung1 point
-
I love it,but for some odd reason feel a little embarrassed to admit it. Pretty much has to be a PhotoShop build.1 point
-
I thought these were pretty cool, Not original Mopar but Priced pretty good. I had to use my Die grinder and drill press to make them fit the stamped tail light bracket DCM sells. https://www.amazon.com/gp/product/B01CQCQ9AE/ref=oh_aui_detailpage_o06_s00?ie=UTF8&psc=11 point
-
OMG @Merle Coggins, so much to learn, and look what I found. Though not as cool as a glass lens with "Dodge": https://www.etrailer.com/Trailer-Lights/Peterson/432000.html About $12 bucks. Check out how well the product is presented and demonstrated.1 point
-
Great thanks!!! Now who can put the lines and arrows on the front and a paragraph on the back explaining what the lines and arrows are. Also I have about ten photos of a cut away engine, how do I go about doing a cutaway album set up with these for the reference section?1 point
-
I may have been the guy mentioned with the 360 in the 1959 D100. I managed to break the frame behind the steering box once. I was running it up to 7000 RPM with a 11:1 360. I was driving it daily on race gas. Way before settling down and having a family! After I reinforced the frame, my problems went away with cracking up the frame. If you drive it sensibly, your frame will be fine. If you drive it hard, follow 48Dodger's advice. Your truck is a beauty!1 point
-
I like how the engine looks in red.1 point
-
She wanted jewelry for Christmas? Just explain this is antique jewelry! Worth a try? Merry Christmas to all!! The reason for the season. DJ1 point
-
The folks on this site have the coolest trucks and are truly good people. God bless Marry Christmas.1 point
-
Went to the Alaska DMV yesterday to register the coupe with an original 1947 license plate. Before I went I phoned and was told that I had to have a front plate. In 47 they only made one plate and it was made out of soy. I came up with the bright idea to make one out of an old clipboard. It looks similar to the soyboard but stronger. I had a sign maker paint it and digitally reproduce the lettering and numbers. The very nice lady that I dealt with at the DMV told me that the oldest plate that they had codes for was 69 and that replica plates were not allowed. When I told her that they only made one plate per car for 47 she went to her supervisor. They called the DMV director, who looked at photos of the replica and original and said do it. He'd personally put a note in my file saying that he authorized it. They also phoned the main DMV to get a code to enter the year in the computer. While I was there I permanently registered it for an additional $30. That way I will not face a hassle in the future.

 1 point
 -
You could post more pictures and I'm sure nobody would complain. Heck, throw in a story or two1 point
-
My favorite mix for stuck pistons is half transmission fluid and half acetone.1 point
-
A forum member (who is no longer active) refurbished this pair of tags for me a few years back. As far as security you could rivet the tag to the bracket but this will only keep honest people from stealing the tag.1 point
-
my friends used this picture for their Christmas card taken by "ART" during my wedding reception.
 1 point
 -
These two door suburbans are very special models. While I like my '53' that rear fender on the earlier years really makes a nice statement of antiquity. Oh, the hood is genius!1 point
-
Copied this image from Aug. 2016 40plyrod post above, because someone on another thread mentioned patina. The Sub. still looks like this and the car is pretty much a daily driver. Mike is a very involved Dad so much of his free time lately is working with Josh on school work, rockets and quad runners.1 point
-
Hey Crew. Trucker Tim & My Lori want to send a very special "Thank~You" to the FHUBLER Family. New to this site I've found a whole new group of like minded Folks that seem to enjoy the simple things in life. When I mentioned we needed some special parts for our new "48" Plymouth, Mr. Fhubler said not to worry they had extras and would be happy to help us out. The parts showed up in today's deliveries with a Seasons Greatings card with instructions to "enjoy" the new parts. Not very often will you find an old truck driver speechless. Thank You Fhubler. Thank You Fhubler. Thank You Fhubler. Tim & Lori.
 1 point
 -
Don, I doubt it--I donated the car to PBS and it was auctioned off in South Bend1 point
-
Then there are after market choices. I am running wheel vintique style 20 smoothies. Mine are 15 x 5 with a 3.5 inch back space. They are drilled for Mopar/Ford and GM bolt patterns. One of the gm holes allows the locating pin to be retained. They don't have clips for the stock hubcaps so I run baby moons and trim rings. The good thing is they are new so no worries about bent rims rust or metal fatigue or cracks from being over torqued. I am running 225 75 15 on the rear and 205 75 15 on the fronts. The 225's said minimum 5.5 inch wide rim but going on 30,000 miles with no issues. I had a bit of rear fender rub on sharp turns but new spring and shackle bushings, and rear shocks took care of that.
 1 point
 -
Don't let your dream project sit too long.....
 1 point
 -
Ok, got it.

 1 point
 -
A fun comparo,........barely 6 months -1 point
-
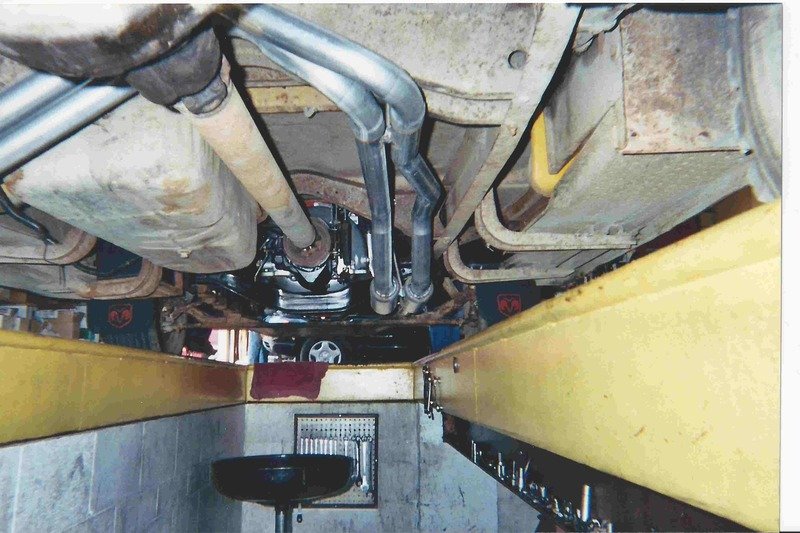
Time to start going back together... A Fenton intake and a home made exhaust manifold ought to wake it up a bit!


 1 point
 -
If you bought the repoped original look spark plug wires, they leak, had a set on mine and at night it looked like a Pink Floyd light Show under the hood. In anticipation of a long road trip I just bought a set of universal 6 cylinder copper core tractor wires from Tractor Supply Company 16 Bucks tax included. Unless your breaker plate is sticking or very rusty, I would leave it alone. Easiset way to change the stuff in the dizzy is to pull it out of the engine and replace the parts on the bench or with the diz clamped in the vise. Remove the vacuum line the coil wire, the wire from the coil to the side of the diz. Remove the diz caps leaving the wires in the cap and move it aside. With a piece of chalk or tire crayon, make a reference mark on the engien block that lines up with where the vacuum advance points to, then mark the diz whare the rotor points to. Then pull the retaining screw that holds the diz to the engine and pull the diz out of the engine. This will allow you to inspect all the parts of the diz, the shaft shouldn't wobble in the body, the breaker plate should move freely, the points cam should still have points on it, you can check the vacuum advance movement with either a hand vacuum pump or by sucking on a line attached to the fitting. You can check the condition of the internal wire that runs from the terminal on the body to the points, and you can assure that the lug insulation is still in good condition. Broken insulation here will allow the signal from the points to go to ground rather than the coil. Same wit the internal wire. This needs to be a flexible piece. I found mine had most of the insullation dried and split. Not having a suitably flexible piece of wire, I removed the original piece and wound a couple of passes of silk thread over it which I then covered with rubber cement. Still working after 5 years. Remove the old points, if you have a magnitized screw driver use it to keep track of these small screws, mine seem to want to jump out and escape to undiscovered places in my garage. Remove the condesor. Install the new pieces and adjust the points gap as specified with a feeler gauge of the proper thickness. Snug up the adjusting and retaining screws. Make sure you apply some of the greas that comes with the points on the rubbing block where it contacts the diz cam. Before you rinstall the diz, put some light oil in the oil cup on the side under the body. Reinstall the diz realigning to your reference marks, reinstall the rotor and cap. Assure your coil wire is fully seated in the cap. If you are changine the spark plug wires do then one at a time starting with the longest first. cut them to lenght snap it on the plug, thread it through the wire loom, add the distributor cap and end, and snap it tightly into the diz cap. You can adjust your timing with a timing light, or by attaching a vacuum gauge tot he port on the intake manifold, and turning the distributor to achive the highest possible vacuum reading at idle (should be 600 RPM or less) the Vacuum reading should be between 19 and 21 inches on a healthy engine. While you are in the neighboor hood, give the oil fitting on the back of the generator a shot or two of oil, and check the fan belt for proper tension. Good time to clean and tighten your battery cable clamps on both ends. While were talking about bat cables, yours should be nice thick ones. In many cases these will have been replaced over the years by new ones made for 12 V applications. Should be minimum 1 gauge wire. If yours are not as thick as you little finger, I would replace them with properly sized cables. Hope this helps.1 point