Leaderboard


Popular Content
Showing content with the highest reputation on 07/06/2017 in all areas
-
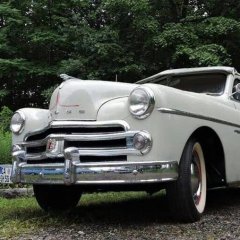
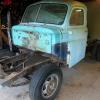
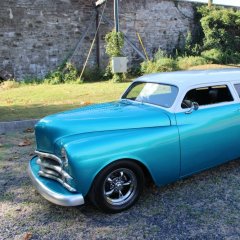
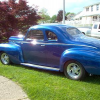
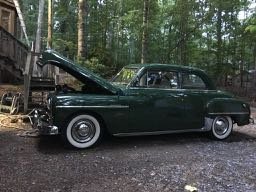
after too many years, I finally got my shop built and got to pull the 53 out of the pile of crud that slowly enveloped it and put it in the new shop. My plans are to be driving this gal next summer.

 2 points
 -
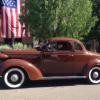
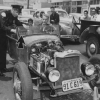
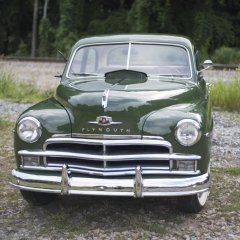
From this mornings home town parade.Happy Independent Day to all!2 points
-
Look stock to me....2 points
-
This is awesome! I will likely follow this on my 47 build.2 points
-
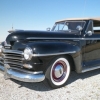
...that I got my car back to road. Want to say thank you for this great forum and the help of all posts while looking for information during restoration and the answered questions I ask. First 250 mls I drove and hope a lot more will be added... Andre
 2 points
 -
Stock '53 fully open. No complaints. I just did a valve job at home, never took the hood off. Sure, I bumped my noggin a few times. Only on the hood latch. Dang that hurts.2 points
-
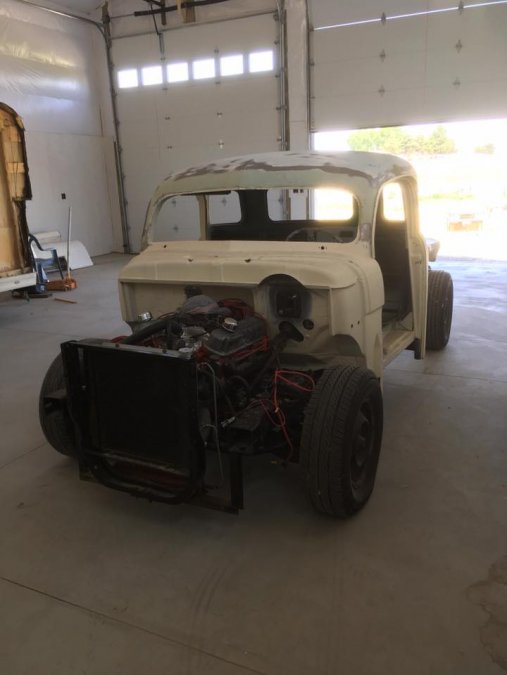
Very happy to say that the old girl is running like I dreamt it would! I actually completed my work last night but decided against flashing it up. Incase there was a problem then I'd be up late troubleshooting, disappointed, and get a lousy nights sleep. No such worry was needed. After some good cranking time to prime up the fuel system and fill the float bowl, she flashed right up. No more exhaust noise back through the carb intake from #6 intake being stuck open for so long. She purrs nicely. Next I will warm the engine up to full operating temp and re-set my valves again. Spec is hot at .008 intake .010 exhaust. I set them cold at .010 and .012. They tick a little cold so I figure I'll do them again one more time when hot. No sign of any oil burn so far. I'm a happy camper. I also plan to re-test the compression and see where it sits compared to before I tore it down. I can post my findings at that time. Thanks for all your help here kinds folks. Another one, back on the road. He she is, just coming out after a long month in the garage. I'm grateful to have a cool air conditioned garage. Hot as hades round here lately.2 points
-
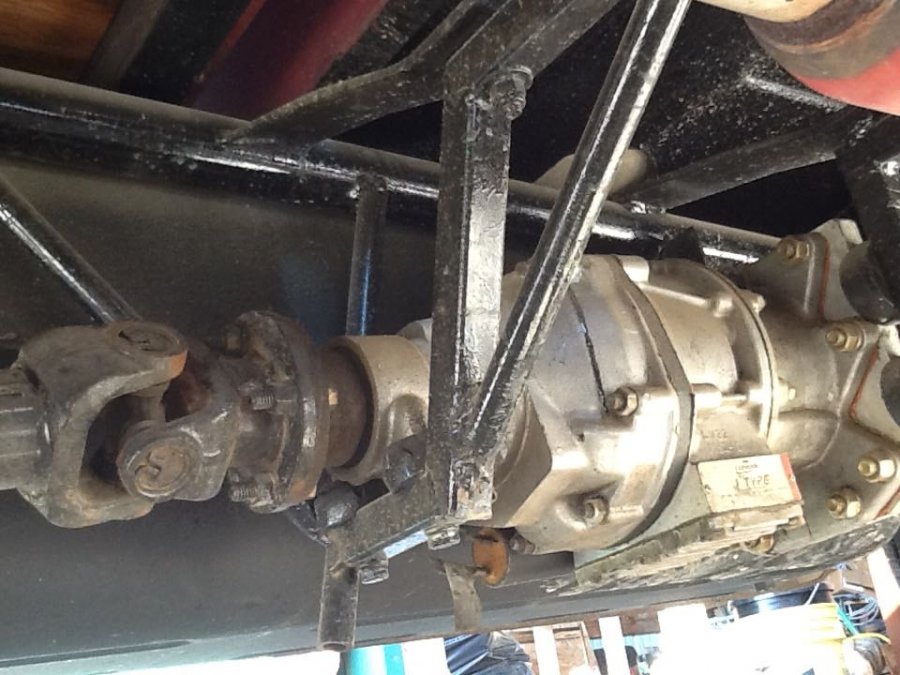
I think this is what you're looking for. Here are some pictures to get you in the ballpark.


 2 points
 -
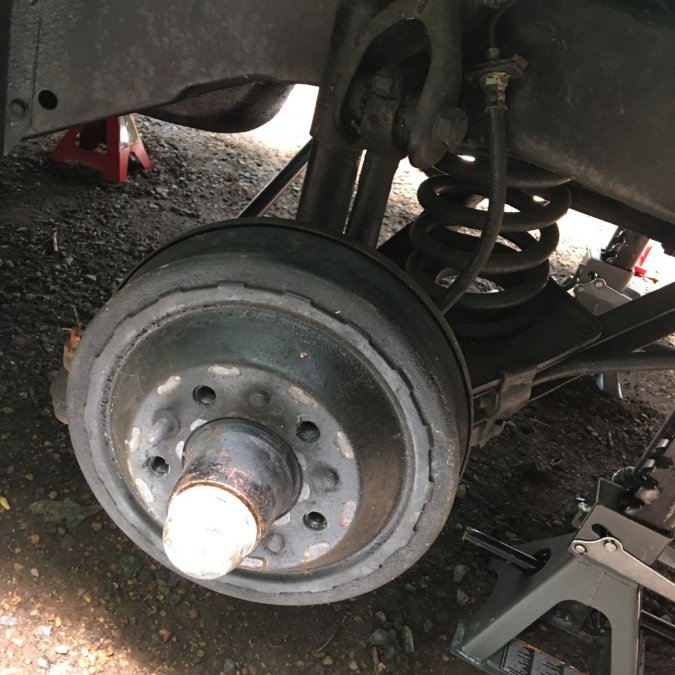
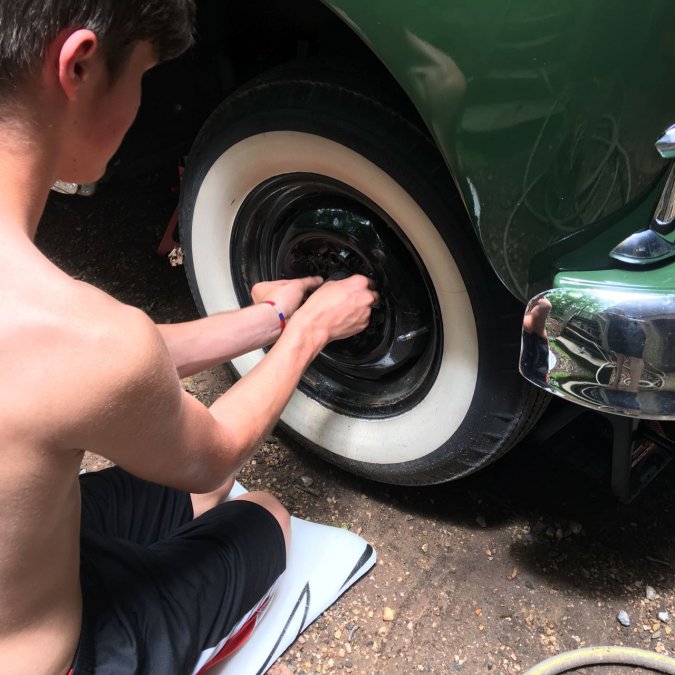
Part of the reasoning to get my son an 'old car' for when he had his license was that he had to invest time in making it safer before he could drive it. So today, Jacob, now 15, is starting the process of converting the front brakes to discs (yeah, I know some are quite happy with drums and in all honesty, the drum brakes had been redone relatively recently in the car's life before we bought it). But we are converting. So I'm going to try to get as many details as possible. Started by taking off the hubcaps and loosening the lug bolts (don't forget that the L on right side is left-hand thread). Made sure the back wheels were chocked on both sides and the parking brake (only functional for 2 days) was on. Left the car in gear. Started the jacking. I've got a pair of 6 ton combination jackstands up front and put another pair under the frame (one behind each wheel). You can see them in this photo. Finished jacking up the car and took the wheels off. More to come.
 1 point
 -
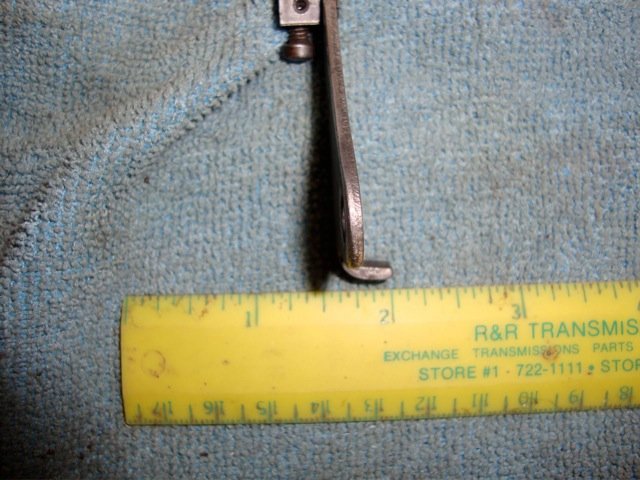
I have never broken a cotter pin. They are soft bendable material. I use dikes. Unbend the curved end and the grab the pin lightly with the dikes at the looped end close to the base. Squeeze just tight enough to make a slight indentation and push down on the handle end to effectively pull the pin upwards. This will take several bites to work the pin out but you will not have a broken pin. Cotter pins are a one time only use. But an assortment at the hardware store and always use a new one.1 point
-
See he busted a knuckle.....builds character and the vocabulary.1 point
-
Great thread. I am following.1 point
-
This will be a great story and one that I will follow.1 point
-
Glad to see your teaching the boy about the car. I tried to let my son do as much as I could on his own. I believe in letting them think for themselves on projects and letting the make some mistakes along the way, part of the learning process. I think your son will appreciate the car more and if he's actually going to drive it He should know how to work on it. Thumbs up!1 point
-
Scarebird kits make it easy. Way to go.1 point
-
Hey Mike; Good to see ya back at it. Home Depot sells an inexpensive tub for mixing mortar etc......that is just the ticket. Jeff1 point
-
Would a gloss white work or should it be more of a satin/matte white? I'll start taping the rest of the light up to avoid overspray. Did a little rust removal with some evapo rust. I think it came out great! Just need to get a big tub to stick the whole pedal in.1 point
-
hi, i recently asked scarebird and this is there answer : Part Application NAPA Wagner Raybestos Rotor 1993-96 Ford Probe 4886318 BD125274 90318(R) Caliper, LH 1983-92 S10 4WD 442-2046 TQM25048 RC5248 Caliper, RH 1983-92 S10 4WD 442-2047 TQM25049 RC5247 Brake Hose (15”)* 1979 Seville front 36845 F98912 BH36845 Brake Hose (17”)* 1979-82 El Dorado front 36959/36960 F98914/98914 BH36959/3696 Brake pads 1983-92 S10 4WD TS7070AM MX154 EHT154 Wheel Seal 1967-69 Camaro Timken, National 8705S SKF, NAPA 17187 Dust cap 1983-2010 Ranger 2WD NAPA 735142 Dorman 618-503 *Verify fit and length before buying1 point
-
About 2hrs. Already had the old springs out and the car in the air which helped speed things along1 point
-
@keithb7 wow your 53 opens a lot wider than the OP's 50 and my 50. I wonder if the hinges could be transplanted. Hmm1 point
-
I just bought new ones from Orielly's. Weren't expensive and I knew that they were new.1 point
-
I got a piece of aluminum pipe 1 inch dia. Then got some rubber bumpers ,the ones you use on the bottom of a metal table so it doesn't scratch the floor. I put them on either end of the pipe and use it to prop open the hood on my 50 Ply wagon. Here's another helpful tip.......the latch that hangs down in the front is most always a place that you whack your head on the way out of the motor area. I took an old tennis ball and put a slit in it and it slides over the latch. So if I am doing any kind of prolonged work under the hood, when I back out if I hit the latch, my old head is protected.1 point
-
These hood openings were designed to create an intimate bond between the mechanic and your car's engine.1 point
-
I have emailed scarebird. Figured there was just as much, if not more knowledge here. No harm in asking right?1 point
-
Why not contact Scarebird directly?1 point
-
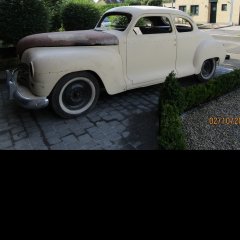
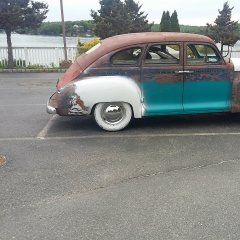
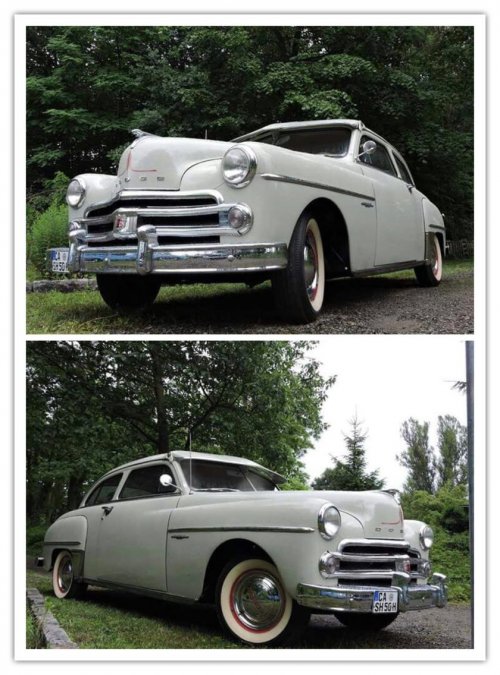
Looks pretty full open to me. Here are photos of my P20 taken with an iPhone at dusk (photos are grainy) I have a friend in town that remanufactures hood hinges for 60's & 70's muscle cars. I asked him to take a look and he agreed that there was no way it was going to open any further. But he said that the way it was made, it was never going to need his services. It sure is a pain to work on things under the hood if they are other than next to the fenders.

 1 point
 -
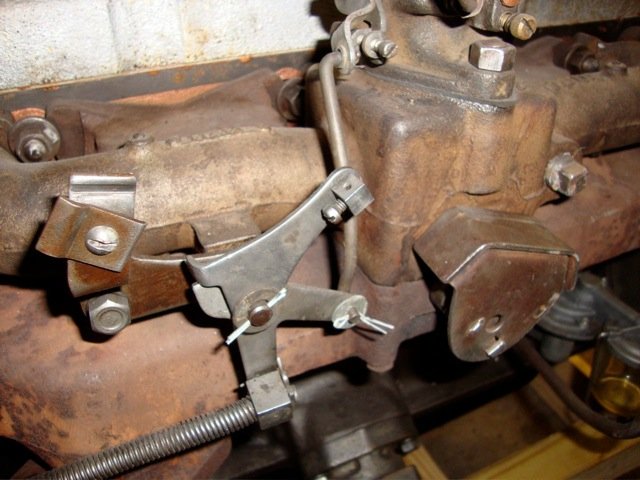
I have repeated this story many times on this forum. Back in the day many of the unscrupulous repair shops along the highway would charge customers for a complete tune up but simply replace the throttle spring with one of lesser value. When done the customer would test drive the vehicle and comment how much better the vehicle accelerated because it took less pressure on the foot feed to get up to speed.1 point
-
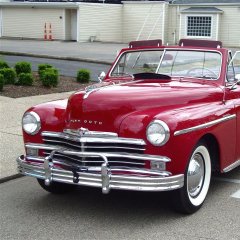
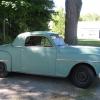
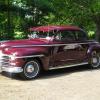
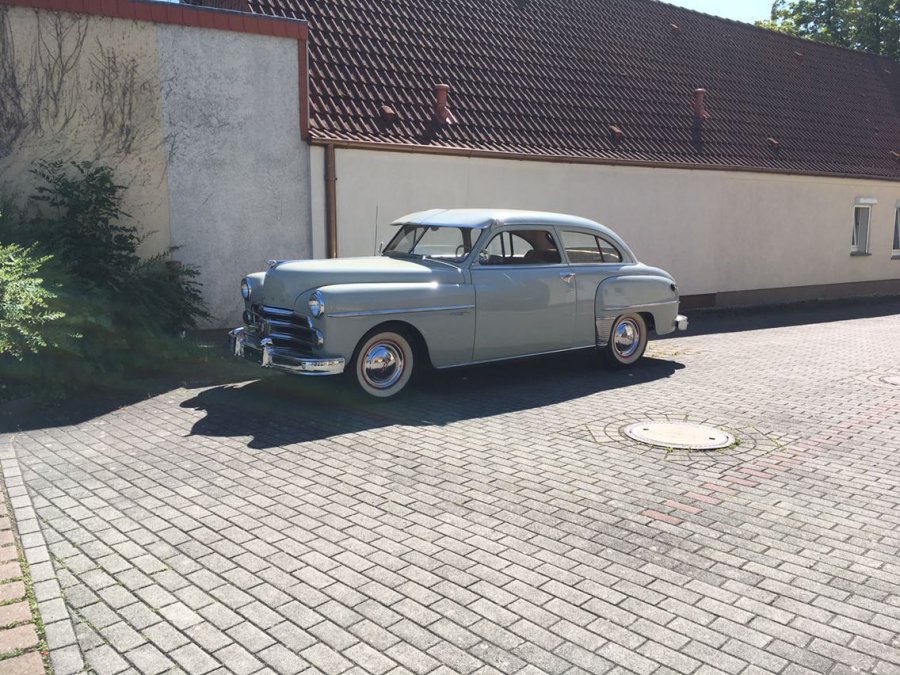
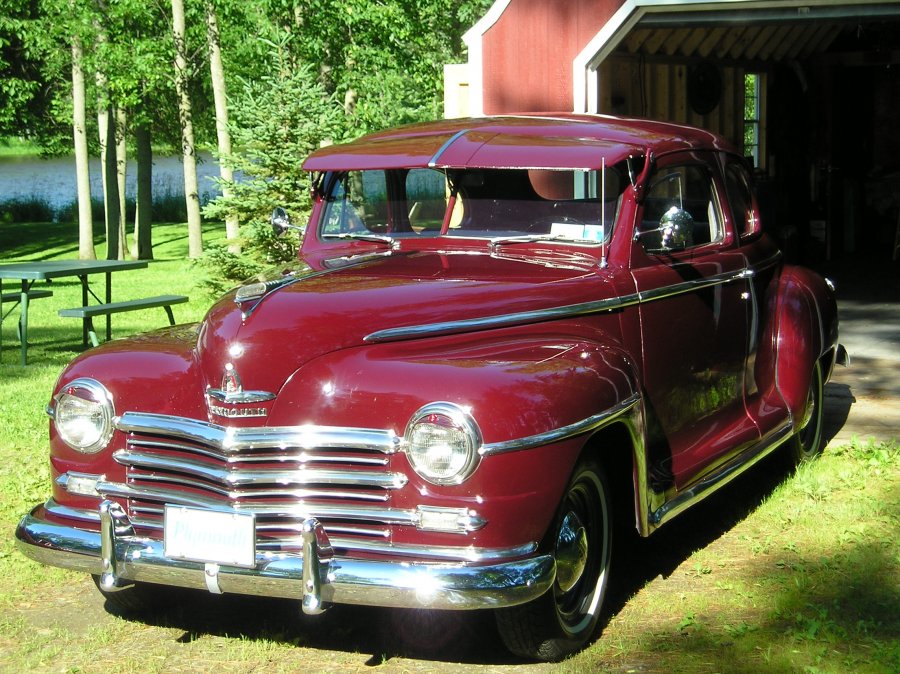
My first hobby is photography. My son, Jacob, decided at age 14 that he wanted 'an old car' when it came time to drive. I searched around and found this 1950 P20 Special DeLuxe Club Coupe that had been restored two owners ago. The previous owner bought it from the prior's estate. The PO had the bumpers rechromed, found some trim, redid steering tie rods, and a few other things. I've primarily just been doing maintenance, but Jacob is starting a Scarebird Disc Brake install real soon. I don't know why I haven't taken the time to take a photo of the car -- perhaps all the time my wife's kitchen remodel is taking? That project started at the same time we got the Plymouth -- hmm. Anyway, yesterday, 4 July 2017, I finished repairing the parking brake and then asked my youngest daughter to put on a dress and we headed out to take some photos. I started at local college campus but got run off by security. Headed to a park that has an ancient stone gazebo, but being a national holiday, the park was overrun with people. Decided I would head down to this pull off across the river as it has a place without any time telling details. Favorite shot of the youngest daughter with the Plymouth.
 1 point
 -
Beautiful car and beautiful young lady.
 1 point
 -
actually WHITE works better1 point
-
If you get the o-ring kit, you'll also get some very nice images of how to rebuild the OD. It is a very simple procedure. There just isn't much to these units, and not much to go wrong unless you put the seals in incorrectly--generally, either the electric solenoid goes bad, or the hydrauling unit needs the o-ring kit. It is possible that the clutch material may wear out. The gears are pretty much bullet proof, unless they are sheared off by a load, and it would have to be a really big load... I've never heard of anyone blowing one up. I have two units and both seem pretty solid. There are a lot of warnings about putting them into reverse, so I'm going out of my way to see that it doesn't happen. I have a dash light that reminds me when it is on. I may add a brake or clutch over-ride as well. Maximum Overdrive has a schematic for a brake override to protect the OD. Anytime the brake is engaged, the OD shifts back to low. You could also put it on the clutch, which would be more useful, I think. Anytime the clutch is engaged, the OD shifts to low. If you are really enterprising, you could mount a reverse switch to the end of your transmission. It would take a little engineering to find the right spot... Last thing before watching fireworks is that the hydraulic pressure is created by the input shaft RPM. It drives an eccentric cam that pumps a little hydraulic piston in the OD. The pressure that is created is used to shift from low to high. The electric solenoid, when engaged, routes the fluid to the pistons. The reason that the OD isn't used in lower gears is that if the shaft isn't turning fast enough, there won't be enough hydraulic pressure to shift or maintain the high speed position. That depends in part on the condition of the o-rings and the viscosity of the fluid that you are using. I've used it in 1st (accidently!) without any troubles. I especially like using it on 2nd and 3rd. Happy 4th, everyone! A great day to celebrate the birth of the USA! Our founders, when signing the Declaration of Independence, knew they were signing a declaration of war. They hoped it would lead to a new republic, of the people, by the people and for the people. I'm sure they would be amazed, and blessed, to see how freedom has changed the world. We say "thank you" to our founders, and thank you to all our service men and women--actively serving and retired--for giving us peace and protecting our independence.1 point
-
Here are some more pictures of the installation:


 1 point
 -
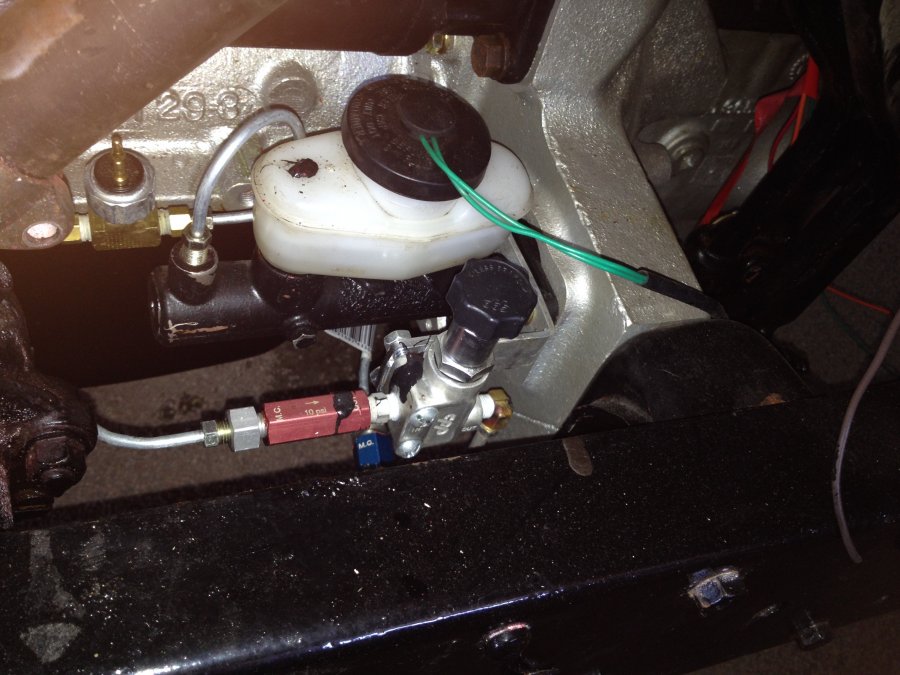
I don't know if anyone is following this thread anymore--want to give a brief update on the Toyota m/c and how my brake project turned out: I installed disc brakes on the front and back of the truck (thanks, Rusty Hope!), and used the Toyota master cylinder along with the appropriate pressure and metering valves. The m/c fit like it was made for the truck. No need for power brakes, this setup has plenty of power for stopping, with little effort on my part. So if you are looking for an m/c upgrade, I would strongly recommend the toyota version. The overdrive was well worth the effort, too. The cab is much quieter, my rpms are much lower, and I get the added benefit of easy upshifting/downshifting with the press of a button.
 1 point
 -
We've all seen and heard about people finding Jesus in potato chips and in different places, well i just found the mopar pentastar in a hamburger roll, its gotta be worth a fortune to a serious mopar collector, I'm gonna sell it on ebay and retire !!!!!!!!!!!!
 1 point
 -
now that is a good idea, why didn't I think of that before... grrrrr... thanks Donald!1 point
-
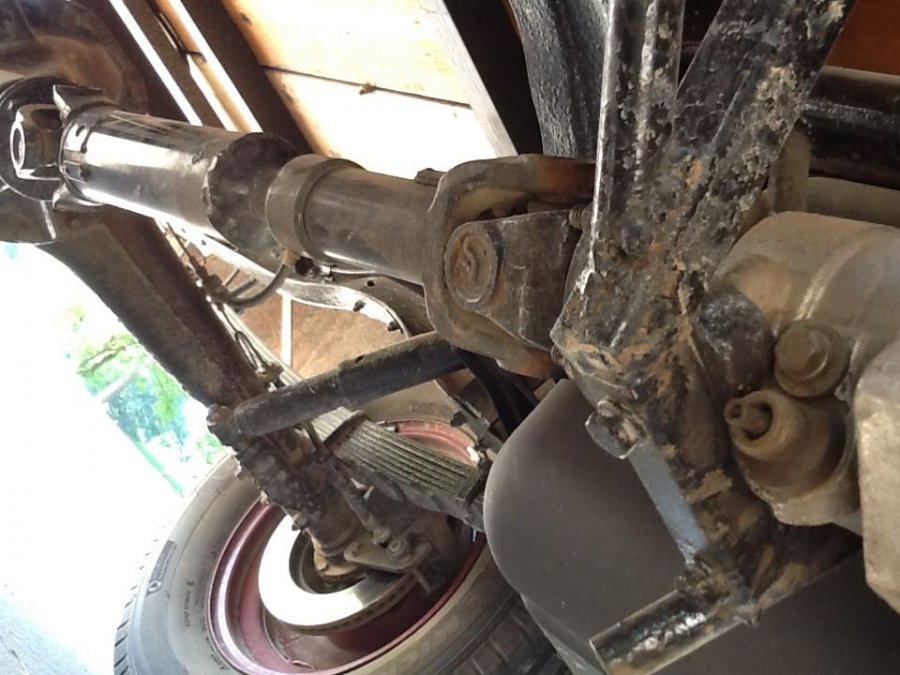
Driveshaft Specialist in Azusa estimated the cost of a driveshaft with the more modern Spicer U joint set up at $350. That's for my 52 Plymouth Cranbrook.1 point
-
i like these brackets1 point
-
Originally written by Robert F. Mehl for Old Cars Weekly in May of 1986. Through most of the '30s, Plymouth was number three in sales. Plymouth appealed to conservative family buyers and didn't have Ford's sport appeal. Youngbloods who favored open cars paid little heed to Plymouth or Chevrolet. Their open car sales were less than Ford's. The flashing V-8 seemed to go with the open car spirit. Open car sales were, by then, a small part of sales (one to five percent). Essex moved away from open models with the first cheap coach (two door sedan), and buyers have favored closed cars ever since. In the 1930s, dealers always had an open car or two on the showroom floor to draw traffic. Auto makers did not make much from open car sales, and many dropped roadsters and tourings early in the decade. Later, some dropped convertibles for a time. Convertibles with wind-up windows were expensive to build after mass production made closed car bodies relatively cheap to make. Convertibles had heavier frames, top irons with many individual pieces and required tailoring of the top. Prices for convertible coupes and sedans were a hundred or so dollars more than the closed coupes and sedans. While many admired sporty ragtops, few bought them. Most didn't like the hassle of folding tops (no great effort on convertible coupes, but a two-man job on convertible sedans). Then Plymouth got a better idea: a power top for it's '39 convertible. Engineers came up with a power mechanism for the ragtop coupe. It consisted of two vacuum cylinders mounted, one on each side, by the rear quarter panel. Top irons were redesigned so the power units, working in unison, could either pull (for dropping) or push (for raising) them. The rewards of innovation did not go to Plymouth. Other carmakers adopted this idea and sold more. But Plymouth did make a major contribution to the development of the convertible, nevertheless, and ragtop owners have power tops today.1 point
-
As usual , Bob T is right on ! I have never seen anything but a vacumn op.top on Ply. since its first intro in 1939. That incidentally was the first Amer. Manuf. car with a automatic top. Ply tops '39 thru 48 were ALL vac. operated. The cylinders are very powerful when in good condition. The tubes under the carpet AND under the boot well were STEEL. The 1/2" outlet on the manifold was used for volume that the large cylinders needed. The small muffler half way between the carb and the firewall I would guess was to stop debris from the top mech. from entering the fuel intake. Thats just my thought tho and until -if we ever find out for sure- its a guess situation. Chrysler,De Soto,and Dodge in those years ( 42-48 ) all used the same lift mech. Two motors with gear reduction attached to two long screws raised and lowered the top. All electric. They drew so much juice that it was suggested that the engine be run during operation. Ply changed to Hydo-Electric in 49 and later to just electric as was formerly said. Had to jump in here guys ---hope no one minds. Frank M.1 point