Leaderboard

Popular Content
Showing content with the highest reputation on 06/22/2017 in all areas
-
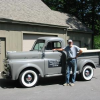
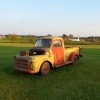
This is an old farm truck I pulled out of a fence row in Colorado. An afternoon with a hose, soap, and some Mother's cleaner wax got me here.6 points
-
A bit of paint and a brush can cover and preserve with very little cost.3 points
-
For taking off the oxidation and grime, the Mothers polish and an old wash cloth works great and is much less work that a bunch of different sandpapers, Not to mention being a rubbing compound, much gentler on the 60 year old paint. That truck would really look nice with that green that is hiding under all of the years of abuse.3 points
-
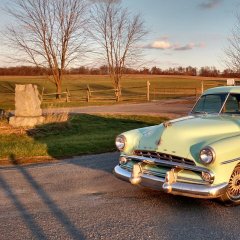
Just purchased a 48 business coupe. Has 270 poly head with a fluid drive sitting in it right now. Plan on putting a 230 with a straight drive from a donor car in it soon. Wish me luck, It has the grill and all the chrome.
 2 points
 -
I'm not sure there is a correct way to do it. I start on passenger side and tighten the bolt until a heavy piece of paper will just slide between the drum and the lining right under the bolt. Then I'll tighten up the "T" bolt until the lower half of the drum rubs on lining. Then I'll tighten the upper half limiter until the paper just slides between the top half of the lining and the drum. Then I'll go back to the "T" bolt and tighten till the paper just slides between the lower half of the drum and lining. I'll paper check it everywhere and make little adjustments as needed then put the safety wire back on the passenger side bolt.2 points
-
I haven't posted a whole lot lately probably because I'm out enjoying the truck! Here's a couple videos from driving back from a cruise night (about 1.25 hours away from my house). When I left the house the weather was perfect. I got to the show and it started raining, and it rained the entire drive home. My windshield leaks pretty bad, so Saturday it has an appointment with a local shop to seal it better. I've also been playing with the speedometer. It seems to catch around 40 mph until around 50. It also bounces a lot. Last night I changed the cable and it acted different all together (not in a good way). I sent it out to have the mechanical parts checked out when I restored the truck, but it still isn't right so it will be heading back to them. Kevin did the gauge faces and the speedometer face. It still looks great and is holding up perfect! Its been few years since he did it now I think. I couldn't be happier with how they look! Out of curiosity last night, I swapped in a very nice original speedometer that I bought for $15 at a swap meet. The swap meet speedometer works perfect. Its smooth, doesn't bounce, and is accurate (minus the rear end ratio difference). Maybe I can make one good out of the both? Anyway, here are somewhat boring videos. P.S. - I'm really happy with the radio setup in the truck, it sounds great and works perfect!2 points
-
Mike; Mine started off as a $1000 non running derelict. I did pretty much everything but the paint myself. And other than the paint I never spent more than a couple hundred a month on it during the build. I knew from day one that I wanted it to be a daily driver. So my build always kept that in mind. I made a lot of subtle mods as I progressed but I also tried to retain as much of the original stuff as I felt I could make do with. I am very happy with the end product. These truck were obviously a good design when they were made and most of it still works well today. I will say that when one considers something like this they need to be realistic about how it should perform. Change too much or ask it to be like an Escalade and it will lose it's real charm very quickly. These are just work trucks....... plain and simple. Keep that in mind and you should get good results. Jeff2 points
-
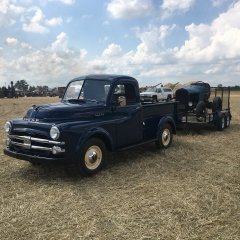
That is proud father of 70 year old truck that has new twin carbs. 99%complete. Need throttle springs and Dashman 2" carb spacers.
 2 points
 -
46-48 plymouth rear fenders are all the same except maybe wagons2 points
-
So I am trying to decide if I want to wax my truck or leave it the way it is. I have washed it a few times now. As a buddy of mine tells me it's patina. My question would you wax or leave the patina.
 1 point
 -
When I had my 41 Plymouth Coupe I used Wheel Vintique Chrome Smoothies 15x6 and 15x7 with 195/70 and 235/70 tyres and did not have any issue with front or back fender or inner wheel well clearances even with the car lowered 2" all round.........I'd think that anything over 215 on the front would be a little too wide, but that's just me, the 195 were great, these were Coker Classic radials and the rims were the standard offset that the Chrome Smoothies came with.....the difference to the old crossplies was amazing, I had forgotten what a PITA crossplies are..........lol........everyone should be made to drive with them once just to realize what a difference and improvement radials are......my Oz 2 cents worth........lol...........andyd1 point
-
I don't feel I co I don't think I contradicted myself. I do not agree that dirt, rust and oxidation are patina. Patina is what is under the dirt,rust, and oxidation. There is nothing wrong with the aged, weathered look of old paint. I like it. My '39 Dodge has the original paint and it's staying. The car is very original except where a p.o. Sprayed some primer in a few places. I like to see what they looked like when made. They're only original once. But I know everyone has their own preferences. And that's fine. I do know that if I was lucky enough to have my Dads truck, it would be clean and shining.1 point
-
Thanks Don! Once you said that, I remembered I looked into those before, but I didn't want to spend the money. Well, I just ordered an adapter to mount directly off the transmission. It was pricey, but it should fix my issue. I'll report back on hopefully a success story when I get it. Thanks Again!1 point
-
I agree. A gentle paint rubbing compound by Mothers or Mequiers followed by a couple of coats of nice wax and your truck will still have the old paint but it will look pretty nice and shiny. Stay away from sandpaper. Your truck looks nice now but would look great with some TLC.1 point
-
shhhh.......the local gestapo would not understand......it's hard to have just one of anything good....1 point
-
But wait !.....aren't you the guy with two wives ?1 point
-
Looking goooood!!!1 point
-
It is a course of studies book I did in the army.1 point
-
Very nice! More pics please....1 point
-
Three words! Boiled Linseed Oil. Preserve, protect, has a semi gloss sheen. Popular with antique farm implement and tool folks, and Antiquers too. Check you tube there are a couple bids. One even is a dodge truck.1 point
-
Dirty.........if you have a Canadian Dodge then you have the same problem I have with my 1940 Oz Dodge ............what the Yanks call a Plodge..........Plymouth with a Dodge grille.........am pleased that it sounds like you have had a win tho'..........regards, andyd1 point
-
1 point
-
I'm a hotrodder so the Bob Marley & Wailers running gear sounds o/k by me....lol.......that rear end setup looks good.....btw is the rear end a transaxle or just the diff?....that third member mount looks good...........oh........and I added 2" into each rear fender on my 1940 Dodge when I rodded it in 1973, gas welded and hammer finished the whole way....lol........andyd.1 point
-
I saw that car for sale, im in concord just south of you, i have a 48 plymouth club coupe, need to get togher sometime
 1 point
 -
I restored this truck over a 2 year period, but sold it several years ago. I would like to know if anyone knows where it is today. It was sold to a person in Maine then he sold it to someone else. I anybody has seen it, please let me know. Thanks
 1 point
 -
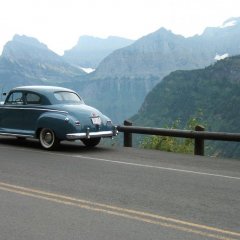
Coming home from my place in Maine today, took rt. 202 to avoid tolls, added 2 hours to an already four hour drive, but the road less traveled often offers more for the eye, and the garage. I happened across the better half of a Plymouth on my way through Winthrop Maine at a drive thru called fast eddies. Fish and chips was good, waitress was cute; I recommend the slow road as often as you can afford the time.
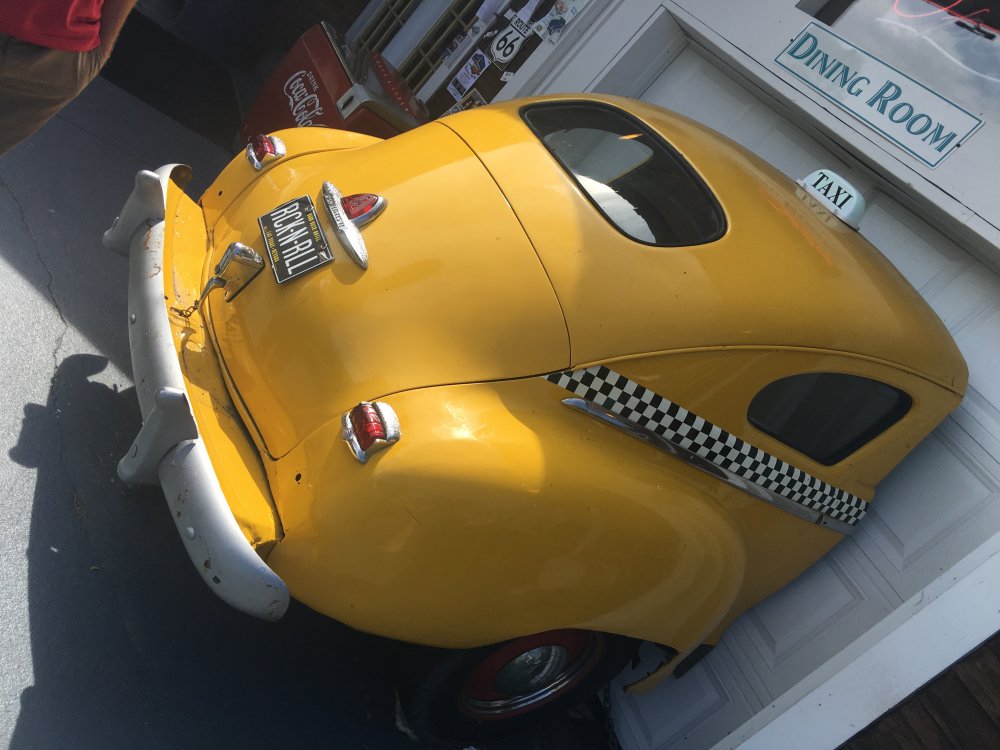 1 point
 -
The beer don't have no head (flat)1 point
-
Another way to check wheel/tire straightness is to jack up front of car with tire just clear of ground and take a wood block and place at side of the tire and slowly rotate tire/wheel moving the block very close to the side of the tire. Does it move in or out away from block? If so put a straightedge higher up on block to hold against the wheel bead area of the wheel rim to see if the tire is the problem area or the wheel. OK,? Then move block just in front of the tire and rotate tire and make a center line scribe with a pointer of some point and see if tire run true and then also watch from the side to see if the tire runs out of round. Really only takes a minute or two. Repeat one wheel/tire at a time, front repeat steps on the rear. Less than 20 minutes total when the test is completed. Just helps with this easy/quick test before moving on to other Good ideas already posted. Best, DJ O1 point
-
Don telling someone to lighten up. That had me laughing out loud. Earl1 point
-
Paul, I ground my valves with the engine in the chassis, nose and manifold both off. I took my valves to the local shop and had them ground professionally - all were in fine shape. Then I knurled the valve guides and reamed them back to original specs. This knurling operation centered the seat grinding tool for that operation. All my guides knurled fine and were reamed back to original i.d. except for the front exhaust valve. This valve runs hottest of all the valves due to kits position in the block and the fact that it receives the least oil splash from the crankcase. This guide I replaced with a new one, and then knurled and reamed it as well, so they'd all lubricate the same. In the Tech tips section of this web site is an excellent artifle that tells you how to replace guides by driving them downward and snapping them off with a hammer. Works like a charm. Once my guides were back to standard size, I used an old Sioux kit similar to the tool Don C showed that utilized a small abrasive disc on a 45 degree mandrel to polish the seats before they were finally lapped to a nice thin contact area in the middle of the valve seat. My experience tells me that it is nearly impossible to remove the inner fender on a Pilothouse truck with the fender proper still in place. Cars have an inner panel that is removable but trucks have no such feature. For my money, it would be easier and quicker to pull the entire fender assembly. AND by all means drop the manifold. It will allow you to see what you are doing on reassembly and the adjustment procedure. By the bye, since adjusting these valves hot is not a possiblility for me with numb, diabetic hands and poor eyesight, I set mine four thousandths wider than specs with them cold and at room temperature. The engine sounds perfect - you can just hear the slightest amount of valve noise - exactly what I wanted. If you err when making this adjustment, always err in the diretion of too loose, else you run the risk of burnt valves. JMHO Good luck1 point