Leaderboard


Popular Content
Showing content with the highest reputation on 06/19/2017 in all areas
-
It's been a while. Moved and been driving the wheels off the old truck. It has been great! What a good little workhorse this truck is. No problem keeping up with traffic here anymore. Guess it just needed to be pushed hard and a bit of MMO to get the rings to re seat. I think I even startled some yoyo in a Tesla this morning when he was poking along in front of me. Too bad......wonder what he was thinking as my grille loomed close? For those of you who want to use one of these trucks as a daily driver.......It can be done without too many mods. Jeff6 points
-
That, of course, assumes that it wasn't swapped out for a "This will fit" in the past.2 points
-
fluid drive is a sealed unit, all oil is internal and not shared with any other device, not sure where you are reading your info, could you provide that link. The Hy-Drive of 53/54 fame did indeed use the engine oiling system but it was a true torque converter, not a coupler....2 points
-
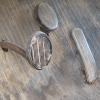
My windshield wipers haven't worked since we bought our restored 1950 P20 Plymouth Special DeLuxe Club Coupe earlier this year. I serviced the vacuum wiper motor, but the best it would do is an occasional swipe if you helped it. Vacuum test only indicated about 12 inches. About 6 weeks ago a saw a NOS rebuild kit for the accessory vacuum pump. Today I followed my factory service manual for testing it: disconnect both vacuum lines and test with vacuum gauge. My reading: 0 (zero). Sigh. Clampped off the fuel hose and disconnected both fuel lines on the pump, but not in that order. Sigh. Wedged my socket in to remove the two bolts holding the pump. If you do this job, I suggest you take off the higher front bolt first. I, however didn't. And the when taking it out, my socket wrench kept switching directions on my and the durn bolt would tighten right up. Sigh. Cleaned yo the pump in my parts washer -- I do like that thing, then took the pump in the house to open up the vacuum end. The factory manual has some great directions on doing that so the spring doesn't go flying. Found the vacuum diaphragm looking like this... Well I had a replacement in my rebuilt kit. Only problem is the arm for the oil seal was different, so I had to get creative with a drill and my dremmel tool. Thus far no replacement part for this car has been perfect. Sigh. Returned the pump to the car, connected the fuel lines, and released the vice grip clamp on the fuel hose. Started the car, checked the vacuum and was getting about 7.5 inches. Manual says if I don't have 8 inches that my pump needs servicing. Sigh. Turned off the car, and held the manifold vacuum line to tester. I had my 15 year-old son start the car. It was pulling a steady 16+ inches with me holding the lines together. But it was running much smoother than it normally does. This vehicle has always run rough and I'm not knowledgeable enough to know why. But this is sounding better. I let go of the vacuum line to tell my son to turn off the car and immediately it went back to its rough running. Hmm I connected the manifold line to the vacuum pump again and had the vacuum gauge on the other side. Started the car. Now it is pulling a steady 18". I rev the engine and as it slowed down the vacuum shot up past 20 and then slowly settled on 18 again. But it is running smoothly. Final test, hook up the wipers instead of the vacuum gauge. They work. They work! Now we don't have to leave the Plymouth at home when it is threatening rain. Success. But I really wanted to test out the engine. So I had my son move the parking break cable to the correct side of the clamp (that story to come later) and we took it for a 5 mile drive - up hill. It still doesn't have the power to make it up that really steep hill at 55 mph, but it did it at 52 instead of the 48 mph in the past. And idling on the way downhill, none of the rough running. Success On the way back, we pulled into a parking lot and I let my son drive. Never got past 2nd gear but this parking lot is NOT flat so it is a good proving grounds for teaching the kids to drive a manual transmission. My son doesn't get his learners permit for another 5 months, so he can't drive it on the roads yet. This was only the 2nd time I've let him drive it and he did pretty good. Lots of sighing, but 3 positives 1 wipers work 2 engine runs better 3 my son is learning to drive the car we bought for him
 1 point
 -
You indicated that you son was learning to drive the car. Might want to check with the insurance company on your antique car. Some have a limit on the age that a family member has to be before they can drive the even if they are your immediate son or daughter. I have read that they must be at least 25 years old. Just check before you get them behind the wheel. If they have an accident then your coverage might not be valid. I urge everyone to check their individual antique car policy for the age restrictions for a family member to drive your car or truck. Beware of this now and not when and if you have an accident.1 point
-
10 quart pan, 11 quart with oil filter change....the book does not go into details of the oil pan shape or for that matter the address of the oil pick up tube...in engine, lube or Hy-drive section1 point
-
Not much, It started right up. I did post a video of it starting and I hadn't even timed or tuned the engine. The video is on my flickr page. The engine seems to run fine, it just that the car needs a lot of work and we (the car and I) have been spending a lot of quality time in the driveway. I haven't driven the car much lately. This spring I retired 1 April and brought my car in to have the shackles replaced. They said "no thank you" and gave me a tour of my suspension. Thousands of dollars in body and paint riding on $1.98 suspension. Last week I replaced the leaf springs and shackles. Today I start rebuilding the front suspension, "kingpins, coil springs, and bushings oh my."1 point
-
Mike....I just did a quick US ebay search under plymouth fuel pump kit and on the 1st page there were 5 or 6 pump kits listed.......only problem was that some were listed for the double action pump that the vaccum wipers were connected up to, I'd go thru these and also maybe phone Bernbaums and Roberts direct, also what sort of pump do you have, I was able to get a brand new pump for the 41 Plymouth I had about 4 yrs ago and it was listed for a early/mid 50's mopar 6 but worked fine... and was the same price as a pump kit.........as far as I am aware all the mopar 6's from at least 1936 thru to 1959 use exactly the same 2 hole mounting base and although the cam actuated lever can be of a different shape all that means is that some levers sit under the pump cam while some fit hard against the cam but either way works..........you might have to alter your fuel inlet/outlet lines as this angle can be different but you may also be able to move the 2 halves as well as the 6-8 bolts also allow some adjustment............regards from Oz.......andyd1 point
-
Isn't it nice to have a win..........lol..............regards from oz.........andyd1 point
-
Wow what a strange sequence of events. But if the end results are the positives you mentioned, then how can you beat that? Thumbs up man1 point
-
The red REO pickup is 48/9.1 point
-
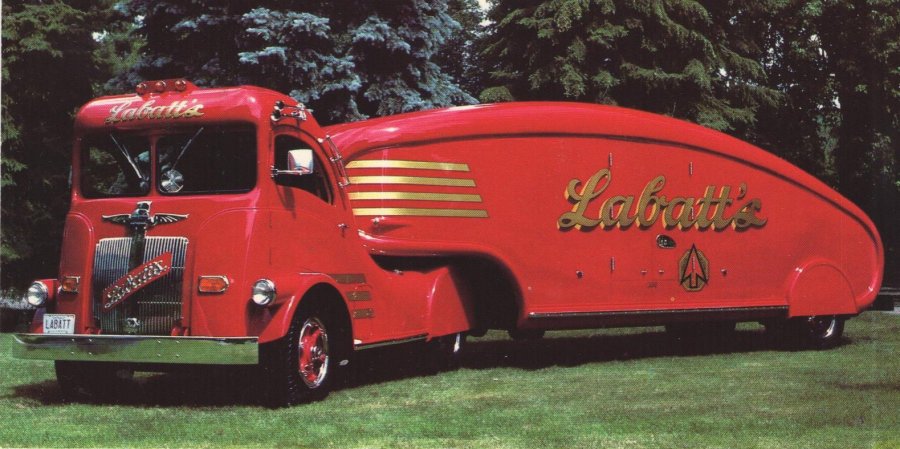
Art Deco Beer Delivery I have been on this truck and it is stunning. "Labatts Streamliners were a unique sight in Canada from 1932 to 1955. The tractor chassis was produced by White Motor Company and the trailer chassis by Freuhauf. Designed by Count Alexis De Sakhnoffsky, the bodies were crafted by Smith Bros. Body Works in Toronto. Joe Scott together with his brother Bob of London Ontario took up the arduous task of restoring this famous streamliner for the Labatt Brewing Company and their skill along with 7 years of dedication to the minute detail have seen this beautiful legend return to mint condition."
 1 point
 -
1 point
-
A 1935 Chrysler CW Airflow It speaks Art Deco....
.JPG.12bdd57f91cf0b5c532ca48ffe4b2285.JPG) 1 point
1 point -
You mention a PCV system has been installed on the engine, but has the carburetor been rejetted accordingly? The PCV is a controlled vacuum leak which will change the air fuel mixture, and could create the lean condition, and backfires, that you refer to.1 point
-
1 point
-
while white vinegar is a rust eating acid and is quite safe for the most part, be ye advised that long term soak of cast iron tends to break it down molecularly. For more information you can refer to those folks dealing in cast iron cookware cleaning and preservation advisements. How long it would take to do harm I have no clue but I also know it is not hard to get distracted and walk away from a project to do something else that pops up and who knows when you recall the previous task of vinegar and cast iron..phosphoric acid eats oxide....does not damage ferrous metal, I have used it to clean oxidation from gold and get units to pass meg-ohm tests when all other cleaning methods fail....good stuff...safe and effective....many uses and many ways to accelerate its use....as with any chemical/acid...use with care, read, get up to speed and you will not be disappointed in the performance of this product. Highest pure strength I have ever seen is 85%....I have some of that left here yet but of later I have found a source at 55% that is dirt cheap and self cleaning due to special app mixture.....shop around...find a local source. a side note....vinegar is a good cleaner and wipe for galvanized metal prior to coating...1 point
-
1939 Airflow
.jpg.50c4c930092d7cc9fa8403f3783d6c1a.jpg) 1 point
1 point -
Or better yet,white vinegar. I love vinegar because it eats rust like nobody's business,is safe to use and handle,and once you get it too contaminated to use anymore,you can use it as a weed killer. Cheap,too.1 point
-
start by familiarizing yourself with the properties of phosphoric acid, its application to metal for treating and preventing rust while working bare metal......AND what metal to keep it away from for long term exposure. It is an excellent product....in your case, just invert and fill it for a short spell with coco-cola..it has enough phosphoric acid to treat flash rust1 point
-
37 was the last year for the Dictator name, became the Commander in 38, then top of the line Studies became Presidents. Can't forget the utility version1 point
-
Plymouthy Adams pointed out something often overlooked when it comes to starter problems,namely the battery cables. This can be a huge problem for these old 6 volt cars if a previous owner has replaced an original cable with a auto parts store cable typical for a 12 VOLT system. 6 Volt systems draw a LOT more amps than 12 volt systems,and the thinner cables can quickly become brittle. Brittle wires just get hot,they don't transfer any amperage Check both of your battery cables after you are done cleaning and installing your starter. IF the cable going to your starter from the battery seems very stiff,cut a little insulation from either end and check to see if the wire is corroded/discolored. If it is,don't waste any time fooling with it. Take both cables off,throw them away,and buy very thick gauge cables made for 6 volt positive ground systems. I say positive ground systems because the positive cable end will be smaller than typical for a positive battery cable,and the ground cable battery end will be much larger because it goes to the positive battery post. I can't remember what gauge cables are recommended right off the top of my head,but I am sure someone else will pop up and tell us both. Also,while your starter is apart do NOT neglect the bushings in each end. They wear out and when they do,you are only getting part of the amps you need to spin the starter. If it were me,I would only buy these from a NAPA store because that way you can be almost certain to get a oilite bushing and not some cheap,thin crap made in china out of brass-coated tin. Also,don't forget to put a thin coat of wheel bearing grease on the starter shaft while you have the starter off the car..1 point
-
coat it with a good solution of water and coolant with proper rust inhibitor additives.1 point
-
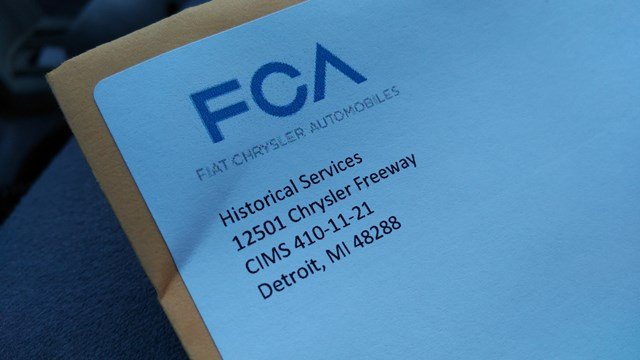
Three weeks after re-submitting my requests from eight months ago, I received a bigger envelope and was very surprised to see my three request payment checks paper clipped to my letter explaining the quality of the original build cards...welllll allrighty then
 1 point
 -
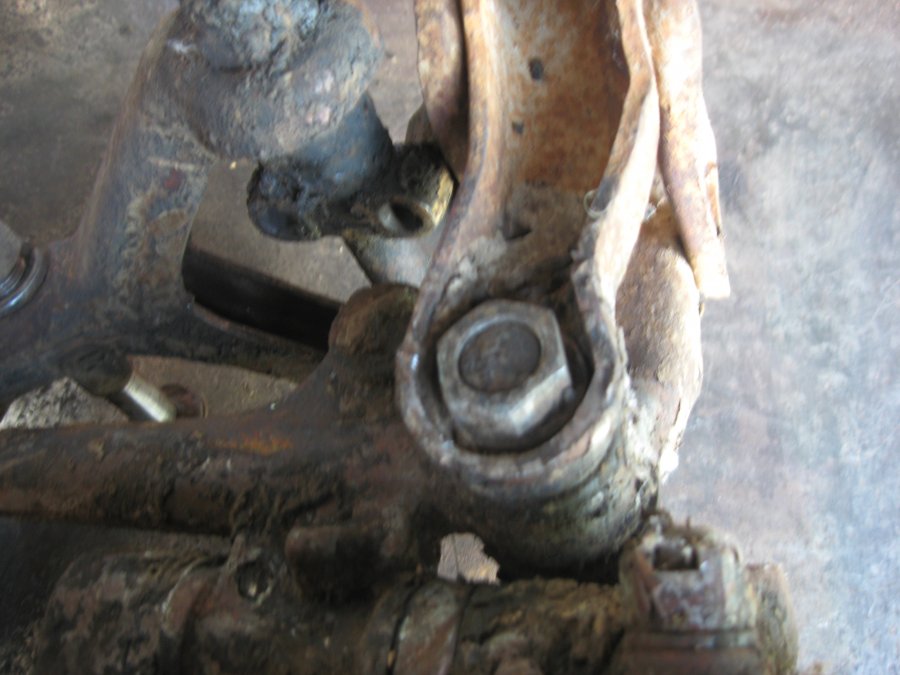
This is a friendly warning to those of you who have got into the 'old car hobby' recently.You really need to check these cars out before you hit the streets. They are 60 yrs old or so and who knows what tey have been thru or what has been done prior to your ownership. Car might look shiny and all chromey, neet as a pin. Or it could be something that was recently dragged out of a ditch that's been home for the last ....??? Do yourself and all of us a favor and go over the front and rear suspension and steering. I say this because no matter what the PO told you, you just don't know what you don't know. I am going thru the front suspension on my '52. All was ok with the left front....got to the right front and found this...... This is the nut and pin that hold the lower control arm to the spindle. The nut is finger loose in this pic. Not good. So the message here is that just because you pour some gas into the carb, fire it up and go for a cruise, doesn't mean it is safe to do so. Suspension, steering and brakes......check 'em out before they check you out.
 1 point
 -
I call 'em connecting rod, big end bearings. Of course at opposite end of the small end bearing. Aka piston pin bearing.1 point
-
Well spitfire it's a shame you're so far north but comparing a 218 or 230 to a 265 is a little hard to do but we've got a little flathead in our shop that might run with the king of the flatheads
 1 point
 -
I owned a P4 sedan for thirty years from 1968 to 1998. At 54 400 miles I bored to .050 and ground the crank 010. new cam bearings and chain and used a later oil pump. A GOOD runner . A word of caution. Mark the oil cross over pipe before removing it. If you put it on end for end, the counterweight just kisses it , making a most alarming noise. The correct way does not look as neat as the wrong way but clears everything.1 point
-
For your very generous forum donation. These donation help keep the site online and your help is really appreciated. Thank you, GT1 point
-
If the valves have been rattling around, the valve seat angle becomes distorted and they will not seal properly... loose and oil will be drawn into the combustion chamber on the intake stroke. I hand lapped my valves with the suction cup on a stick and valve grind compound... it took awhile, but I developed a feel for when the valves and seats were in full contact1 point
-
If you do take a file to the rod bolts, make sure that you file along the length of the bolt, and not across it. The file marks can cause stress cracks in high-stressed components, and if you’re going to have such, it’s better to have them length-wise rather than cross-wise. This is based on what I was told way-too-many years ago by a race-engine builder, who had a habit of reusing components. I’ll now admit to doing that, too. I drove a sling-shot dragster (back then, I was the skinny one, and was the only one who could fit into the car), and in between rounds, I’d pull all of the pushrods, put them on the pavement in the pits, and stomp on them to get them straight again. Ahhhh, now those were the days.1 point
-
Bartender's Friend's owner is a female medical doctor in Indianapolis, IN. I had a packaging machinery business appointment with her some 20 years ago. She is also the owner of Saturday Evening Post Magazine.1 point
-
ready for pick-up..thought you were building a car ok...its not that bad a joke...1 point