Leaderboard


Popular Content
Showing content with the highest reputation on 04/24/2017 in all areas
-
This was my home made pre-oiler that I used. Worked great and showed 20 psi on the gauge. (oil filter was pre filled)
 3 points
 -
Looking at the adapter I do not see any means of registering said adapter to the bellhousing. You cannot rely on the bolts to provide registration and the front bearing will complain if the TIR exceeds 0.007". So, what is planned?2 points
-
Wow What a GREAT TIME we had at your BBQ Tim, Thank you and your Bride for a wonderful meal and party. Sorry we had to eat and run, I am sure we will be back up that way in the future for more BBQ and chatting with new friends. Happy to meet and put faces with those I have been chatting with . See you all again sometime. Thanks again Tim & Steph for an excellent adventure. Rod2 points
-
With thanks to Gary Larson, "The Far Side."2 points
-
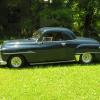
Interrior almost ready....
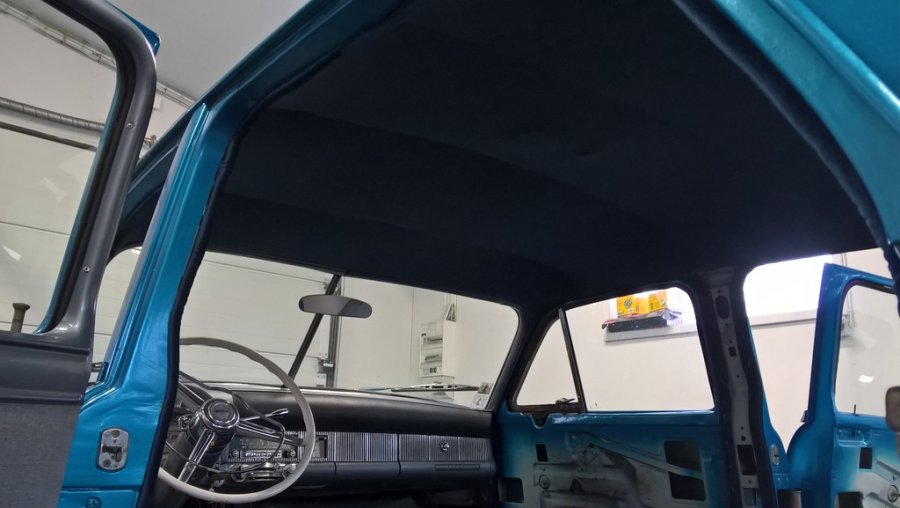
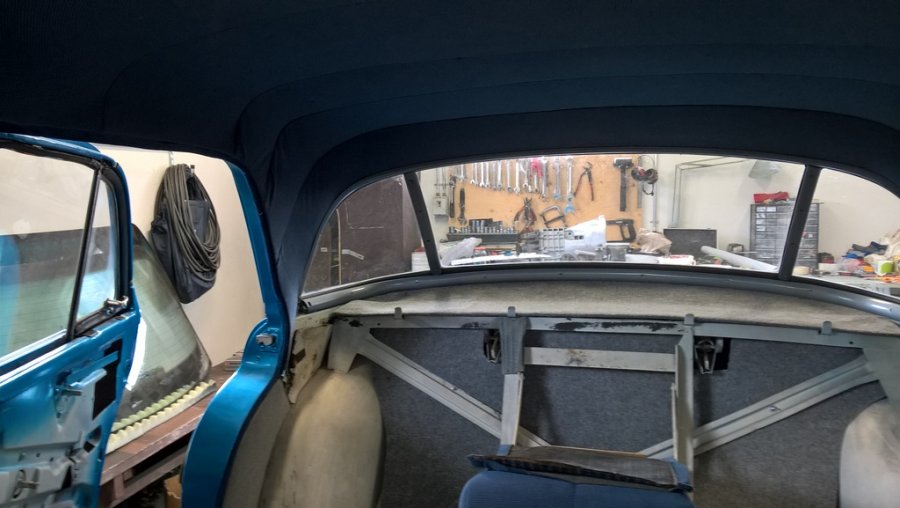
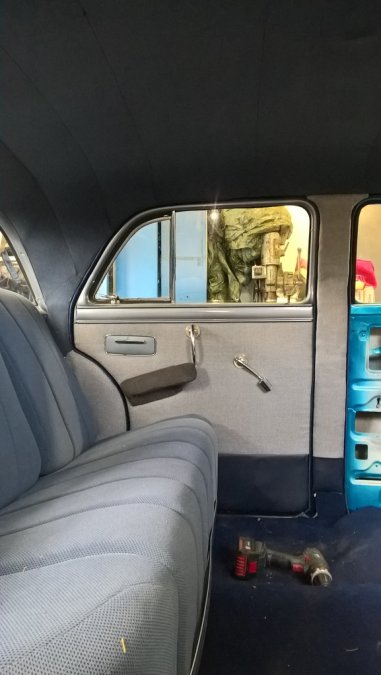
 2 points
 -
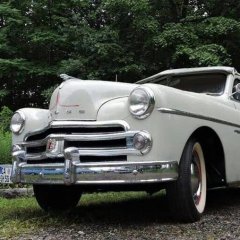
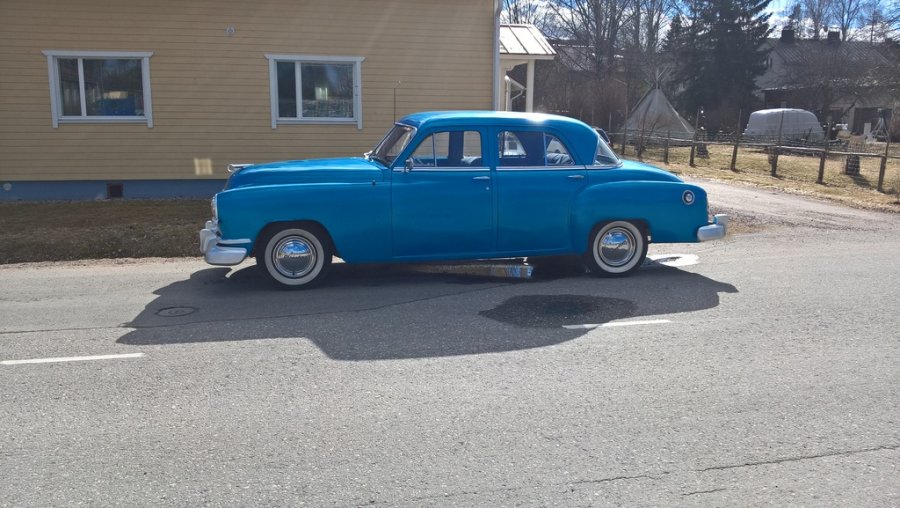
Changed plugs and wires and cleaned up the engine bay a little. replaced the heater shut off valve with one from eBay for $12. Perfect fit. Lowered the car yesterday in the rear using 2" blocks from Mooneyes. they don't come with u-bolts so i still have to cut them down to size, as the ones I had were way too long. looks like I might have room for a 3" block without scrub line issues. I think I'll be happier with an extra inch..... I'll re measure when I get a chance to get out there again. I had trouble with the original wheels so I had some smooothies made for me in a 15/6 with a 3.5 inch backspace. With a 205/75/15 Goodyear, skinny whitewall they fit like glove. Ill be lowering the front with some extra original springs I have sitting around with 1 1/2 coilscut off. Hopefully it'll give me a 2" drop. next week I'll be putting in new brake shoes and wheel cylinders all around. Then testing the master cylinder. never rebuilt one before but I found that NAPA has a kit for $19.99.
 1 point
 -
Hey All, Just thought I would create a thread dedicated to T5 conversions, pitfalls, methods and what is needed to make it work whether you have a car or truck. How many of the T5 conversions have been done by members say in the last year(s), and what are your results, what are the pros and what are the cons. There are 2 different gears ratios, one with lower gears, and one with higher gears. Now who is using which transmission, and with what differential gear ratios? So here is the opportunity to discuss this topic on T5 conversion for better or worse. As of late have been asked by a few folks who do not do "internet", about a T 5 conversion, what's involved, which NWC trans gear ratio is best, what differential gear ratio is best, and who is pleased with there results, not only in Overdrive, but in all 5 gears, for off the line performance, as well as the gear spreads etc. I have suggested there are other trans options, and a trans conversion is not limited to just a T 5 transmission. This thread is not intended as a "brand" debate, but for learning and informative communications to be kept to the topic where possible. As of late been offered 2 of the T5 transmissions for nothing, but not my choice, so have offered them to other flathead owners, who as I mentioned would like the low down on the transmissions, differences and best application......1 point
-
gotta love it.....!! I guess Mr Larson is still on sabbatical...sure do miss his cartoons. I read where he got mail by the sacks full of folks who have wit but no cartoon skill suggesting cartoons for him. I also miss Watterson and the perpetual 6 year old. Thanks for the chuckle...1 point
-
1 point
-
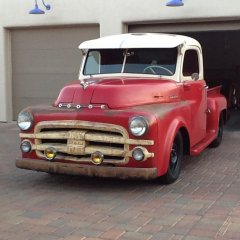
Delivered my daughter with her giant inflatable swan to the beach, now that's 'Dodge tough!'
 1 point
 -
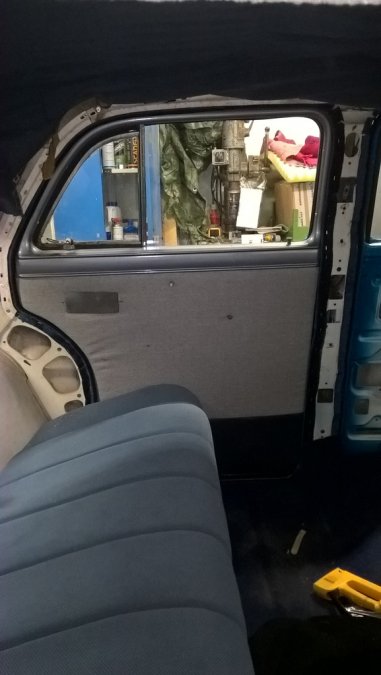
Put the emergency brake with cable back in the car. Unfortunatly I didn't make a photograph of the routing of the brake cable. On the photograph attached you see the cable going to the brake above rear motor mount crossmember and bell housing but it is bend because it is touching the lower part of the bell housing. Looks not right to me but working... The next problem and the most of you will laughing about it but I have no idea how to attach the wiper blade to the arm . Never had to do with such a mechanism. It is a 1950 Dodge Wayfarer with Fluiddrive. Thanks in advance. Andre

 1 point
 -
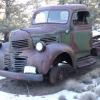
After 60+ years with the driver and fuel tank on the same side she leans just a wee little bit.1 point
-
YES! If you look on the previous page, Don Coatney provided a blow up diagram of all the parts. My spring 6-52-5 was from a different year and it was too short!! I bought the proper one and now everything is kosher!! Thanks for inquiring. I meant to post the resolution and forgot.1 point
-
was in the process of setting up for a 51 331 extended bell hemi. sold the motor to help with medical bills awhile ago.1 point
-
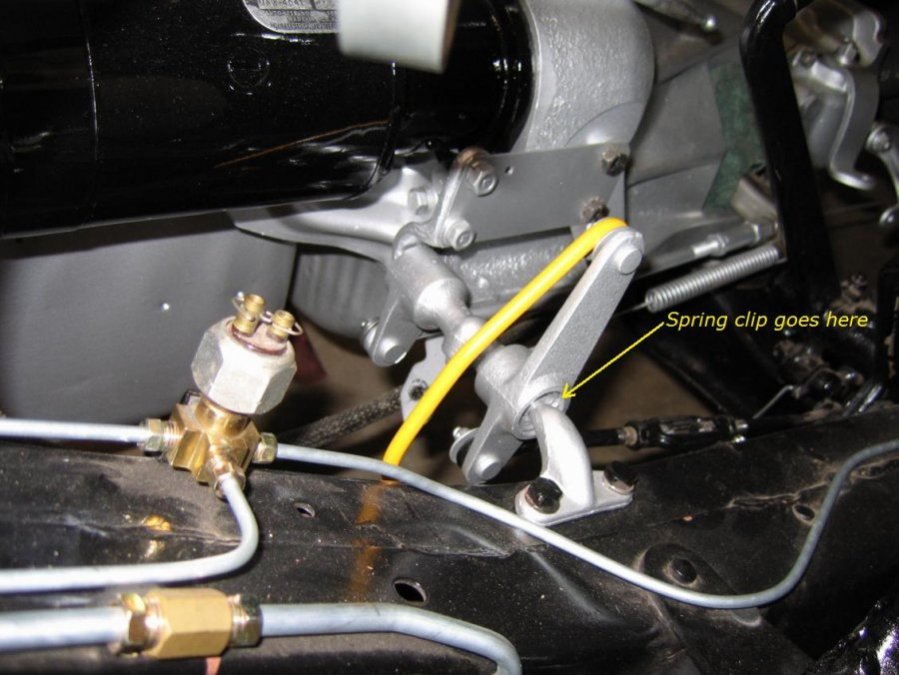
My Chryslers have that hole in the same position as yours though I don't think it matters if the plate were rotated 180 degree's as long as the ball pivot is mounted to the plate and bell housing correctly. The hole is not used as shown by your excellent notes too! Note keeping and pictures are a good thing for sure as long as we can find and use them!
 1 point
 -
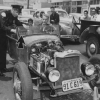
For you British car nuts....
 1 point
 -
Why? It will be on the inside and covered by the door upholstery when the car is back together,and never seen,and it's simp to weld it back again once the repair is finished. I've cut them out to get rust out of the bottom of the door so I could clean it and paint it inside,1 point
-
hold off with the cutting wheel for a bit more....cussing is however a valid option and feel free to let fly the colorful words. Get you a small prybar like used in carpentry work..the smaller 6 inch unit...slip between the latch and the door metal and lever firmly pulling the latch away from the door and then try to remove the screws..it is obvious they are stripped out and unable to catch any threads....the pressure will hopefully allow you to catch threads or continue the destruction of the screw threads and eventually give you enough head and body showing to easily cut. Once latch is out...and if still in good condition itself..you can weld appropriate sized nuts to the backside and rebuilt the unit's integrity.. If this fails you still have the very option of drilling out the screw with a quality machinist centering bit..remember, when drilling do not rev the drill, if variable speed drill keep speed slow, bit lubed, lots of pressure..if not a variable drill, short burst is ten time more effective than a open run..you do not overheat the bit and lose its temper and cutting edge1 point
-
there was never a reference to fighting in this thread.....only hunting....they call this a sporting event...so give the animal a SPORTING chance....get some Freddy Kruger slip on nails to even things out.1 point
-
Your emergency brake cable is correct. The wiper : You tip the arm at an angle to the blade and push it into the socket. To release, you must depress the spring in the blade tip the blade again and withdraw the arm.1 point
-
All my parts seemed OK, but gauge didn't work. With everything removed for bench test got gauge to move by moving float. Replaced (defective?) wire to sending unit, and new ground from sending unit to body. Problem solved.1 point
-
Hi Walt, thanx for the post, wow, you happen to stumble on this thread, as I see it's your first post on this forum. Glad you are satisfied with your Chevy/Ford T5, and it sounds like your 230 is happy for it. Your 265 build, sounds interesting, hope to see a thread and pics of your build. While on the topic of pictures, can you post pics of your T5 conversion, as there are many on here, or even visitors who would be interested in seeing your approach. Yes the fluid drive coupler replacement is a must for any of these conversion, as I do not know of anyone engineering a long input shaft for a T5 to make it work. There is another member, who is debating what to do with his truck, with a fluid drive and 4 spd trans, think he will need to ditch the fluid drive, do as you have done. I do hope he tunes into your process, to solve his problem. Well I was beginning to think nobody on this forum was either interested in sharing their T5 stories, glad it works for you.1 point
-
Hi Fargo, I,REALLY, REALLY like my T-5 conversion in my '49 (1st series) D-24 Dodge Business Coupe! I guess because of my long-time auto industry data processing background - I'm a 'Bill-of-Material' type of guy. I develope project goals/objectives, define completion steps, and start collecting parts to finish them. Although I'm primarily a Musclecar restoration person (I finished my original '65 Plymouth A-990 aluminum-head Hemi lightweight restoration in March of '14), I had wanted a 'fat fendered' Mopar flathead for sometime. I purchased my California built coupe in the fall of '12. During high school I was given my Grandma's 39,000 mile D-24 Deluxe 4-door - so I was familar with the sedate perforamce envelope of a 230 Fluid-Drive vehicle. My goal was to have a very road worthy flathead powered Mopar that would kick-the-ass of Ford flathead street cars. So, my project has evolved into an upward compatible three step program, The first being the TRANSMISSION/AXLE, second the 12V CONVERSION, and lastly the ENGINE REPLACEMENT. The first two having been sucessfully completed,and I'm now in-process on 265 development program. STEP 1: Replace Fluid-Drive 3-speed and original rear-axle assembly. I did extensive web-site reviews, and in particular Don Coatney's efforts on this one, I had a a lot of conversations with George Asche, Paul Curtis and Tom Langdon about the best approaches and combinations. I've known Mr. Curtis and Mr. Langdon for over 40 years, as we're all members of the Michigan Hot Rod Association. Here's what I came up with; TRANSMISSION P-15 Bellhousing, clutch fork, and flywheel. Paul Curtis transmission adaptor kit Paul Curtis: www.pjplymouth@netscape.net Mustang T-5/S10 Hybrid transmission Earl Johnson www.hjhnracing@msn.com '95 V-6 Mustang World Class Main Case (3.35, 1.93, 1.29, 1.00 ratios). This was chosen because the Ford case 'packages' better with the P-15 bellhousing, the ideal gear spacing, and that it's input shaft is the longest of the Fords. '86 S-10 Tailshaft (.72 5th gear). This was my choice because of the forward shifter location and the mechanical speedometer capability. Hurst shifter package. Needed to tighten up shifter pattern, for the longer shifter lever. Lokar XMSL6B - 16" black single bend shifter lever. Lokar SK-6872 - 5-speed ivory knob. REAR AXLE: '65 Plymouth B-body housing, with 10" brakes. Brake drum-to-brake drum measurement is .75" narrower than stock, and the 10" drum size is the same as stock! For me, this was a 'no brainer', as I has a lot of extra rear end parts left over from my Hemi project. 3.73 742-Case Sure-Grip, NOS. Same ratio as stock. Lokar EC-8002HT - '38 - '48 Mopar Hand Brake Connector package. Emergency Brake Cables - '70 Challenger, modified. In-Line Tube. With this drive train combination, my car's current '56 230" Power-Wagon engine gets an all-around 19 mpg average. First gear has a great launch and is good for 25 mph. The car revs at 1950 @ 60 mph, and 2600 @ 80 mph. When I get the 274" (.060 over 265") installed, I might change to a 3.90 or 4.10 to slow the top end down and pick up a little acceleration! Even with the current 102 hp engine, it easily stays up with modern traffic. IT'S A TERRIFIC PACKAGE!!! Walt1 point
-
Real nice work, Your skills with metal work are FIRST RATE. Great Job, Rod1 point
-
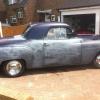
OK, so started work on repairing the passenger side rocker panel this weekend. Removed the front seat and the inner fender to get better access. May have to remove the wing but that looks like a lot of work so have left in place for the moment. Floor looks like this: So then removed the patch panels that had been tacked in place and cleaned it all up to start to expose the extent of the rot. You can see where the floor has gone over the front outrigger and also at the front of the footwell where it meets the inner fender area. I was just going to cut out and replace along the rocker but there was also some small holes in the rest of the floor and experience has told me it takes longer to try and fill all these than it does to make a new panel. So out with the plasma and air saw and we then have a big hole! The bulk of the outrigger is in really good shape except where it meets the rocker (which is pretty much the same story on all of them) There is also some repair needed in the box where the rocker meets the inner fender area and back along the top and inside of the rocker itself. The plan at the moment is to rebuild the rocker panel in 2 or more pieces (top and inner) and slide this in behind where the outrigger joins. Then make good the end of the outrigger and drop in the replacement floor panel. Fair bit of metal shaping to be done to get that all to fit but that’s the plan anyway! The rest of the outer rocker is pretty solid apart from a few lumps of bondo where the locating holes for the trim have been filled. Also there has been some work done on the lower panel behind the door and this has been "blended" in with a load of bondo as well. The sides on this will probably be smooth rather than refit the original trim so I will do a bit of panel beating/pulling and lead work to get the metal straight again so it only needs a very thin skim of filler before paint. OK, so started work on repairing the passenger side rocker panel this weekend. Removed the front seat and the inner fender to get better access. May have to remove the wing but that looks like a lot of work so have left in place for the moment. You can just about see from this pic how the panel has been gathering rust under the bondo (as its porous) so in the fullness of time the whole thing will need bare metalling, but that can wait till I have time to do a full frame of resto! That’s all for this weekend! Cheers,1 point