Leaderboard


Popular Content
Showing content with the highest reputation on 03/02/2017 in all areas
-
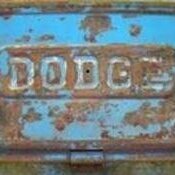
Just got a pic of one. They are the same as the '48-'50 B series truck with a slightly different face.
 3 points
 -
Shown is a USA good quality Belden H-Duty crimping tool used for all spark plug wire terminal ends...

.JPG.97b55a16a10bab9898f358f26499bef2.JPG)
.JPG.20d467d4cd187eb84c44e286ff3fdc15.JPG) 3 points
3 points -
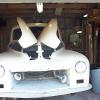
Our truck before we bought it........... After they painted it and how we bought it.....

 2 points
 -
1 point
-
For the "kick-down" function, the full throttle position closes the downshift switch on the carburetor, to ground the solenoid, or something like that. It might just be an adjustment of the throttle linkage, to close the switch when the (technical terms follow:) gas pedal is tromped. Such was the case with my 47 DeSoto. I had to push the pedal through the floor to get the car to downshift. Now I just have to compress the carpet halfway. Congrats on the carb work. Tweak that throttle adjustment and you'll have more to brag about.1 point
-
Just wanted to update my carburetor problem of leaking. I tried everything I could think of to fix the leak to no avail. I bit the bullet and ordered another rebuild kit from Mikes Carburetor Parts. As I was rebuilding, I found a small piece of broken off of the spacer that goes between the float bowl assembly and the throttle body. I replaced the broken spacer with one from another carb I had and finished the rebuild. This piece might not have let it be tightened down enough without warping and leaking past the gasket. All is well now with no leaks! It doesn't downshift from 4th to 3rd when I put the petal to the floor but I think it's just an adjustment in the linkage. Thanks for all the responses Wayne1 point
-

Version 1.0.0
87 downloads
Mopar Factory Service Reference Book How To Check And Adjust Distributor Advance Mechanisms1 point -
Version 1.0.0
23 downloads
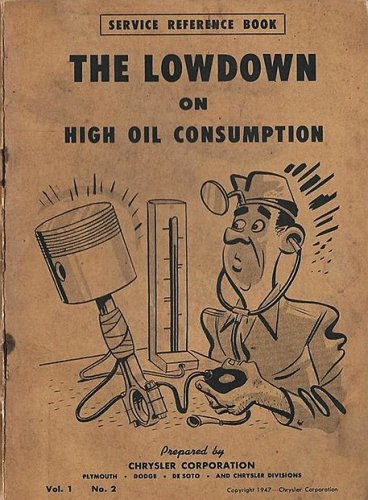
Chrysler Factory Service Reference Book The Lowdown On High Oil Consumption1 point -
Version 1.0.0
48 downloads
Chrysler Factory Service Reference Book Special Reference To The Generator Regulator1 point -
1942 Plymouth Ad.jpg View File 1942 Plymouth Model Line Up Submitter P15-D24 Submitted 03/02/2017 Category Marketing Brochures1 point
-
Service_Reference_Book_Special_Reference_To_The_Generator_Regulator.pdf View File Chrysler Factory Service Reference Book Special Reference To The Generator Regulator Submitter P15-D24 Submitted 03/02/2017 Category Reference Information1 point
-
Service_Reference_Book_The_Lowdown_On_High_Oil_Consumption.pdf View File Chrysler Factory Service Reference Book The Lowdown On High Oil Consumption Submitter P15-D24 Submitted 03/02/2017 Category Reference Information1 point
-
The best location for mounting any electric fuel pump is the rear of the vehicle. The inlet and outlet of the pump must be mounted below the lowest point of the tank. This is necessary to allow for an adequate fuel supply. The pump is designed to push fuel and not designed to suck fuel out of the tank. It needs to be gravity-fed or if it’s pulling from the top of the tank, it needs to develop a siphon feed to the pump. The pump should be mounted on the chassis, in a vertical position with the pump motor on top. Avoid exposure of the pump and fuel lines to moving parts and to any hot areas, such as the exhaust. The pump should not be mounted in a closed area, such as the vehicle’s trunk. Follow the steps below for mounting the pump. I experienced problems and thought I was getting defective pumps. After 2 pumps I installed the pump as described above and problem solved. No leaks and tank was vented.1 point
-
Be sure to mount the fuel pump lower than the gas tank. The pumps operate off of a syphoning effect. Ask me how I know.1 point
-
I have a tool that exclusively does 7mm and 8mm spark plug wire ends.1 point
-
Young Ed gave a doable solution but I can't tell if rotating the fixed appendage attached to the side of the pump (cast lid and a glass bowl below), 60 degrees away from the exhaust pipe, brings the fuel exit inline with the same hot pipe, and another fitting. I don't to want to 'toast me truck' so I'm going to use an electric pump (Carter p4070) It will be a much shorter fuel line run, right up the firewall and right to #2 carb. The headers and dual exhaust are accompanying a new dual carb. set-up and a milled head. I'm 'diggin' tidying up the engine bay. One of the true pleasures in life! Isn't hose and wire management fun? Thanks all for your input.1 point
-
Ok, I ordered new springs. Correct for 11" brakes. Problem solves, front done, adjusted, bearings packed and drums on! Next, change out the rear spring.
 1 point
 -
look close..all my Mopar steel wheels and through late 2007 Mopar factory alloys have the recess correctly for the rivets....1 point
-
Only Dodge and Plymouth and trucks used the six from 55 onwards. The cars used a center sump pan from 55 to 59 but I cannot be sure the 57 to 59 pan is the same as 55-6. The oil pick up may be the same as in the 23 inch engine It is not the float type and there is not much discretion as to where it sits. On a similar topic, anyone changing a 53-4 engine will find that the Canadian models use a rear sump pan which is slightly shorter in the sump area in order to clear the steering . This can be useful to know if swapping a 25 inch engine into a 49-52 which originally had a 23 incher. On these cars originally built with the 25 inch , the steering box is located further forward. And some people think these cars are all the same !1 point
-
5 years ago when I was 55 and still strong as an Ox, I took a piece of Flat Metal 6" x 48" 16 Gauge, and used spray adhesive to glue 80 Grit Sandpaper to it (Belt sander size paper) from Lowe's. I also prepared the other side with 120 Grit. Then on the flatest part of my garage floor I rubbed the two Manifolds bolted together their Flanges against it in a continous firm fashion until all flange surfaces became flat and true. The sand paper on the other side acted like a bench hog. It went fast, maybe 20 - 25 strokes on each Grit. They were ready to install, Flat and True to each other and looked professionally machined. Using New Manifold Gaskets with High Heat Gasket Sealer they snugged back on true and have never leaked since. In my humble opinion sending manifolds out to be machined is not necessary when using my method described above. Metal Stud Supply Houses have the Flat Metal, and will sell you a 4' piece cheap. I think I had @$10 in my shade Tree method. You need strong arms and wrists to hold the Manifolds Flat and True as you Rub them across the home made plane. The weight of the Manifolds helped keep them true, care must be in not letting tem rock back or forth in either direction. Tom1 point
-
Whelp i broke down and bought the Scarebird front disk conversion a while back and started to tinker with it a little. all in all pretty simple install (i only did one side so far.) After installing the other side i need to plumb ion the residual check valves and remove the residual check valve from the master. some pics:1 point