Leaderboard


Popular Content
Showing content with the highest reputation on 11/09/2016 in all areas
-
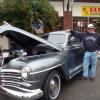
For what it's worth, I have decided to stop paying for a domain registration for my '50 Plymouth website ($37.00/year). I sold the car in 2010... However, because the site still sees a considerable amount of traffic, I have moved the website to another server (oldwillysforum.com) so that it can remain on the net indefinitely for future reference. The new URL for the old 50lymouth.com site is: http://www.oldwillysforum.com/Plymouth/02-hom/home.html Unfortunately, many of the images I have been posting here for the better part of 10 years will now be dead links... Most of the images are on the website though, so they are still accessible if anyone really wants to find them. Plymouth built great cars! Pete4 points
-
Pete, nice to hear you are still around, I trust you are well and things are good..........I ended up selling my 230 engine & all the bits plus the 41 Coupe unfortunately, whilst it was the right decision back then I still have regrets however the 318 poly powered 1940 Dodge helps to clean the cobwebs away when needed......lol..........look after yourself & family............your website and more importantly your Plymouth had a huge impact on the modified mopar 6 world showing just what could be done............many thanks & regards, Andy Douglas2 points
-
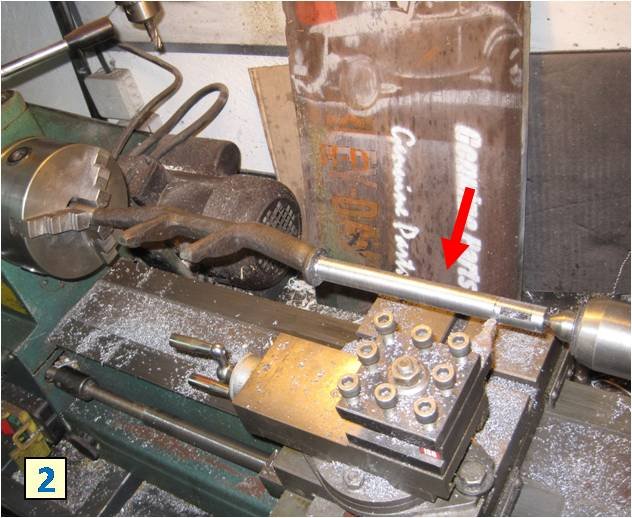
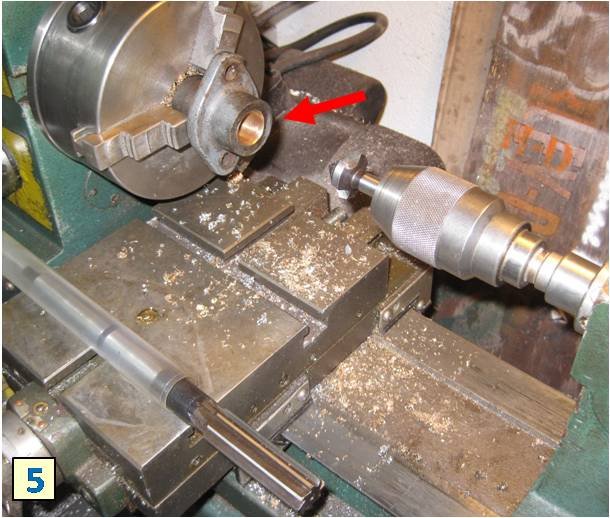
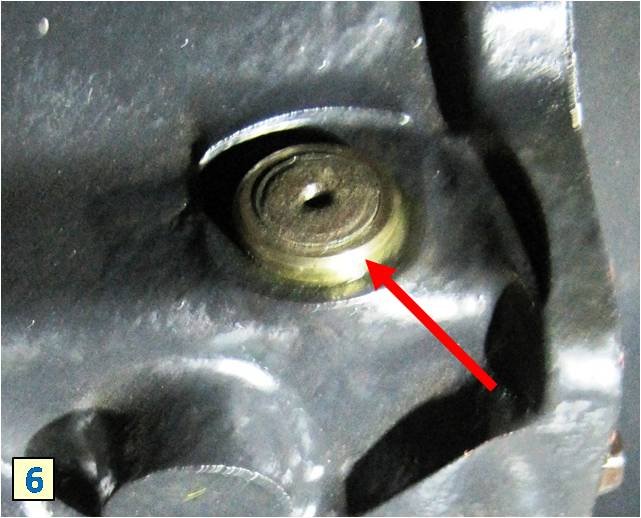
Starting with that: worn clutch fork shaft The shaft of my clutch fork was heavily worn [1]. The clutch and brake pedal wiggled there and back certainly by 1 to 2 inches. I was hopeless to find a spare part that fits to my truck. The solution was to remove most of the worn shaft surface by lathing [2]. Since I did not want to reduce the diameter too much, I have left some minor areas. In the second step I pressed a stainless tube onto the shaft. More stable and provides the required diameter for the clutch pedal bore. Additionally the tube is secured with a metal adhesive. Next where the pedals: bored out the worn/oval holes [3]. I made a brass sleeve which matches the diameter of the shaft and bore hole in the brake pedal. The sleeve has got a collar to provide the distance between the pedals [4]. It also got a groove for lubrication. Since the clutch pedal needs to be connected with the clutch fork shaft, the bore fits to the diameter of the shaft. Last was to rework / make new sleeves for the clutch housing [5, 6] That`s it [7]. O.k., access to a lathe and a stable drilling machine is needed … but that was my plan B ☺ Who else had a nice plan B to find ?


 2 points
 -
Starting this topic because I am wondering if someone here sometimes also had the question how to repair or to get a specific spare part that is not just lying around the street … When working on my PT81 I had some moments where I needed a plan B. Might be that this is my specific problem since I am living in Germany and I have limited access to some sources in the USA. But I could imagine that the one or the other here had a neat solution regarding a spare part problem, too … !? What was your remedy ?1 point
-
Andy- Yep, I miss my Plymouth quite a bit too. But, the sale allowed me to survive the economy crash and also allowed room for other ventures like Willys Wagons, including oldwillysforum.com. I've been toying with the idea of another Plymouth, but it will be a number of years before that can happen. My oldest is a senior in High School, and youngest is a sophmore... Once we get them off to college, I'll have more time to take on something new. I took this clip today on a long lunch with my dog Champ- All is well here in Idaho. Pete1 point
-
Wow Pete, hard to believe you sold the Plymouth 6 years ago. I do see your car on occasion. Mostly in the loser's circle1 point
-
This a common practice with wobbly pedals or control levers on shafts: machine the shaft and bore to remove grooves or uneven wear then match a brass bushing that can be replaced as needed. It's not cheap but works well especially when there are no other alternatives. Simple sheet metal parts, brackets, shields etc can also be fabricated. Other members have fabricated dual wheel fender extensions, bench seats, entire beds...some have even used modern 12V blower motors in vintage heater units as they fit, worked well, and were much cheaper than the very rare but correct 6V blower motors. I have been tinkering with a fix for the oft broken and partially missing original door checks and may be close to a working solution that is very cheap and easy to make...so it all depends on your needs, expertise level and personal experience as to what you can make work within your budget1 point
-
I 2nd George. He's built a dual carb set up for me and it looks so much better than the Offy.1 point
-
You might consider taking it to George Asche in Venus PA. West side of PA, but he is the expert. He is listed all over the place on this site. He specializes in mopar flatheads and the old trannies like the R-10 overdrive that are used with them. Very nice man and a wealth of knowledge.1 point
-
I had a similar problem with my 48 plymouth 3 speed. My shifter would often lock up between gears, felt like I had to force it into gear. We put the car onto a lift and I had someone shift through the gears and watched what was going on with the linkage. What I discovered was that the "gearshift lever shaft" was moving up and down during shifting, rather than just back and forth. We pulled the gearshift housing and found that a pin or set screw that should ride a groove in the shaft had warn out, once the screw was replace the shaft stayed in the down position, moving only back and forth and the car now shifts very easily and smoothly. As I recall this retainer is center and near the top of the gearshift housing cover, it is in line and near the top of where the gearshift lever shaft passes through the housing. In retrospect I think I could have removed and replaced the setscrew without removing the gearshift housing. I'm sorry I don't have any pictures, I hope my description might be of help. Bill1 point
-
That's got to a place to stow strap on ski's for the front wheels.........1 point
-
Best splice is a soldered western union splice as pictured. Once soldered cover it in heat shrink wrap.1 point
-
Don: I have the stock Ball and Ball carb on my 39 Desoto and the stock fuel pump which is the AC 588 that has the glass bowel and just before the carb I have another fuel bowel which is the newer style AC that has the glass bowel and a paper filter. I am not having any issues with fuel delivery or the engine stalling out. I have the 5/16 fuel line that is standard on my 39 Desoto. The Carter filter that has the ceramic filter was used as standard equipment back when these engines and cars were being run on a daily basis. Maybe the size of the picture is what is making you think the carter filter is not big enough to handle the fuel supply. Rich Hartung Desoto1939@aol.com1 point
-
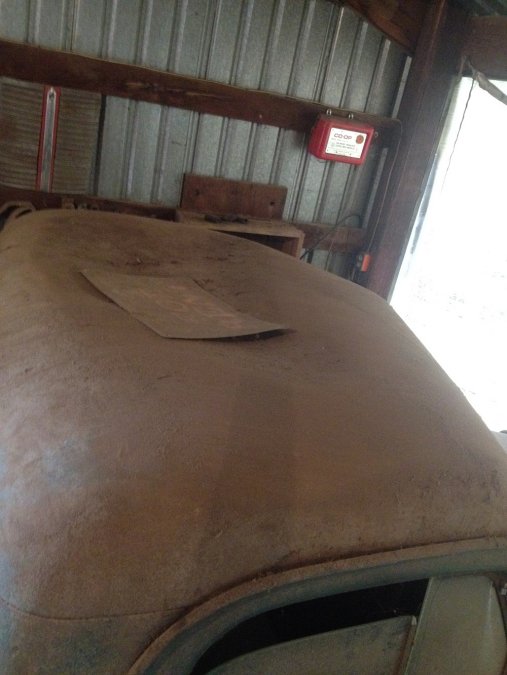
pulled the headliner out to pop out the roof dent this past weekend I was thinking I might try and clean it up and use the expanded metal backing and glue it to the liner to keep the original cardboard .... not sure yet if it will work I was admiring the truck (as I often do ) as it was starting to get dark.... anyone know what are the two drop down sections (above the spare tire mount) are for? I was thinking they were to hold the spare tire in place but I don't see them on my B3B's
.JPG.bb024b774dbc7cf1b951906a614162b2.JPG)
.JPG.ba704f6dc630ecd2752f3bfe9f286a58.JPG)
.JPG.7269e6115056314e097d3998ffd8b83a.JPG)
.JPG.8bce8d985f2e68a2c473752ff54e1ef8.JPG)
 1 point
 -
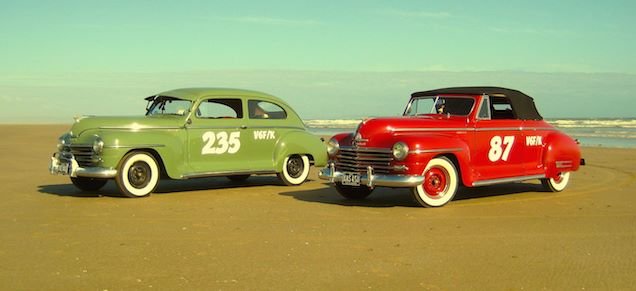
Dean and I got notification today that we have each got Race Passes for next year's VHRA Hot Rod Races at Pendine Sands (Wales, UK). It'll be the 4th year in a row that we've both been able to run our cars there. There'll be added interest for us because we'll be joined by Steve for the first time. He'll be running his coupe which was originally hopped up in the early 1960s. Dean is the current class record holder AND is also this year's poster boy! It's an amazing event and we're proud to be part of it...


 1 point
 -
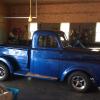
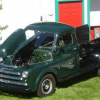
This is my 49 b1, have been working on it for two years.


 1 point
 -
Ok, got it.

 1 point
 -
Pics of progress and final assembly. Really happy with the results.


 1 point
 -
glad we go that settled.......1 point