Leaderboard


Popular Content
Showing content with the highest reputation on 09/04/2016 in all areas
-
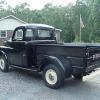
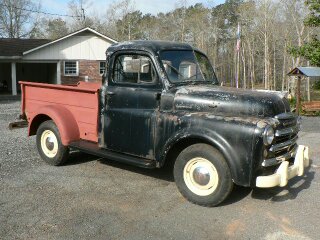
The 49 Woody, I have is the truck I learned to drive in way back in 1959. Dad drove it to work everyday, and we all thought it was an "old" truck back then.
 6 points
 -
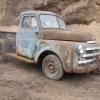
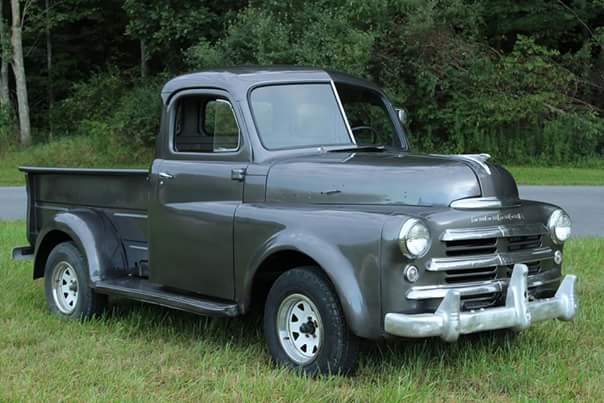
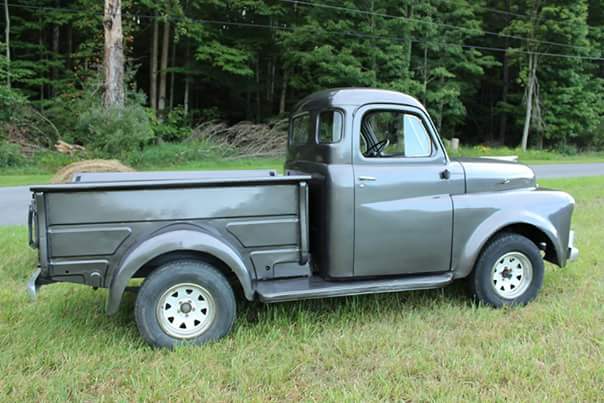
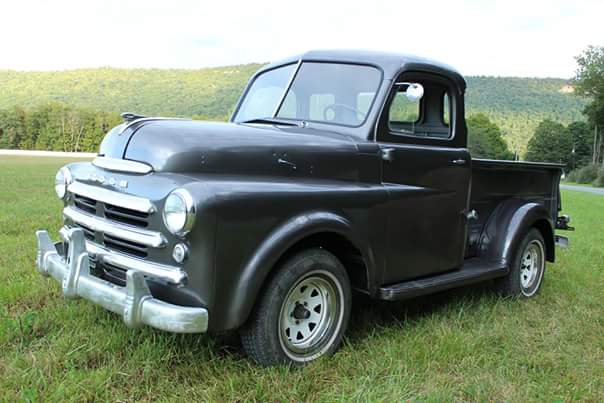
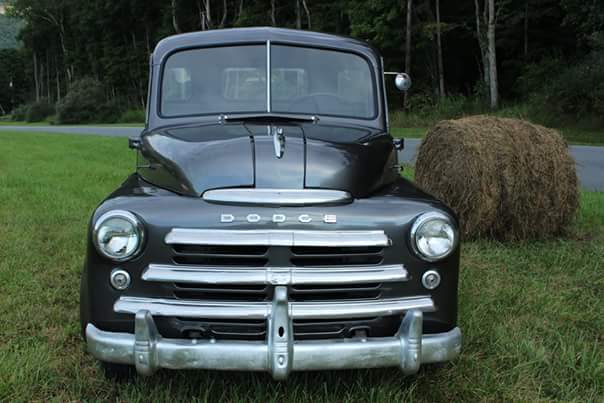
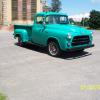
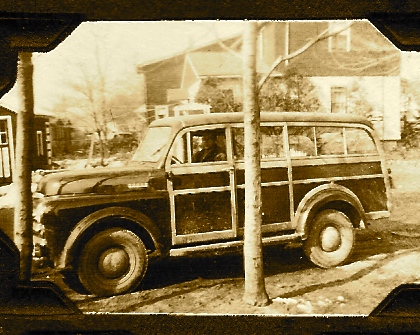
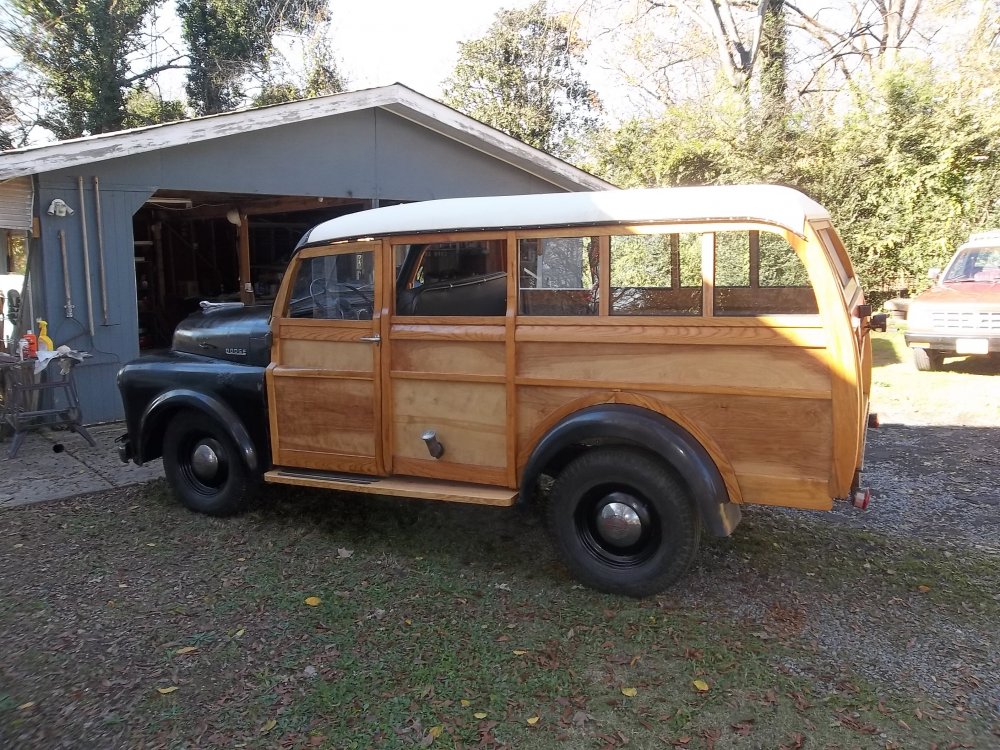
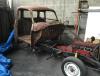
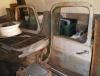
Here is a before and after
 5 points
 -
3 points
-
Timely thread. Just after lunch a man riding by on his bicycle saw Phoenix and and my son out front, stopped and asked if the truck was for sale. He learned how to drive in a like truck when he was 14 and has been looking for one for some time. I said I have promised it to my daughter then I showed him my suburban. He wanted the track first but said he'd be back in Reedley in October and waned first shot at which ever one I would sell. He is from the Bay Area. Oh, and he said, "Don't paint the truck!" Interesting. People never forget the first vehicle they drove, nor the first girl they kissed. To be continued.3 points
-
With the enviro-nazi's and the fascist left gaining more and more power all the time,I'm guessing in 20 years it will be practically impossible to buy any part for a car,antique or new. I am predicting it will even be illegal to work on any cars build before the mid-70's unless you are a federally-inspected and authorized repair facility with all the proper test equipment and forms to fill out. Chances are you will be required to take it to a dealership to even get it tuned. Don't like getting political on this site,but I also don't like the politicians getting me,and make no mistake about it,they are after total control over every facet of our lives.2 points
-
Plug gap should be .035".2 points
-
I think the previous two posts, while accurate, are overstated and discouraging to a novice. I started my first engine refresh with an empty tool box and zero knowledge. I bought tools as I needed them ALL readily available. Sidebar, expensive tools are not required and there are possible about six or so tools that are really helpful, just buy these as singles not full sets. Remember, O'Rielly's, have an excellent selection of very speciallized tools, free to use. Parts, buy one or two old engines, they are every where at a dime a dozen and you will likely find most every part you need. Here I may get some slack. To me, if the old engine has 40 #'s of oil pressure when motored by the starter, why fix what works, and if the cylinder walls are nice and smooth, why tear down lower? For me, there is one mandatory step. Block crud! Once my engines are stripped, that is, the head is off, I remove the freeze plugs, the water pump, and the water distributor and I spend at least an hour cleaning out the crud with a high pressure steam cleaner. I help things along by poking into all the water holes with a stiff pointed rod and as long as the water is colored I steam clean. The two most important items that protect the engine are water and oil! Accordingly my eyes are always on the oil gauge and the temp gauge. My overriding point is this, it is better to do it right once, yet let's not overstate what is so simple to learn, and wrongfully discourage newbies by implying perfection is required. Finally, pulling the doghouse, then the engine, makes this task SO much easier. Hang a winch on a rafter or a GOOD tree limb and begin a great journey. IMHO.2 points
-
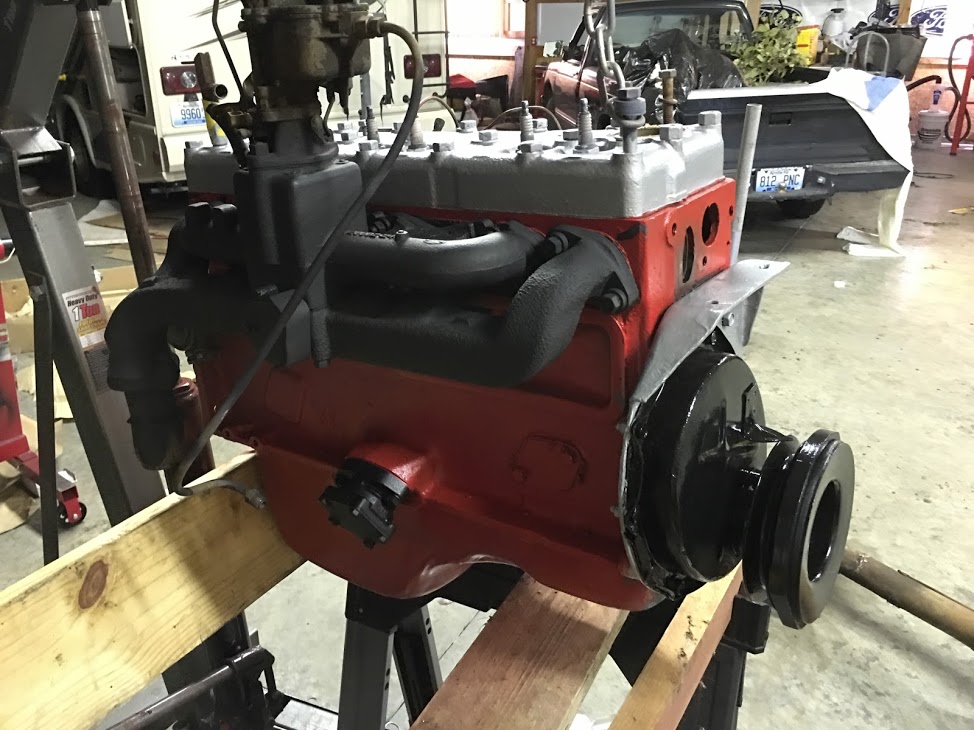
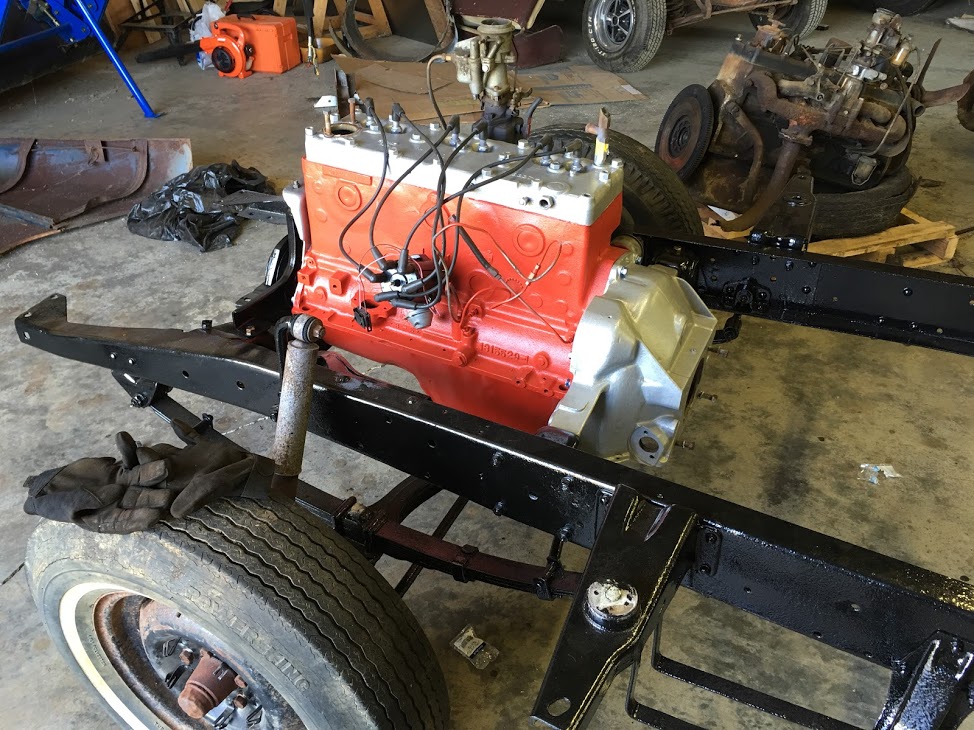
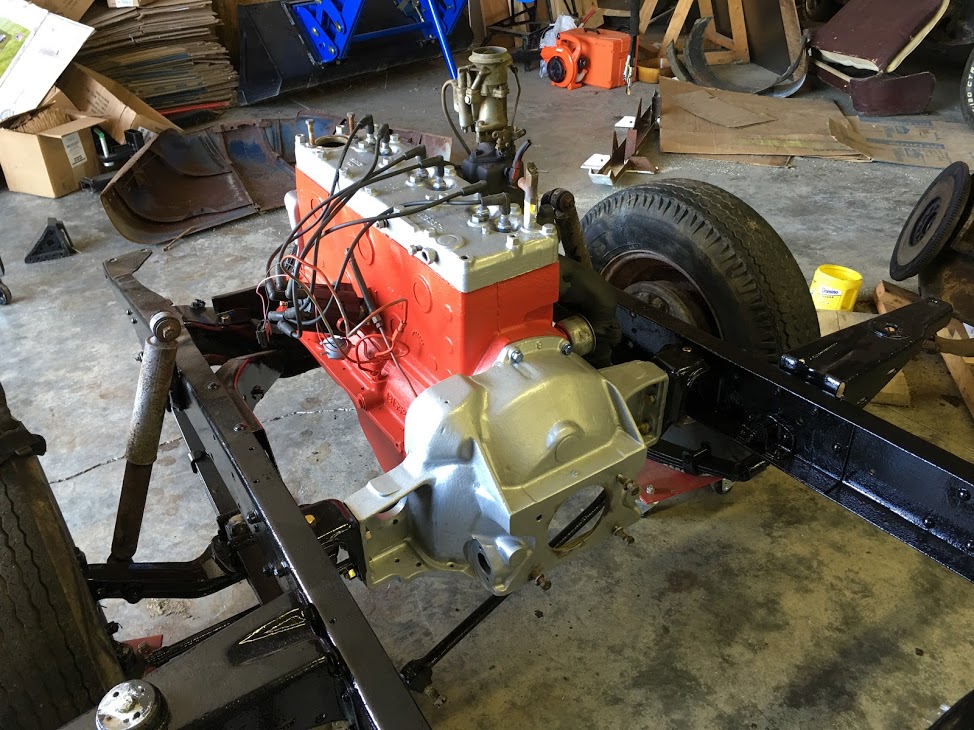
I got tired of looking at a rust/patina combination on the engine, so I cleaned it up and sprayed some color on it. The media blast cabinet has come in handy already blasting small parts for it. I still need to do some touch up on it, but at least it has some color now. I'm glad I took some of the parts off. I had a new thermostat to put in it and when I took the housing off and found it had no thermostat in it. I have a carburetor kit and will do a full clean up of it as well. It really looks dirty now against the fresh paint.
 2 points
 -
You need to pull the block. Before investing in a rebuild you need to get the block magufluxed for cracks, and to properly do the valve seat, cam bearings and cylinder walls. Other wise your throwing good money away. Reassembly is not complex, but lot of nits to get you in trouble like the correct way to install valve guides and the proper spacing on all the rings. Need a ring expander, torque wrenches, good set hand tools engine stand. Also learn about plasticgage, feeler gauges and good dial (or digital) indicator. Take your time, follow the manuals and ask questions when you get stuck and it will be an enjoyable experience.2 points
-
First would be the old Oliver Row Crop 77 tractor at the farm, followed several years later by the farm's 1952 Dodge 1/2 ton, tall side, short wheel base truck. My (not the wife's or the kids vehicles) I have daily driven 7 Mopes ('41 up) + two Mazdas and one Nissan. I always considered working in the gas station as a kid a bonus. I got to drive a King Midget car, a Crosley, a Hudson, several Packards & Nash, Studebakers, Internationals (and a Knox), Ramblers, AMC's, and everything (except a LaSalle) that the Big Three cranked out (loved the Muscle Car era), as well as pretty much everything the Japanese and Germans were sending here in the 60's and '70's.2 points
-
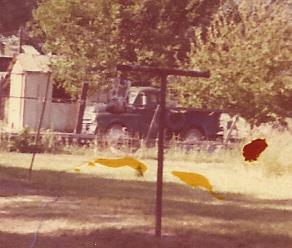
My Dad took me out for my first driving lesson in his B1B when I was about 10. I learned to drive in that awesome truck and I double clutched my way thru High School. Here it is 35 years later and sadly my Dad and his truck are both long gone but a little over a year ago I got my '49 because it reminds me of my Dad .I love my truck and its almost like I can feel my Dad with me when I drive it even thought it isnt the same truck. Probably wishful thinking but its still comforting. Here is a picture of Dads truck on our farm in St David, AZ back in the mid 70's.
 2 points
 -
I don't exactly recall my first drive but at 12 years old I was taking my dads car when he and my mom were away in my mothers car, and cruising the local drive in restaurants very much illegally. Guess I was a juvenile delinquent. Some things never change. Now I am a senior delinquent. But I sure miss my mom and dad.2 points
-
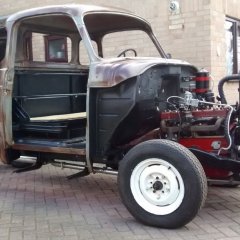
Welcome to my recent purchase, a 1954 dodge pickup. original chassis and engine. straight 6. Model C-1-B6.. I was that keen to get this that I have knocked the back of my garage out to get it in, full wall down will follow soon. Most of the body panels have been shot blasted so the patina has been lost on some parts. Bit of welding on the back of the cab and passenger floor and cab mount, apart from that body is sound. Work to do on the engine and all linkages. Brakes have been rebuilt with new cylinders and drums, just need cleaning and perhaps new seals as this has stood for about 3 years. Just thought I would share this......dont expect a fast rebuild, slow and easy I think. Need the back wall down so body can be put on. All body panels in daughters garage next door, hopefully she wont move !!!!!!...Hope pics load ok.........Dave, Norwich, UK.. What are your views and where is the best place for spares ????? Thanks

 1 point
 -
Actual vehicle was FEF on the farm taking seed out to my dad and brother when I was 12 or so. I started driving the H tractor a year or so earler.1 point
-
Got the master cylinder and proportioning valve on today. I found that the Cherokee master cylinder was binding at the first bit of travel due to the design of the cylinder. So I changed to the GM style cylinder which is much more similar to the stock style. When everyone talks about using that Cherokee unit, they are talking about 53 and earlier which is very different than the 54+. Just a few more brake lines, bleed and tighten the front u-bolts and she should be ready for a test drive. Also as a side note, the GM style doesnt use the bubble flares. Just the standard double inverted that you can make in your garage!1 point
-
Well done and congrats! There ought to be a merit badge for those of us who have gotten past this little treat. Jeff1 point
-
I'd rather go through the pains of learning this new forum than any other "mind exercise". The payoff here is the wealth of information (and sometimes entertainment) provided by the still best forum on the web. Thanks Tim for pointing out an option I didn't even realize was there and I agree that we shouldn't have to change our preferences with every log-in.1 point
-
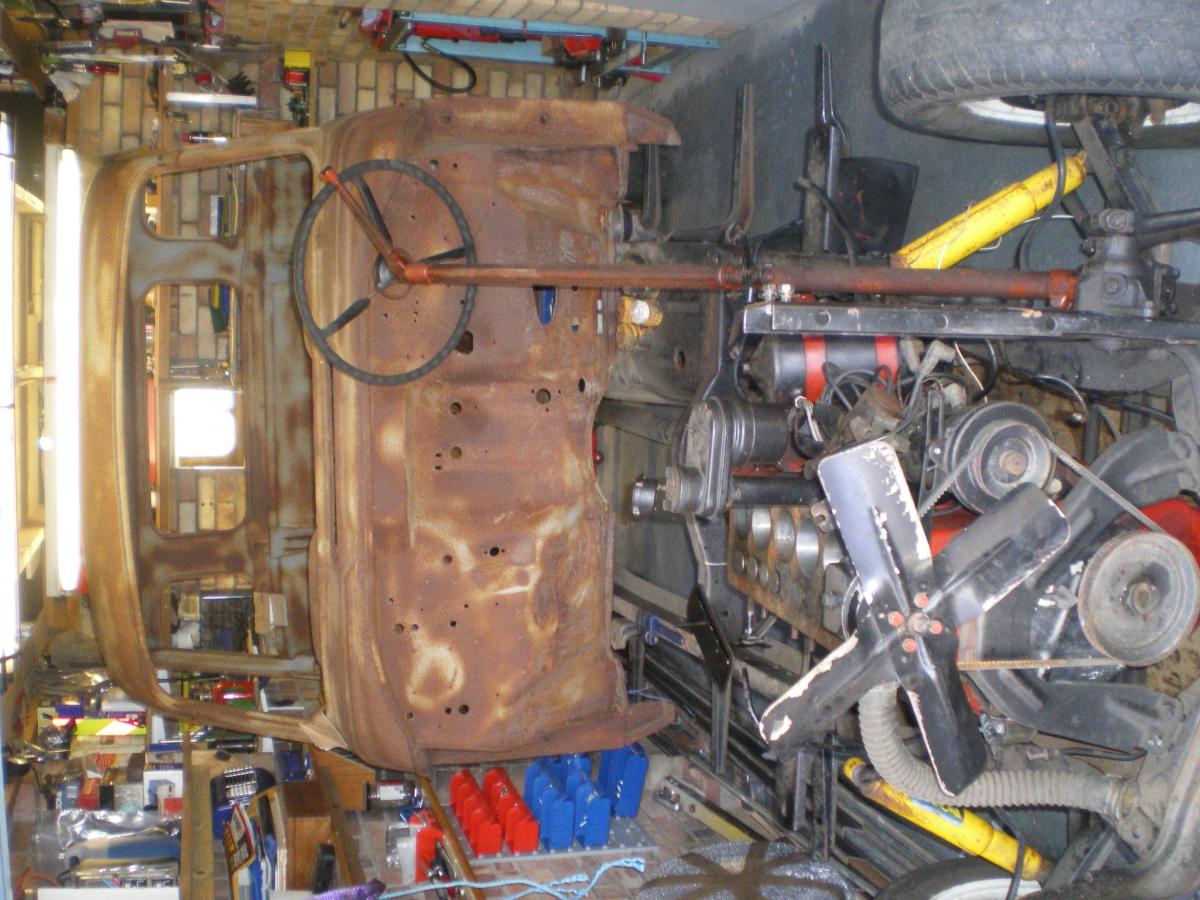
Since this engine didn't come in this truck, I decided to test fit it in to the new mounts and the housing that I cleaned up and painted that was laying in the PO's back yard for 6 or 7 years. I had to cut two mounting nuts they welded to make the bigger Chrysler engine fit, but other than that, it dropped right in to the space. They were in the way of the pulley.

 1 point
 -
There is oversize lining to be used for brake drums that have been turned or enlarged. This extra material should work for drums machined out to the safety limits of the drum which I recall is about 0.060 inches from new. What should be done is get the lining arched so that it matches the shape of your drum. There are places that do this and by doing it your brakes should fit and work better.1 point
-
A glance now and then should be enough.........eyes belong on the road.1 point
-
1 point
-
I posted photos of this truck a while back. ID and authenticity questions aside I think that since they are using this truck they ought to consider changing the show name to Yesterday.1 point
-
From the album: 1948 Dodge resto/rat rod project
1 point -
From the album: 1948 Dodge resto/rat rod project
In the process of widening the front to accommodate the wider Nissan Armada wheel track1 point -
I also have no need to argue. I have a 1948 Plymouth converted to 12 volts. I also have a 1948 Dodge I purchased recently, still on 6 volts with a 6 volt positive ground alternator. Both are reliable and run well. Nice thing about the 12 volt system is I can power up my GPS and charge my seldom used cell phone. On my 12 volt car I installed a 12 volt starter from a 55 Plymouth. Main reason being I discovered that not only does the starter motor run twice as fast but also the Bendix engaged the flywheel super fast and did not sound good. The 12 volt starter sounds much better. With a foot starter that would not be an issue. Many folks are happy running a 6 volt starter on 12 volts. As mentioned 12 volt starters have a green tag.I modified my original generator bracket to mount the 12 volt alternator.1 point
-
Hey, she is a smart girl. If things go really wrong, she is ready to bail out and leave it up to you to deal with whatever! LOL. DJ1 point
-
First drive in a truck was when I was 11, took the '75 D200 Club Cab long bed five miles to pick up my dad at my grandparents' house (by myself)...I had been driving tractors for a couple of years at that point, no traffic on them country roads back then...almost drove to the high school for the first day of driver's ed 4 yrs later, but my ride finally showed up1 point
-
very cool, soon you will be able to take a pic with snow1 point
-
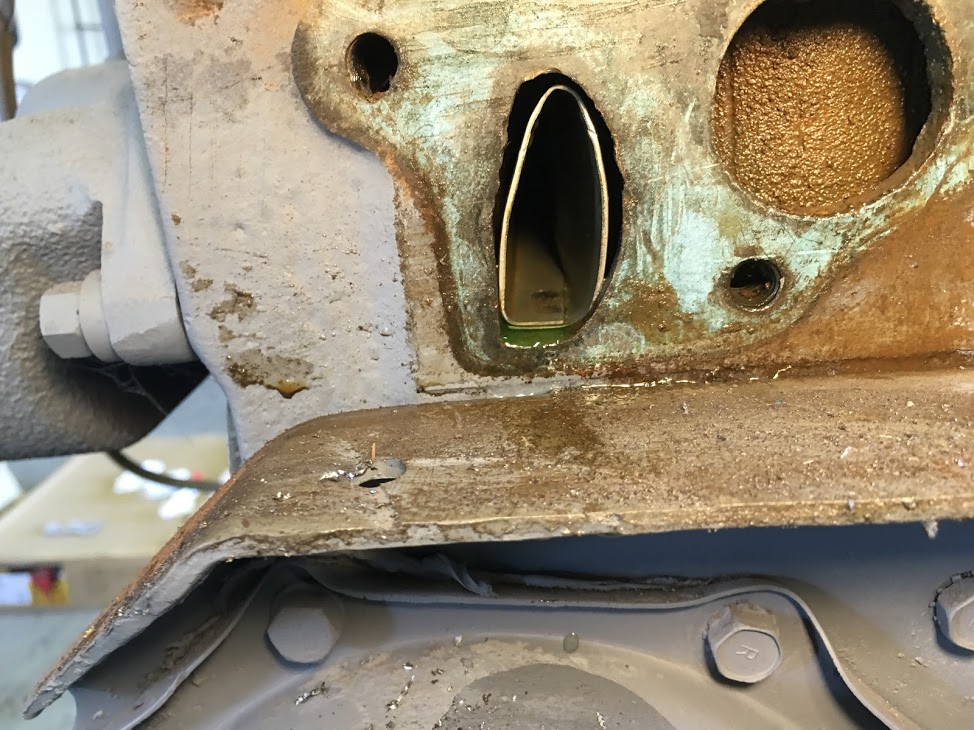
I got a new water pump from RockAuto and only broke two of the 3 bolts off removing the old one. Fortunately, I have plenty of drill bits in preparation for such things. After getting it removed, I was happy to see the water distribution tube was replaced when the engine was rebuilt 30 years ago. Since the engine didn't have 1000 miles on it after the rebuild, the tube looks like the day it was installed. After reading so many threads and watching 48dodgers video, I'm glad this is one thing I don't have to do.
 1 point
 -
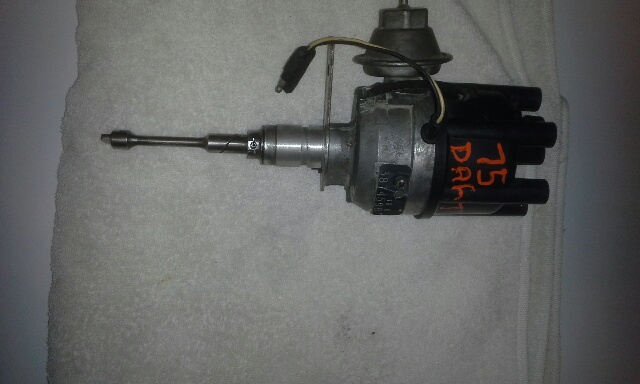
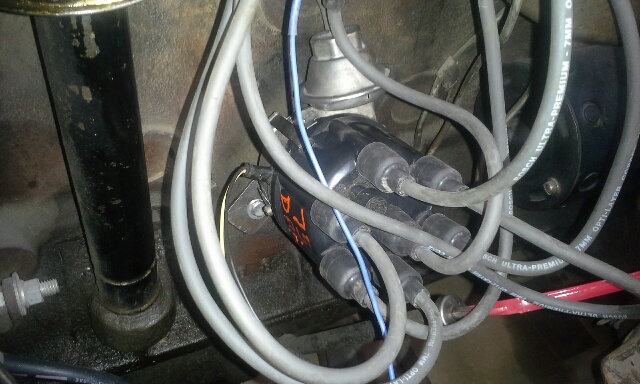
Another way to electronic ignition is with a Mopar /6 distributor conversion. Not that difficult, you can use it in conjunction with a GM HEI, if you don't like the Mopar style module. It takes a bit of effort, but is certainly not that difficult....

 1 point
 -
I love your sentence structure.1 point
-
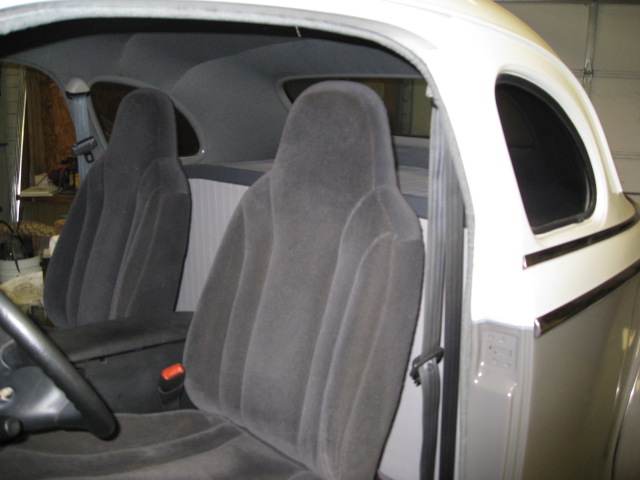
got to love the grays..... (official color of reported aliens worldwide) this shows my gray theme inside and out of the car...
 1 point
 -
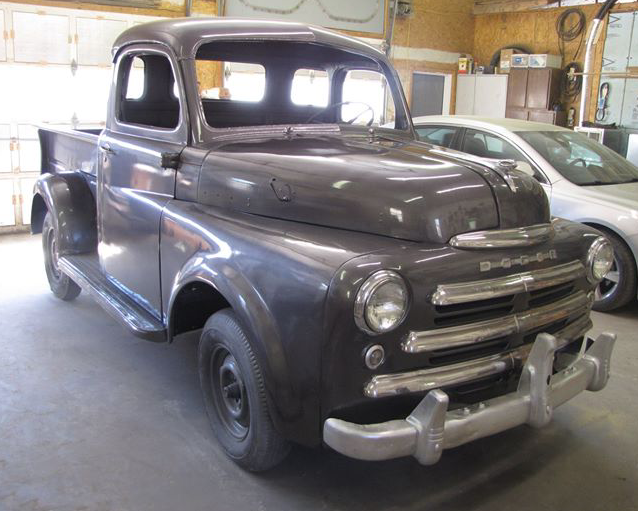
Outside pic after paint.
 1 point
 -
Just realized its been ages since I updated this. Here is a pic of my self-made and upholstered seat. Not too bad for my first ever.
 1 point