Leaderboard


Popular Content
Showing content with the highest reputation on 12/29/2015 in all areas
-
Cheers from me and the 51 I've been playing with at the moment.
 4 points
 -
It's still taught in school, just not practiced on forums......along with spelling, grammar, and punctuation.3 points
-
Keep the axle nut on....loosely, to avoid the drum from "flying" off AND protect the end of the axle threads, which I'm sure has been mentioned.3 points
-
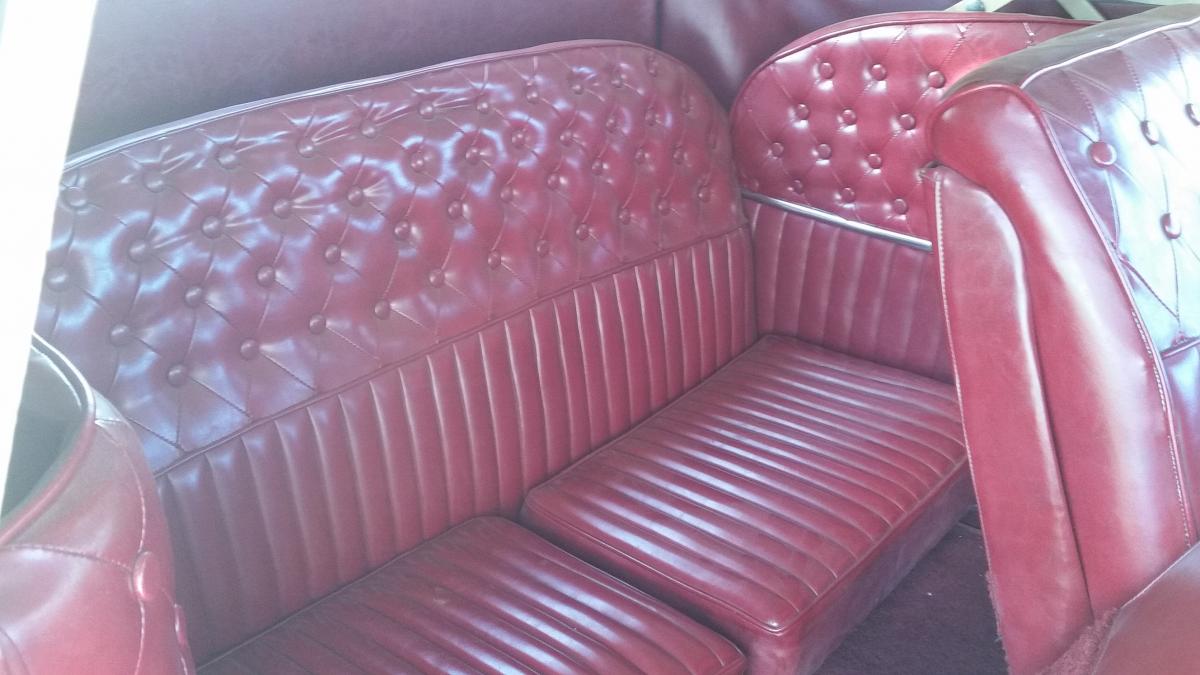
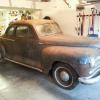
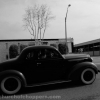
Last week I posted on the forum to get some opinions regarding this car. I ended making a deal to buy it so I thought I'd post back some info and a few picks. The car has an interesting local history, it was originally won as a new car at a race track by neighbor, restored in the 70's as a 4 h project by another neighbor and his 4 h group. Local shops donated services and taught the kids basic restoration skills. They then showed the car for a number of years at Frank Maratta's auto show here in Hartford. After that it pretty much sat in a shed until now. I spent some time today and got it running, it's just a real sweet car so no mods in store for this one, it's going to stay just as is.


 2 points
 -
bwengler I think was suggesting that after turning the hub puller a few turns you give the head of puller screw some "light to medium" taps with a hammer. The vibrations from this tapping releases the tension from the built up torque from tightening the hub puller. My drum slide off a few millimeters at a time this way from tapping on the head of the screw ... versus shooting across the garage as can happen if the drum breaks free all at once. This will not damage the threads or bearings of the axle. Now if you took a 5 pound hammer and gave it very hard hits .. that would at the very least damage the end of axle threads.
 2 points
 -
Unless you've got that compartment boxed off to minimize content travel, whatever you put in there will always end up at the far end, out of reach I think that's one of Murphy's laws.2 points
-
Hi all, I thought I would post some thoughts on the subject at hand. Since I have currently five flathead engines, two in cars, and 3 on the floor, as well as parts from 2 others... In assembling the new engine for the '49 Desoto using a block that is a 1968 Chrysler Industrial as far as I can tell and using a "box" Standard Crankshaft Company rebuilt 4.5 inch crankshaft that is zero-zero... I am finding some interesting things about the timing chain, gears, oil slinger, case, hub and the like. I have three hubs on the bench and guess what? There have different depths. Also, if you try and use the Desoto style felt dirt seal and retainer with the short or the long hub and NOT using the oil slinger it will bind on the case. Now the case may be a little different. It looks like the depth or projection for the front seal is a little different on a couple of cases. What this all boils down to is that there are enough differences that one has to be careful. I have two of the oil slingers out of engines and BOTH have signs that they were rubbing on the side of the chain. I think that they may have used the slinger with the later chains which are a little different in shape. Although this is just a guess. In this case I am using a modern seal with the dust outer lip. So, I am not using the retainer and felt dust seal. I actually like to be able to pressure clean down in there from time to time. I wanted to let folks know what there are differences and that if you go to mix and match you may get into trouble. James.1 point
-
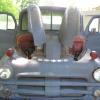
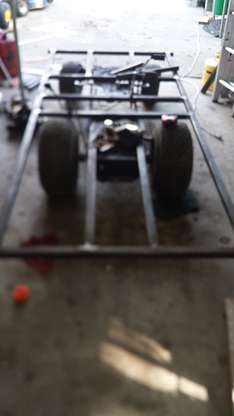
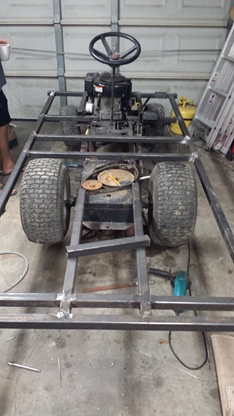
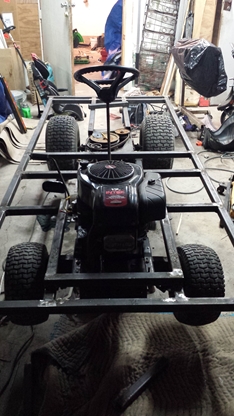
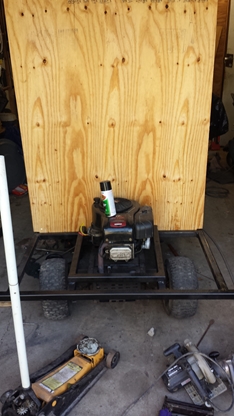
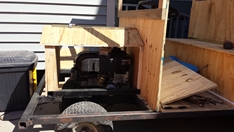
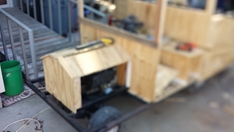
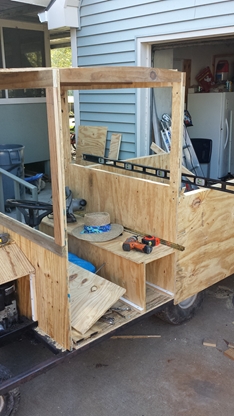
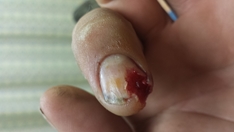
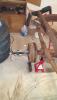
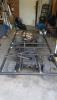
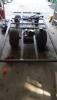
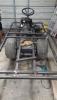
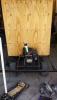
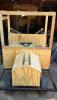
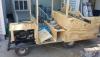
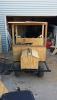
You know sometimes you just do what you have to do no matter what the cost or what time it takes you to do the project. I have a six year old grandson that has Curable Pulse (CP) that just loves Fire Trucks. He has ask me if I would build him one. Well as you know what the answer to his question was I just didn't quite know how big nor if it was in my ability to build one. I started thinking that I have a couple of old lawn mowers in the back that I could possible turn into a Fire Truck so the old mind started turning with great speed. If I was to build one that was motorized his older brother would have to drive it or I would which to me would be a pleasure seeing him smiling all the way. So here's my story: I got one of the old lawn mowers out of the pasture and began to disassemble it piece by piece until just the frame was there. Worked on the engine and made sure it ran and was alright. Took the frame and cut into just to add 20" to it and welded it up again. Took some measurements and went to a Iron Works place to purchase square tubing in 11 gauge. After a few scratch ups on paper I decided in order for me to drive this thing I was going to have to make it large. What I came out with is from bumper to bumper 9' and side to side 45" wide. Welded up a frame that size and welded it to the mower frame as you can see in the pictures. Had some sheets of 4 x 8 x 1/2" plywood in the wood shop that was just the old sheathing type that I am using for the body. Now I know what his favorite color is but I ask him what color would his Fire Truck be if he had one and just as I suspected he answered his color of Orange. I tried to explain that most Fire Trucks were red but he wouldn't have it, it had to be orange his favorite color. This is what I have got constructed so far in the picks and let me tell you I have had a hard time keeping the secret from him as this is going to be his Christmas Present this year and by the way watch out for those darn saw blades they will get you when you least expect it.


 1 point
 -
I have pulled 100s of these drums and never had one go flying or doing damage from pounding on the puller with a hammer.1 point
-
...actually, this would not be treated kindly on the Hamb.1 point
-
If anyone is trying to play with the Carter BB's...they may find this information of use. James Carter_Car_Specs.pdf1 point
-
58 5/8 on the front, 61 1/4 on the rear for a B108 Under the resources tab, DPETCA site, pilots knowledge - scroll down. there's a bunch of builders layout prints you can get dimensions from.1 point
-
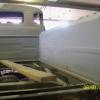
I'm resurrecting this thread provide an update. Well, it's funny how time flies. It's hard to believe it's been 2 years since I started this project. I had to take over a year break from it though. We bought an older house just over a year ago that needed a full remodel, so I've been playing Bob Villa and the Plymouth has been sitting there gathering dust. The house is "done", at least enough where I can now start back on the Plymouth. Time to stop spending all my money at Lowes and start spending it on car parts. However, one of the reasons I bought this old house was because there's a big workshop in the back and now I have plenty of room to work on the car. Last week I ordered all new internals for the distributor and plug wires from Andy Bernbaum and a Pertronix Flamethrower coil. I got it all installed last night. I know for sure this car hasn't been started in at least 15 years, and I literally just put the distributor on and plugged the wires to the spark plugs. I thought I would see if it would hit so I squirted some gas in the carb and I can't believe what happened next. https://goo.gl/photos/XmQnoV9e5sajXvBv71 point
-
I have run into the same issues over the years on all the flat heads. Sometimes the timing covers are damaged/pushed in from improper seal removal and installation procedures causing interference issues. Modern seals are better to use IMO with a perfect hub wear surface-speedi-sleeve or a NOS hub..1 point
-
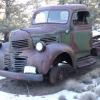
A litle late in posting, but I took this the morning of my g/f's and my Christmas celebration1 point
-
Not a car or truck, but I had to share. My friend's 1951 Massey-Harris model 22 that has been in the family since his Father bought it new in 1951. I took these photos earlier this week

 1 point
 -
Here's mine on display. Merry Christmas to all.1 point
-
Doesn't look like much, but its the original shifter knob from Ol Bessy. Brown hard rubber and now smoothed out a bit to remove years of dings and scratches and polished up....gotta get it adapted to the Auto OD trans lever that will be installed soon....1 point