Leaderboard


Popular Content
Showing content with the highest reputation on 03/01/2015 in all areas
-
4 points
-
Found in the www wonderworld... No idea which city? Time could be end of 1930's.2 points
-
Paul puzzles Paul...........2 points
-
OK this is thw first time at trying to post photos. Hope it works


 2 points
 -
my engine is so smooth it picked up a dual over head cam v8 in the bar parking lot last weekend2 points
-
Have you ever had one of those days? When what you are working on, which seemed like it was going to be a simple task, has you going crazy?? My first Air Force supervisor, SSgt. Connelly, called it goin' "Nuckin' Futs!" I call it "Doin' circles in the parking lot!" Nothing that you are doing is working, you can't figure out why, and none of ot makes any sense...just like "Doin' circles in the parking lot!" This was my day today. And when I couldn't figure it out I took a deep breath and logged onto this forum and started searching. About a half hour later I discovered the solution to my dilema and am now back on track. All it took was one picture that someone posted a while ago. That one picture "turned on the light", jarring my memory. So a very big Thank You goes out to all who participate in this forum, helping novices like me over yet another hurdle....1 point
-
There are 3 types or styles of FD seals ...1941-42, 1946 to early 1950 and last the housing type seal assemblyused from late 1950 to 1954. That kit you have is a late style 1950 to 1954 FD "housing" type seal. It replaced the bellows type fd seal assembly. You can use it as a whole kit as long as all the parts are correct in your kit..The graphite ring should be hazy shiny if new and never used-not wear or pits. I always install what was there so to speak to eliminate possibility of issues later on. There is a Miller tool set that is used to install this newer style of housing seal assembly. You will notice the two notches in the graphite ring. The tool set centers and protects this delicate ring and also compresses the strong spring for proper safe installation. A shop manual to install the housing type seal and special tools probably is required! Some pics... Bob1 point
-
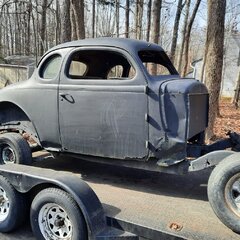
I snapped a photo of this 39 Studebaker at a car show today. The owner runs ghost tours at our local historic jail.
 1 point
 -
I drove it 20 miles today, heck the road was super dry, speeds up to 100 kmh. I also poured some Seafoam down the carb, didn't seem to do a whole lot, but it made me feel good. I don't understand not going for a drive on dry winter days. Go to the HAMB, a few guys in Winnipeg are driving old classic cars year round, they are of course there old car beaters, but still they are having a blast1 point
-
My truck will make it this year. It hasn't been on the road since last year's BBQ. I just finished bleeding the brakes and everything looks to be holding up. I'll wash it tomorrow and go for a more extended ride...1 point
-
You can set the idle speed in the shop, but unless you can actually take multiple drives after each change to see which way your going, you could be idling fine, but running rough when driving, and driving on a day like today is going to give different results then July. I can set my Monaco to absolutely purr in the shop....drive it and then you start getting into mid range and hard acceleration issues. Your dealing now with engine issues, so corrections to smooth that out may now mean bad drivability1 point
-
Ha! Funny thing about the dice, they were scented and as soon as the scent disappeared so did the dice.1 point
-
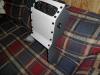
Pulled the starter Looks as though the teeth are damaged? I'll open it up this week and check inside. Ive got a rebuild kit from Andy's. Installed new wiper arms/blades along with new cowl lacing.1 point
-
Tim, I don't think there's a problem mentioning a supplier, as long as you're not affiliated with selling said product....otherwise, it would go in the Classified section. At least that's MY interpretation. Engine looks nice, BTW.1 point
-
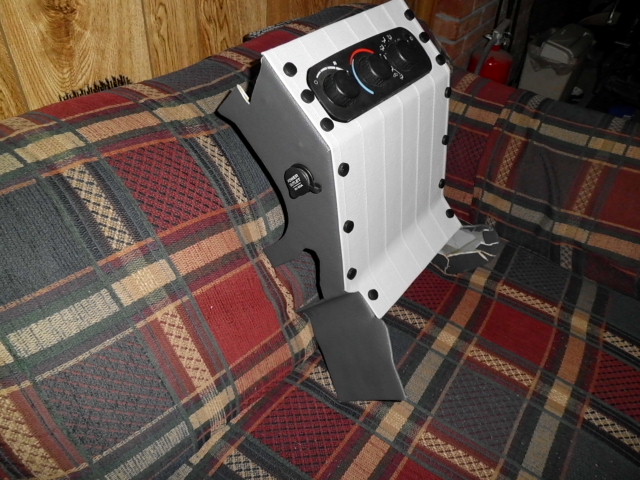
there are a number of ready made aftermarket consoles that just plop down on the floor and afford the owner cup holder and a tad of storage for personal items. These are reasonably cheap/inexpensive. Also if you were to walk about in a few wrecking yards you will be rewarded with other factory fit consoles that one can pick up also for a fair price. The Chrysler Town and Country and I would guess the Dodge lineup as well has consoles that sit between the seat that could easily be rotated 180 and fit beneath the dash and point toward the seat...these are designed to lock into place and not move..they are latched in place by a remote latching/release lever inside the compartment...there can easily be vinyl dye sprayed with such products marketed by MarHyde to compliment you car's interior. But if you dead set on making your own..then for all practical purposes you should start with measuring your available space, select proper travel cup as they are all not equal and elect if you want power taps for audio device/chargers and let the big dog eat..Ihave made a few consoles. The latest was due to the fact that the fatory heater AC of a 2004 vintage vehicle retrofitted left little room in the dash to place all controls etc...so my answer was...make it..all metal..conforms to dash and floor..heater/AC control and dual power taps for cellphone and other misc items like GPS and I-pods

 1 point
 -
I haven't been able to work on the car lately but the I did manage to mold the passenger side drip rail out of 5/16" round stock and finished up most of the body work the lat time I was in town.1 point
-
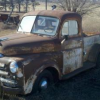
Hi Hell City I am a newbie too...love those photos...make sure you don't paint that truck...that finish is perfect in my eyes. MikeC1 point
-
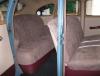
If you want something close to original be prepared to pay $450 just for the material or find a good fabric store that sells drapery material and get the next best thing for $50. Here is my (blown) budget P15 for example. Jim M
 1 point
 -
1 point
-
1 point
-
my kind of truck1 point
-
ugly, but interesting1 point
-
The deluxe cab has the rear quarter windows1 point
-
Did you ever hear the story of Tom Ruddy of Beverly Hills? here it is as I read in the 1952 edition of Hop-Up magazine, he had a 1950 Plymouth business coupe with a reputation, he created a real dent in Southern California racing circles , in close conjunction with Engles Machine Shop, to get maximum performance from his engine, the car was used for personal transportation and raced weekly at the local dragstrips. No lower end troubles developed even after a solid year of racing. Toms car was equipped with a specially adapted manifold using two Stromberg 81s .080" mill on a 1950 head giving well over 8:1 compression, and a reworked stock ignition. This amount of mill required flycutting the head to clear the valves. Cam was a 3/4 Engle "Special" grind. Gear ratio was 3.54:1 [stock]. A run at one Russetta Timing Lakes Meet in 1951 showed a true top speed of 103 mph the results attained by Toms car shows what can be done to your Plymouth to make it really perform.1 point
-
In the process of rebuilding the carb. If you haven't i highly suggest, easier than i thought and lots of the jets/holes were partially plugged I used these 2 very informative videos \ I was able to get the rebuild kit from a local NAPA for around $20. Nice to have a clean carb again. Good news is i've finally moved into a place with a 2 car garage. However the car is located 2hrs from where i am. Wont be back out to the car until the new year so i hope everyone has a Merry Christmas and Happy New Year. Updates in 2015!1 point
-
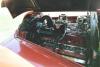
It's getting a 230 flathead. I originally built the motor for a t bucket project I was building but that has since been traded to a friend. It's got a balanced 230 crank and rods, small block chevy valves, 280 / .395 cam, electronic ignition, edgy aluminum head, offy intake and fenton knock off manifolds. It's backed by a 426 hemi flexplate to a 904 automatic. Here it is in the car when I was making the transmission tunnel. And in the bucket1 point