All Activity
- Past hour
-
If the vacuum meter is ok (check your other car) you probably have a leak somewhere.
-
My altitude in Berlin is 34m (100ft?)
-
My exaust heat riser is not in operation. The previous owner left out the spring and the counterweight. Unfortunately, I didn't get the parts either. When I remove the manifold I will see if the flap is still there. The axle of the flap is also not there. If the flap is removed and the holes are sealed, I will make a cover plate so that the intake manifold is not constantly heated. But no exhaust gas comes out of the axle holes. So they're somehow shot
-
That's right... Flathead is complicated like this. The TDC is too small for the average camera (I did check for the deposits inside, it is not exactly a pinhole, but something like 2/16). A professional scope (like the one you've seen at the doctor's office 😅) would do just fine, but the one they loan at the Zone is too large, it is really does not work well. I cannot believe they sell it for ~$170. This is clearly a $30-40 scope in Amazon. Poor quality image, poor illumination, etc.
-
Bob Riding started following Rubber mount Control Linkage
-
- Today
-
As a side note, removing the carbon in the plug hole was my bone head move. I just used a 16 penny nail and punched though. When I started the truck it ran for about 30 seconds really rough as the carbon got stuck under the exhaust valve .... then it passed through and was fine .... I think. The valves clearly are not seating perfectly from sitting 20+ years .... I'm hoping a nice long drive in the country will go a long ways .... possible I damaged the valve seat with the carbon .... time will tell. If I could do it over again, I would put some grease on a sharp drill bit and drill the carbon out .... most particles would get stuck to the grease and any in the cylinder would be harmless. I just find it strange that a loaner tool would not go through a spark plug hole .... Amazon has several from $12.99 & up depending on your phone ..... Here is one for $33 and needs no phone. ..... I do not have one yet, I expect to pick one up when the need arises. DOH!!! what a idiot I am, the spark plugs on a flathead are over the valves not the cylinder ..... so close you wont see much .... the tdc pipe plug will probably be best access.
-
First time in crate. Yes he got out. 20230116_141520.heic 20230116_141513.heic
-
-
Do you have any enemies?
-
Could it be exhaust heat riser flapping around? Wire it in open (rotated fully clock wise) and wire it there temporarily. Might also be the flapper shaft leaking. Remember if you decide to remove the manifold assembly, there are 13 fasteners holding it together. When reinstalling, leave the four bolts holding the manifolds together just snugged. They can then get a final tighten when finished tightening the 13 manifold nuts. Another consideration when putting the manifolds on, tighten the fasteners in a spiral pattern starting in the middle and working outward to the ends. Do not over tighten. Snug them then add quarter turn, start and run the engine to operating temp. When it has coold enough to work on, snug and quarter again from the center out. Then check the 4 on the heat riser. These assemblies heat and cool at different rates, they need to be able to move as they do so. Over tightening prevents this and leads to cracking. Remember the magic number is 13 plus 4(heat riser) When I did mine, I took an old Taiwan box end wrench took out a section of the box like a tubing wrench, and ground it thinner to make it easier to get the nuts that are partially obscured behind the exhaust casting. Good luck.
-
Dodgeb4ya started following How Many Pilot House Trucks Have Survived?
-

How Many Pilot House Trucks Have Survived?
Dodgeb4ya replied to Bradley S.'s topic in Mopar Flathead Truck Forum
I like that yellow COE... -
The hole is packed with carbon on the bottom. It's bigger than a pinhole.
-
one thing I will add is that the local paint jobber is not going to be that willing to take the time to mix just a touch up amount of paint and even if he does, odds of finding one that is able to work comfortably with a color palette....not so easily found would be my guess. Feel your pain as you want to not have to lose an original finish and forced to recoat for hope of protecting the vehicle.
-
Dave, I am afraid that the hole for TDC is way too small. The plug itself is 3/8, while underneath there is just a pinhole
-
Have you tried pulling the plug for TDC and using the borescope through that. With the piston down instead of up you might get a better look at the entire piston.
-
You best bet is taking the truck or a color sanded and buffed section of the truck to a paint supplier or body shop that has a color camera for paint and can then mix a amount for you if they haven't switched to waterborne paint only. Toners used to mix your color are no longer available and as Tim said, time does have an affect so unless the mixer is really good a close match is all you'll get. With more and more body shops switching to waterborne it's going to get even more difficult for the DIYer.
-
finding touch up paint for a formula that old is not going to happen...secondly if it did, the sun fading and chalking of the paint due to age and exposure will not at this time be as the original touch up paint and look like lipstick on a pig....this will have to be custom blended to get anywhere close to a match...washing out the pigment to reflect age and fattening to reflect loss of sheen.
-
AND.....dodging a deer!
-
I use to think, 'How can I drive this truck into a brick wall at 70mph and survive'.
-
I’m trying to find some touch up paint for my original 1953 FARGO. I believe they used the same colors as dodge. Color is dark blue. Does anyone know of a supplier who knows the dodge/fargo colors and can provide paint.
-
I thought I’d chime in to share my success (thankfully) story. I could shift between 1st and Reverse, to 2nd if I was lucky, and to 3rd was ok. Going back to 2nd from 3rd was hit or miss. After reading the posts in this thread, I took the cable off. It was stuck and required a lot of pressure on either end to make it move. I hung it up vertically in my garage and sprayed penetrating oil and brake cleaner on each button and the 'collar' that houses each button. I let that soak a bit - then would press each side back and forth a few times. I'd then flip the cable around and spray the other button/collar to let liquid seep into the opposite end. After about 2 days of doing this on and off a handful of times per day, everything loosed up nicely. I can now make the cable move with very little pressure and it springs back into place without issue. I reinstalled the cable and we're back to normal. Thanks to everyone who posted!
-
As Paul Harvey would comment, and now the rest of the story....."90% of all ford pickups are still on the road today", the other 10% made it back home.
-
SteveR started following The Worst Parts Ever? and not for the guy who
-
Not mine! She is wonderful, helps me get my tools and assists me when needed. My wife is the reason I bought our 37 Plymouth.
-
In 1978 I was going to replace my 65 Barracuda. It was turning into a rust bucket in Minnesota. The front fenders were only held on by stubborn rust. I wanted a pickup, but which one? I listened to all the hype and had a brother-in-law who worked for Ford Motor Company. He assured me it was a good choice Coupled that with, "Built Ford tough" slogan and "90% of all ford pickups are still on the road today", I bought an F150, 6 cylinders, 4 speed with overdrive. It had a 12,000 mile warranty. I had problems from 3000 miles with the transmission. The service backup was, well, pathetic. My dog could do a better job than they did. At 12,164 Miles at night I was on the last leg of a 300-mile trip home when the left front wheel bearing disintegrated at 70mph. Prior to this I had 3 seals replaced in the rear end. I finally replaced the transmission with a manual 3 speed. That truck was the biggest piece of junk I have ever owned. So what part was bad? The whole damn thing!
-
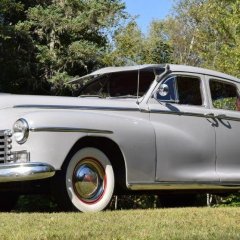
Finally got the ol' Dodge buttoned up after all the winter work I did on it. I was kind of anxious, as this was the first start after completely rebuilding the carburetor and reinstalling the Sisson choke. And, it started right up once fuel got into the bowl. I have some adjustments to make to get it to warm-up a bit smoother, I am not used to dealing with the Sisson choke and a working fast idle, but it was cool watching the Sisson choke arm relax as the car warmed up. I had my doubts the choke would work, I removed it over 30 years ago because it wasn't working right, but since found out why (thanks to this Forum and Rich Hartung's information) and finally decided to remedy it. Simple enough, it wasn't adjusted right, and it never had the gasket. The bimetal arm is a tad rusty, I thought that would affect it, but it doesn't look like it. Alas, no drive though. The fuel pump diaphragm gave up the ghost. Not enough to keep the car from running, but enough to clean off the side of the engine and start a gasoline puddle (Fuel squirting out from somewhere on the top of it). Annoying but not surprising, since it's a good 30 years old. Installed it when we lived in El Paso, TX after the EPA mandated an ethanol requirement in winter gas, but before anyone knew what ethanol does to older fuel systems - so not ethanol resistant. New one is on the way. "It's only April", so it snowed yesterday and last night, I wouldn't have taken it out anyway.


.thumb.jpeg.28cb36506a6b17cd30e7d4a22504384d.jpeg)


